|
|
|
|
|
| Author |
|
|
Registered
|
Spraying filler primer smoothly
I've been working on getting my body panels (front/rear hoods and doors) ready for paint. They've had a skim-coat of body filler, shaped with a body file (36 grit, then 80 grit) and now I've put a couple coats of filler primer on (PPG JP202). The instructions for mixing the primer indicate that you can either mix it 4:1:1 (primer:reducer:hardener), or 4:1 (primer:hardener), the latter for use as a filler. For the first coat, I used it mixed as 4:1 (no reducer), but it didn't spray very will (it went on like ceiling stucco). For the second coat, I used the reducer and mixed it 4:1:1, but it still left a very rough, pebbly surface. I'm using a good DeVilbiss gun and tried a variety of settings, but was not able to improve the resulting surface quality. I was able to sand it off, but I want to put one final primer coat on and don't need any real filling as these first two coats, as ugly as they looked, did the job of filling ok. I just needed to sand down to the filler in several spots and I want to give it a homogeneous primer coat.
Why is it going on so rough? Is it because filler primer is so thick? Could I cut it with reducer some more to thin it out? Do I need to get a bigger spray tip for my gun? Any help would be appreciated. Thank. Geoff
__________________
'82 911SC (Complete rebuild) Click here to go to the project website that chronicles the rebuild process |
||
 07-20-2008, 08:07 AM
|
|
|
Registered
Join Date: Dec 2003
Location: MS.
Posts: 2,322
|
What temp. range reducer are you using? There could be several factors for the problems, some of them not even something that you have no control over. If you can't get it to lay down a really nice surface, you might need to get someone local, to have a look at it, and see what is really happening. Or, use a different product/manufacturer.
I don't personally use PPG products anymore. I had a bad batch of the primer/surfacer, reducers and hardeners delivered to my shop a few years back. It would never totally, go off. The stuff ruined a lot of work and it was so screwed up $hit, it even softened Corvette Panel Adhesive to a silly-putty like mess. Tons of work had to be scrapped, and re-done. PPG tested the products and found that there were some improper ingredients in the primer and the reducers. I am glad that i had bought more than just one container of each product, otherwise they probably would have just claimed that I or someone else had contaminated their product, resulting in the damage done to some of the composite components on that Testarossa. PPG finally covered the cost of the bad products, but fell way short of the cost involved in all of the repairs caused by them. All in all, it cost me about $7,000.00 to know that I would never use PPG Paint products again. The $7,000.00 was what they would not cough up for some of the damages, and the cost to repair them and paint. They acted like they could really care less about this problem, till they received the "first notice" intent letter, and were then served the rest of the papers.
__________________
84' Steelslantnose Cab. 1953 Dodge B-4-B-108" 90,127 miles 1953 Dodge B-4-C-116" 58,146 miles 1954 Dodge C-1-B8-108" 241V8 POLY 1973 Roadrunner 440-SIX-PACK* 1986 F-250 Super Cab-460 V8 tow Newest additions- Matching numbers 1973 340 Road Runner!! 1948 Dodge B-1-F-152" 1-1/2 ton Dump body, 39,690 miles others... |
||
|
07-20-2008, 09:50 AM
|
|
|
Registered
|
Sorry to bring back memories of your bad PPG experience. The shop that will be painting my car is a PPG shop, so I pretty much need to stick to PPG products - not my choice.
I'm not sure about the "temp. range" of the reducer, but when I bought the primer, they gave me the "Fast" reducer (JR505). There are Medium and Slow versions available as well. Geoff
__________________
'82 911SC (Complete rebuild) Click here to go to the project website that chronicles the rebuild process |
||
|
07-20-2008, 11:09 AM
|
|
|
Registered
Join Date: Dec 2003
Location: MS.
Posts: 2,322
|
What are your outside temps or the temp in the garage or shop where you are trying to spray it? I know that where I am located, I would not be using the fast or even the medium reducers, as it is too hot around here for that. It would make the product come out with very poor results, and possibly even somewhat grainy or with a very rough surface. Considering your location, the fast, may still be "too hot" for the heat in your area. That is what it sounds like to me is what is going wrong. I check the temp ranges the slower reducers to see which is proper for your climate. Good luck!! Tony.
__________________
84' Steelslantnose Cab. 1953 Dodge B-4-B-108" 90,127 miles 1953 Dodge B-4-C-116" 58,146 miles 1954 Dodge C-1-B8-108" 241V8 POLY 1973 Roadrunner 440-SIX-PACK* 1986 F-250 Super Cab-460 V8 tow Newest additions- Matching numbers 1973 340 Road Runner!! 1948 Dodge B-1-F-152" 1-1/2 ton Dump body, 39,690 miles others... |
||
|
07-20-2008, 03:44 PM
|
|
|
Registered
|
Tony - that might be it as its been hot (and rather humid) as hell here in MA when I've been spraying. I've been doing it outside my shop.
I'll talk to my paint dealer about getting a different reducer - thanks for the help. Geoff
__________________
'82 911SC (Complete rebuild) Click here to go to the project website that chronicles the rebuild process |
||
|
07-21-2008, 04:28 AM
|
|
|
Registered
Join Date: Dec 2003
Location: MS.
Posts: 2,322
|
Hope you get it corrected. Good luck!! Tony.
__________________
84' Steelslantnose Cab. 1953 Dodge B-4-B-108" 90,127 miles 1953 Dodge B-4-C-116" 58,146 miles 1954 Dodge C-1-B8-108" 241V8 POLY 1973 Roadrunner 440-SIX-PACK* 1986 F-250 Super Cab-460 V8 tow Newest additions- Matching numbers 1973 340 Road Runner!! 1948 Dodge B-1-F-152" 1-1/2 ton Dump body, 39,690 miles others... |
||
|
07-21-2008, 11:45 AM
|
|

|
|
gargles with Dom Perignon
Join Date: Feb 2008
Location: Pale Blue Dot
Posts: 479
|
Yep I'd say go with the slow reducer.
__________________
"If triangles' had a God, he would have 3 sides." |
||
|
08-05-2008, 12:30 AM
|
|
|
Registered
Join Date: Dec 2003
Location: MS.
Posts: 2,322
|
Hi Geoff, did you ever get around to getting a good coat? Tony.
__________________
84' Steelslantnose Cab. 1953 Dodge B-4-B-108" 90,127 miles 1953 Dodge B-4-C-116" 58,146 miles 1954 Dodge C-1-B8-108" 241V8 POLY 1973 Roadrunner 440-SIX-PACK* 1986 F-250 Super Cab-460 V8 tow Newest additions- Matching numbers 1973 340 Road Runner!! 1948 Dodge B-1-F-152" 1-1/2 ton Dump body, 39,690 miles others... |
||
|
08-15-2008, 09:00 AM
|
|
|
Registered
|
No, actually things got busy at work and I had to do some travel, then I was traveling on a family holiday. As it turns out, tho, the temperatures have now moderated here and if I have some time this weekend I was going to try to spray it again when the temps are in the 70's (instead of the 90's when I sprayed it last time) and see if it makes a difference. If it still looks the same, I'll go and get some slower reducer. I'll let you know how it turns out.
Geoff
__________________
'82 911SC (Complete rebuild) Click here to go to the project website that chronicles the rebuild process |
||
|
08-15-2008, 03:19 PM
|
|
|
Registered
|
I finally got a chance to spray some primer this morning. I had prepped everything yesterday, so I was able to get out early this morning when it was calm and cool. The primer went on much smoother. I think as you guys pointed out, my previous problems were due to the hot weather and the fast reducer I was using was evaporating before the primer hit the surface.
Time for sanding! Thanks. Geoff
__________________
'82 911SC (Complete rebuild) Click here to go to the project website that chronicles the rebuild process |
||
|
08-24-2008, 06:41 AM
|
|
|
Registered
|
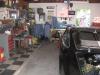
Here's a pic. Not much to see, but a picture's always nice...
Geoff 
__________________
'82 911SC (Complete rebuild) Click here to go to the project website that chronicles the rebuild process |
||
|
08-24-2008, 06:46 AM
|
|
|
Registered
Join Date: Dec 2003
Location: MS.
Posts: 2,322
|
Looks like you are on the way of having a really sweet ride! Tony.
__________________
84' Steelslantnose Cab. 1953 Dodge B-4-B-108" 90,127 miles 1953 Dodge B-4-C-116" 58,146 miles 1954 Dodge C-1-B8-108" 241V8 POLY 1973 Roadrunner 440-SIX-PACK* 1986 F-250 Super Cab-460 V8 tow Newest additions- Matching numbers 1973 340 Road Runner!! 1948 Dodge B-1-F-152" 1-1/2 ton Dump body, 39,690 miles others... |
||
|
08-24-2008, 11:34 AM
|
|
|
Registered
Join Date: Sep 2008
Location: St Louis Missouri
Posts: 2
|
Geoff,
in the future always apply the first coat of product thinner so it adheres properly. Always apply coats that go on wet and shiny for proper adhesion. Additional coats can be applied to build the thickness of the primer to fill surface imperfections. After primer has dried but before sanding use a guide coat. A guide coat is a very thin spray of a contrasting color primer. this primer could be from a spray can purchased at the auto parts store. Compatibility is not a problem as all of the guide coat is going to get sanded off to make the primer smooth enough to paint over. While sanding, the low spots in the panel from scratches and imperfections will show up becaust the guide coat will still be in the little scratch or imperfection until it is completely sanded out making the old question of wether you have sanded enough answer itself. Good luck Bodyman 911 |
||
|
09-05-2008, 02:23 PM
|
|
|
Registered
|
Bodyman,
In the future...yes, the next time I do this will be much easier and I will not need to waste so much time figuring out the best way to do things. Good to know that you should use a thin 1st primer coat - makes sense. It took me awhile to get the settings on my gun right so that it went down wet and shiny. Earlier in the summer I had been trying to spray the primer on when it was 90F+, using a fast reducer which was producing a very rough, pebbly finish. Since I've moved to spraying early in the mornings and properly adjusting my gun, I'm much happier with the wet and shiny coat that you describe. When I first started priming/block sanding, I had heard about using a guide coat, but watching videos or reading posts about it, I wasn't sure how useful it was going to be. But, I've been spraying a light guide coat on after each priming and have found it extremely useful to do as you say - locate both surface imperfections/undulations that needed extra filler, but also to reveal scratches imperfections. Thanks. Geoff
__________________
'82 911SC (Complete rebuild) Click here to go to the project website that chronicles the rebuild process |
||
|
09-06-2008, 06:20 AM
|
|
|
Registered

|
The 3M powder guide coat is real handy and easy to use.
__________________
Robert Williams 70' 911T |
||
|
09-06-2008, 08:30 AM
|
|
|
Registered
|
Quote:
Geoff
__________________
'82 911SC (Complete rebuild) Click here to go to the project website that chronicles the rebuild process |
||
|
09-06-2008, 08:47 AM
|
|


 1970 Porsche 911T

