|
|
|
|
|
| Author |
|
|
Registered
|
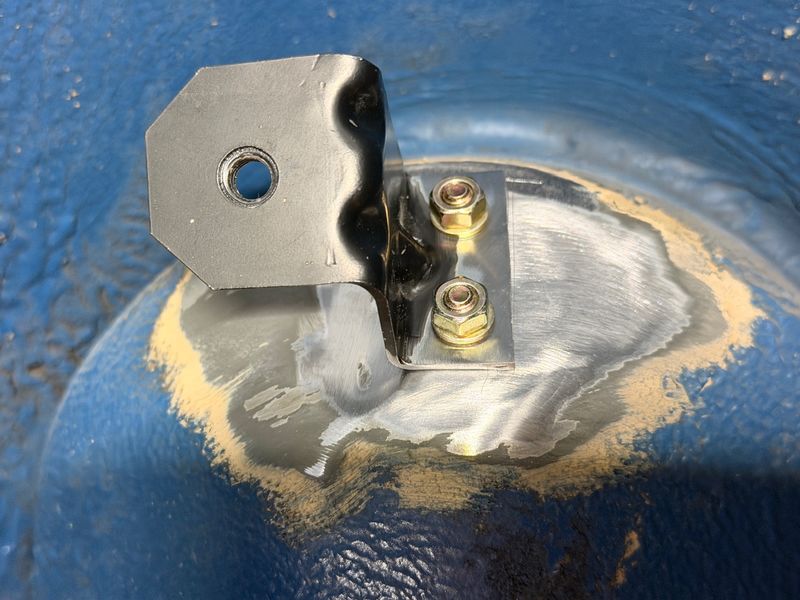
Made some progress today:
- I painted a bunch of parts with SprayMax 2K primer and then 2K Hot Rod Black. The Hod Rod Black went on great. Being 2K it should be more durable overall. - I also applied POR15 to various parts of the body that are prone to collecting dirt and rusting. I’m starting to really like this stuff. It seems to stick to anything. - The heater valves were installed. I broke one of the bolts on disassembly so I had to use a rivnut for that bolt. Was my first time doing this. Pretty straightforward. I used a bolt and nut instead of a tool to compress the rivnut. - I designed and had laser cut sway bar bracket reinforcements. These were welded in and make the whole bracket much stronger. Good old POR15 sealed it up afterwards. I’m happy to share the CAD drawing for these. - My car had the muti tube style oil cooler and I’m upgrading to the later cooler and adding a fan. The new cooler came with a different upper bracket. I removed the old upper bracket and bolted in the new one. I actually drilled the holes to rosette weld it in place but then realized it would be so much easier (and reversible) if I just bolted it. - Lastly, I put on some new door strikers from Sierra Madre. They were fairly cheap and it’s so nice to see fresh metal plating. There zero reason to do this at this stage except it keeps me motivated…     
Last edited by Coultl; 11-16-2025 at 07:43 PM.. |
||
 11-15-2025, 05:47 PM
|
|
|
Registered
|
More photos
|
||
|
11-15-2025, 05:48 PM
|
|
|
Registered
|
More photos
     
|
||
|
11-15-2025, 05:51 PM
|
|
|
Registered
|
More photos
     
|
||
|
11-15-2025, 05:53 PM
|
|
|
Registered
|
More photos
|
||
|
11-15-2025, 05:55 PM
|
|
|
DIY wrencher
Join Date: Apr 2015
Location: Vienna
Posts: 227
|
Looking good!
FYI to make that oil cooler work properly you want to maximize air flow through it, as it will naturally want to flow around it instead. The Porsche shroud works well for this, and our friend Jonnny042 found a better/cheaper alternative to the factory gasket - which costs a ridiculous $160 for a few feet of foam - in his perfectly executed install. He also made some brackets to solidly attach the same Spal fan you are using (which is great BTW), better than those through the radiator zip ties in my experience: https://forums.pelicanparts.com/porsche-911-technical-forum/979976-project-heavy-metal-all-steel-classic-remastered-24.html#post10729537 If you were planning something like that anyway, carry on! Cheers, Lukas
__________________
88 911 Carrera 3.2 G50 - driver 77 911S - rust bucket backdate project IG: @lukas.matzinger Last edited by LukasM; 11-17-2025 at 04:48 AM.. |
||
|
11-17-2025, 04:15 AM
|
|

|
|
Registered
|
Great! Honestly, I deleted that stupid foam seal from my cart on multiple orders. I just couldn’t bring myself to spring that much for it. I already have the sheet metal piece and it’s awesome to have a solution for the foam. Thanks.
|
||
|
11-17-2025, 09:32 AM
|
|
|
Registered
|
Quick question for the group. Do I need to have the rear trailing arms set at a specific angle when tightening the main bolt? Seems like those bushings dont slide (Im using OEM ones) and normally that means you tighten them at the ride height angle to avoid over stressing them.
Thanks! 
|
||
|
11-19-2025, 10:41 AM
|
|
|
Registered
|
Its been freezing here in Colorado and my little garage heater can barely keep up at night, but I still made some progress. A couple quick updates:
- The stock rear control arm bushings are bonded so they do need to be tightened at ride height. - I had my fan assembly Vapor blasted thinking I would paint it myself. Cerakote would be much better so Im going to send it out to Tru6 to get it done properly. - It doesnt really make sense to put the brakes on now, but I did anyway because it feels great to see it looking like a car again! - Lastly, I worked on getting the frunk in order. This took a while as there was paint on the wiring harness that needed to be removed. Its not done yet but its close! - I should get a whole box of parts back from from the plater this week. With that I can finish installing the suspension. 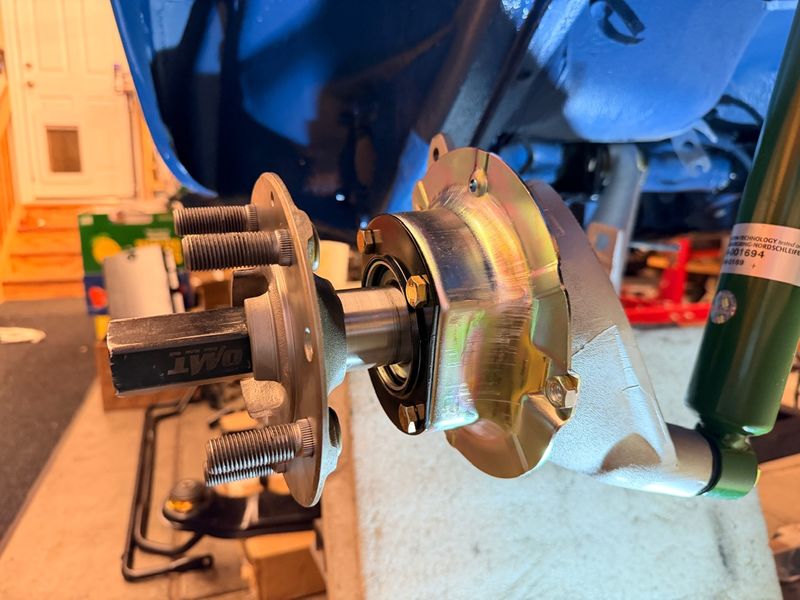     
|
||
|
12-02-2025, 12:06 PM
|
|
|
Registered
|
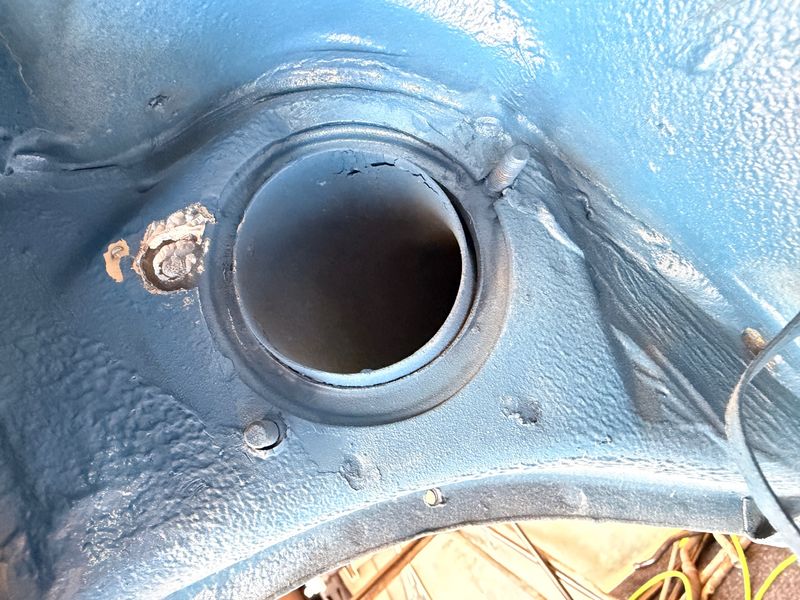
I also got the fuel filler neck in, which was much more challenging than I expected. Using all new rubber, it was a very tight fit. I ended up having to 3-D print a little bulbous nose for the vent line in order to get it through the rubber seal…along with using dish soap. There’s just a lot of risk to the paint when installing, and thankfully, I didn’t create any damage.
  
|
||
|
12-02-2025, 12:59 PM
|
|
|
Registered
|
Just picked up my parts from the plater (Denver Metal Finishing). I did minimal prep/cleaning and they turned out great! So satisfying.

|
||
|
12-05-2025, 11:33 AM
|
|
|
Registered
|
A few quick updates.
Brake lines are all done. I used 3/16” copper nickel hard line, metric fittings from Bell Metric, and a handheld DIN flare tool. This was my first time using a flaring tool actually works every time (Capri Tools 3/16 in. Dual Head Flaring Tool). So nice. Every line is new except the two from the brake booster. I thought the tunnel line would be a pain but it was straight forward.      
Last edited by Coultl; 12-08-2025 at 10:18 PM.. |
||
|
12-08-2025, 10:05 PM
|
|

|
|
Registered
|
With the base plated, I reassembled the pedal box with all new bushings and springs. Installing it was a PIA. I eventually figured out that the only way I could tighten the support bar bolt was to cut a small section of 8mm Allen wrench and use a 8mm crescent wrench on it. Not sure how others accomplish this.
The accelerator will be a BMW electronic unit. Installed soon hopefully. 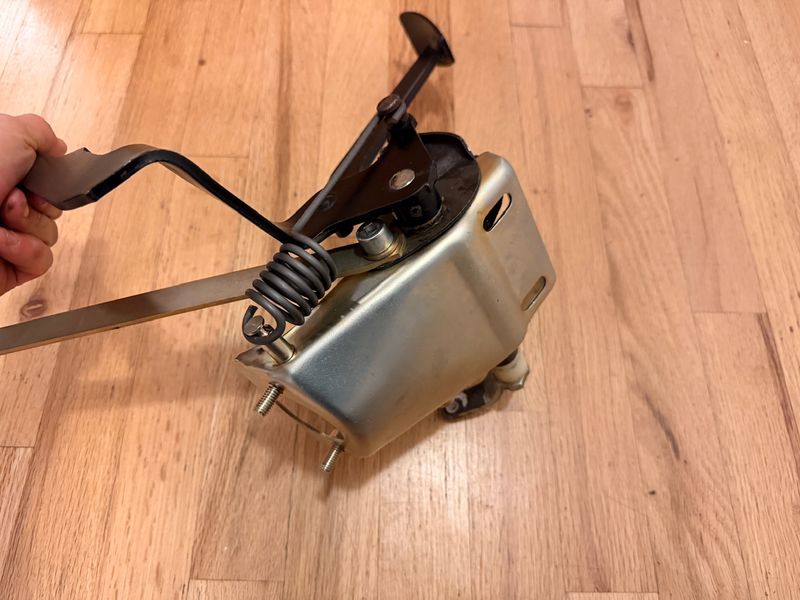    
|
||
|
12-08-2025, 10:10 PM
|
|
|
Registered
|
The front control arm bushing install took a couple tries. I was trying to save some $ and didnt buy the Elephant Racing install tool. They looked simple enough so I drew them up and printed them. Turns out the dimensions are pretty critical and it took three versions (and a whole lot of dish soap) before they worked properly.
     
|
||
|
12-08-2025, 10:15 PM
|
|
|
Registered
|
Control arms are in. Was a little challenging. Here was my process:
- Install ball joints on uprights - Put control are assembly on jack stands - Jack up each side one at a time to connect ball joint to control arm - Jack up center while connecting steering coupling, then bolt in cross member - Jack up the control arms to 12 degrees and install the torsion bar cap in the center(ish) position. Took a couple tries but its all installed now! 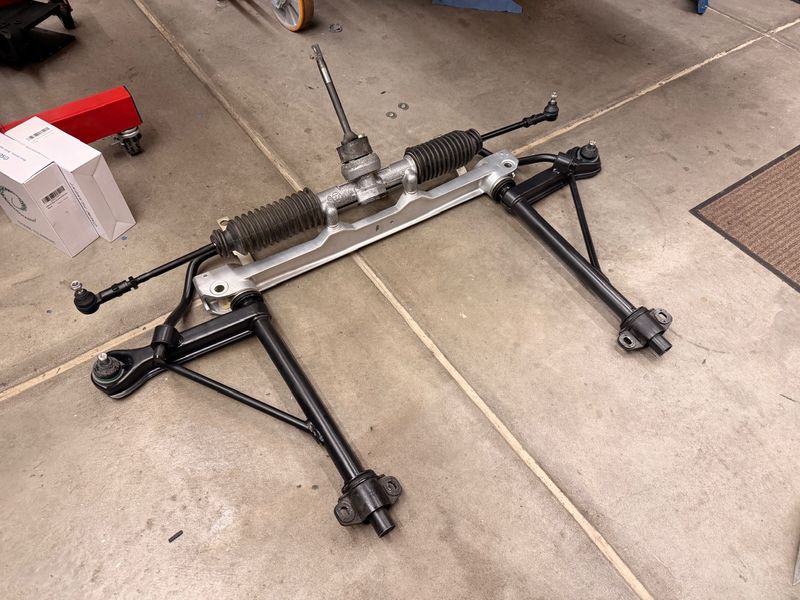    
|
||
|
12-13-2025, 09:02 AM
|
|
|
Registered
|
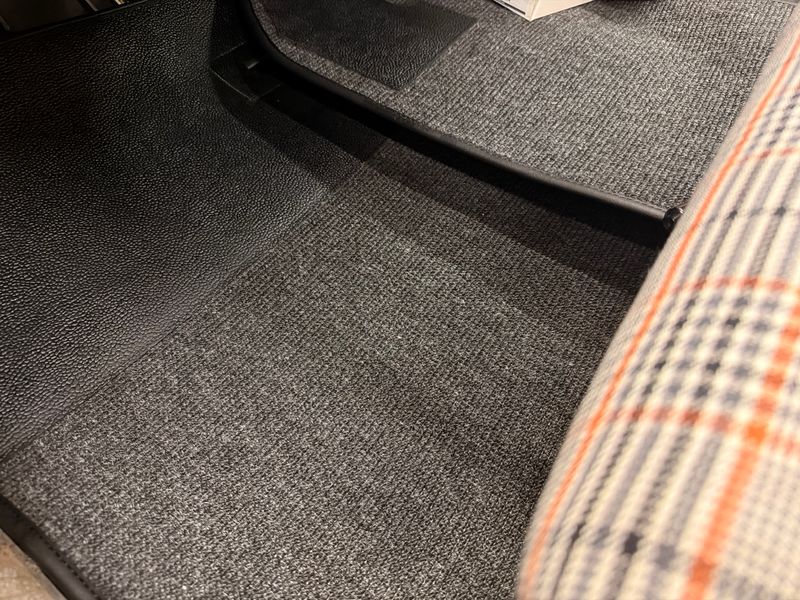
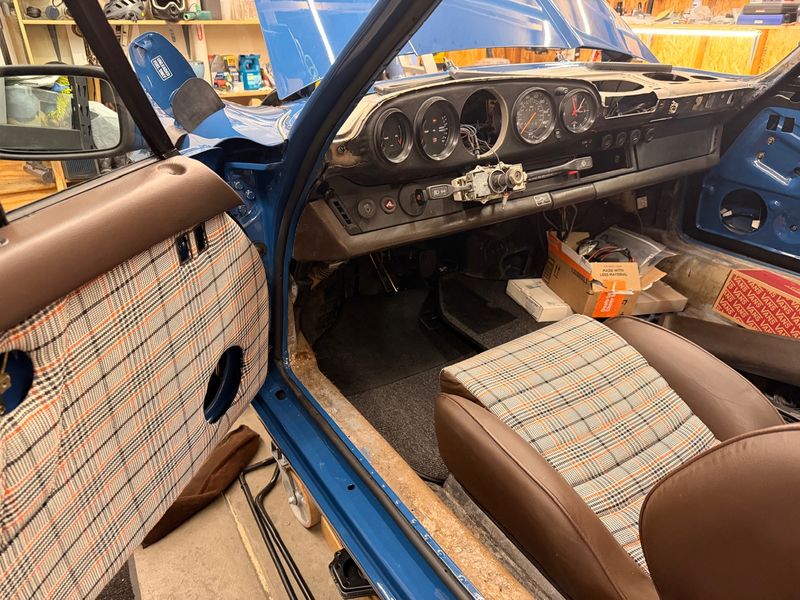
I also got the interior back from the upholstery shop. The fabric is from Relicate. I wanted something that would be fun and pop
and it sure does. Ha. Its a little loud but I think it will look great once the car is all sorted. The carpet is salt & pepper square weave from Lakewell.
|
||
|
12-13-2025, 09:06 AM
|
|
|
Registered
|
Tunnel fuel lines are in. Like most things, that was a challenge but it would be 10X easier when I do it again someday. I finished one, installed fittings, and then realized it wasn’t running through correct part of the tunnel. Cut and remove…
I went with 3/8” copper nickel lines. Bullet proof and easier to work with than stainless. I used the Rigid tool to make the flares and went with 6AN stainless fittings…again to make it bulletproof. The front fittings are done and I’m still trying to decide what to do in the rear. I think I’ll bend them up and have the fittings live near the trailing arm bolt. That way I’ll have space to use the flaring tool and that’s the about the path that stock lines take. I’ll then make another set of hard lines to the engine bay. The fuel lines in the tank area will be an interesting challenge. Not a lot of room to work with and I need to for a flex fuel sensor in there as well.      
Last edited by Coultl; 12-19-2025 at 08:31 PM.. |
||
|
12-19-2025, 08:11 PM
|
|
|
Registered
|
I ended up keeping the lines long in the engine bay and routing them along the same path as the OE lines. Id like to fit the fuel filter somewhere down here but I have no idea where it might fit when the engine is in. A work in progress.
I also finally got to adding seam sealer to the front of rear wheel well. This area is very gooped up at the factory and that all came off when I repaired the rust here. It would have been better to have done this before the car went the paint. I have a pint of the Oslo Blue paint and will paint over the seam sealer once dry.    
|
||
|
12-20-2025, 09:09 PM
|
|
|
Registered
|
This is so good. Nice, unique plaid from Relicate and handsome stitching/ assembly on the door cards and seats. I really like your execution on the tunnel fuel lines and such. I did quite a bit of 6AN in the engine bay but didn’t consider front to back like you’ve done. This build is bad @ss.
__________________
912E-3.2ss |
||
|
12-21-2025, 01:01 AM
|
|


 911 Coupe
 Tojo
Tojo URS6
URS6
 P912E 3.0
