|
|
|
|
|
| Author |
|
|
Registered
Join Date: May 2009
Posts: 20
|
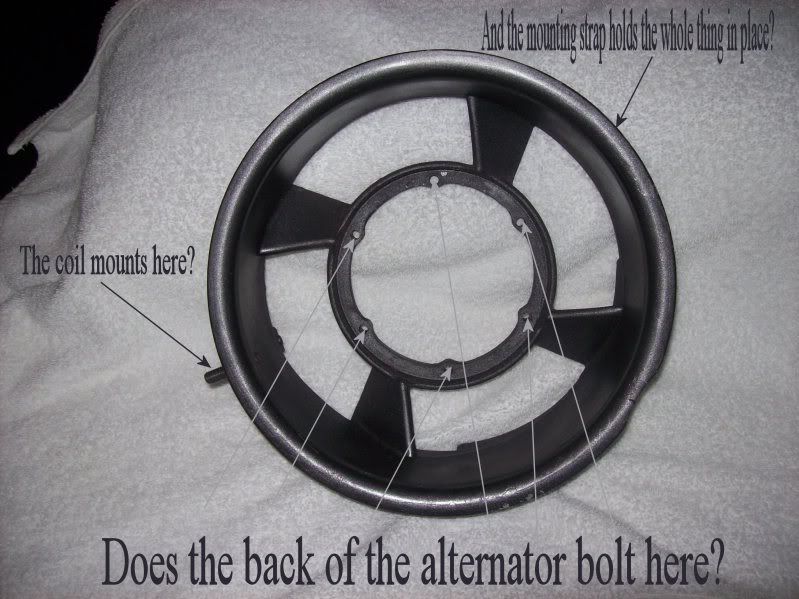
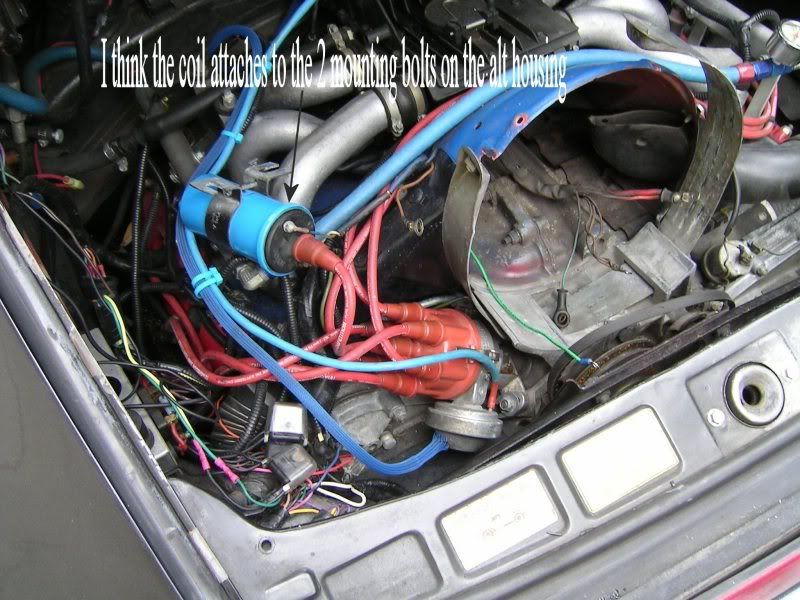
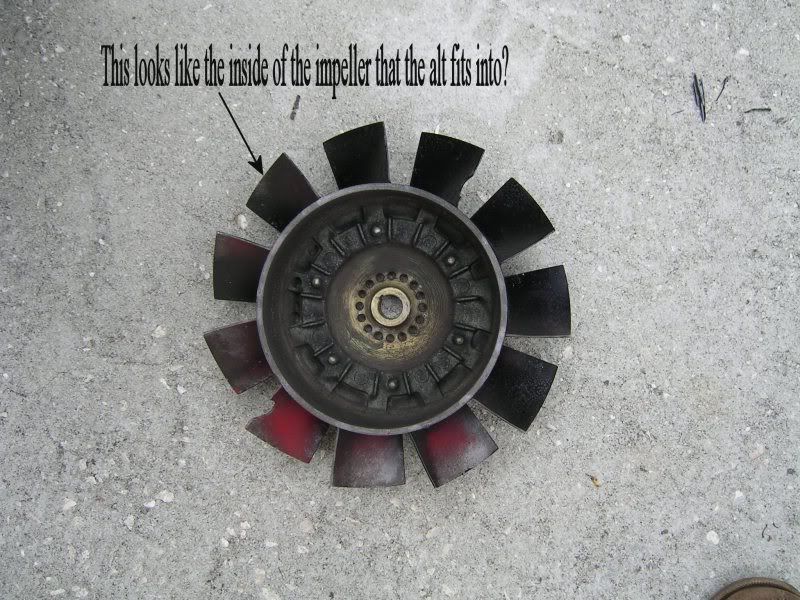
Hello, My name is Jack and my brother who I think was a member of this forum (Buster) past away last week and was waiting on an new alternator to install. I have never worked on a Porsche before but am very mechanically inclined. There is a large circular strap that looks like it actualy holds the alternator in place with an impeller attached with some shims. The coil also looks like it needs to reattached after the alternator and impeler is straped back in place. I have some wiring diagrams and photos of what I'm working with.
http://s5.photobucket.com/albums/y159/ChoDan/911SC/ Tomorrow I will post actual photos of the WIP. I know you can't help me at all right now without all the WIP photos and tech info, but I'll do my best. |
||
 05-10-2009, 06:01 PM
|
|
|
Registered

Join Date: Mar 2008
Location: Thousand Oaks, California
Posts: 367
|
Sorry to hear about your brother.
There are plenty of pictures and descriptions on this site to help you. Post some pics of where you are at. I'm sure many will chime in to help. |
||
|
05-10-2009, 09:32 PM
|
|
|
Registered

Join Date: May 2009
Location: Cedar Hill, TX
Posts: 16
|
Here are some pics of mine kind of start to finish...hope they are useful
     
__________________
1981 SC Targa Euro - Minerva Blue 2003 Audi A4 1.4T 1999 Audi A4 1.4T - Hers |
||
|
05-11-2009, 10:51 PM
|
|
|
Registered
Join Date: May 2009
Location: Cedar Hill, TX
Posts: 16
|
Now back in

__________________
1981 SC Targa Euro - Minerva Blue 2003 Audi A4 1.4T 1999 Audi A4 1.4T - Hers |
||
|
05-11-2009, 10:54 PM
|
|
|
Senior Member

Join Date: Mar 2000
Location: Lacey, WA. USA
Posts: 25,312
|
Sorry about your brother.
Remove the fan belt by using the spanner wrench to hold the pulley still while loosening the nut. There is a half-moon "key" in the shaft, so don't let that fall down under the bottom pulley. Unbolt the strap and pull the fan housing toward you. This will allow you to access the fasteners on the back, which hold the plastic air cone thingie and the alternator. I believe they are 10mm nuts. Patience. Then, the cool trick for getting the alternator to fall out of the fan housing is to set up a pile of rags on the floor, and set a 2x4 or two next to the rags. Bang the fan housing, upside down, on the 2x4, gently, a little at a time, moving around the housing with each tap, until the alternator falls out onto the rags.
__________________
Man of Carbon Fiber (stronger than steel) Mocha 1978 911SC. "Coco" |
||
|
05-12-2009, 07:26 AM
|
|
|
Registered
Join Date: May 2009
Posts: 20
|
[QUOTE=Skitstoval;4658691]Now back in
Great, so the coil does actually bolts back on to the alternator strap.     
Last edited by Silverbullet52; 05-12-2009 at 08:22 AM.. |
||
|
05-12-2009, 07:42 AM
|
|

|
|
Registered
Join Date: May 2009
Posts: 20
|
Quote:
Yes that helps alot, I'm understanding more and more now. What's the purpose of the "plastic air cone"? Insulation from the wires on the back of the alternator? It's my understanding that there's no seperate regulator with alernators, just generators? |
||
|
05-12-2009, 07:49 AM
|
|
|
Registered
Join Date: May 2009
Posts: 20
|
Quote:
I can do that and understand it 
|
||
|
05-12-2009, 08:25 AM
|
|
|
Registered
Join Date: May 2009
Location: Cedar Hill, TX
Posts: 16
|
I used the same approach for getting the altenator out of the assembly, go slow and keep everything close to the ground. I pressed my fan off the shaft as it was being stubborn.
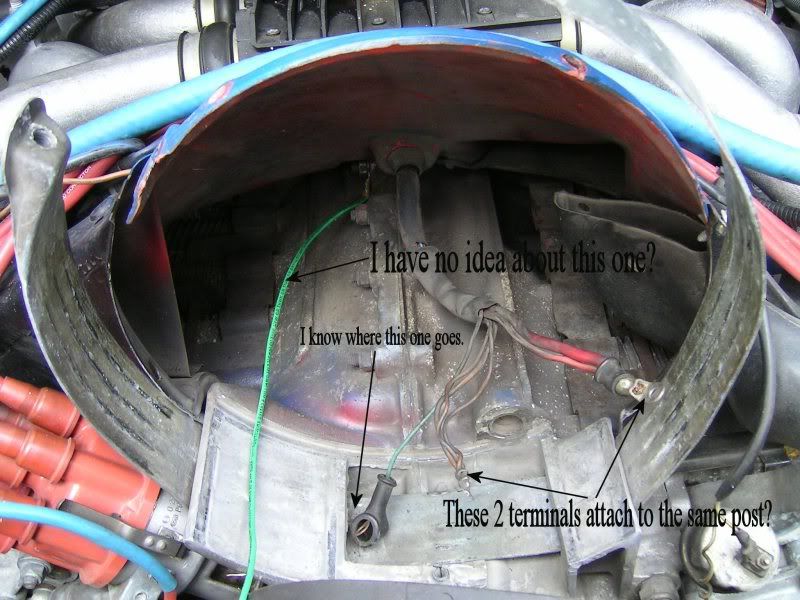
Belt tension - this site is full of info on that, with a new belt I use 3 shims in the front and 3 in the back, for the front shims I use a little piece of scotch tape just to hold them altogether. Coil - yes it attaches above the strap like the first pic shows The posts on the back of the alternator are sized differently so almost one way off andback on, atleast on mine. Take a picture if you can or make a sketch and if you have multiple wires tie wrap them together. Not sure if it is a ground just happened to be the only connector with a spade.
__________________
1981 SC Targa Euro - Minerva Blue 2003 Audi A4 1.4T 1999 Audi A4 1.4T - Hers |
||
|
05-12-2009, 10:54 AM
|
|
|
Registered
Join Date: May 2009
Location: Cedar Hill, TX
Posts: 16
|
The bracket was for the air pump which is long gone
__________________
1981 SC Targa Euro - Minerva Blue 2003 Audi A4 1.4T 1999 Audi A4 1.4T - Hers |
||
|
05-12-2009, 10:56 AM
|
|
|
Registered
Join Date: May 2003
Location: San Diego, CA
Posts: 191

|
Quote:
The "air cone" helps guide air from your fan down over the cylinders. The fan is press fit and just slides off the alternator shaft, it may take some encouragement. Do a search there is a lots of good information regarding this procedure. Also, don't bang o the alternator bolts to get it out of the housing, they deform easily. You'll see what I mean. |
||
|
05-12-2009, 11:35 AM
|
|
|
Registered
|
silver. sorry about your bro.
where are you located? someone could probably come by and help. here is a great technical article. step by step: http://www.pelicanparts.com/techarticles/911_alt_replace/911_alt_replace.htm
__________________
poof! gone |
||
|
05-12-2009, 11:44 AM
|
|

|
|
Senior Member
Join Date: Mar 2000
Location: Lacey, WA. USA
Posts: 25,312
|
Two more things:
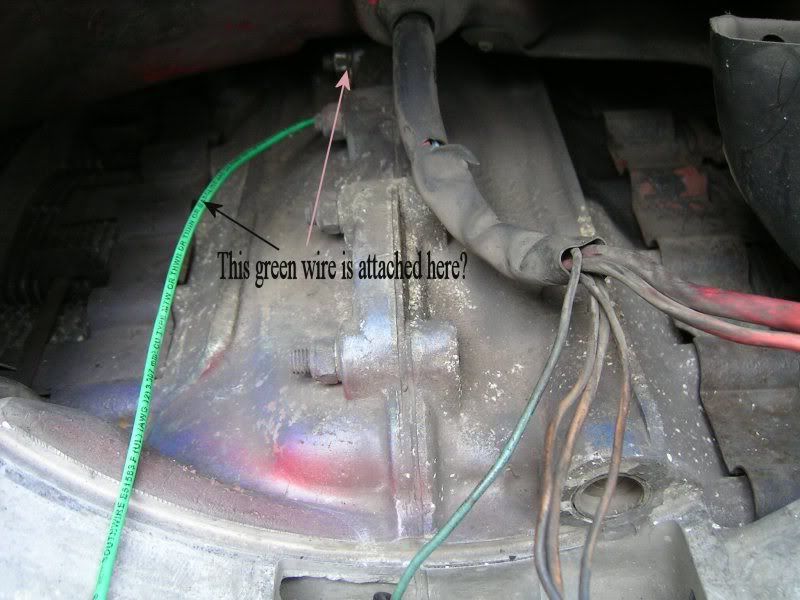
1) Ground wires are brown. Always, or nearly always. 2) The shims adjust the distance between the fan and pulley, to adjust for belt wear. The correct number of shims MUST be installed under the alternator nut. Some of them go between the pulley half and the fan, and the rest go under the "cup" that is between the nut and the pulley half. I am not clear on how many shims are required, but they all must be in there in one location or the other.
__________________
Man of Carbon Fiber (stronger than steel) Mocha 1978 911SC. "Coco" |
||
|
05-12-2009, 12:00 PM
|
|
|
Registered
Join Date: Mar 2008
Location: Thousand Oaks, California
Posts: 367
|
There should be six shims total. You must use all six, in any combination, until you get the desired tension on the belt.
|
||
|
05-13-2009, 10:50 PM
|
|
|
Registered
Join Date: May 2009
Posts: 20
|
Quote:
That article helps alot!!! I live in St. Petersburg Florida. |
||
|
05-15-2009, 04:23 PM
|
|
|
Registered
Join Date: May 2009
Posts: 20
|
Quote:
Well that straightens out my theory of mixing brown with red wires ") Thanks. Thanks.
|
||
|
05-15-2009, 04:25 PM
|
|
|
Registered
Join Date: May 2009
Posts: 20
|
OK, Here's what I got to work with:
 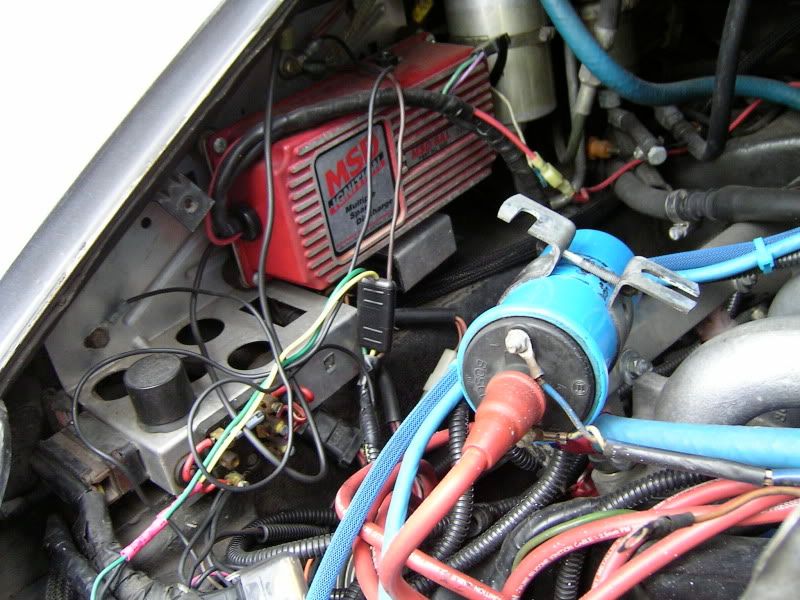        What a mess, huh? Thnaks all. Jack |
||
|
05-15-2009, 04:29 PM
|
|
|
Registered
Join Date: Mar 2004
Location: New Jersey
Posts: 1,861
|
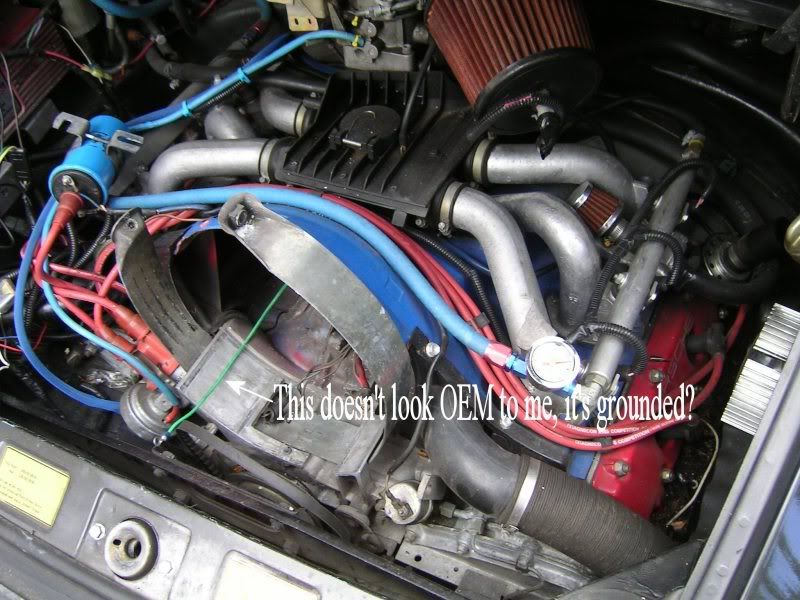
Looks like the green wire was used to replace what should be a Brown ground wire. Do the Porsche world a favor and change that wire to the proper color, Brown.
I believe that the factory suggested adding the brown ground wire to ensure a proper ground.
__________________
Peace, Ron www.ronorlando.net 78SC Targa 3.2 SS, 964 cams, CIS, SSI's,Dansk Own a gun and you can rob a bank , own a bank and you can rob the world. |
||
|
05-15-2009, 06:37 PM
|
|
|
Registered
Join Date: May 2009
Posts: 20
|
Quote:
 Thanks Thanks
|
||
|
05-15-2009, 06:40 PM
|
|
|
Registered
Join Date: May 2009
Posts: 20
|
Wire Connections
Does anyone have a diagram or photo of the back of the alternator with the wires attached for reference or should it be obvious. I'm assuming the largest terminal should be for the red(hot) connection ?
Thanks |
||
|
05-19-2009, 09:50 AM
|
|


