|
|
|
|
|
| Author |
|
|
New User
|
Engine Teardown Part 2
Back to the engine teardown. Everything is new for me, I've never taken apart a car engine so I'm taking my time and hoping for the best! The cylinders came off the pistons just fine, the pistons from the rods was a little fiddly. The rockers from the shafts gave me a spot of bother as one wouldn't come out and I had to get the hammer out. The camshafts are a little beaten up so I'm thinking of getting them reground to 'E' cam specs. The heads took a little persuasion but they are now free from the cam housing and ready for their date with Ted Robinson at German Precision down in Santa Clara CA along with the cylinders, camshafts, cam housings, flywheel and rockers. I have decided to split the case and take a look!
Part 2 of the teardown: First cylinder came off real easy!  All off no drama!  The fins were super simple and I gave them a quick blast, next I will modify them as per the instructions in Wayne's book then they'll be ready for powder coating.  Removed the rockers and shafts, one gave me a bit of trouble but it came out with some persuasion!  Removed the heads and cleaned up the cam housing in the parts washer before packing it up.  Heads ready to go! I will keep everything numbered so it goes back together the way it came apart.  The damage to the cam shaft.  Flywheel and new bearing ready to go.  Ted said not to clean anything as that was his job but I can't resist using the blast cabinet! (Only the exterior, not the interior walls of the cylinder. That will be honed by Ted).  Cleaned the head bolts and washers, I seriously have a problem!  Cheers. -Kav. Last edited by kav; 11-14-2017 at 09:10 PM.. |
||
 02-01-2016, 07:54 AM
|
|
|
Registered
Join Date: Apr 2014
Location: PA
Posts: 512
|
looking good! I've been enjoying the videos, thanks for sharing!
|
||
|
02-01-2016, 09:15 AM
|
|
|
Registered User
|
I have enjoyed too!
|
||
|
02-01-2016, 10:26 AM
|
|
|
Ubi bene ibi patria
|
I've been watching your thread & progress with interest kav.
Thanks for posting & as always, Cheers JB
__________________
Two possibilities exist: either we are alone in the Universe or we are not - both are equally terrifying ― Arthur C. Clarke "As soon as laws are necessary for men, they are no longer fit for freedom." - Pythagoras |
||
|
02-01-2016, 01:35 PM
|
|
|
Registered User
Join Date: Aug 2012
Location: Stockholm, Sweden
Posts: 13
|
I assume you are going to change piston rings, at least that is what I suggest you should do. When you clean your pistons do not sandblast them. They are made of aluminium and to soft to be sandblasted.
|
||
|
02-03-2016, 10:15 AM
|
|
|
Registered
|
This is one of my favorite threads. I always get excited when I see there's an update! Very educational and entertaining videos.
I'm planning on watching all of these again when I get the courage to tackle this job myself. |
||
|
02-04-2016, 04:38 AM
|
|

|
|
New User
|
Quote:
Cheers. -Kav. |
||
|
02-04-2016, 08:09 AM
|
|
|
Registered
|
Great thread, great videos. I have been searching the book for the tin modification you mention. It is time for me to do that - can you point me to the reference? Mine is about to go out for powder coating.
Sent from my iPad using Tapatalk
__________________
John 1972 911T 3.0L Coupe 1986 Carrera Targa 1989 BMW M3 2007 328iT |
||
|
02-04-2016, 05:19 PM
|
|
|
Registered
|
Quote:
__________________
1987 911 Carrera coupe - Guards Red 2010 997.2 C4S 6-Speed 2005 Mini Cooper Convertible (R52) - Wife's car 1977 VW Bay Window Camper Bus |
||
|
02-04-2016, 09:40 PM
|
|
|
New User
|
Taking a break
Taking a break and we are back in England for the BAFTA awards (the English Oscars but with more booze!). We were nominated for 'Star Wars the Force Awakens' The other nominations in our category were very strong including 'Mad Max Fury Road' which was winning every technical award that evening. Luckily the force was strong and we won for best special visual effects! I'm very proud to be part of the team and represent the talented artists at ILM. Now back to stripping engines and blasting bolts! Can't wait!
Cheers -Kav Last edited by kav; 05-03-2019 at 02:07 PM.. |
||
|
02-18-2016, 09:41 AM
|
|
|
Registered User
|
Hi Kav,
Congratulations on your win, very well done!! Now get back to your engine, I want to see it finished  Cheers, Harry. |
||
|
02-18-2016, 01:06 PM
|
|
|
Registered

Join Date: Feb 2016
Posts: 622
|
This is a great thread... now subscribed...
I plan to pull my engine soon, it has a lot of leaks... was gonna just tear down and reseal it... don't want to put a ton of money into it, as i'd like to build a larger motor later. Currently running a 2.2 out a 1970 911t... but want to build a or 3.2 at some point soon. Until then, I need to stop the oil pissing that it is doing. I just don't want a tear-down to reseal turning into a huge snowball $10k 2.2 liter build, lol... Thoughts on just reassembling with same parts with no rebuild ,etc?
__________________
1968 912 - widebody - 3.2 - 915 - endless build 1980 911 - targa - barnfind nightmare - gone 1985 911 - targa - barnfind nightmare - gone 2017 991 - C4S - summer daily - for sale IG - therealcarwash |
||
|
02-18-2016, 07:21 PM
|
|

|
|
Registered
|
Star Wars/Mad Max!? Wow! Congratulations Kav!
|
||
|
02-19-2016, 04:43 AM
|
|
|
Registered
|
Wow! Congratulations on your win and on your progress on your car. I am enjoying this thread and your build progress.
__________________
'71 914-6 #0372 '17 Macan GTS |
||
|
02-19-2016, 06:51 AM
|
|
|
New User
|
Engine Teardown Part 3
Well after all the excitement of the past few weeks it's back to the garage for more work on the Canary. I've been looking forward to seeing inside the engine and what the condition of a 191,000 mile, 47 year old engine looks like. I was very nervous about removing the head studs from the case and quite rightly so. This is not a job for the faint hearted! I used a 10" pipe wrench, lots of heat, lots of soaking in PB Blaster and my trusty jack handle for leverage. The head studs were well and truly in there and it took a huge amount of effort to get all 24 out. I had only one snap, the last one of course! It snapped a few inches up from the case so with more heat and lubrication it eventually came out.
After that ordeal spitting the cases seamed quite easy! With all the bolts, crank pulley and intermediate shaft cover removed a few taps with my rubber mallet I soon split the cases. What I found inside was a relief, the crank shaft and bearings looked in decent shape. Yes they show signs of wear but nothing too bad. The previous owners had looked after the engine, I suppose that's what you do when you buy a Porsche. My next task is to package it all up and send it on it's way to Ollie's Machine Shop for some reconditioning. Part 3 of the teardown: My wife bought me a set of overalls! Amazing how many shirts and pants I have ruined before learning this lesson! Lily models them!  She had them embroidered!  24 head studs to go! I soaked them in PB Blaster all week.  Heat, heat and more heat is the key.  A 10" pipe wrench will hold onto the studs. My jack handle on the back for leverage.  Action shot!  The last one snaps! More heat and it eventually came out.  All out and time for some tea.  Removed the crank pulley and intermediate shaft cover as well as all the case bolts.  A few taps with the rubber mallet and a gap opens up. 
Last edited by kav; 11-14-2017 at 09:30 PM.. |
||
|
03-08-2016, 07:53 AM
|
|
|
New User
|
The cases split, time to inspect.
 Everything looks pretty clean.  Removed the intermediate shaft and crank.  Next are the rods.  The rod bearings look good.  As do the journals.  Trying to keep everything together.  The engine cases side by side, ready for Ollie's.  Cheers. -Kav. Last edited by kav; 11-14-2017 at 09:34 PM.. |
||
|
03-08-2016, 07:54 AM
|
|
|
Registered
|
Very entertaining and informative video as usual, Kav! It's not surprising you're in the film industry. The video really helps in understanding how these engines are assembled, and how they come apart. Everything looks great - you must be encouraged!
Did you do a compression and/or a leak-down test before you started working on your engine? It'd be interesting to compare before and after values. Last edited by 911T70; 03-09-2016 at 09:27 AM.. |
||
|
03-09-2016, 05:36 AM
|
|
|
New User
|
Quote:
Cheers. -Kav |
||
|
03-09-2016, 12:52 PM
|
|
|
New User
|
Shipping parts
How do I ship a 40lb crank and engine case to Arizona and have it arrive in one piece? I looked on the Googles and found lots of great options. Build a wooden crate or ship them in a cooler. After many hours getting frustrated I called Ollie's and talked to Ike. What a great bunch of guys, he said forget all that and wrap it in layers of cardboard and put that in box. Simple. I looked online and found this great step-by-step instructions to ship a crankshaft. So that's the direction I went with both the crank and the case.
APE - Packaging Instructions Attached my contact details and info about the car. Ike said it was amazing just how many people don't put any contact info in their packages.  Cling film to keep it dry.  A layer of bubble wrap.  A box from Home Depot cut to the width of the crank plus a little room for packing the top and bottom.  Rolling the Burrito.  Strapping tape.  Making the end caps.  Stuffing the ends.  The end cap goes in place.  All strapped up. 
Last edited by kav; 11-14-2017 at 09:38 PM.. |
||
|
03-13-2016, 06:00 PM
|
|
|
New User
|
Packing up the rods.
   All ready for the big box.  I cut down a Uhaul box.  More strapping tape, can never have too much.  Removed all of the studs from the case.  Bare engine case held together with 4 bolts.  Again attached my details.  I used a Dish Barrel Box from Uhaul, double walled and the perfect size. 
Last edited by kav; 11-14-2017 at 09:42 PM.. |
||
|
03-13-2016, 06:09 PM
|
|


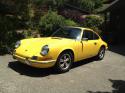 The Canary

 McQueen
 1986 Porsche 911 Carrera Targa
 1987 Porsche 911 Carrera
 1972 Porsche 911T
 Michael's Six
