|
|
|
|
|
| Author |
|
|
SEVENT9
|
HEAD STUDS: Can I check them engine in?
Hi everyone,
I am working through a winter list of oil leak fixes and as I continue to fall down the slippery slope it has been suggested to me that I should check the head studs. I have read a lot fo thread on this forum about doing it but my question is.... can I check this with the engine in the car and, if I can, could someone quickly walk me through how to check them? Attached photo is my current stage (newbie first time doing any of this stuff):

__________________
- - - - SEVENT9 '79 SC Black: My first 911 & my birth year!!  http://forums.pelicanparts.com/porsche-911-technical-forum/1000359-79-outlaw-build-thread.html |
||
 02-15-2020, 07:00 AM
|
|
|
Registered

|
sure, just pop the valve covers off, look for any loose/broken headstud heads and maybe torquecheck them.
perfect time to check valve lash as well.
__________________
before: '69 Porsche 911T bahama yellow now: 1981 911 SC Targa winered |
||
|
02-15-2020, 07:08 AM
|
|
|
Registered
Join Date: Nov 2002
Location: Kansas City
Posts: 721
|
Yes, you can. Just remove the valve covers and look for the barrel nuts holding the studs, 12 per side. If they're broken the nut will be loose in the hole. You can put a wrench on them, but don't try and torque them at all, just verify they're not loose.
__________________
Current: 1975 911S --Chocolate brown Past: 1967 911S --Bahama Yellow 1990 C2 Targa --Silver 1973 914 2.0 --Delphi Green |
||
|
02-15-2020, 07:17 AM
|
|
|
SEVENT9
|
Quote:
__________________
- - - - SEVENT9 '79 SC Black: My first 911 & my birth year!! http://forums.pelicanparts.com/porsche-911-technical-forum/1000359-79-outlaw-build-thread.html |
||
|
02-15-2020, 07:20 AM
|
|
|
SEVENT9
|
Quote:
__________________
- - - - SEVENT9 '79 SC Black: My first 911 & my birth year!! http://forums.pelicanparts.com/porsche-911-technical-forum/1000359-79-outlaw-build-thread.html |
||
|
02-15-2020, 07:21 AM
|
|
|
Registered
Join Date: Nov 2002
Location: Kansas City
Posts: 721
|
yup, both top and bottom, 6 up top 6 on bottom!
__________________
Current: 1975 911S --Chocolate brown Past: 1967 911S --Bahama Yellow 1990 C2 Targa --Silver 1973 914 2.0 --Delphi Green |
||
|
02-15-2020, 07:43 AM
|
|

|
|
Registered
Join Date: Oct 2013
Location: Prescott, AZ
Posts: 1,062
|
Quote:
__________________
1990 964 Coupe 1986 Carrera 3.2 Targa |
||
|
02-15-2020, 07:46 AM
|
|
|
Troll Hunter
|
Well, I'm not sure about 3.0's, but I just did this on my 2.4.
I guess people call them barrel headed nuts, but they're not easily seen or reachable. They're 10mm Allen headed studs and you need a 6 inch long Allen wrench to get to them. Here's the procedure I followed: Drain all the oil Remove all the valve covers Buy or have on hand a 6 inch long 10mm Allen wrench, ratchet headed. Have on hand a torque wrench. You'll need a small one also to get to the upper head studs because a large torque wrench doesn't fit in the tight spaces in the engine bay. The torque setting for head studs in my 2.4 engine is 24 foot pounds. Check yours. Get an inspection mirror and/or a good light and look deep inside the valve cover area. Way back there next to the spark plugs you should see 10MM Allen headed studs. Those are your babies. 6 per valve cover. 12 up/12 down. 24 total. Insert your Allen wrench and make sure it sets inside the stud head. Now, here's the sphincter tightening part. You need to decide whether you're going to re-torque them or just check to see if they're broken. A very well known Master Porsche Mechanic friend of mine told me to re-torque them. It was a pee in the pants moment, believe me, but I trusted him. But first, I just gently tried them to see if they were loose. Since nothing moved, I GENTLY torqued them to 24 foot pounds. Mind you, my engine had had case savers installed years ago. Each one I worked on and discovered wasn't broken felt like a Grand Slam. I kept track of each stud by taking notes. Sure enough when I was done, 17 out of 24 studs accepted being re-torqued. In other words, they moved and tightened, while 7 just torqued right away. After this was done, I adjusted the valves. No sense doing them first if you've re-torqued the head studs. This was a good day in the garage. I'm not sure about 3.0's. Maybe John Walker Workshop could chime in on the recommendation of re-torquing yours or not. PM him? Good luck Nick
__________________
1978 SC Coupe, Gris Argent Metallic Silver 1988 FJ62 Blue/Gray 2020 M2 CS Last edited by NYNick; 02-15-2020 at 09:51 AM.. |
||
|
02-15-2020, 08:38 AM
|
|
|
Insert Tag Line HERE.....
|
Quote:
__________________
Marc |
||
|
02-15-2020, 09:52 AM
|
|
|
Registered
Join Date: Jul 2012
Location: Mississippi
Posts: 2,354
|
Quote:
On an SC you only need to remove the lower valve covers to find if you have any broken or missing head studs. They will be the 6 barrel nuts on the 6 studs across the bottom on each side of the engine. The upper studs are under the upper valve cover; they are steel and not prone to break. Last edited by SCadaddle; 02-15-2020 at 11:14 AM.. |
||
|
02-15-2020, 11:11 AM
|
|
|
Registered
Join Date: Nov 2002
Location: Kansas City
Posts: 721
|
Yes, on my 67 with al case and all steel studs I did retorque. But on a 2.7 or 3.0 SC I might be a little scared to try and go to full torque. The SC's can sometimes have the old Dilivar studs on the exhaust side and those can get brittle, while 2.7's might be prone to pulling threads. So on both I'd just verify they're tight, maybe 10ft lbs or so. I'll actually be doing this on my 2.7 shortly, fingers crossed!
Quote:
__________________
Current: 1975 911S --Chocolate brown Past: 1967 911S --Bahama Yellow 1990 C2 Targa --Silver 1973 914 2.0 --Delphi Green Last edited by RetroSC; 02-15-2020 at 11:33 AM.. |
||
|
02-15-2020, 11:21 AM
|
|
|
Troll Hunter
|
Quote:
 Now you understand further my pee in the pants moments, but my friend is a lifelong Porsche Master Mechanic, so I went with his recommendation and it worked out.
__________________
1978 SC Coupe, Gris Argent Metallic Silver 1988 FJ62 Blue/Gray 2020 M2 CS |
||
|
02-15-2020, 11:28 AM
|
|
|
Under the radar
Join Date: May 2007
Location: Fortuna, CA. On the Lost Coast near the Emerald Triangle
Posts: 7,129
|
Quote:
Are you saying that during the rebuild those were replaced with dilivar? Are you sure? I'm not sure why anyone would do that, IMO.
__________________
Gordon ___________________________________ '71 911 Coupe 3,0L outlawed #56 PCA Redwood Region, GGR, NASA, Speed SF Trackrash's Garage :: My Garage |
||
|
02-15-2020, 07:27 PM
|
|
|
Troll Hunter
|
Quote:
However, I have been assured that Dilivar is fine with Case Savers. This is the combo they used during the rebuild. They're all in good shape and even re-torqued. Nick
__________________
1978 SC Coupe, Gris Argent Metallic Silver 1988 FJ62 Blue/Gray 2020 M2 CS |
||
|
02-16-2020, 08:03 AM
|
|
|
SEVENT9
|
Quote:
__________________
- - - - SEVENT9 '79 SC Black: My first 911 & my birth year!! http://forums.pelicanparts.com/porsche-911-technical-forum/1000359-79-outlaw-build-thread.html |
||
|
02-16-2020, 01:04 PM
|
|
|
SEVENT9
|
Quote:
__________________
- - - - SEVENT9 '79 SC Black: My first 911 & my birth year!! http://forums.pelicanparts.com/porsche-911-technical-forum/1000359-79-outlaw-build-thread.html |
||
|
02-16-2020, 01:05 PM
|
|
|
Vintage Owner
|
Dilivar was thought to be the way to go, but they get brittle an snap. Casesavers will prevent the studs from pulling out of the case, but won’t affect the studs snapping. I used the Supertec studs when we rebuilt a 2.7 about six years ago, so I hope that was a wise decision.
__________________
84 Targa (sold) 70 914-6 (sold) 73 914-6 2.7 conversion (sold) 75 GMC Motorhome (sold) 2016 Cayenne |
||
|
02-16-2020, 01:33 PM
|
|


 '79 SC
 1969 Porsche 911T 2.0L T

 KEMOSAHB
 Landcruiser
 Fred
Fred 78 Porsche 911 Turbo
 1972 porsche 72 rsr clone
 1995 porsche 993
 1995 porsche 993
 1990 porsche C2 911
 1966 porsche 911
 1984 Porsche 911
 2003 Porsche 996
 My Garage
 1971 Porsche 911
 Baja Bug
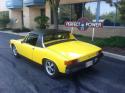 1970 Porsche 914-6 (sold)
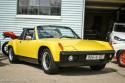 1973 porsche 914-6 conversion (sold)
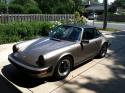 1984 Porsche 911 Carrera Targa - sold
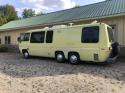 GMC Motorhome
