|
|
|
|
|
| Author |
|
|
Registered
|
I've been following this thread from day 1 .. Sorry i haven't posted earlier.. What an awesome source of info and inspiration !!!!!! I have just began stripping an 86 coupe , with complete resto and backdate in mind .. Keep up the great work !!!!!!!!!
|
||
 02-14-2022, 01:21 PM
|
|
|
Registered
|
Id pull the lines along with the A/C. I yanked all of mine including all the crap in the smugglers box. The 40 year old lines were so nasty I dont think they would have held any Freon. If you decide to add A/C down the road, a good installer will want new lines rather than trust whats been exposed since the removal. Many are going with the electric A/C unit which I understand doesnt require the lines anyway.
Quote:
|
||
|
02-14-2022, 06:56 PM
|
|
|
Full Send Society
|
Day 15
This update is a few days late because the forum was having a fit and then I had to actually do some work at work... Anyhow, let's pretend it's Monday morning... Wisely I sent the kids off to Grandmas house on Friday night for a sleepover and told my wife Id give her the house for the day. And you know what that means: Julian gets the whole day to play with his Porsche! Like a kid awaiting Christmas morning I was up at 4:30 like a bat out of hell. I got to work and started on what I knew would be a long day. My goal was to get the entire car all sanded and ready for primer. Simple task you say? Well, not being a pro at applying body filler I applied a generous amount as I wanted to be thorough. Haha, the jokes on me. This stuff is like a tattoo- easy on, not so easy off. I employed the services of a DA and RO sander to remove the bulk of the filler, slowly watching dollars and cents turn into dust; Rage products aint cheap. Theyre amazing but you definitely pay a premium to make dust. I then switched to sanding boards, sanding sponges and sandpaper starting at 60, then on to 80 and finally 100 grit and got everything smooth, even and exactly how I wanted it. There were two spots that I had to re-fill but they were so small and so thin that Im not stressing about it. The sanding saga sucked up several hours: 6 to be specific. Ugh. But I did get all of the filler and bumpers smooth as a babys     Now, we'll see what it actually looks like once I throw some primer and guide coat over it but for now I'm reveling in being done with the brunt of the sanding. Once complete with a few hours until the return of the childrens and responsibility I looked for other projects.  I started painting the trunk but ran out of course. So, half completed it will have to wait until I get more paint. I started trying to paint the gas tank but as obsessive followers of this forum might have seen, I ran into some issues... the rubberized coating would not play nice with any of the paint I tried (polyurethane, lacquer, enamel...). No matter the paint it was always sticky so it's clear that I'll have to remove the rubberized coating and re-coat it with Wurth and then paint it with 2k satin. I'll probably repaint the trunk with the same 2k so it matches... sigh. I also finally started on the Classic Retrofit AC installation by removing a whole bunch of blower parts and opening up the boxes that have been sitting on my loading dock for about a year. I won't be detailing that process in depth here unless I run into problems or neat tricks or something that I think is novel enough to share as others have done far more extensive threads on the AC install but expect to see some of it. I also started on another project that speaks to the final look of the car. I know, crazy to start thinking about the final look but I needed something fun to do. The R bumper Im using has the air duct cutouts but they look a bit unfinished to be honest and also, they are gaping holes in front of the oil cooler and AC condenser and Id rather not have debris make its way to those important pieces of kit. So . I procured some brass metal mesh and fabricated two screens for the bumper. These are pretty rough right now but rest assured, they'll be nice and finished when they're...well...finished.    As compelling as bright gold might be for someone who just got a pager, its not the final look. Ill be applying a patina to the brass to give it a darker gold color and a bit of a weathered look. Somewhere along the likes of the middle piece:  I also made another thing with the brass. Notice a theme here  More to come on that...
__________________
-Julian 1977 911 S: Backdate, EFI/ITB, AC project in the works: http://forums.pelicanparts.com/porsche-911-technical-forum/1106768-when-well-enough-cant-left-alone-backdate-efi-itb-ac-more.html |
||
|
02-16-2022, 04:52 PM
|
|
|
Registered
|
Good to see you progressing on the build. I like the brass touches!
__________________
Diederick I drive a US import 1977 911. Formerly owned by a woman in California named Ginger - which appropriately led to the nickname. IG: no dedicated account but photos are posted with #ginger77 |
||
|
02-16-2022, 09:58 PM
|
|
|
I'm good with tools.
|
The brass accents work well.
__________________
72 911 Coupe "OILDOOR" 24 INEOS Grenadier (daily) 13 991.1 Coupe 2S 3.8L (currently undergoing mods) 02 996 4S |
||
|
02-17-2022, 05:16 AM
|
|
|
Registered
|
We're too old for gold...
"a little bit of brass and a flip phone"
__________________
-Tony Instagram: @Pablo_the_Porsche | @RuchlosRallye AchtungKraft #002 |
||
|
02-17-2022, 10:20 AM
|
|

|
|
Full Send Society
|
Day 16
Another early start but this time a limited working session of only three hours. Its both amazing what you can get done in three hours but also shockingly less that you hoped. Anyhow. Stymied by the rubber coating on the gas tank and the multiple failed attempts at simply painting it I had to come up with another plan. I tried all sorts of paints and the solvents (acetone and xylene) always softened the rubber coating. I tried coating the tank with water-based primer and shellac but the solvents penetrated and still made a mess. So, I resolved to remove the coating. I first started with a heat gun and scraper to no avail, then onto an oscillating tool with a scraping bit which was better but still woefully inadequate. I turned to the tool I kind of knew I was going to have to use anyway; the angle grinder. Equipped with a gnarly wire wheel it was able to take all of the coating off. It wasnt hard but it wasnt fast. It took about 2 hours of work to have the top of the tank clean. Given how durable the coating was, I opted to leave it on the bottom of the tank. This aint no concourse car and I like the protection it provides. It made a royal mess of stringy rubber everywhere. Luckily it was not sticky and swept right up.  A silly-string like mess everywhere. All that work was worth it as the tank looked glorious once cleaned. I was happy to find no rust at all and all of the metal in perfect 43 year old condition.  Oh, hi there. Nice to see you're solid! I gave it a quick wipe with acetone and then decided to coat it with Wurth High Build Rubberized Undercoating. I have to say, it looks damn beautiful. The Wurth coating is not as thick and as the original rubber and the texture is finer so it looks more deliberate and less sloppy. It has a really velvety satin finish and looks amazing. I couldnt be happier. I still have to paint the inside of the fuel filler dish but again, Im waiting on paint to arrive.  You sexy thing, you!  The texture is like leather grain  Thinner for sure but it'll still protect and deaden the sound. With a bit of time left I decided to turn my attention back to the trunk. Im still waiting on the paint I need to arrive so I decided to take advantage of having access to the back of the dash to do some work that wont be fully realized until next winter. I pulled the cigarette lighter, fog lamp switch and defogger switch, seatbelt/brake light and all the associated wires. I had converted my fog lamp switch to an oil cooler fan manual override switch last winter (See link here) but decided to go another route all together.  Buh-bye I decoded the various switches and how they operate and extended and labeled all of the wires, made a new loom and fed them into the cockpit through an existing hole below the dash. For the time being they'll just sit bundled under the dash. When I redo the interior, the dash will be redone and the holes covered. The oil cooler fan switch, rear defogger switch, and a few other secret switches will be relocated. Doing this work now means that I wont have to remove the AC later.  Ok gang, sit tight for now, you'll have your turn in the spotlight. And with that I was done- my three hours were up and I had to take the kids to a trampoline park to burn off some energy. This week I hope to sneak a few 30mins here and there to finish painting the trunk and start fabricating something that I've been thinking about for months. Muahahah
__________________
-Julian 1977 911 S: Backdate, EFI/ITB, AC project in the works: http://forums.pelicanparts.com/porsche-911-technical-forum/1106768-when-well-enough-cant-left-alone-backdate-efi-itb-ac-more.html |
||
|
02-21-2022, 07:04 AM
|
|
|
Registered
Join Date: Jul 2016
Location: Hoschton, GA
Posts: 363
|
Damn, the tank looks great!
__________________
1979 911 SC Gran Prix White. Gone but not forgotten. 2016 GT4, current steed. IG @hulley31 |
||
|
02-21-2022, 12:32 PM
|
|
|
Full Send Society
|
Day 17 - Part 1
This post is a fable about ambition, the seduction of process and breaking rules. As I mentioned a few posts ago I have begun thinking seriously about the final look and feel of the car. I have a general idea of what I want it to look like but as always, these things are evolving and fluid. One of the major lessons I learned studying studio arts in college and through my work in the arts is that the development of a lexicon that can be repeatedly implemented across mediums and situations leads to a cohesive product that can be understood without explanation. That is; develop a language, put rules for use into place and follow them.  When well enough was left alone Before this project, when the car had the SCRS front bumper I fabricated some air duct grilles to match the rear engine grille; wherever air was moving there should be a chrome grille. It was a good proof of concept, it looked good and made design sense so I decided to carry that forward with this iteration of the car. Where air flows there will be a patinated brass mesh. This includes the engine grille, the bumper ducts, the fresh air intake and the horn grilles in the fenders; uniformity in design lexicon. While fabricating the horn grills, I decided to see if I could extend the mesh covering across the entire front turn signal. This was a lark of an idea that seemed to make sense in my mind; why break up the surface of the mesh for a lens. I began bending brass rod and shaping it to fit the profile of the front fender. I beveled the corners and using silicone bronze wire, MIG brazed the brass rods together. Much filing and working the joints ensued until I had a shape that fit the opening. I then began bending and shaping the brass mesh to fit the opening. Lots of bending and small cuts on my ungloved hands later, it was so. I tried MIG brazing and silver soldering the mesh but it was too delicate; the MIG burned it and the silver solder discolored it so epoxy was used. Brass is a highly reactive metal and takes epoxy really well, much better than aluminum or steel.   And with that I had a brass rod and mesh panel that extended across the horn grill opening and the lights.  And then I sat back and came to the conclusion that I had become seduced by and lost in process to the detriment of content. That is, I was so focused on whether or not I could do it, if I had the skill, if it would come together and be different that I ignored the rules of my lexicon. Remember; where air flows there will be mesh. By covering the turn signals with mesh, I had expanded that rule; air flows and lights are now covered in mesh. That in turn would necessitate that the rear lights get meshed and aside from not wanting to make more work for myself (haha, who are we kidding!) I felt that was too much and verged upon begin a theme car, think of all the goofy motorcycles Orange County Choppers made and how they looked like toys. It was unnecessary, served no functional purpose and was tiresome as a design aesthetic. The resolution was to consult my lexicon and stick to the rules; the panel must be cut down, regardless of how painful that may be to the fabricator in me. So it was.      
__________________
-Julian 1977 911 S: Backdate, EFI/ITB, AC project in the works: http://forums.pelicanparts.com/porsche-911-technical-forum/1106768-when-well-enough-cant-left-alone-backdate-efi-itb-ac-more.html |
||
|
02-28-2022, 07:17 AM
|
|
|
Full Send Society
|
Day 17 Part 2
In addition to Meshgate I actually did some other stuff. I painted the remainder of the trunk and the front filler panel satin black. Im glad I did and I like it a lot. I think when its all buttoned up itll look very nice.  I also spent some time furthering the AC install. This has proved to be the slowest part of the entire build thus far, thank goodness I have the tank out and can sit in the trunk without being hunched over. I also threw on a coating of high build primer to the areas where I had put filler. Initially I had planned on color matching and blending in the new work with the existing paint but am having second thoughts. I might be better off with a respray at a shop which will allow me to change the color slightly-itll still be white but Im thinking chiffon white, medium ivory, or the like to play off the patinated brass and interior. That said, I didnt want to drive around with exposed filler so some white primer will suffice for now. Hey, driving in primer is the hot new thing, dontcha know? I would have loved to have it painted this year but I think thats pushing it well see.   Its really rewarding to see the car in a uniform(ish) color. Seeing all of the work disappear into what it should is reassuring. It feels like a major step forward.
__________________
-Julian 1977 911 S: Backdate, EFI/ITB, AC project in the works: http://forums.pelicanparts.com/porsche-911-technical-forum/1106768-when-well-enough-cant-left-alone-backdate-efi-itb-ac-more.html |
||
|
02-28-2022, 07:20 AM
|
|
|
scumbag
|
Can confirm:
1. Driving in primer is very fashionable. 2. The change from multiple colors to one is incredibly satisfying and motivating. 3. You are a madman. That brasswork is incredible. 4. You made the right decision about the meshy lights. I would have given you a hard time about that if you'd chosen to keep it.
__________________
My first Porsche - http://forums.pelicanparts.com/porsche-911-technical-forum/989493-my-low-budget-dream-car-build.html AchtungKraft #009 - IG: @doktor_b |
||
|
02-28-2022, 07:57 AM
|
|
|
Registered
|
Great to see another update. I love the brass mesh panels. So well thought up and so well executed!
__________________
Diederick I drive a US import 1977 911. Formerly owned by a woman in California named Ginger - which appropriately led to the nickname. IG: no dedicated account but photos are posted with #ginger77 |
||
|
02-28-2022, 01:07 PM
|
|

|
|
Full Send Society
|
Day 18
Since the beginning of working on this car I have learned many lessons; some about tenacity, some about expectations, but none is truer than every Porsche maintenance victory will be followed shortly thereafter with a Porsche maintenance defeat. I did spend a minute working on the brass mesh horn grilles... I used some low temperature solder to braze some brass brackets to the back of the brass rod and fitted them to the car. Ultimately, everything behind the mesh will be black so the brackets won't be seen but for now, I'm very happy. This was an absurd amount of work and I could have easily just ordered some from Achtungkraft but I wanted to make my own and I didn't want plastic. The mesh still needs to be tweaked a bit and brazed on but for now I'm happy. Suffice it to say, I ain't doing this again.    Brass monkey, I sure feel like one at this point! Next was the Classic Retrofit AC install. A long time ago for a reason that I can’t remember (masochism, perhaps) I once removed the entire blower system and reinstalled it. That experience made going into the AC install a bit less daunting. I got everything removed and everything installed fairly easily in a few hours though those “T” fittings were a bear! Once the blower, ducting, compressor and drier were installed in the trunk I ran head first into the other side of the “that wasn’t that bad” coin.   I tried for two hours to Tetris the condenser under the left fender to no avail. Regardless of how I rotated it, which way it was placed, all the little swears and prayers I said, it just wouldn’t fit. I’m running an R style fiberglass bumper and I suspect that it eats up the little bit of extra space I need. It just wasn't happening.  I have made it to level 28 in Tetris, I am car packing hero and the bag-boys at the grocery store run when I show up but this battle couldn't be won. After stopping, cleaning up and leaving my studio I pondered a lot about what the solution would be. The obvious answer is to just run the condenser in the rear left fender. I’m not totally thrilled about that as it puts the condenser very far away from the system and that has to have an effect on efficiency. So, I decided to add a second condenser. I’d rather do it now than later once the car is complete and though Chicago isn’t the South, it does get hot and muggy here and my plan is to drive the snot out of this car, daily is the goal, so I want to be comfortable. Also, see Wife. I wish I would have bought a 2-condenser system from the get-go as it’s only $200 more whereas adding a second condenser after the fact is $500 more! Ugh. So now I just have to wait for the condenser and other parts to arrive which is killing me because I really want this car off jack stands! Lesson learned; just go all in from the get-go and don’t leave anything on the table as it’ll cost you double later. Side note to all those with single top-sliders and CR AC... what are your thoughts on how the system performs? I understand it was designed with the dual sliders in mind and for single sliders there's a compromise.
__________________
-Julian 1977 911 S: Backdate, EFI/ITB, AC project in the works: http://forums.pelicanparts.com/porsche-911-technical-forum/1106768-when-well-enough-cant-left-alone-backdate-efi-itb-ac-more.html |
||
|
03-07-2022, 03:14 PM
|
|
|
I'm good with tools.
|
Fabulous work on the brass.
__________________
72 911 Coupe "OILDOOR" 24 INEOS Grenadier (daily) 13 991.1 Coupe 2S 3.8L (currently undergoing mods) 02 996 4S |
||
|
03-08-2022, 08:33 AM
|
|
|
Full Send Society
|
Gentlepeople of P-Land, I come to you with a conundrum, one that has and will repeat it self since time immemorial.
This of course is all about wheels and tires. Ugh. I currently have 16X6 and 16x7 Fuchs with Dunlop Direzza 205/50/r16 but I think I'd like a tire with more sidewall for a more comfortable ride, a less square profile, and to have an earlier car look so I'm considering 205/60/r15 I am leaning toward a set of 15" Group 4 alloy steelies. I've just spent nearly 2 hours reading threads on tires and wheels and I'm no wiser, no less conflicted and only a bit more crosseyed. Here are the facts, ma'am: -1977 body with rolled rear fenders -Lowered to about 24.5" rear fender to floor height. -Street car only. No AX, no track. -3.5 season car: on the road until salt. -Some rallyes, mostly just lots of full send driving. -Stock engine with EFI/ITB conversion, maybe ~190-200 engine HP on a good day? -Lightened car, getting close to 2100 pounds. -Eventually RS spec P&C, or something spicier to replace CIS P&C I am conflicted about staggering the wheels. 6" up front, 7" in the rear, 7" all around, or 6" all around. So my brethren, what say you. What advice or insights may you have. I don't know enough about wheels and tires to make this decision without guidance. Thank you and good day. Julian S Preston Esquire.
__________________
-Julian 1977 911 S: Backdate, EFI/ITB, AC project in the works: http://forums.pelicanparts.com/porsche-911-technical-forum/1106768-when-well-enough-cant-left-alone-backdate-efi-itb-ac-more.html |
||
|
03-10-2022, 05:13 PM
|
|
|
Registered
Join Date: Jul 2016
Location: Hoschton, GA
Posts: 363
|
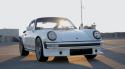
Here is a vid from "Duck and Whale", this guy fitted 15s on his longhood and talls specifically about the tire choice and why. Pretty good lookin car, I think 15s and a chunky tire look great on a longhood.
https://www.youtube.com/watch?v=2ZhwAgcWEKw&list=FLFVHrO6GB1gY3FiY2q3nHGw&index=9&t=340s
__________________
1979 911 SC Gran Prix White. Gone but not forgotten. 2016 GT4, current steed. IG @hulley31 Last edited by Hulley; 03-10-2022 at 06:35 PM.. |
||
|
03-10-2022, 06:33 PM
|
|
|
scumbag
|
Julian,
I have nothing constructive to add about your tire quandary. Your proposed path is in direct opposition to my wheel/tire proclivities. But I support your decision-making abilities after you've heard all the various opinions and look forward to the outcome.
__________________
My first Porsche - http://forums.pelicanparts.com/porsche-911-technical-forum/989493-my-low-budget-dream-car-build.html AchtungKraft #009 - IG: @doktor_b |
||
|
03-11-2022, 05:28 AM
|
|
|
Full Send Society
|
Quote:

__________________
-Julian 1977 911 S: Backdate, EFI/ITB, AC project in the works: http://forums.pelicanparts.com/porsche-911-technical-forum/1106768-when-well-enough-cant-left-alone-backdate-efi-itb-ac-more.html |
||
|
03-11-2022, 05:29 AM
|
|
|
Full Send Society
|
Quote:
__________________
-Julian 1977 911 S: Backdate, EFI/ITB, AC project in the works: http://forums.pelicanparts.com/porsche-911-technical-forum/1106768-when-well-enough-cant-left-alone-backdate-efi-itb-ac-more.html |
||
|
03-11-2022, 05:30 AM
|
|
|
scumbag
|
I would consult the oracle known as Duane Wik about tall tires on midyears. His white car is fantastic and he's had many different sets of wheels/tires during his ownership.
Born in '75. Me and my 'new' 911s.
__________________
My first Porsche - http://forums.pelicanparts.com/porsche-911-technical-forum/989493-my-low-budget-dream-car-build.html AchtungKraft #009 - IG: @doktor_b |
||
|
03-11-2022, 05:34 AM
|
|


 Porsche 911 Coupe
 Pablo
Pablo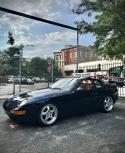 1994 Porsche 968
 1979 Porsche ROW 911 SC
