|
|
|
|
|
| Author |
|
|
Targa_PB_78_SC
|
Take a heavy gauge electrical wire you can wrap around the ball socket, leave ends to grab with a pliers and pull the socket straight off. Just remembered it worked for me.
__________________
BareRearedRookie Last edited by mike sampsel; 12-02-2022 at 03:58 AM.. |
||
 12-02-2022, 03:56 AM
|
|
|
Registered
|
Quote:
For the fuel lines, don't buy anything from these guys (  ) but their engine removal blog has some great photos. ) but their engine removal blog has some great photos.https://blog.*******.com/how-to-remove-engine-gearbox-classic-air-cooled-porsche-911 the asterisks are FCP euro
__________________
1982 911SC |
||
|
12-02-2022, 05:36 AM
|
|
|
Registered
|
Can I unthread the rod to separate it? Or do I need to cut it and replace.
|
||
|
12-02-2022, 10:43 AM
|
|
|
Registered
|
Quote:
__________________
1982 911SC |
||
|
12-02-2022, 10:57 AM
|
|
|
Registered

|
Pop it off. More power!
__________________
IG@ADDvanced Youtube@ADDvanced www.gruvdesign.com |
||
|
12-02-2022, 10:59 AM
|
|
|
Registered
|
Must still have the clip inside because I'm bending the lever
|
||
|
12-02-2022, 11:22 AM
|
|

|
|
Registered
|
Try this, then. Unbolt the throttle linkage mount from the engine, disconnect the looong throttle linkage down at the transmission bell crank, then pull the whole linkage assembly out with the airbox/throttle body. Once it's out you'll have more options and leverage to inspect it and pull it apart, then you can clean up, grease and reassemble while patting yourself on the back.
Actually, I'd suggest doing that anyway because the bushings in the throttle linkage bellcrank are more than likely in bad shape and need replacing. Easy job to do if you have it all apart.
__________________
1982 911SC |
||
|
12-02-2022, 11:40 AM
|
|
|
Registered
|
Finally got it off. I was able to loosen the rod and undo the nut to release some of the tension on the ball cap and came off easily then.
Do I disconnect the fuel line to the accumulator and at the top of the fuel filter? |
||
|
12-02-2022, 01:09 PM
|
|
|
Registered
|
Finally got it off. Now to clean it all up and replace old parts.
 
|
||
|
12-03-2022, 01:38 PM
|
|
|
Registered
|
Good Job........
Joe,
Congratulations! You have achieved your goal removing the complete CIS in situ. Time to move to the next level. Learn to drop the motor this time. Once you done an engine drop, you would realize why knowledgeable and experienced people prefer to remove the complete CIS on an engine stand. People who had attempted to remove the complete CIS in situ have not done an engine drop before. And I dont blame them for choosing to do it in situ. The fear and anxiety is too much to overcome for some people. Just imagine installing the CIS unit back with the motor on an engine stand and sitting on a comfortable chair on wheels and finishing it after a few hours. Use your imagination how easy and wonderful to work on your motor if you had removed it........ Tony |
||
|
12-03-2022, 07:29 PM
|
|
|
Targa_PB_78_SC
|
Quote:
__________________
BareRearedRookie Last edited by mike sampsel; 12-04-2022 at 04:57 AM.. |
||
|
12-04-2022, 04:55 AM
|
|
|
Registered
|
I know it would have been easier to drop the engine to do this but I have a one car garage and live here in Montreal were the weather doesn't permit working outside in January. Got all the clips but broke the O2 sensor plug. It was already kind of loose. How hard is it to find that part?
|
||
|
12-04-2022, 05:08 AM
|
|
|
Registered
|
Congratulations Joe!
When you get ready to start the car back up, youll need to set it back to factory baselines as likely things were adjusted to make it run with various vacuum leaks and other problems. If you cant find the procedures, let us know and either I or someone else can get you the settings.
__________________
Rutager West 1977 911S Targa Chocolate Brown |
||
|
12-04-2022, 09:27 AM
|
|
|
Registered
|
[QUOTE= How hard is it to find that part?[/QUOTE]
Good luck, but I have seen on this forum where a member is making a nice replacement. |
||
|
12-04-2022, 10:17 AM
|
|
|
Registered
|
Thanks I'm sure I'll have a lot of questions.
How do I remove the injector caps? Do I need a special tool? |
||
|
12-04-2022, 11:13 AM
|
|
|
Registered
|
Trying to remove the oil cooler cover from the top, there are four bolts on top but the cover won't come off, is there any other bolts below to remove?
Thanks |
||
|
12-12-2022, 05:28 PM
|
|
|
Registered
|
Quote:
You should probably watch some of my videos on CIS refresh: Teardown: Go to 6:40 to remove the injector seats Also, make SURE you rebuild your airbox, I'm guessing the factory screws holding it together are pulled out, I used nuts/bolts on mine instead to compress it together. Airbox rebuilding video: This is reassembly of everything, how to mount new injector seats, plug the EGR port on the bottom of the intake, bunch of details this should help as well Sorry for spamming my channel but I think this will really help you out, Joe. Cheers!
__________________
IG@ADDvanced Youtube@ADDvanced www.gruvdesign.com Last edited by ADDvanced; 12-12-2022 at 05:51 PM.. |
||
|
12-12-2022, 05:46 PM
|
|
|
Registered
|
I have watched your videos several times now and have found them very useful.
I'm referring to the grey plastic cover that you can see in the last photo of the engine bay I posted. I think there's 2 from below that also hold the engine tin. |
||
|
12-12-2022, 06:20 PM
|
|

|
|
Registered
|
Yep, there are two bolts on the rear face of the engine that hold the engine tin and the cover to the back side of the head. You should be able to reach them from underneath.
__________________
1982 911SC |
||
|
12-13-2022, 08:33 AM
|
|
|
Registered
|
I did have a look and there are 2 bolt, thanks.
|
||
|
12-13-2022, 08:58 AM
|
|


 67 Datsun stroker 2000
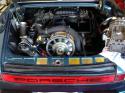 Porsche Targa 1978 SC


 1977 Porsche 911S Targa
