|
|
|
|
|
| Author |
|
|
Registered
Join Date: Feb 2005
Posts: 397
|
Rear taillight cluster refu rbishment
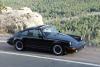
Here is a writeup of a recent project to fit new gaskets to my rear taillight clusters.
The first issue was removing the cluster. Getting the actual lens off is easy, but like many owners, removing the two bolts securing the cluster to the car is very difficult. This is because they are rusted up, or if you can turn them, it tuns the captive nut shown on the lower pic. This is held in place by a clip. Do yourself a favour and drill the nut out. Worry how to sort it out later.  
|
||
 09-15-2011, 05:08 AM
|
|
|
Registered
Join Date: Feb 2005
Posts: 397
|
Once the unit was out, it was a real mess having the equivalent of a quarry piled up on top of it, held in a lattice of grease and grime.
I degreased, sanded smooth the outer surface and then painted it with white epoxy rustguard paint.  The rear cover of the light cluster is held on with two screws. This had to be removed to fully disconnect the cluster at the light end. I also sanded and painted the cover.  The new seal was then fitted to the painted unit using contact cement to secure it. 
|
||
|
09-15-2011, 05:21 AM
|
|
|
Registered
Join Date: Feb 2005
Posts: 397
|
With the cluster finished, the trick was to get it back onto the car.
First however, the area behind the recess was thoroughly cleaned, surface rust ground off with a dremel tool and painted with the epoxy paint. The whole area was sprayed with Lanotec Ultra Protection, an lanolin based product which I though would be good as a leave on rust-inhibitor  The screws that secure the cluster to the car are secured to the curved bracket you see on the picture. The bolt passes through the bracket into a clip that is wrapped around the end of the bracket. At the rear of this clip, is a captive 5mm square nut that is held in place by two prong of the clip. This prevents the nut from turning. I replace the original screws with stainless bolts. For the captive nut, I used a cage nut, which looked like this: 
|
||
|
09-15-2011, 05:32 AM
|
|
|
Registered
Join Date: Feb 2005
Posts: 397
|
I positioned the cage nut with the curve clips facing the rear surface of the curved bracket and slid the cage grooves inside the prongs of the retaining clip on the rear side of the curved bracket. This held the cage nut in place so the bolt could be screwed into it after fitting the cluster back onto the car.
Here is another view of the original clip so you can visualize what I mean  Prior to re-installing the clusters, the wires had to be reconnected and the back panels re-screwed on using new stainless fasteners. I used heat resistant black sealant round the edges of the rear panels to make a sound seal to avoid water getting in. After the clusters were screwed back onto the car, the rubber drain plug was fitted. This is a rubber bung that goes through the hole on the bottom surface of the cluster and through the lower surface of the car body. This has to removed at the outset to get the cluster off the car. time to fit the lenses back on, clean up and take lots of pictures. This ended up being a very time consuming project, learning how do to it and getting the correct fasteners. 
|
||
|
09-15-2011, 05:42 AM
|
|
|
Registered
Join Date: Feb 2005
Posts: 397
|
  
|
||
|
09-15-2011, 05:46 AM
|
|
|
Registered
Join Date: Nov 2004
Location: Raleigh, NC
Posts: 3,891
|
Thank you so much for posting this project.
I have been meaning to replace the seals onmine but had a hard time removing the tailight housing units.
__________________
John D. 82 911 SC Targa-Rosewood 2012 Golf TDI |
||
|
09-15-2011, 09:20 AM
|
|

|
|
Registered User
|
Great write up. This project is taking me forever.
Where can i get some new black screws from that hold the lense to the housing? Also the little washers underneath? Cheers Ed. |
||
|
09-29-2012, 04:00 AM
|
|
|
Registered
Join Date: Feb 2005
Posts: 397
|
Not sure! They normally come with the lenses - either get some new lenses or try to get some other screws that fit + washers from a hardware store.
|
||
|
09-29-2012, 04:04 PM
|
|
|
Registered User
|
I just replaced both gaskets on my '85 Carrera. As a one owner, lo miles, SoCal car since imported, never driven in winter, probably not even much in the rain, rust wasn't an issue. The car has absolutely none, anywhere. I'm blessed. Dirt was. Losing one of the back female nuts also was; found it on the floor and with the car raised managed to get it back into place. I did have to cope with lots of grit, mostly on the top of the assembly; used the shop vac. Your idea of placing painters' tape on the bumper BEFORE starting work = excellent. Didn't do this on the first assembly, tried with a towel. Hopeless. Tape is the way to go. How the heck did you unhook the wiring loom? My Bentleys says look for connection in the engine bay and somewhere underneath. I could find any??!! I did my work without removing the assembly.
Also, the cracked/aged gaskets on my car had been attached with adhesive (3M or some such). I didn't bother with glue...just pushed them on and kept them attached with finger pressure until the lens was on. Should I have glued them?? |
||
|
09-30-2012, 09:06 PM
|
|
|
AutoBahned
|
you can visit a major fastener supply house for the cap screws or paint silver bolts black
you can use small O-rings to replace the little washers underneath |
||
|
09-30-2012, 09:43 PM
|
|
|
Member 911 Anonymous
|
Nice work, how is the white paint in the reflection area working out?
For others, while your in there, check the pcb type connectors, over time and use these tend to fracture causing a bad contact or worse a short in the brake light system. My passenger side brake light always weirdly, I tried bending the tabs and even o-ring but I took it apart to find the pcb backing snapped and the ground was touch another hot lead and shorted out.
__________________
'85 Carrera Targa Factory Marble Grey/Black * Turbo Tail * 930 Steering Wheel* Sport Seats * 17" Fuchs (r) * 3.4 * 964 Cams * 915 * LSD * Factory SS * Turbo Tie Rods * Bilsteins * Euro Pre-Muff * SW Chip on 4K DME * NGK * Sienes GSK * Targa Body Brace PCA/POC |
||
|
09-30-2012, 11:28 PM
|
|
|
Registered
Join Date: Jul 2003
Location: Glorious Pac NW
Posts: 4,184
|
Quote:
__________________
'77 S with '78 930 power and a few other things. |
||
|
10-01-2012, 01:24 AM
|
|

|
|
Registered
Join Date: Feb 2005
Posts: 397
|
If you look at my pics, you can see that I didnt actually unhook the wiring loom at the car body end, but I took the back off the actual light assembly and unhooked the wires from the inside. This enabled me to properly clean up and paint the assembly and cover.
Getting the rear cover of the assemblies while the unit was attached to the car was a royal PITA. thank goodness for the painters tape. Also, after refurbing the light assembly, it was a good opportunity to reseal the unit properly as the orignal sealant had gone dry and just broke off. I glued the gaskets on with contact cement - seemed a better way of doing it as I was worried about them moving during installation. Also, I found re-installing the unit was tricky to stop the cage nuts I retrofitted from turning in the clip. All good in the end - the trick is to use fasters long enough to pass through the cage nut. Seems obvious but it is easy to underestimate the length you need. |
||
|
10-01-2012, 03:49 AM
|
|
|
Designer King

Join Date: Mar 2004
Location: Toronto, ON Canada
Posts: 5,499
|
Nice writeup.
You mentioned the cage nuts turning. Could they have been glued into the holders to keep them stationary? One thing I'm not clear on---did you paint the interior reflecting surface white? Did it make any significant difference in brightness as seen through the lenses?
__________________
Paul Yellow 77 Sunroof Coupe/cork interior; 3.2L SS '80 engine/10.3:1/No O2; Carrera Tensioners; 11 Blade Fan; Turbo tie rods; Bilstein B6; 28 tube Cooler; SSI, Dansk; MSD/Blaster; 16x7" Fuchs/205/50 Firestone Firehawk Indy 500s; PCA/UCR, MID9 Never leave well enough alone |
||
|
10-01-2012, 06:08 AM
|
|
|
Registered
Join Date: Feb 2005
Posts: 397
|
OK re the gluing - possibly, but you are never sure of the EXACT position that the bolt is come through at until the housing is actually put back on the car. I actually looked from the underneath of the car and guided the bolt into the cage nut and held it until the threads took up after a few turns.
Regarding the interior reflecting surface - I didnt paint this - but the PO might have sprayed as he had (heaven forbid) clear indicator on there. |
||
|
10-01-2012, 06:11 AM
|
|
|
Registered User
|
Thanks, Spuggy...will do. That said, I'm hoping that it'll be a long time before I have to disturb the tail light assemblies again.
|
||
|
10-01-2012, 11:41 AM
|
|
|
Go Speedracer, go!

Join Date: Aug 2002
Location: Indianapolis
Posts: 1,951
|
Quote:
My car is a euro and it has a white painted reflector in the turn signal housing just like the pictures above. I'm pretty sure it's factory original and all of the euro/ROW cars were that way. Looking at the pics of the OP car it has small bumperettes, so maybe it's a euro too (or a 73.5-74 US 911)? It doesn't seem to make a difference on brightness.
__________________
1981 SC ROW Coupe Last edited by SpeedracerIndy; 10-01-2012 at 12:35 PM.. |
||
|
10-01-2012, 12:31 PM
|
|
|
Registered User
|
Our Euro '85 assembly, original I'm quite sure, is painted white inside where the turn light is; ditto above discussion and photo.
|
||
|
10-01-2012, 10:15 PM
|
|
|
Air Cooled
|
Great job, that looks very nice!
- Craig D
__________________
'78 911 SC "Blackjack" & '76 914/4 2.0L "The Brat" - - '99 Honda VFR800Fi, '98 Honda SuperHawk '88 Honda Hawk GT, '77 Honda CB750K Cafe '69 Honda CL350 |
||
|
10-01-2012, 11:33 PM
|
|
|
Registered
Join Date: May 2009
Location: Lakewood Colorado
Posts: 1,346
|
That looks great. I will be doing something similar shortly.
__________________
1969 911T - The "Rat" 1997 A4 Quattro 2.8 (270k) - Black Kaniget - Dead but not forgotten 2010 Jetta TDI Sportwagen - Egg Butt (also Spewing Dragon) 2001 Eurovan Weekender - Bruni |
||
|
10-02-2012, 08:05 AM
|
|


 Targa
Targa
 Marble Grey
 Blackjack '78 SC
