|
|
|
|
|
| Author |
|
|
911SC Tinkerer
Join Date: Nov 2013
Location: Jacksonville, FL
Posts: 770
|
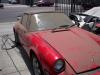
ETarga LED Install DIY
I recently ordered the Etarga Instrument light LED kit.
They are well built and, at least for me, illuminated the dash instruments much better than the 30 year old bulbs that were in since new. Most importantly was the burned out speedometer bulb at 12 o'clock. It was almost impossible to see any speed between 70-100. Ill keep all the old hardware if I chose to go completely back to stock, but I plan on keeping the car for a very long time. Edit: Some say this isn't necessary at all while some prefer it. To each there own. There is more than one way to drive a 911. Anyway... Tools needed: 27mm Socket 1/2" breaker bar with at least a 6" extension 13mm box end wrench FT LBS torque wrench Scribe or a really steady hand and a good memory Brass brush, dielectric grease These steps assume you have a stock car with no upgrades. I preformed these steps on a beautiful 1983 911SC. 1: Start by disconnecting the battery with the 13mm wrench. 2: Remove the steering wheel pad by pulling up gently from the bottom of the pad toward you. This worked for me, your results may vary. 3. You will now see the 27mm nut inside the steering wheel hub. Use the breaker bar and extension to loosen it. After you loosen the nut recenter the front wheels and steering wheel. If you need to use the scribe to mark the position of the steering wheel to the steering shaft. 4. Pull or wiggle the wheel toward you gently. Some force may be required, but not much. 5. Now that the wheel is off you have two options. You can use your fingers to pry the gauges off by alternating your leverage points around the gauge. Little by little they will come out. Alternatively you can go into the trunk, remove the carpet and push one gauge out from the back using the empty hole to push out the rest. A broom stick might be good for this if you can't reach. (Edit: This is a half hearted joke) 6. I started from left to right (aft facing forward) with the gas /oil level gauge. 7. After your selected gauge is out, simply take out the bulb and holder. Once out you will have to twist the bulb 90* and pull it out. Check for any corrosion or signs of burnt wiring "while you're in there". I seriously thought about taking my Tach apart to get the dust out of the gauge face. Alas there are never enough hours in the day... 8. Replace with your selected light upgrade, make sure you put the blue and green LEDs where they belong. 9. After you re-install the gauges, temporarily reconnect the battery and test the lights. Marvel at modern technology for a moment and wonder if you should have chosen the antique look instead. Realize that the white LEDs kick butt and shrug it off. 10. Re-center and re-install the steering wheel and nut torqueing it to 30ft lbs (as per the Bentley). 11. Reinstall the horn pad. Don't forget the attach the horn wire. Put the top on first and then push in on the corners. 12. Reconnect the battery and put all your trunk carpets back in order. ALL DONE! They look soo much better and don't bother me at all at night. I have driven BMWs with amber lighting for almost 10 years now and I was worried that the white lighting would bother me at night, but it really makes no difference to me. I will probably find a radio that matches the lighting or one that can at least have the colors changed. I'm currently leaning toward a KDC-X996 or a KDC-BT945. The 945 has a flat black face plate and white on black illumination, perfect for the dash and not at all blingy. Heres some pictures of the various steps. I hope someone get something out of this DIY. Thanks for looking!  Horn Pad Removed:   Steering Wheel removed. Use your brass brush and dielectric grease to clean up the contact as needed.   This is what a turn bulb looks at everyday.    Old Stock (non-working) casette radio that I will repair as time permits. 
__________________
-'83 911SC Coupe SSIs, Dansk GT3, EFI ITB, Instagram: @ Zinnmetallic_sc Last edited by merlinfe; 12-23-2013 at 12:37 PM.. Reason: Spelling errors fixed now that my 3 year old is asleep. |
||
 12-21-2013, 09:11 AM
|
|
|
My other ride is a C-130J
|
WOW!!
I think safety trumps originality for daily drivers
__________________
1975 911 Targa S 3.0 2000 911 Carrera Cab 2005 Cayenne Titanium Metallic 2022 Mercedes-Benz E450 Coupé 2020 Mercedes-Benz E350 2006 ACG Hummer Previously Owned Art from Stuttgart 2000 Boxster -1983 911 SC Cab -1984 944 N/A |
||
|
12-21-2013, 09:26 AM
|
|
|
Registered User
|
Great DIY writeup. I am also going to this soon so thanks for taking time to do such a detailed DIY. I chose to go with Vintage LED set. Hope it's brighter than stock while keeping some resamblance of factory look.
__________________
 "There is no old Porsche, just a new Porsche owner" "There is no old Porsche, just a new Porsche owner"
|
||
|
12-21-2013, 09:33 AM
|
|
|
AAEEEEE!
|
You don't need to take the steering wheel off ... Use a paint can opener to pull the gauges out
__________________
Steve Laissez les bons temps rouler |
||
|
12-21-2013, 10:05 AM
|
|
|
911SC Tinkerer
Join Date: Nov 2013
Location: Jacksonville, FL
Posts: 770
|
It took me just as long to do it this way and I ran no risk of marring the gauges or the instrument bezel.
But thanks for your input Steve.
__________________
-'83 911SC Coupe SSIs, Dansk GT3, EFI ITB, Instagram: @ Zinnmetallic_sc |
||
|
12-21-2013, 05:36 PM
|
|
|
Uncertifiable!!!
|
Quote:
__________________
🇨🇦 The True North Strong and Free 🇨🇦 Living well is life's best revenge- George Herbert (1593-1633) 2006 C2S, 2024 WRX GT, 911 hot rods on Pelican . Evolution of a Carrera RST, and Sweet Transplant |
||
|
12-22-2013, 10:55 AM
|
|

|
|
Registered
|
Good write up and smart to mention to make sure the blue and green bulbs go in the proper place. I think the right way to do it is as described by removing the steering wheel. When I did mine I could not get enough clearance to remove the tach without removing the steering wheel. It only takes a couple of minutes to remove it.
__________________
89 930 Cab Black 11 Cayenne |
||
|
12-22-2013, 11:02 AM
|
|
|
Registered
|
Quote:
__________________
Kinsley 1980 SC Targa - MS2, EDIS |
||
|
12-22-2013, 11:42 AM
|
|
|
Registered User
|
I just installed Etarga Vintage LED's on my 83 SC. I followed above DIY and removed the steering wheel which was very easy. It provided planty of room. I am happy with the Vintage LED brightness. It is much better than factory. I took few photos before and after.
First 3 photos are factory lights.     
__________________
"There is no old Porsche, just a new Porsche owner"
|
||
|
12-22-2013, 02:41 PM
|
|
|
Zombie
Join Date: Aug 2013
Posts: 70
|
I purchased this kit and will be installing in spring. Great write up, thank you.
Can anyone tell me if/how I can get rid of the damn CAS light while I'm in there? |
||
|
12-22-2013, 03:46 PM
|
|
|
Registered
Join Date: Jan 2000
Location: Richmond, VA USA
Posts: 1,058
|
What's a "CAS light?"
|
||
|
12-22-2013, 06:11 PM
|
|
|
Registered
Join Date: Nov 2013
Location: sf bay area
Posts: 956
|
i think he meant CASIS. as in the shifter light...
|
||
|
12-22-2013, 10:25 PM
|
|
|
AAEEEEE!
|
Quote:
 yes, like the one in the picture - I and others have used this several times with absolutely no damage to the guages, paint or vinyl trim on the dash. Much better than a broom stick LOL Removing the steering wheelk is an absolute waste of time .. never the less this is a good write up
__________________
Steve Laissez les bons temps rouler |
||
|
12-23-2013, 08:36 AM
|
|
|
AAEEEEE!
|
Quote:
Another Radio Upgrade
__________________
Steve Laissez les bons temps rouler |
||
|
12-23-2013, 08:42 AM
|
|
|
Driver, not Mechanic
Join Date: May 2013
Location: SF Bay Area
Posts: 3,021
|
My biggest issue was getting the rubber trim to seat properly. I used Mothers Protectant as I didn't have Armor All at hand. There is still some stretching on the leftmost gauge rubber trim and the tach rubber trim.
Last time I replaced the bulbs I had to buy new rubber trim for the tach as I over stretched the old rubber. Too bad... |
||
|
12-23-2013, 04:34 PM
|
|
|
Registered User
Join Date: May 2011
Location: NJ
Posts: 491

|
anyone has contact info for etarga, I tried sending him message and no reply.
|
||
|
12-23-2013, 05:59 PM
|
|
|
Registered User
Join Date: Jan 2011
Location: Long Island, NY
Posts: 456
|
Quote:
__________________
1983 Porsche 944 (Sold), 1986 Porsche 944 N/A (parts car), 1987 Porsche 944 Turbo (Sold), Mercedes ML55, 2011 BMW 328i X-Drive, 1987 Porsche 944 and a 1987 Porsche 911 Carrera |
||
|
12-23-2013, 06:05 PM
|
|
|
Banned but not out, yet..
|
What eTarga should sell next are replacement LEDS in the same colors (bright white, classic) for install behind the heater controls so everything matches. Anyone heard anything on this?
__________________
An air cooled refrigerator. Mein Teil |
||
|
12-23-2013, 06:15 PM
|
|

|
|
911SC Tinkerer
Join Date: Nov 2013
Location: Jacksonville, FL
Posts: 770
|
Blockhed: Its the day before Christmas Eve. He may be on Vacation...
__________________
-'83 911SC Coupe SSIs, Dansk GT3, EFI ITB, Instagram: @ Zinnmetallic_sc |
||
|
12-23-2013, 07:34 PM
|
|
|
Registered
|
Quote:
|
||
|
12-23-2013, 07:39 PM
|
|


 Dee
Dee
 1983 Porsche 911 SC
 Porschen
 RST
RST Ugly Duck
 PC
PC 911
911 American Ironhorse
 1987 Porsche 930
 1988 Porsche 930
 1989 Harley Davidson FLH
 My Latest
 American Muscle
 Igor
Igor Estrous Express
 The Green Piggy
 Forever
 Whatever
 Fasst
Fasst
