|
|
|
|
|
| Author |
|
|
MBruns for President
|
Edumacate me on hanging fiberglass bumpers
I've searched and found a few threads - mostly involving whole car builds - is there a definitive guide on how to install fiberglass bumpers?
I plan on using the rennline tow receivers and make brackets (I'm pretty handy making fiberglass stuff with three boats)  So - use existing bumper mounts/shocks - (at least one - replace the other with the rennline one Trim the top of the bumper so it mounts with the wheel flares... has room for the front oil cooler. Anything I am missing here?
__________________
Current Whip: - 2003 996 Twin Turbo - 39K miles - Lapis Blue/Grey Past: 1974 IROC (3.6) , 1987 Cabriolet (3.4) , 1990 C2 Targa, 1989 S2 |
||
 04-19-2010, 06:53 AM
|
|
|
Registered
Join Date: Jan 2006
Location: Santa Barbara, CA
Posts: 2,307
|
My sense is almost everyone does something a little different. I've seen no definitive how to do it guide. Whatever you do will probably be three times as strong as needed. If you tap something with these fg bumpers they are toast; it's not as if the brackets are going to help the bumper protect the car. So all you need to do is keep the wind from tearing them off. My rear fg bumper is held on by the stock struts at the sides and three 1/8" nuts and bolts thru the top edge of the bumper into the frame at the bottom of the light box. A small piece of aluminum is used as a washer to be sure the nuts don't pull thru the fiberglass. I also use two tiny nuts and bolts thru the rear fender lip down thru the top of the bumper. It takes very little to keep everything in place, and there really isn't much point in making it much stronger.
__________________
jhtaylor santa barbara 74 911 coupe. 2.7 motor by Schneider Auto Santa Barbara. Case blueprinted, shuffle-pinned, boat-tailed by Competition Engineering. Elgin mod-S cams. J&E 9.5's. PMO's. 73 Targa (gone but not forgotten) |
||
|
04-19-2010, 07:29 AM
|
|
|
disband
|
are you going to have to remove it to trailer the car? michiganmat has a pretty cool system with duce (??) fasteners that allow for quick removal. TRE supplied bumpers come with very usable sheet metal brackets that are pre drilled with plenty of adjustment. a few of us in the bay area have used both front & back and we have all been extremely pleased with fit, finish & install ease. i know with you an east coast guy the shipping from so cal may not be cost efficient.
get a 964 smile for the front as the impact bumper smile does not work well. if the bumper (both f&R) will not pull up tight enough to pinch the rubber piping trim where it meets the body i found that bending the body flange down it will pull it tight enough to keep the trim in place and cover any gaps. my plunge thread in the cal regional forum has some photos of both my & scott of holleran's install
__________________
78SC PRC Spec911 (sold 12/15) https://www.youtube.com/watch?v=f7I6HCCKrVQ Now gone: 03 996TT/75 slicklid 3.oL carb'd hotrod 15 Rubicon JK/07.5 LMM Duramax 4x/86 Ski Nautique Correct Craft Last edited by car 311; 04-19-2010 at 07:43 AM.. |
||
|
04-19-2010, 07:40 AM
|
|
|
MBruns for President
|
So 964 smile vs body welting? do you need that additional seal between the hood and the bumper. - and yes - thinking of something I can take off if needed to trailer in the future.
My bumpers are from Rennspeed. decent quality - and I like the way they reinforce the top so it doesn't get "wavy"
__________________
Current Whip: - 2003 996 Twin Turbo - 39K miles - Lapis Blue/Grey Past: 1974 IROC (3.6) , 1987 Cabriolet (3.4) , 1990 C2 Targa, 1989 S2 |
||
|
04-19-2010, 07:48 AM
|
|
|
MBruns for President
|
Any pictures out there of brackets/mounting? professionals steal, amateurs create...
__________________
Current Whip: - 2003 996 Twin Turbo - 39K miles - Lapis Blue/Grey Past: 1974 IROC (3.6) , 1987 Cabriolet (3.4) , 1990 C2 Targa, 1989 S2 |
||
|
04-19-2010, 09:15 AM
|
|
|
Moderator

|
Love the color of the new car!
Everyone does it differently some use 964 smile some use nothing(I went w/ nothing( some use stock mounting struts others bolt to the chassis and fenders, I did the latter because I used the stock struts to mount a nerf bar that doubles as an oil cooler mount. if clearance for loading on a trailer is an issue then you want to use dzus, the second pic is better, you can see where the 4 dzus are  
__________________
Bill Verburg '76 Carrera 3.6RS(nee C3/hotrod), '95 993RS/CS(clone) | Pelican Home |Rennlist Wheels |Rennlist Brakes | |
||
|
04-19-2010, 09:32 AM
|
|

|
|
porsher

|
Mounting ideas:
1. Make two simple right angle brackets and bolt to the front of the tub. 2. Take 2 pieces of alum plate 4 x 2 x 1/4 and loctite a stud into each. Bond to the underside of the bumper so the studs line up with the holes in #1. 3. This is the clever bit hang the bumper on the brackets by the studs. It will flop around a bit but it will hold the bumper in place while you work on the other monting points - making it a one man job. 4. Bond 2 more stud plates to line up with the stock bumper brakets adjacent to the head lights. 5. Mark through the holes in the sheet metal and drill the upper surface of the bumper. Note that the centerline of the cooler aperture is not aligned with the center line of the car. It's off a bit. At least mine was and based on pics the RSRs were as well. Second clever bit. If you find that the top edge of the bumper does not fit snug against the hood all the way across, you can slot the holes in #1 to give a small amount of adjustment. Measure once, cut twice  
__________________
86 911 Race Car, with a few 993 bits in the boiler room 79 928 Race Car 88 928 Becoming a Race Car |
||
|
04-19-2010, 12:15 PM
|
|
|
Registered

Join Date: May 2004
Location: Encinitas (San Diego CA)
Posts: 4,495
|
If it was me, I'd definitely mount with DZUS clips. I'd also use thin triangulated tubing to create the mounting points (3/8" or 1/2" diameter). Or maybe make a nerf bar that protects and mounts your cooler which fits inside the bumper. Imagine a bar which bolts to the old bumper shock mounts which is curved to fit inside the bumper itself. You could mount a tow hook to it, as well. Use thinwall tubing, may 1.5" in diameter. You could weld tabs for the dzus clips.
The post '73 cars have much more room for such an aparatus. It wouldn't be unlike the 964 aluminum bumper underneath the plastic fascia. One false move and you can take out your cooler (in a small accident). Doug
__________________
1971 RSR - interpretation |
||
|
04-19-2010, 03:24 PM
|
|
|
Slippery Slope Victim

Join Date: Oct 2001
Location: Brooklyn, NY USA
Posts: 4,445
|
Just did my front bumper this past Sat. I am using TRE bumpers. The front came with the brackets, but Dave did not have them for the rear when I bought them.
The real problem for me was the front mount oil cooler that I had to remount and replumb from my old bumper as it was just hitting the inside of the bumper requiring some shaving to fit up. I installed the brackets hand tight but loose enough to be able to move to final spot. I placed the bumper up on one fender, marked the holes on the fender that go thru to mount the bumper. Tightened things up after shifting the bumper around and done. I am using a 964 front seal hich really does clean up the install. 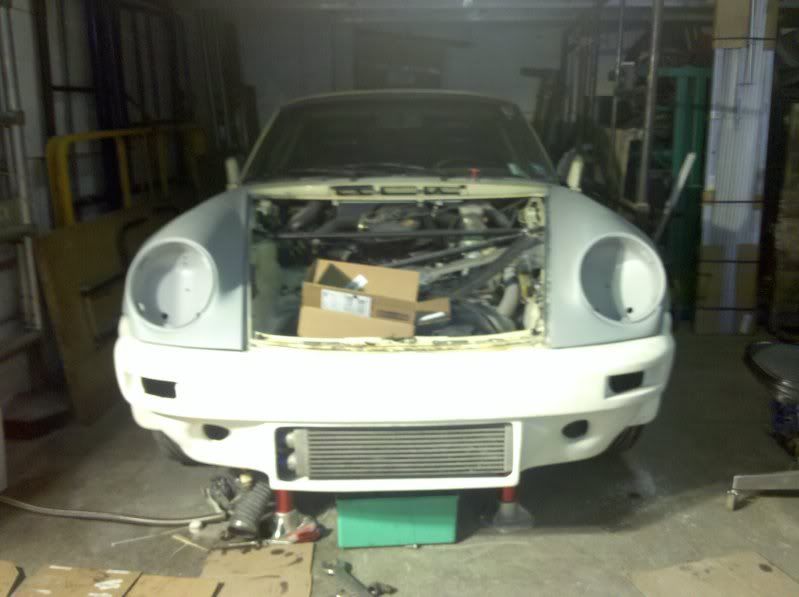 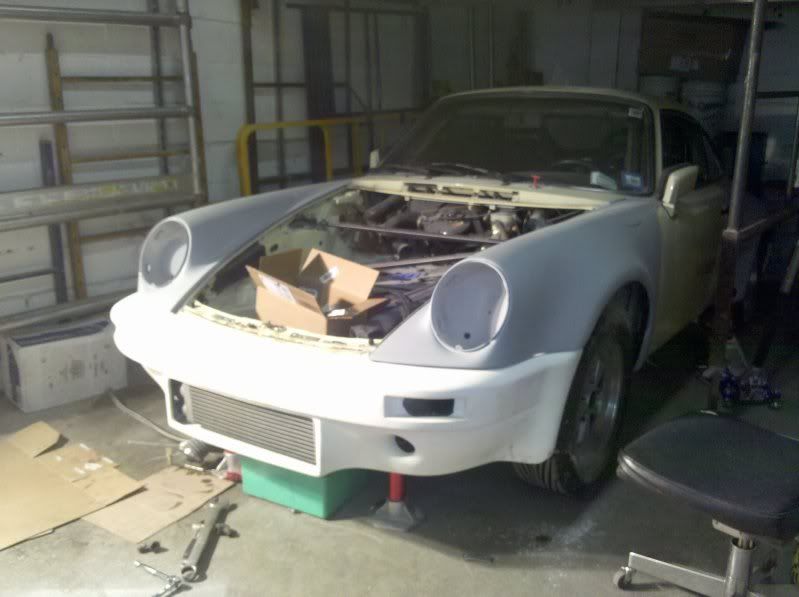 I mounted the rear by fitting the bumper up to one fender, marking, drilling and the doing the other side. I did however need to add a bolt thru the taillight bottom outer housing to get the bumper to sqeeze up closer to the body. 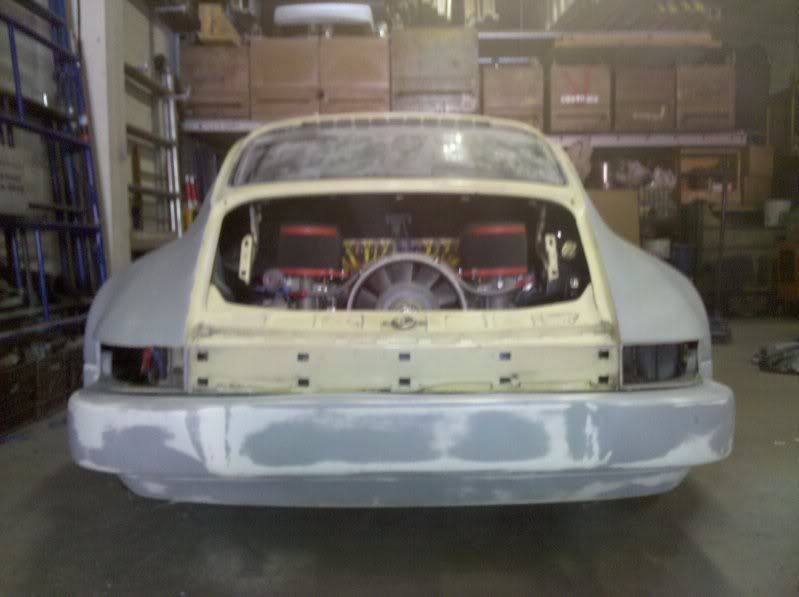 It beomes clearer as you go along.
__________________
Mike² 1985 M491 |
||
|
04-19-2010, 04:59 PM
|
|
|
UFLYICU

|
I used flared sections of exhaust pipe welded to a flat bar on the inside of the bumper, and slip them over the non-flared ends mounted into the stock bumper shock locations. The bumper is held in with a single nut/bolt through each joint at the fender lip in the wheel well.
    edit: sorry about the silly borders, I took the pics with my iPhone. The flat bar is sandwiched with another on the outside front of the bumber, and simply bolted on. It is extremely solid mounting, with some weight reduction. Removal is less than two minutes. and the front view: 
__________________
_______________________ Racer Rix Spec911 #5 prc-racing.com Last edited by ZOA NOM; 04-19-2010 at 08:03 PM.. |
||
|
04-19-2010, 07:57 PM
|
|
|
MBruns for President
|
 Thanks for all your input - EXACTLY what I was looking for ZOA NOM I really like your approach - I may be able to copy this by modifying the crush tubes I have with some other tubing - I may make some fiberglass tubing to go over it -
__________________
Current Whip: - 2003 996 Twin Turbo - 39K miles - Lapis Blue/Grey Past: 1974 IROC (3.6) , 1987 Cabriolet (3.4) , 1990 C2 Targa, 1989 S2 |
||
|
04-20-2010, 06:53 AM
|
|
|
Schleprock
Join Date: Sep 2000
Location: Frankfort IL USA
Posts: 16,640
|
All depends on how you want to do it- use tedious factory mount locations (fenders blind anchors and front tub holes) or DIY fab. As you can see, there's tons of ways to skin this cat.
I chose the tedious route. This time with the new racecar, it's custom fabbed brackets with misc rod and sheetmetal with DZUS fasteners. I watch cstreit pull his bumper and laugh with envy- takes him like 15 seconds to remove it via four DZUS just like Bill showed on that RSR. I'd actually disagree that these bumpers are toast with the lightest impact. A friend wiped his out when he hydroplaned off an on ramp. Drove up an embankment and crunched the front IROC narrowbody bumper fairly good- cracked at the oil cooler opening and the brake duct hole. But it did not separate from the car and remained rather stiff despite the damage. The greater damage was the major buckling that occurred at the front of the wheel arch in the fender. That's some pretty stiff sheetmetal, so I was surprised the fiberglass wasn't destroyed when it transferred all that energy into bending the crap out of the fender. I'll post a picture of the front nerf bar I have from BW Motorsports. Looks pretty sturdy, but it needs some triangumalation to make it stiffer at the bends
__________________
Kevin L '86 Carrera "Larry" |
||
|
04-20-2010, 07:50 AM
|
|

|
|
MBruns for President
|
I thought you might like the color Bill...

__________________
Current Whip: - 2003 996 Twin Turbo - 39K miles - Lapis Blue/Grey Past: 1974 IROC (3.6) , 1987 Cabriolet (3.4) , 1990 C2 Targa, 1989 S2 |
||
|
04-20-2010, 09:44 AM
|
|
|
UFLYICU
|
Quote:
__________________
_______________________ Racer Rix Spec911 #5 prc-racing.com |
||
|
04-20-2010, 01:45 PM
|
|
|
MBruns for President
|
Wow - many people don't use any seal
__________________
Current Whip: - 2003 996 Twin Turbo - 39K miles - Lapis Blue/Grey Past: 1974 IROC (3.6) , 1987 Cabriolet (3.4) , 1990 C2 Targa, 1989 S2 |
||
|
04-20-2010, 02:34 PM
|
|
|
porsher
|
Quote:
Ignore my post and copy this
__________________
86 911 Race Car, with a few 993 bits in the boiler room 79 928 Race Car 88 928 Becoming a Race Car |
||
|
04-20-2010, 04:16 PM
|
|
|
Schleprock
Join Date: Sep 2000
Location: Frankfort IL USA
Posts: 16,640
|
The front seal/smile isn't really necessary w/the fiberglass bumpers. However depending on fit & finish + age, the seal does a nice job of masking the wavy fitment between the hood + fenders against the top of the bumper.
Oh, and you'll likely have to shave the lip on the inner edge of the fender arches of the bumper itself. Otherwise the wide tires will rub when you crank up a good steering angle. Do it now before you get them painted......
__________________
Kevin L '86 Carrera "Larry" Last edited by KTL; 04-21-2010 at 11:03 AM.. |
||
|
04-21-2010, 10:56 AM
|
|
|
Less brakes, more gas!

|
this thread is so perfect timing
Depends on the maker of the bumper weather or not you need a seal. Some of them, like the TRE one I got last week, make a provision for the seal by adding a bit to the edge that meets the fender well. I'll edit in a pic later if you like... -Michael
__________________
 Michael Michael '82 Euro SC 'Track Rat' 22/29 Hollows, 22/22 Tarrets, Full ERPB F/R, Rennline Tri Brace, Glass bumpers, Pro 2000's, 5 pts, blah blah blah '13 Cayenne GTS |
||
|
04-21-2010, 02:17 PM
|
|
|
Max Sluiter
|
The "smile" is a matter of preference. I prefer the cleaner look (on my white car) without, though a "smile" would mask the wavy fitment of the fiberglass bumper to fiberglass hood.
You can see there is a big gap on one half, none on the other. It is not a trick of lighting. It is always there. ")  
__________________
1971 911S, 2.7RS spec MFI engine, suspension mods, lightened Suspension by Rebel Racing, Serviced by TLG Auto, Brakes by PMB Performance |
||
|
04-21-2010, 03:17 PM
|
|
|
Registered

Join Date: Oct 2003
Location: Long Island,NY
Posts: 2,054

|
TRE's glass front and rear. Used his brackets on the front with some hardware along the mating edges of the glass and the fender out to the wheels wells. No smile. The fitment was great, very little fiddling. Some minor shaving to make room for the front cooler but thats to be expected.
  
__________________
1980 911SC #99 track car, 993 3.6, 50 PMO's 2019 Ford F150 da dragger 2015 MB SL400 wifey DD 2008 E93 M3 DD 2007 E60 530 wifey winter beater |
||
|
04-21-2010, 04:44 PM
|
|


 Gone to California
 Turbo
Turbo

 the 23 car
 The Natty
 domino
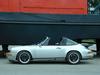 1976 Porsche Carrera 3.0
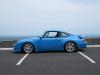 1995 Porsche 993 Carrera Coupe
 Track Whore
 New Daily Driver
 Former Daily Driver

 Ugly Betty
 1971 Porsche 911S
