|
|
|
|
|
| Author |
|
|
Registered
Join Date: Nov 2002
Location: venice ca
Posts: 928
|
where did you find those spring clips? i searched for those briefly but did not come up with anything
__________________
Jason 81 SC 97 328is 87 Jeep Comanche (RIP) |
||
 03-21-2015, 11:04 PM
|
|
|
Member 911 Anonymous
|
Try this number, our host has them: 911-565-263-01, requires 4, most likely the center two fore and aft per the video.
__________________
'85 Carrera Targa Factory Marble Grey/Black * Turbo Tail * 930 Steering Wheel* Sport Seats * 17" Fuchs (r) * 3.4 * 964 Cams * 915 * LSD * Factory SS * Turbo Tie Rods * Bilsteins * Euro Pre-Muff * SW Chip on 4K DME * NGK * Sienes GSK * Targa Body Brace PCA/POC |
||
|
03-21-2015, 11:09 PM
|
|
|
Registered User
|
putty and self adhesive rubber
where do i get the putty and self adhesive strips from?
__________________
project 1976 911 targa everyday drive 1995 318i BMW wifes car 2001 c200 kompressor coupe spare 2006 mazda bravo ute |
||
|
03-22-2015, 04:05 AM
|
|
|
Registered
|
this video is also pretty good, if you speak french.
https://www.youtube.com/watch?v=W94T2tCM998
__________________
1990 964 C4 Coupe & 1991 964 C2 Coupe (current) 1989 911 Targa (sold) 1996 993 Cab. (sold) 1999 x2 Boxster (sold) 2006 Cayman S (my daily) |
||
|
03-22-2015, 05:31 AM
|
|
|
911 enthusiast
|
I just had this done through one of the translation people on Fiverr. She did the translation, transcription, and timestamps. Her German is great, but some of the words are a little esoteric, so if you've got any recommended edits, go for it and I'll update it here. I've split it into two posts because of the word count.
Porsche 911 Targa Anleitung zum Abdichten des Dachs Werksvideo Videoinformation Porsche Service https://www.youtube.com/watch?v=oYmjT8so5Lo English Translation with Video Timestamps Porsche 911 Targa Instructions for Sealing the Roof Work Video Information Porsche Service [0:31-0:40]: All components of vehicles are subjected to large amounts of daily stress. In addition to mechanical stress, many parts are exposed to weather conditions. [0:44-0:53]: On vehicles such as the 911 targa, this is mainly due to the seals in the door area as well as the seat of the windows. [0:55-1:08]: One of the unpleasant consequences of wear and tear and loose or damaged seals is water entry into the interior of the vehicle and the noises that cant be ignored in unfavorable driving conditions. [1:14-1:19]: Strong wind noises are also a result of high speeds. Sealing Work on the 911 Targa [1:29-1:39]: This video shows the professional procedure for finding the cause of the necessary adjustment work in the area of the chassis as well as the replacement and reworking of the seals. [1:41-1:50]: Leaks occur at the crash bar seal, the roof frame seal, along with the front panel seal and the rubber joints. [1:52-2:00]: In this informational video, the work is shown briefly. For more information, reference the Porsche service literature. Visual Inspections [2:06-2:48]: The visual inspection begins with the front panel seal. At the transition from front panel seal to the roof frame seal and along the roof frame seal as well as the crash bar seal to the door seal. Attention is paid to the tight fit, separations, visible damage, or deformations. The contact pressure is examined with a strip of paper in the A pillar area, the front and rear section of the door window pane, and the B pillar area. If the paper can move through without resistance, the contact pressure is too low. [2:51-2:54]: There are important differences to discern at the front and the rear of the roof panel. [2:59-3:07]: The door window pane should not protrude past the door window frame. Here a clear offset is seen. [3:12-3:18]: The transition from the rubber joint to the door window frame and to the door should, if possible, proceed without breaks. [3:20-3:29]: Until the 1985 model, the front panel seal was constructed with molding. The molding must be on the top edge of the door as closely as possible, without a gap. [3:32-3:48]: The roof is placed with the outer surface on a soft and clean surface. On the vehicle, the locks are forward, and the lateral covers and the front panel seal in roof panel area are examined. [3:56-4:17]: The transition from the door seal to the crash bar seal as well as the area of the sealing of mounting for the base support of the roof transport system. The rubber around the rear studs and the crash bar seal in the roof panel area are also inspected for damage, along with the middle of the roof layer. [4:21-4:34]: The front panel seal and door seal must be neatly glued. Likewise, the door seal from the A pillar area to over the same path of the threshold of the door must have correct bonding without gaps or damage. [4:39-5:08]: The roof locking system was changed with the 1986 model. The locking mechanisms, the front fixed stud, the boding of the roof frame seal at the front, and the lateral path of the roof frame seal, the rear bonding, the rear fixed stud, and the middle pilot pin are inspected. [5:10-5:18]: Loose-fitting bars at the front or back of the roof frame are most often the cause of rattling noises. Adjustments [5:24-5:33] To adjust the bars, the roof is slackened. The aforementioned bars are detached, readjusted, and tightened. [5:36-5:38] This also applies to the front bars. [5:42-5:47]: Then the roof is stretched again and checked for tightness. [5:49-5:57]: With the new locking system in the 1986 model, the bolts in the front and the rear have received additional spring clips. [6:06-6:12]: As a remedy to rattling noises, these spring clips can be retrofitted into older vehicles. [6:16-6:30]: The outer roof cover is creased by being pushed together forcefully. Wrinkles also come from warm temperatures. If they are too noticeable, the roof cover can be retightened. [6:33-6:40]: An incorrect seal of the rain gutter leads to water entry. The matching seals allow for slotted holes. [6:42-6:57]: To clarify: The transition is laid on the roof frame seal on the vehicle, the path of the roof frame seal should not overlap the crash bar seal, and the roof frame seal is mounted and fasted. [7:03-7:12]: The rear end cap of the roof frame seal is underlaid with permanently elastic putty and pressed into place for a good transition to the crash bar. [7:20-7:22]: Then it is glued down with super glue. [7:36-7:40]: Super glue is also applied to the end caps in the front. [7:47-7:53]: With a spatula, bring it into position and hold it in this position for a few seconds. [7:56-8:06]: On the elastic roof layer of a high-quality roof, a piece of hard rubber between the layer and the crash bar seal is slid in. The roof will then assume the correct position. [8:10-8:20]: The adjustments in the door area are to remove the door trim strip and the door paneling. The position of the fixing screws of the door window are shown here. [8:29-8:38]: In addition to adjusting the height, the lower fixing bracket of the door window frame can also be increased to adjust the contact pressure of the window pane against the seals. [8:43-8:52]: If the windows are too high in the frame, the bracket, accessible through a gap in the inner door panel, must be adjusted. [8:55-9:01]: After proper adjustments, the bracket is tightened to 23 newton-meters (~17 ft./lb.) [9:04-9:10]: A test rod can be used to further secure the fixing bracket on the door window lifting mechanism in older vehicles. [9:13-9:19]: The slope of the window lift rail can also be set higher by tightening the fixing screws of the windowpane. [9:22-9:33]: After adjustments or in the event of a loose fit, the rubber joints must be fastened. They are cleaned, perhaps deburred, and then leveled out in the gap of the door frame with putty. [9:40-9:47]: And with the use of rain strip adhesive, the rubber joint is attached and held in the installation position for a short time. |
||
|
05-21-2019, 04:51 PM
|
|
|
911 enthusiast
|
Part 2 of the above post:
Seal Replacement [9:57-10:10] The initial front panel seal begins with cleaning the seam and the new seal. The adhesive is carefully and thoroughly applied to the adhesive surface of the seal. Excess adhesive must be removed. [10:19-10:29]: The chassis must also be covered if the front panel is to be covered with adhesive. Typically, the replacement of the front panel seal begins at the top corners. [10:33-10:41]: Further along the course of the front panel, the seal is only provisionally held in place and is held in the correct position with the door window frame. [10:49-10:59]: Before the installation of the seal in the middle of the front panel, both corners must already be glued. Then the seal is finally pressed with a spatula in the correct position. [11:05-11:18]: Beginning with the 1986 model, an additional seal is glued to the front panel as a measure against wind noise. It runs around 5 mm beneath the top edge and can also be retrofitted into older vehicles. [11:25-11:31]: The mid-door seal already connected to the front panel seal is pressed into the fold after adhesive is applied. [11:44-11:52]: Door seals with a hose profile then become the molding of the front panel seal just as well with the door seals with a lip profile. [11:59-12:14]: For the insertion of the crash bar seal, the recesses for the intake of the screw heads of the crash bar paneling are carefully covered with putty. This prevents water from collecting in these cavities. [12:20-12:25]: Putty is also applied to elastic roof layer, which also fills the recesses of your sealing area. [12:27-12:30]: Here, too, the folds and new seals must be cleaned. [12:38-12:44]: Then the area and the elastic roof layer and the adhesive layer of the crash bar seal is coated with adhesive. [12:50-13:02]: The seal and the elastic layer is turned over and pressed in with a screw driver. The crash bar seal consists of the middle pieces and the B pillar seals. [13:05-13:25]: The markings on the crash bar seal function as a working aide. They show the previous transition. The receiving holes for the plastic nails are positioned in the seal with a bradawl. A self-made tool and lubricant applied to the plastic nails can also faciliate the insertion. [13:33-13:37]: The openings of the plastic nails are fitted with cover plugs. [13:40-13:50]: The exact fit of the roof is checked before any further bonding of the crash bar seal. They are covered in the area of the B pillar and pressed down in the chassis fold. [14:00-14:07]: The transition of the door seal must end with the door. Then the seal is definitively in position. [14:19-14:23]: The closure of the door’s top edge must be fitted flush. There can be no gaps. [14:27-14:37]: The hole in the hose profile seal must be as deep as possible. The correct length is determined by lining the seal up with the adhesive fold to the door opening. [14:42-14:46]: The seal is cut and adhered to the crash bar seal. [14:54-15:02]: Door seals with a lip profile can also be cut to the correct length and can be just as precisely adapted to the crash bar seal. [15:05-15:15]: If reworking is necessary, a self-adhesive foam rubber strip that increases the contact pressure between the seal and the door frame can be glued between the A pillar and the seal. [15:28-15:33]: Another reworking possibility is the insertion of a suitable rubber hose in the door seal. [15:41-15:48]: When it is also necessary to raise the contact pressure of the roof frame seal to the door window frame, it is possible with a home-made pad. [15:52-15:56]: After the insertion, the course of the seal must then be sealed with rain-proof cement. [16:01-16:24]: Roof corners and rain gutters are finally brought to their correct positions. At the end of the roof frame seal is a small rubber lip. Pinched, it leads to leaks. Here, the rubber lip lies correctly over the front panel seal. This transition must be considered every time the roof is put on. [16:27-16:33]: The paper strip is left behind or only able to be pulled out with notable resistance due to the tuned fit and the contact pressure. [16:37-17:27]: As a reminder, here are the displayed highlights: • High offset of door windows to door window frame. The window lifting mechanism must be readjusted. • Adjustment of the lateral roof frame seal. The transition must be noted. There should be uniform transitions on the crash bar. The foam molding must lay closely to the top edge of the door. • Transitions from the crash bar seal to the lateral roof frame seal do not fit. The crash bar seal is repositioned. • The roof is too high. The crash bar seal and the elastic roof layer is inspected. [17:33-17:55]: The conclusive test drive shows that wind and rattling noises are eradicated. A control test in a car wash or with the sprinkler shows that there is no more water in the interior. Professional care and maintenance of the seals and the roof ensures the preservation of a successful repair. [17:58-18:04]: Your Porsche Customer School wishes you much success in the execution of the work. Sealing of the 911 Targa |
||
|
05-21-2019, 04:51 PM
|
|

|
|
Registered
|
Fantastic...thanks for making this happen tmadden2!
__________________
__________________ David Yerkes 1987 911 Targa - GP White |
||
|
05-21-2019, 05:11 PM
|
|
|
Registered

|
If you need somethin specificly detailed, DM me.
__________________
Regards, Flo / 79 SC streetrod - Frankfurt, Germany Instagram: @elvnmisfit |
||
|
05-22-2019, 02:53 AM
|
|
|
Registered
Join Date: Jul 2008
Location: New Jersey
Posts: 8,910
|
I'm in PM sent
|
||
|
05-22-2019, 03:08 AM
|
|
|
Registered

|
I'm commenting just so I can reference this article later when I redo my top.
__________________
IG@ADDvanced Youtube@ADDvanced www.gruvdesign.com |
||
|
05-22-2019, 05:56 AM
|
|
|
Registered
Join Date: Feb 2020
Posts: 16
|
Does anyone have a new link to this instruction video? now marked private. Thanks
|
||
|
08-16-2020, 02:36 PM
|
|
|
Registered
Join Date: Oct 2008
Location: Denver, CO
Posts: 3,493
|
let me know if you get permission -- would Love to watch
|
||
|
08-16-2020, 03:28 PM
|
|
|
Analog Air Cooled
|
So that amazing video is off of YouTube. Any other leads, or its private . Would love to see it again.
__________________
86 Targa 91 964 13 6 SPD Cayenne |
||
|
08-17-2020, 08:32 AM
|
|
|
Registered
Join Date: Oct 2008
Location: Denver, CO
Posts: 3,493
|
can host/provide a link if somebody previously downloaded it and can get me a copy/link
|
||
|
08-17-2020, 12:20 PM
|
|
|
Registered
Join Date: Jun 2020
Location: Switzerland
Posts: 50
|
The video link in You Tube is NOT working anymore, it says it is Private, any way we can see it ? THanks
|
||
|
08-17-2020, 02:37 PM
|
|
|
Registered

Join Date: May 2002
Location: Portland, Oregon
Posts: 12,643
|
No longer available on Youtube. Does any one have a downloaded copy to share?
__________________
Harry 1970 VW Sunroof Bus - "The Magic Bus" 1971 Jaguar XKE 2+2 V12 Coupe - {insert name here} 1973.5 911T Targa - "Smokey" 2020 MB E350 4Matic |
||
|
12-20-2020, 12:53 PM
|
|
|
Registered
|
I would love a copy too
|
||
|
12-21-2020, 02:19 AM
|
|
|
Registered
Join Date: Oct 2008
Location: Denver, CO
Posts: 3,493
|
as indicated above, happy to host/provide a link for forum members if somebody else has a copy -- feel free to pm me
 Also, and FYI, I pm'ed the OP of this thread who just confirmed to me that he doesn't have a copy and cannot access the YouTube link either. Last edited by darrin; 12-21-2020 at 07:41 AM.. |
||
|
12-21-2020, 07:38 AM
|
|

|
|
Registered
|
Wow... that is terrible, this video was amazing. Why would someone do that?
__________________
IG@ADDvanced Youtube@ADDvanced www.gruvdesign.com |
||
|
12-22-2020, 05:46 PM
|
|
|
Registered
|
Looking for this video as well
Bummer I didn't archive it before.
__________________
'95 Coupe (2025-??) '86 Coupe (2021-2025) '82 Targa (2018-2022) |
||
|
04-01-2021, 12:28 PM
|
|


 Marble Grey
 1976 Porsche 911S
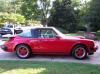 1989 Porsche 911 Carrera
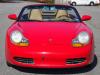 1999 Porsche Boxster
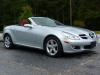 2010 Mercedes-Benz SLK 280
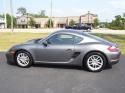 Cayman
 964
964
 1986 Porsche 911
 1987 Porsche 911 Targa
 Porsche 911
 Porsche 911 S Modified
 '82 Targa
