|
|
|
|
|
| Author |
|
|
Carmagic.us
Join Date: Feb 2007
Location: Virginia
Posts: 2,094
|
My 1970 911T project
I picked up a new project almost 2 years ago.
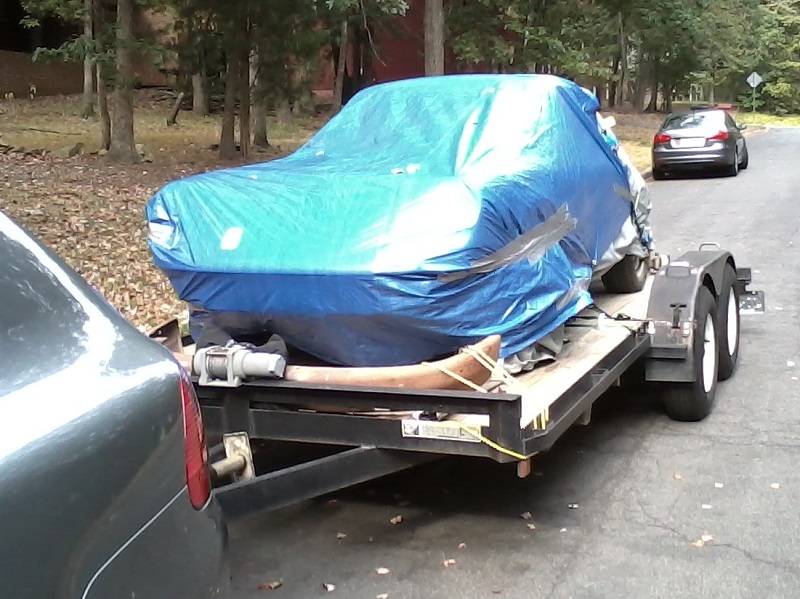 Here are some picture of the inside. 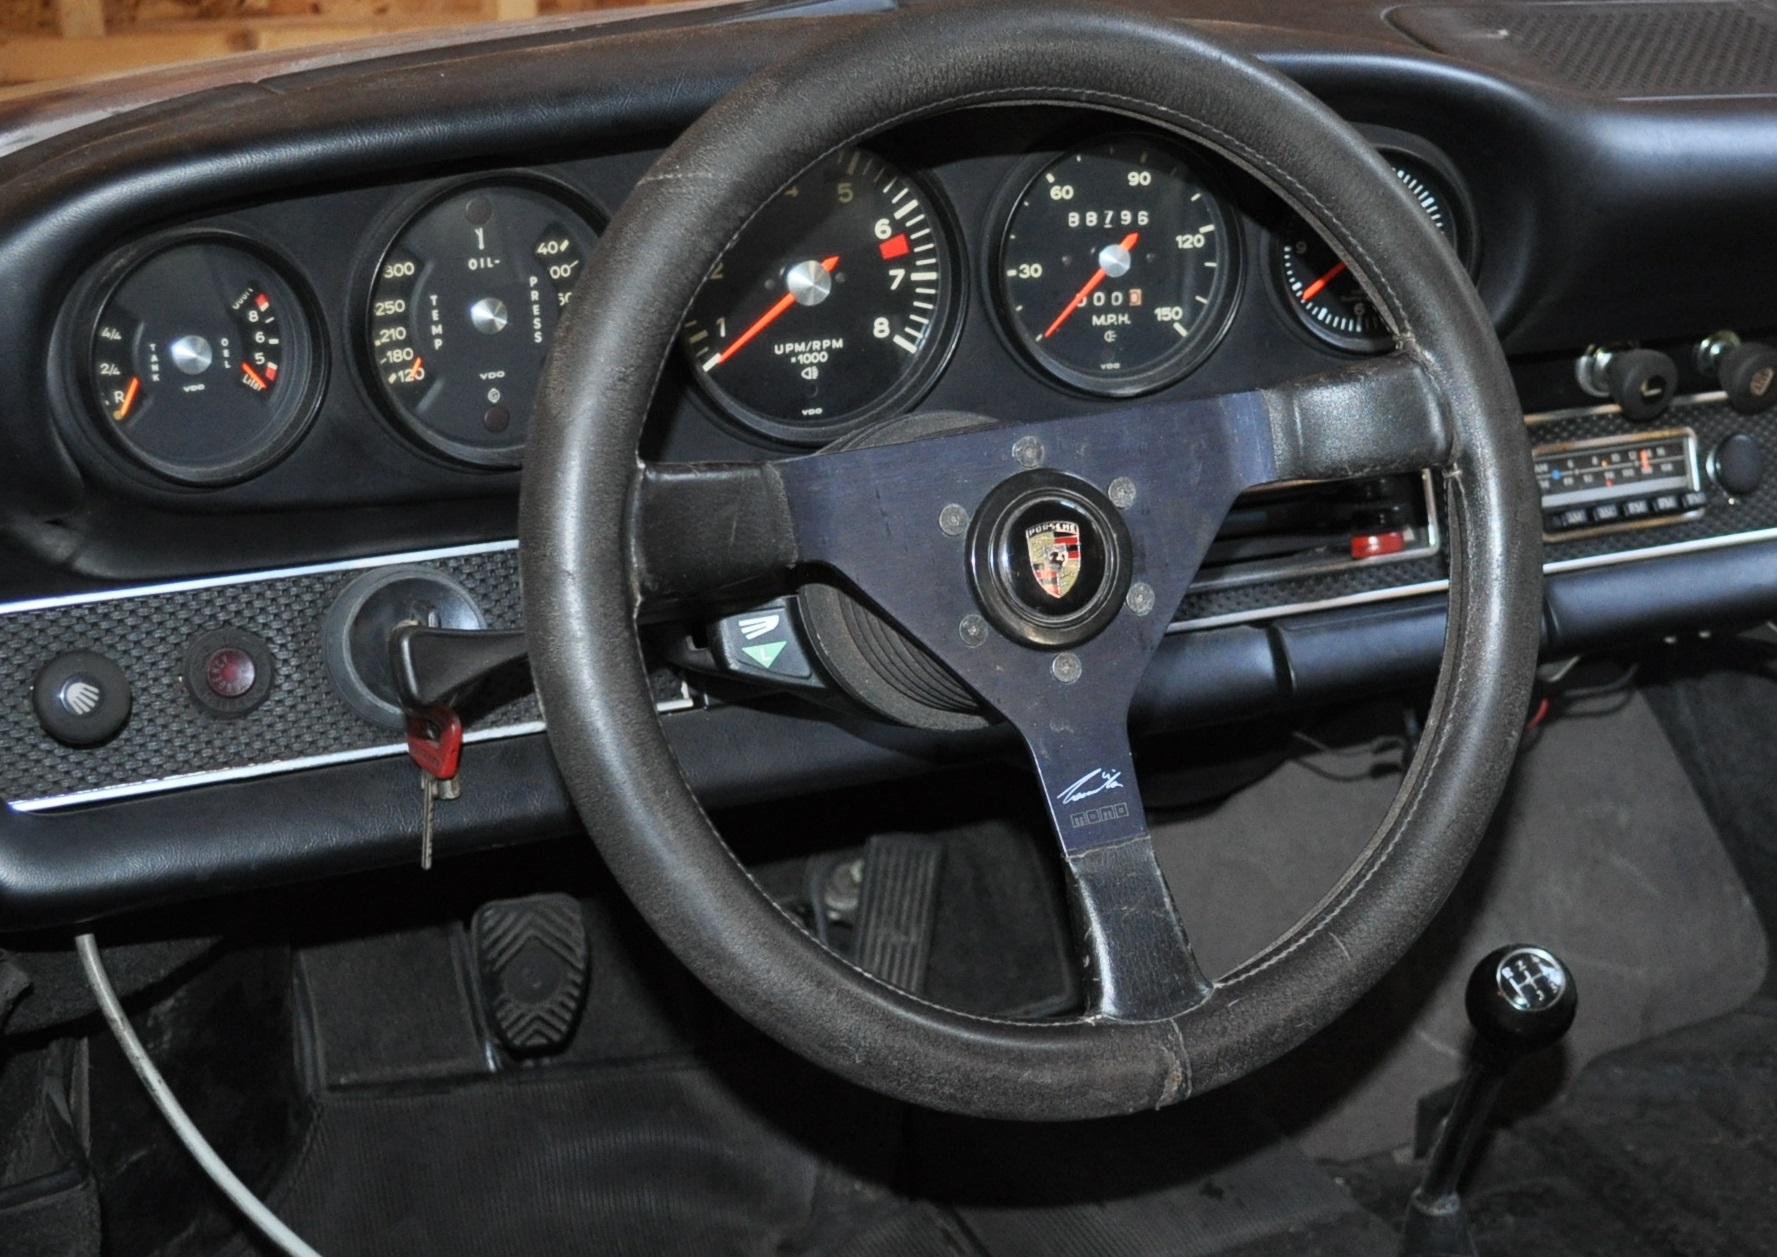 Here are some pictures, before I got started on it 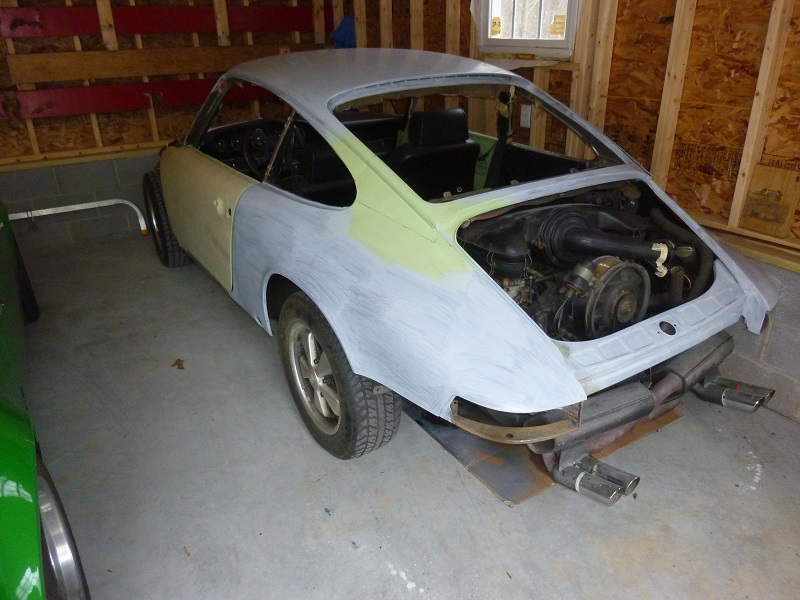 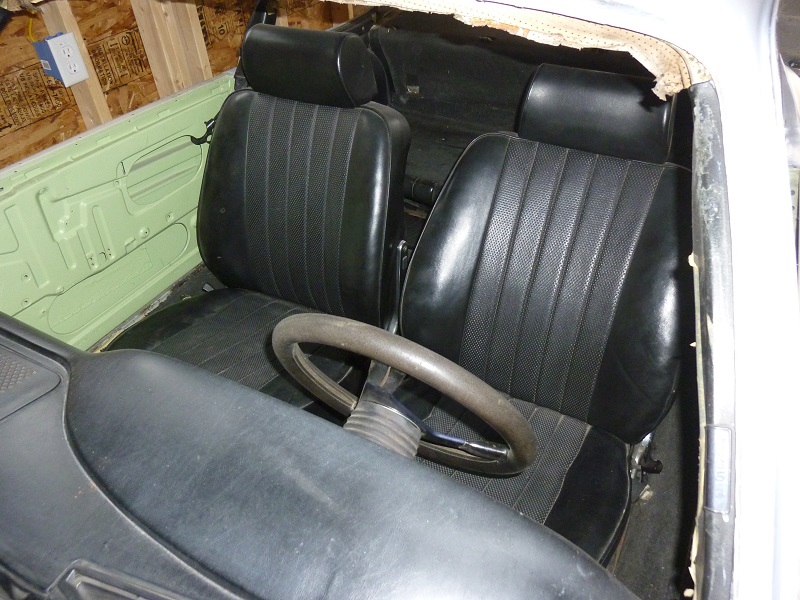 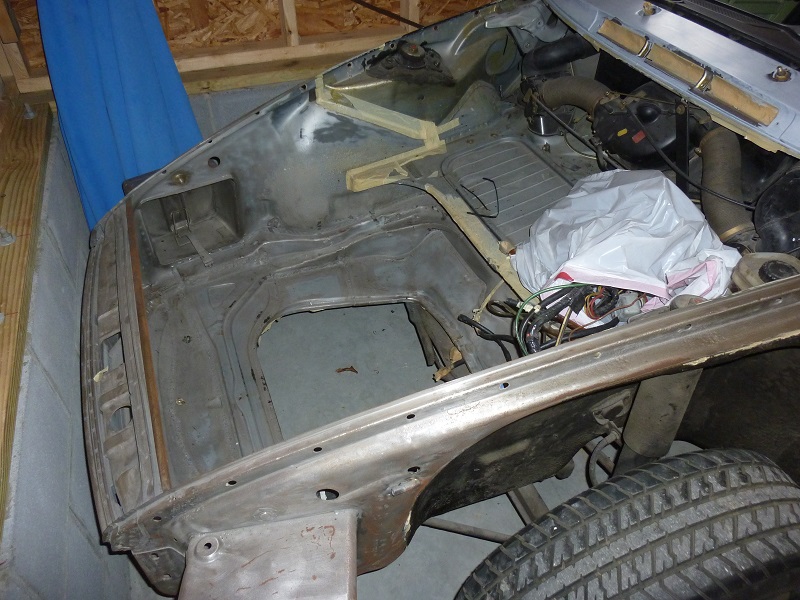 In the meantime, a few weeks back, I made some progress, put it on the lift. Removed the engine and transmission. 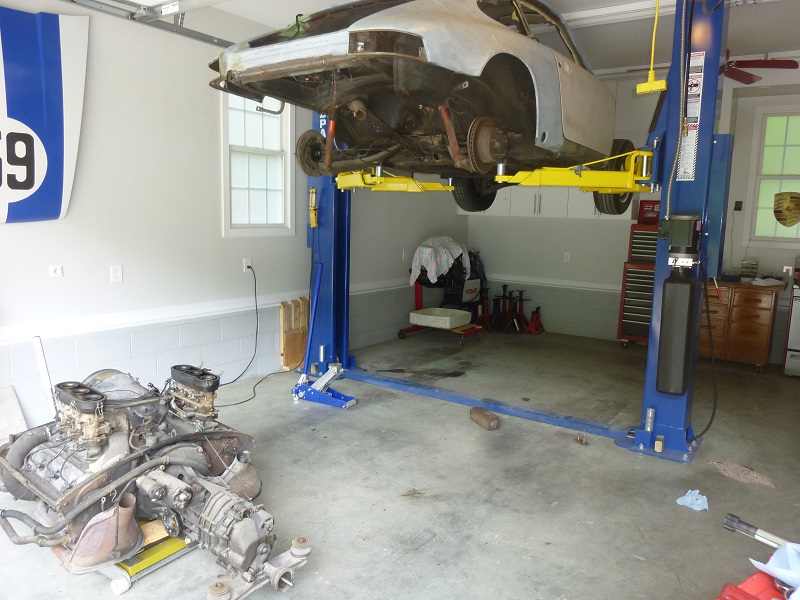 Looks like 45 years of dirt 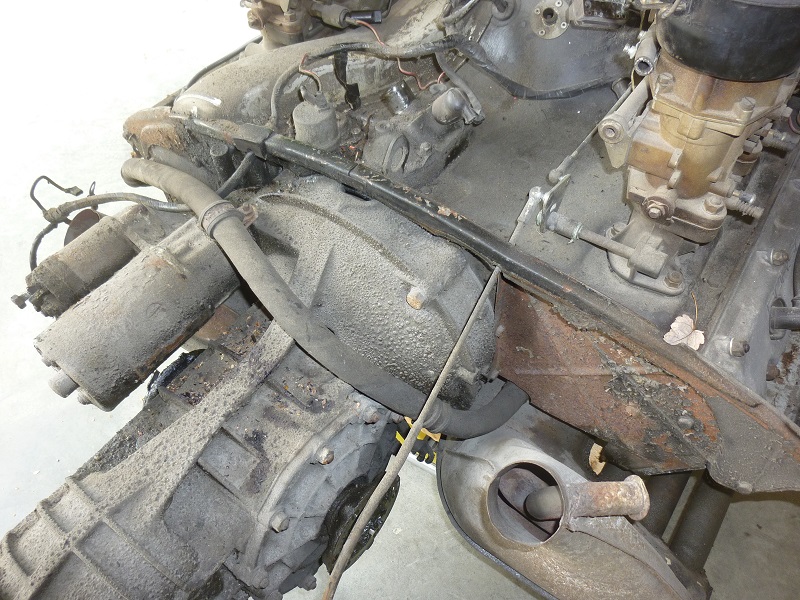 I had some issues with the clutch fork to get out. One of the 3 pins to release the clutch just snapped off. OK, plan "B", just loosen all bolts which hold the clutch to the flywheel, and take out the transmission with the clutch included. Damn, one of the 12 point socket head bolts just turned round. OK, now plan "C" Hammer and chisel. Finally got it out.  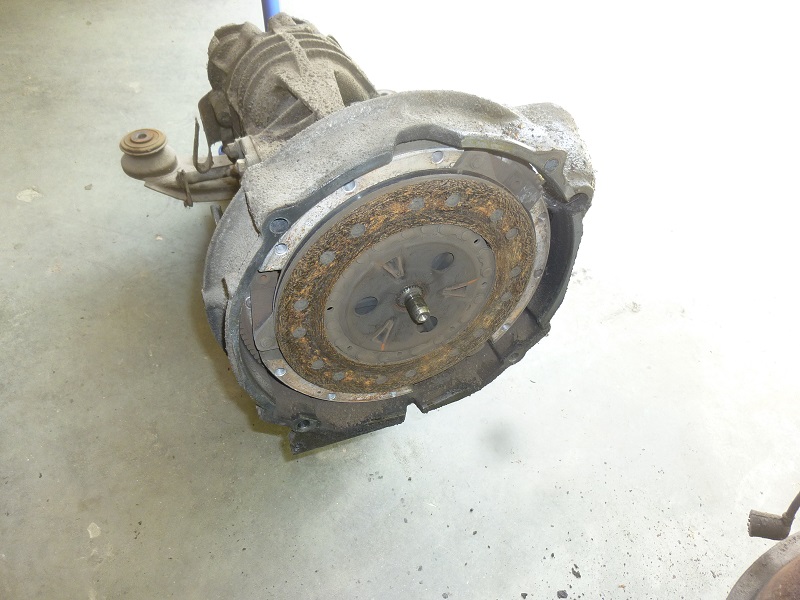 OK, the engine is now on the stand, and it was time for a beer. Cheers Engelbert
__________________
For BA7s Dash LED, and External Marker LED go to carmagic.us - Now Luftgekühlt Emblems |
||
 07-20-2015, 04:20 PM
|
|
|
Ubi bene ibi patria
|
Sub'd, with interest - Good luck on the project.
Cheers JB
__________________
Two possibilities exist: either we are alone in the Universe or we are not - both are equally terrifying ― Arthur C. Clarke |
||
|
07-21-2015, 09:33 AM
|
|
|
Carmagic.us
Join Date: Feb 2007
Location: Virginia
Posts: 2,094
|
More progress on the project.
Removed the doors. 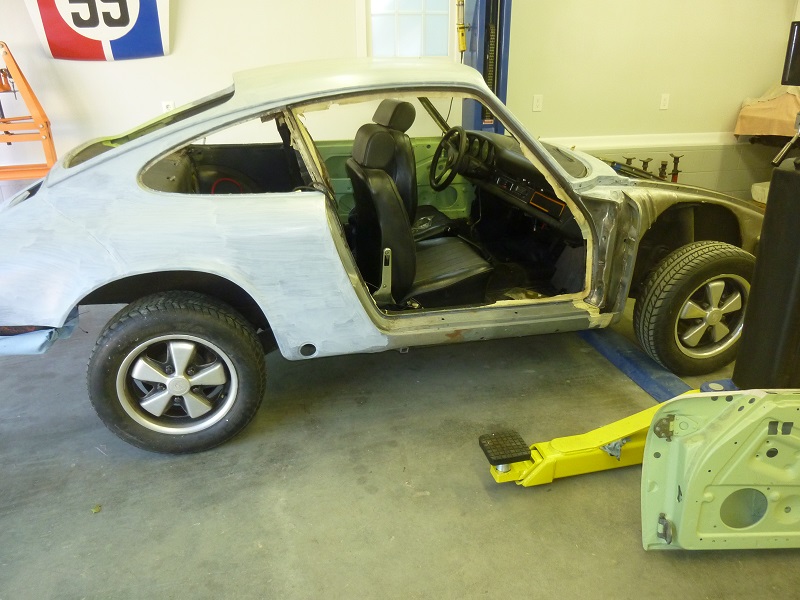 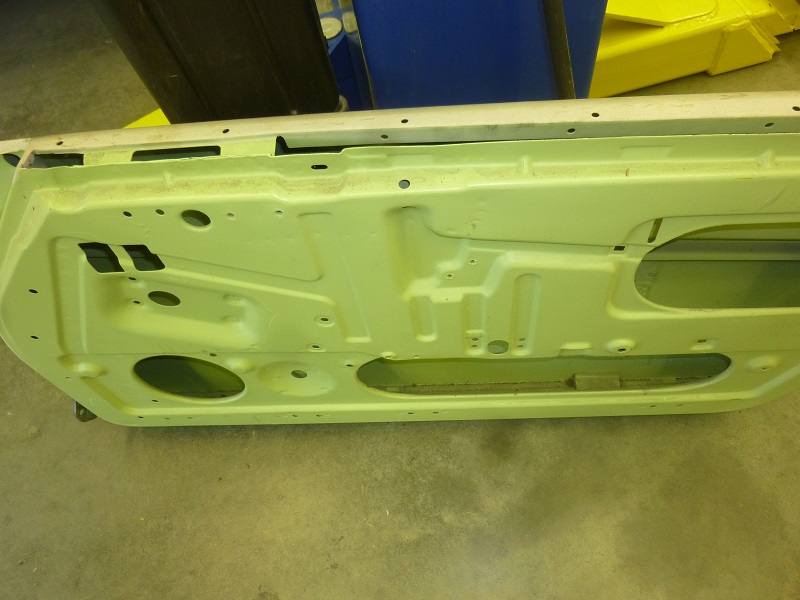 On the left door one of the bolts was already round, OK, hammer and chisel out again, and out it comes.  Removed the seats, and the right seat gave me some issued. one of the bolts that holds the slider to the seat was sticking out. It was the one at the rear left, the place you really can't get to. However, I was able to knock it off with a punch, and pull it out. Next: the carpet, which turned out to in good shape, and I may reuse it after a good cleaning. 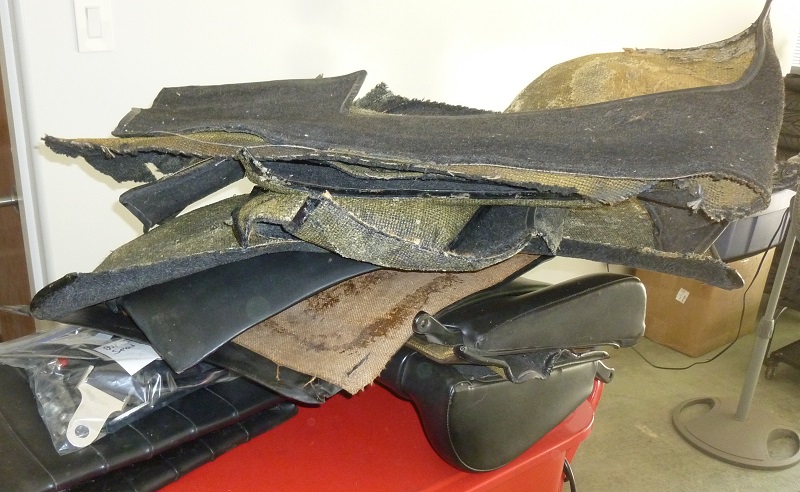 The original owner must have really taken good care to the car, the floor boards looked like new. 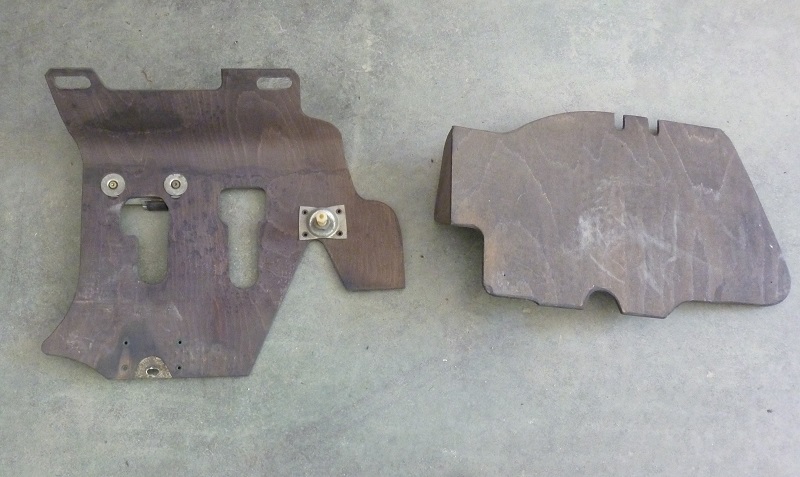 Now, that I have removed all the interior, and the rear shelf sound dampening, I'm wondering if I should remove the section where the rear seats are. There are no signs of any rust from the bottom, and the inside looks really great. I think I will just destroy the pad by removing it, and it will be a waste. 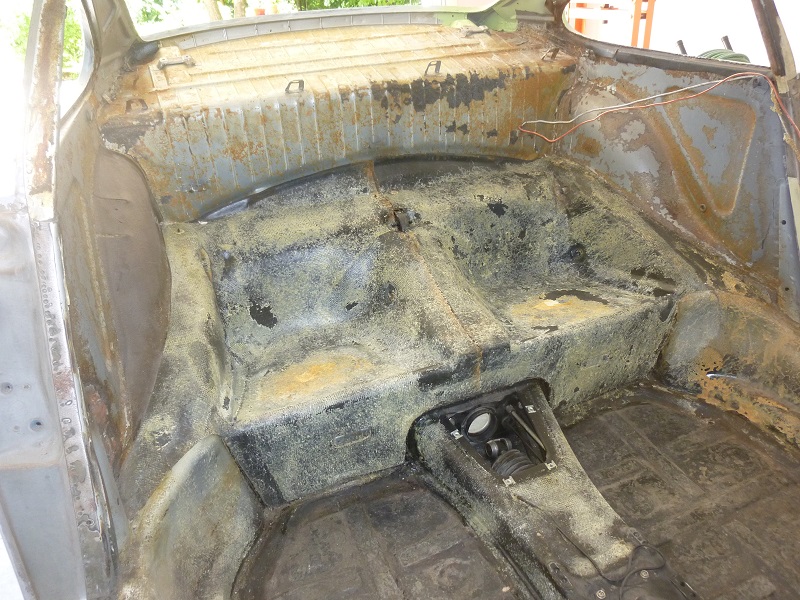 Here is a picture of the rear shelf after removing the sound pad 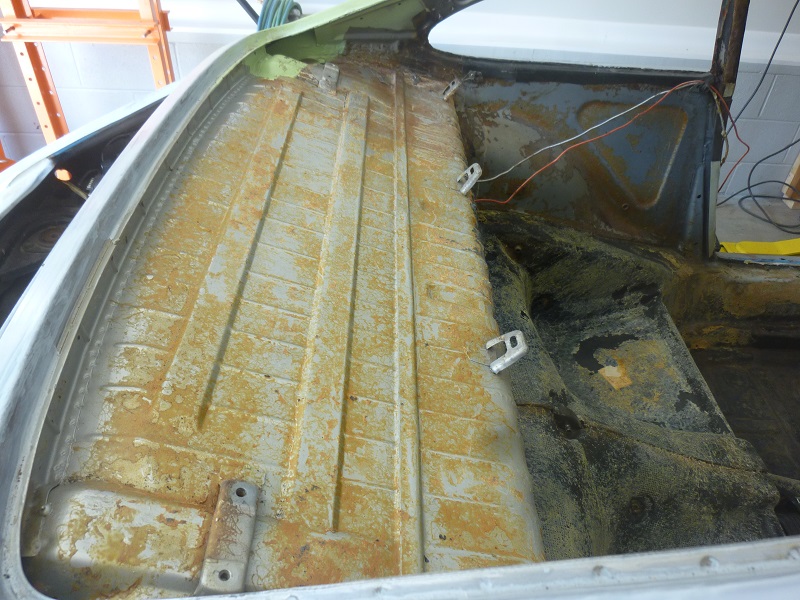 Moving to the engine compartment. Wonder why somebody sprayed some red paint there. I will be able to clean it. 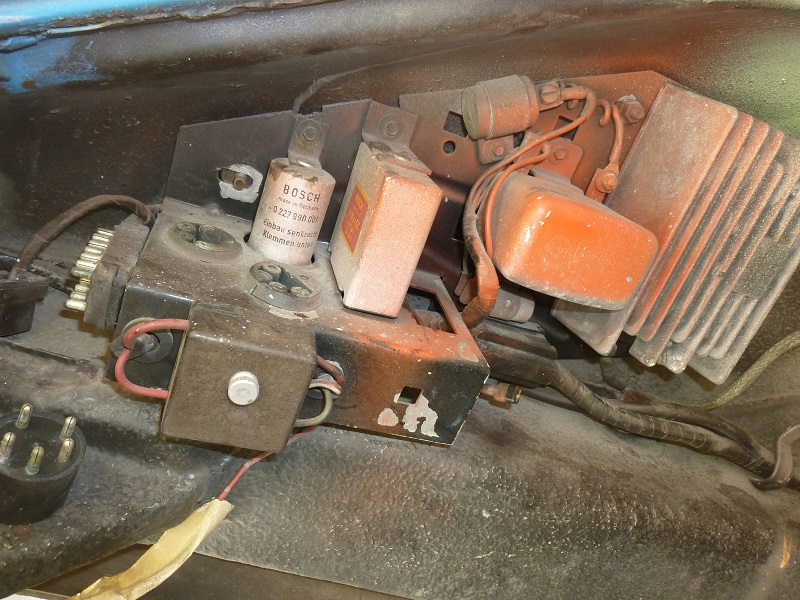 After removal of all the High tech stuff, I moved to the front. 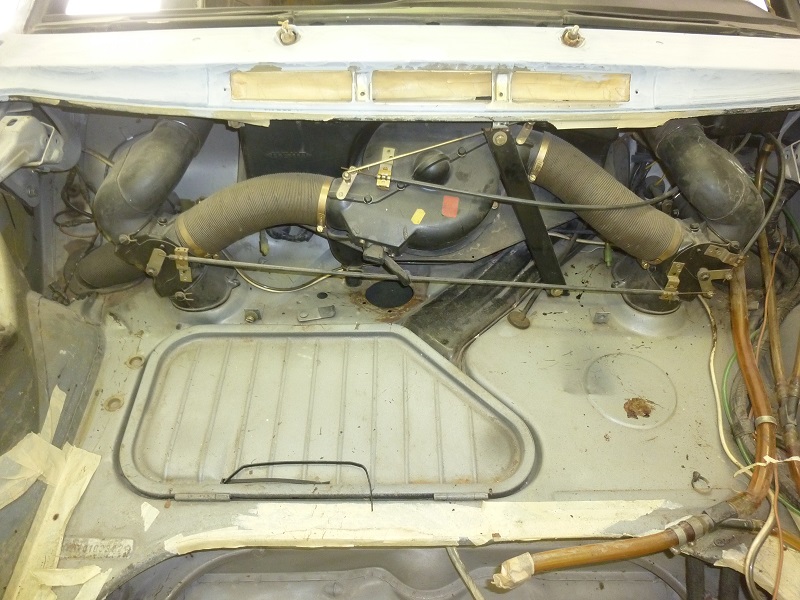 All the ventilation system is now gone. The orriginal silver paint is still there. 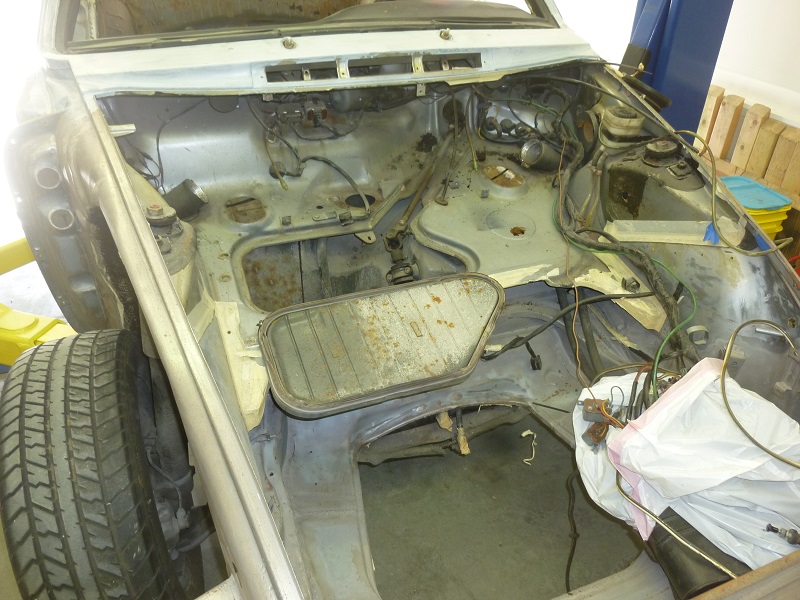 All the part are packed and labeled. More to come. Cheers Engelbert
__________________
For BA7s Dash LED, and External Marker LED go to carmagic.us - Now Luftgekühlt Emblems |
||
|
07-23-2015, 03:12 AM
|
|
|
Registered
|
Wow- that is a terrific looking chassis. Somebody took very good care of that 911. Looking forward to seeing it come together.
__________________
'71 914-6 #0372 '17 Macan GTS |
||
|
07-23-2015, 05:47 AM
|
|
|
Carmagic.us
Join Date: Feb 2007
Location: Virginia
Posts: 2,094
|
Made some progress. All the instruments and the electrical is removed.
The car was blasted and that stuff is every where, good I take it all apart. 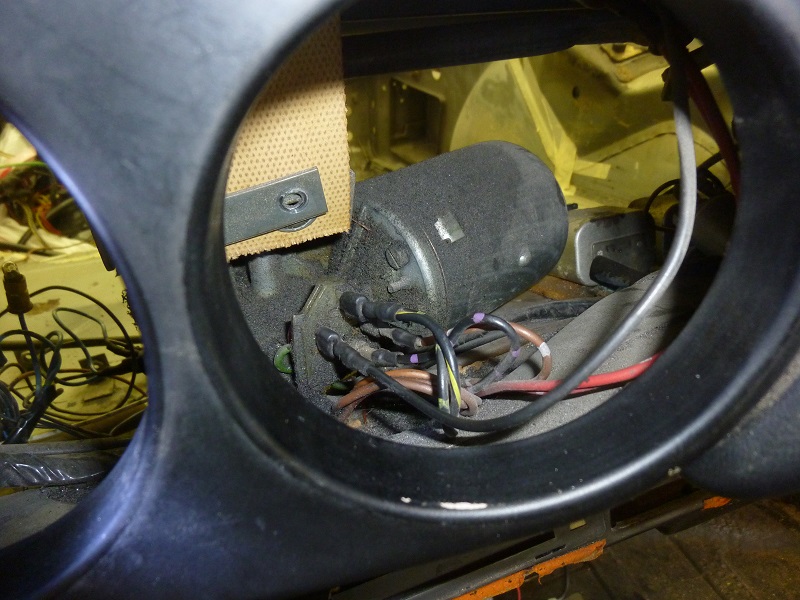 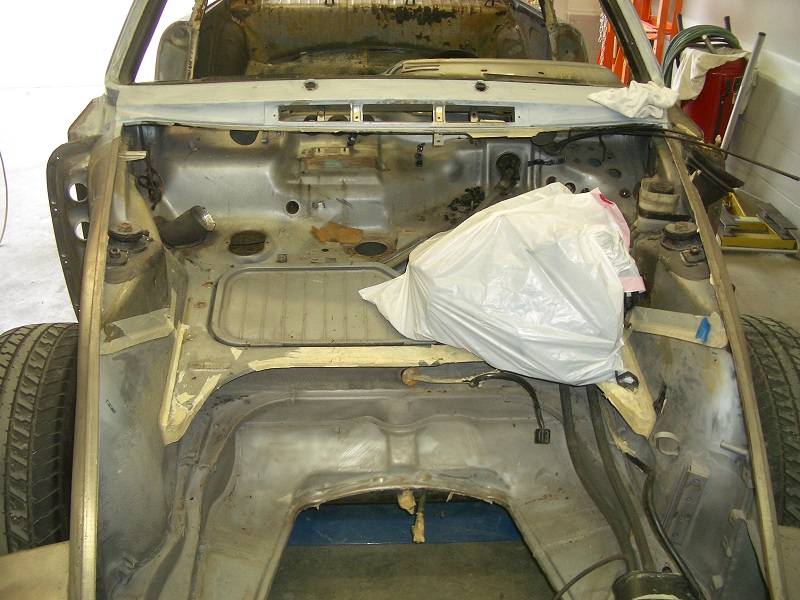 The gauges look pretty good, need to test them to make sure they all work correct. 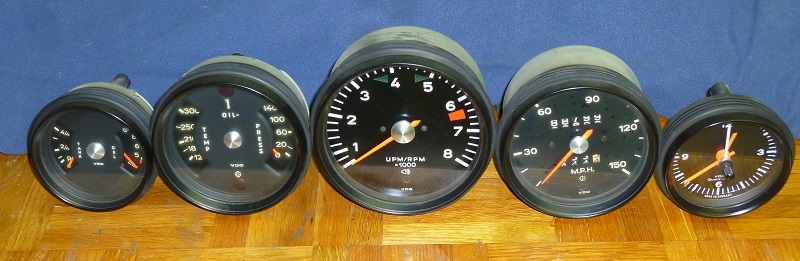 I tested the radio, and it's actually working. Just one issue is the indicator needle is not moving with the dial. Need to find somebody who does repairs on these old radios. 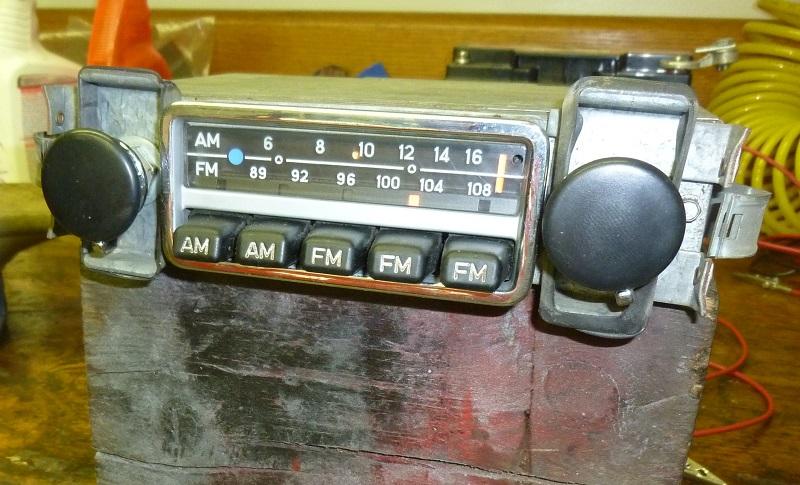 Here is some material that need to be sorted out and cleaned. 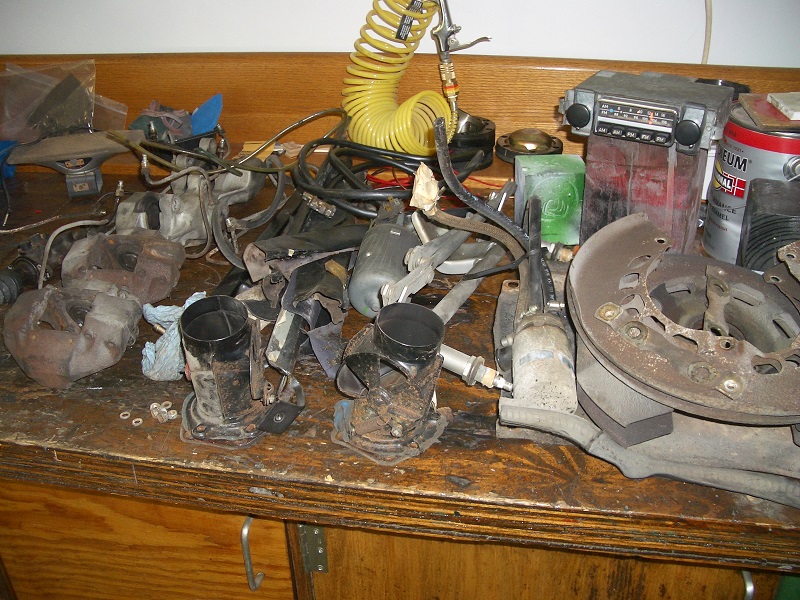 I took the electrical panel from the engine first. Before 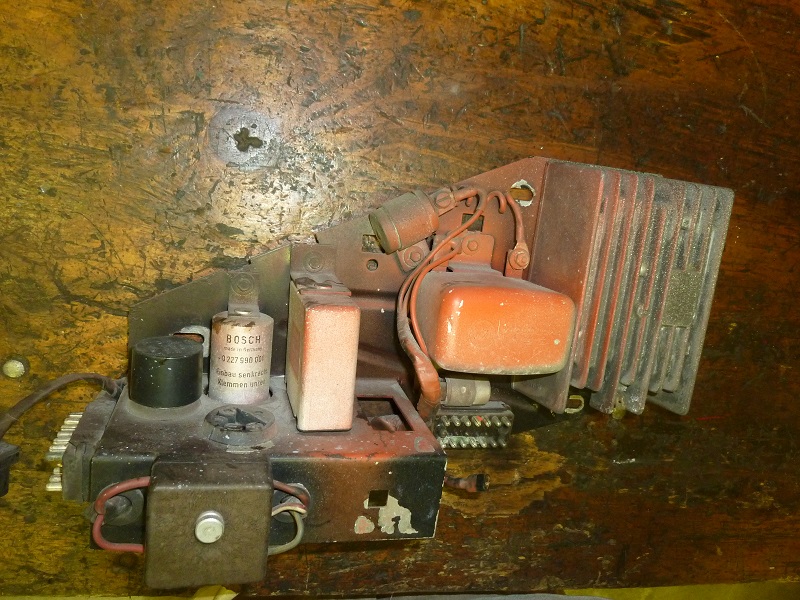 All parts cleaned 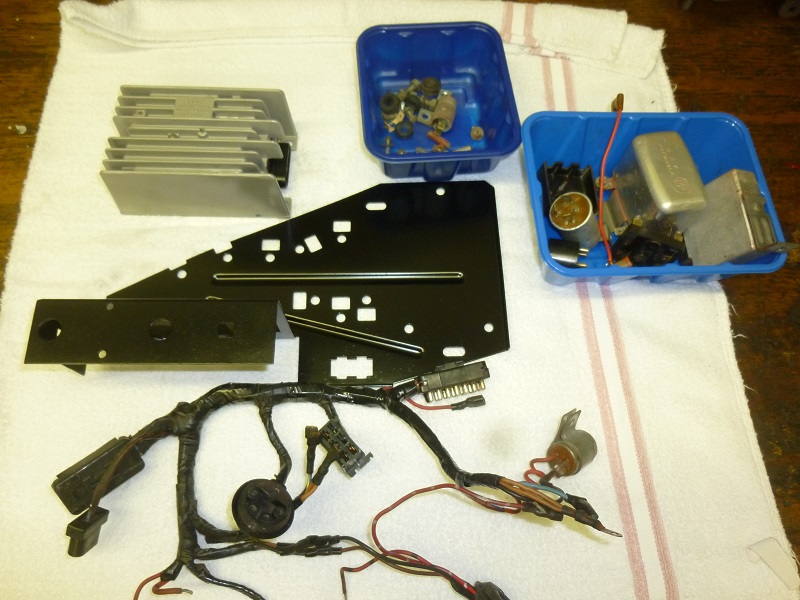 Done  One thing good to go, and I can pack it away and attac the next. It's always nice to complete a small project during a rebuild. More to come Cheers Engelbert
__________________
For BA7s Dash LED, and External Marker LED go to carmagic.us - Now Luftgekühlt Emblems |
||
|
07-24-2015, 04:12 PM
|
|
|
Banned
Join Date: Aug 2010
Posts: 4,682
|
Taking apart is the easier stuff and reveal is the most interesting. After this is work. Nice tub. Looking and rooting u on. What are the plans?
|
||
|
07-24-2015, 05:35 PM
|
|

|
|
Carmagic.us
Join Date: Feb 2007
Location: Virginia
Posts: 2,094
|
My plan is to bring this car back to original, as much as I can.
Cheers Engelbert
__________________
For BA7s Dash LED, and External Marker LED go to carmagic.us - Now Luftgekühlt Emblems |
||
|
07-24-2015, 05:57 PM
|
|
|
Registered
|
What process and solvent did you use to clean up the Bosch CDI box?
Did you spray paint it? Looks great.
__________________
Bavaria911 1970 911T w/ 2.4S 1971 911T Targa w/ 2.2 RG Member # 818 |
||
|
07-24-2015, 06:27 PM
|
|
|
Registered
Join Date: Apr 2002
Location: Clinton, NJ
Posts: 12,782
|
For repair on the Blaupunkt Frankfurt, try BC Electronics in Levittown, PA. They did a good job on mine for reasonable money.
__________________
______________________________ Dave 1969 911T Coupe 1972 911E Targa |
||
|
07-24-2015, 06:31 PM
|
|
|
Carmagic.us
Join Date: Feb 2007
Location: Virginia
Posts: 2,094
|
Quote:
After that I just sprayed a clear coat of plasticoat on it so the aluminum will not start to corrode. Will see how it's going to last. Cheers Engelbert
__________________
For BA7s Dash LED, and External Marker LED go to carmagic.us - Now Luftgekühlt Emblems |
||
|
07-25-2015, 03:53 AM
|
|
|
Carmagic.us
Join Date: Feb 2007
Location: Virginia
Posts: 2,094
|
Quote:
Thanks Engelbert
__________________
For BA7s Dash LED, and External Marker LED go to carmagic.us - Now Luftgekühlt Emblems |
||
|
07-25-2015, 03:55 AM
|
|
|
Registered
|
Subscribed
__________________
Tom Feeney 1970 911 T 1973 911 T Looking for engine 6103643 |
||
|
07-25-2015, 04:48 AM
|
|

|
|
Registered
Join Date: Aug 2008
Posts: 844
|
good work... sub'd
|
||
|
07-25-2015, 04:54 AM
|
|
|
Carmagic.us
Join Date: Feb 2007
Location: Virginia
Posts: 2,094
|
I made some progress.
All the suspension parts are removed. Got some parts blasted. 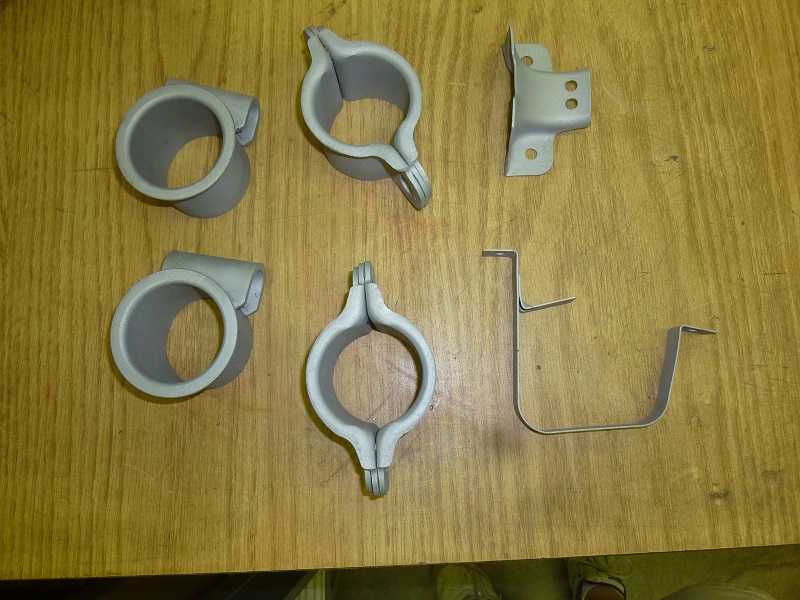 And Powder coated. 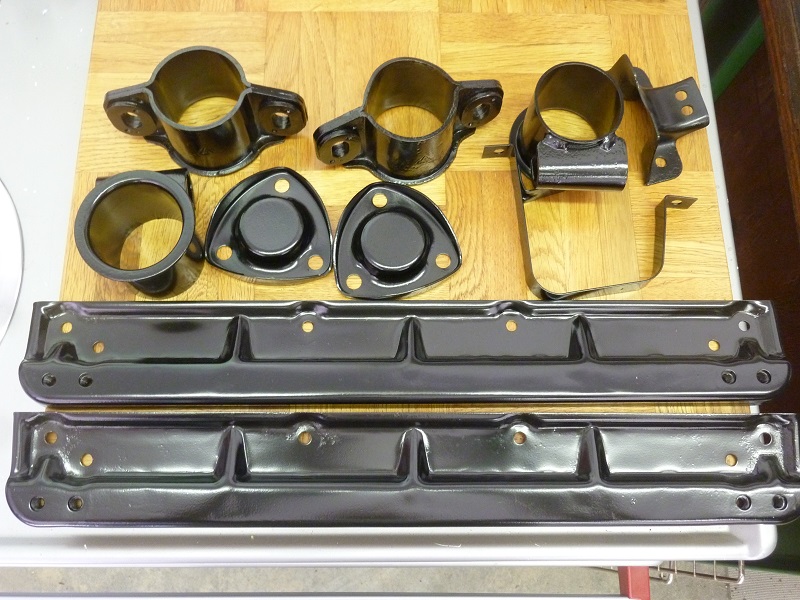 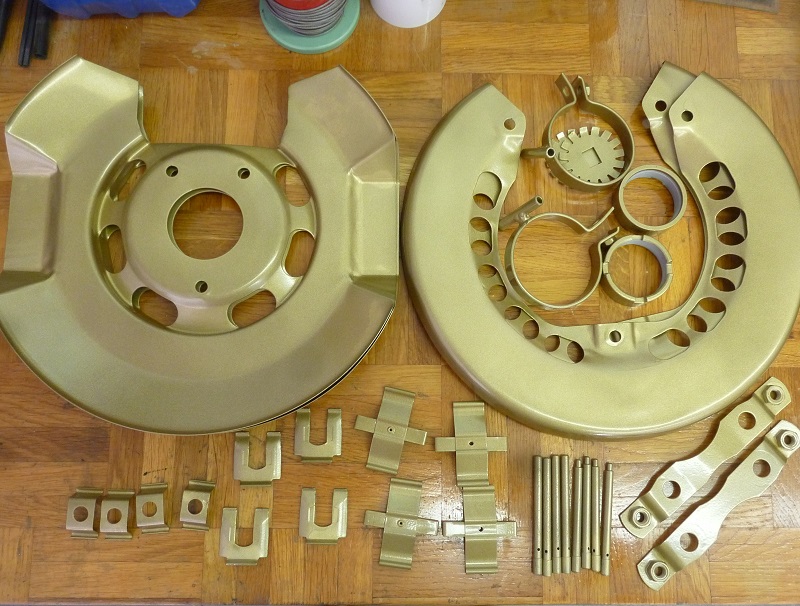 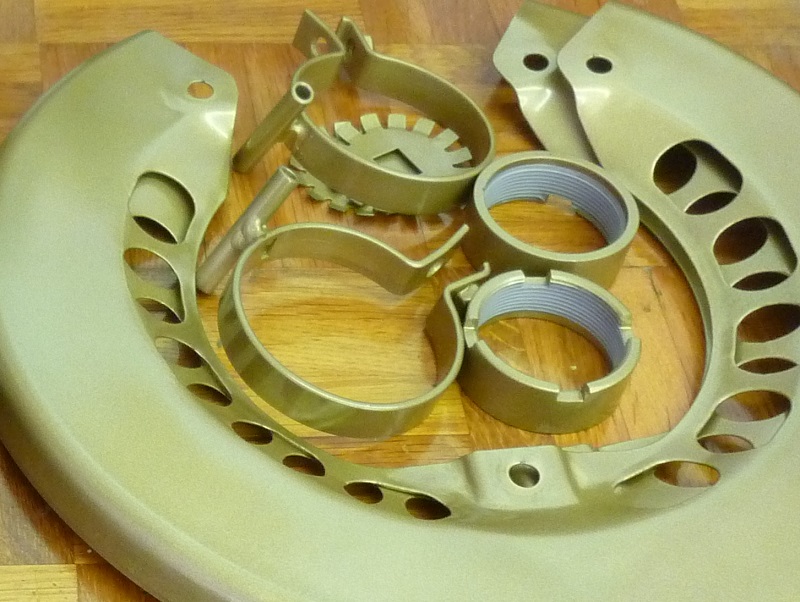 Here the struts and hubs. 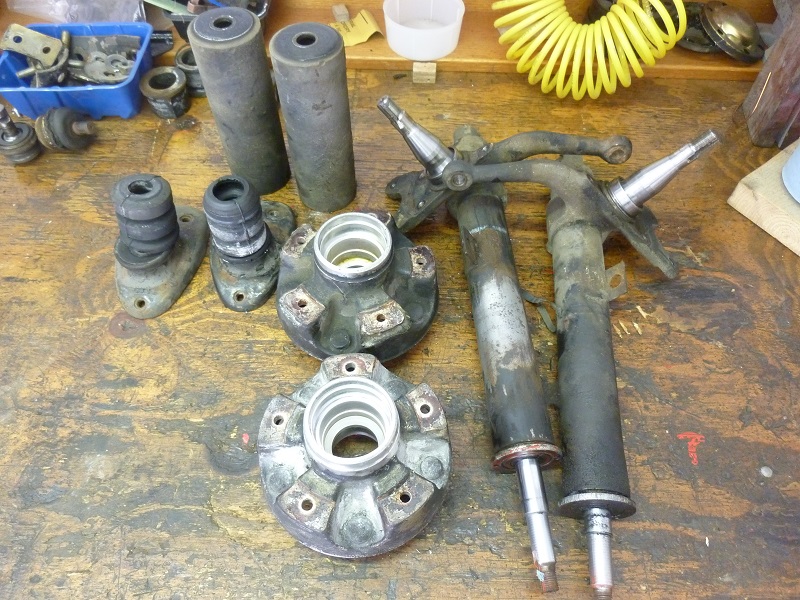 The hubs have quite some corrosion, and I think I need to find some good once.  Here are the struts after blasting. There were Koni insetrts installed. I need to see if it would make sense to rebuild them, or just put a set of Bilstein HD in. 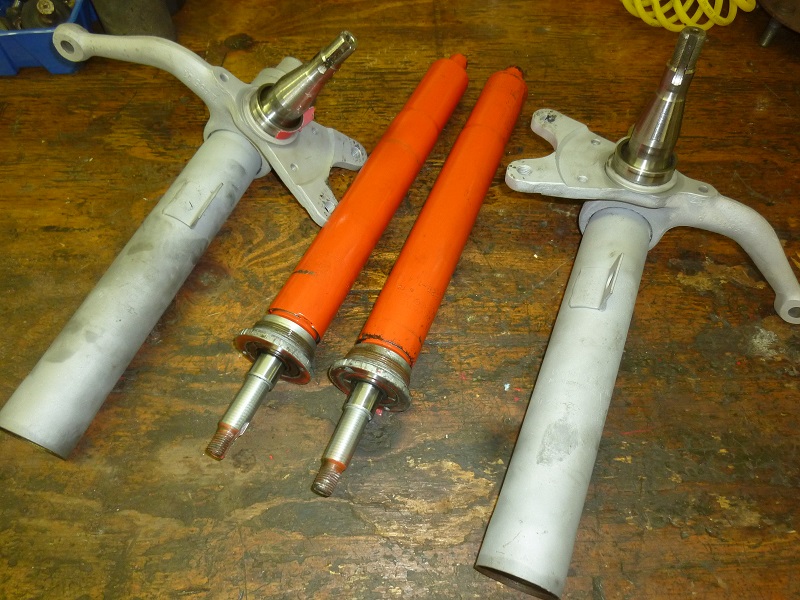 I started to get the undercoat off which was sprayed on the car, what a mess. I got a good tip about using Kerosine. It works but slow, however, that's better than anything else I have tried. Here are a few sections I cleaned up. I sprayed it on with a spray bottle, and then used a brush to loosen it up, and wiped it off with rags. I put a plastic on the floor and some oil try on it. 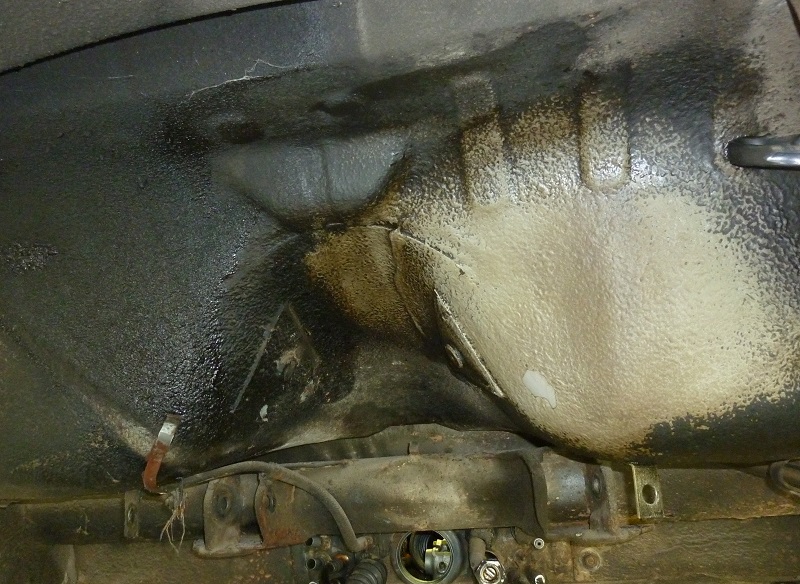 It looks like the factory chip guard is light gray. 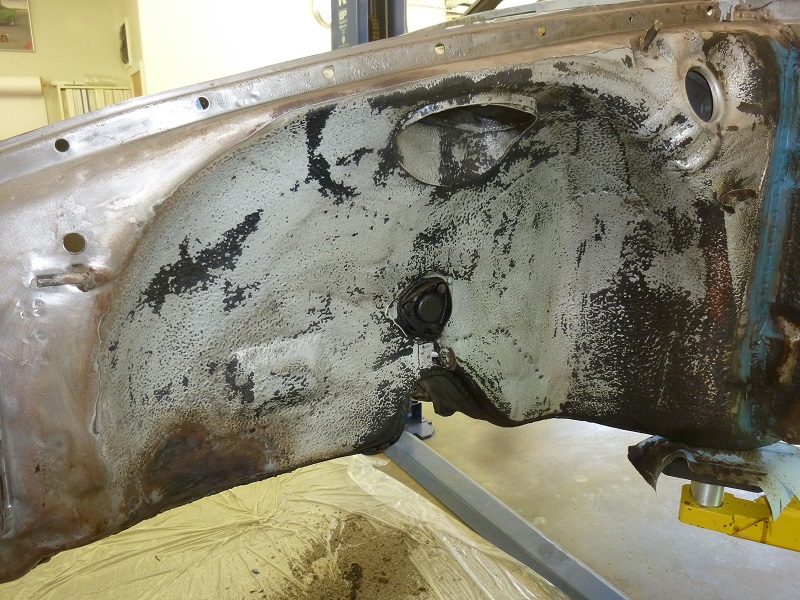 To be continued Cheers Engelbert
__________________
For BA7s Dash LED, and External Marker LED go to carmagic.us - Now Luftgekühlt Emblems |
||
|
08-05-2015, 03:48 PM
|
|
|
Registered

|
sub'd
__________________
PCA-Chgo 1970 911t |
||
|
08-06-2015, 04:41 PM
|
|
|
Registered
Join Date: Dec 2014
Posts: 13,812
|
Great car!! Subscribed
|
||
|
08-06-2015, 05:41 PM
|
|
|
Registered

Join Date: Jul 2004
Location: Austin, TX
Posts: 1,692
|
Wow, that chassis is amazingly rust free, at least compared to my '73 project. Good luck - I'll be following your progress.
__________________
'73 911T RoW (Project) '77 911S 2.7RS '76 914 2.0 Early911SReg #2945 |
||
|
08-06-2015, 08:35 PM
|
|
|
Carmagic.us
Join Date: Feb 2007
Location: Virginia
Posts: 2,094
|
OK, time for an update, after a short interruption for the green car.
I made the supports for the rotisserie. I'm using the engine stands I used for the beetle. Front 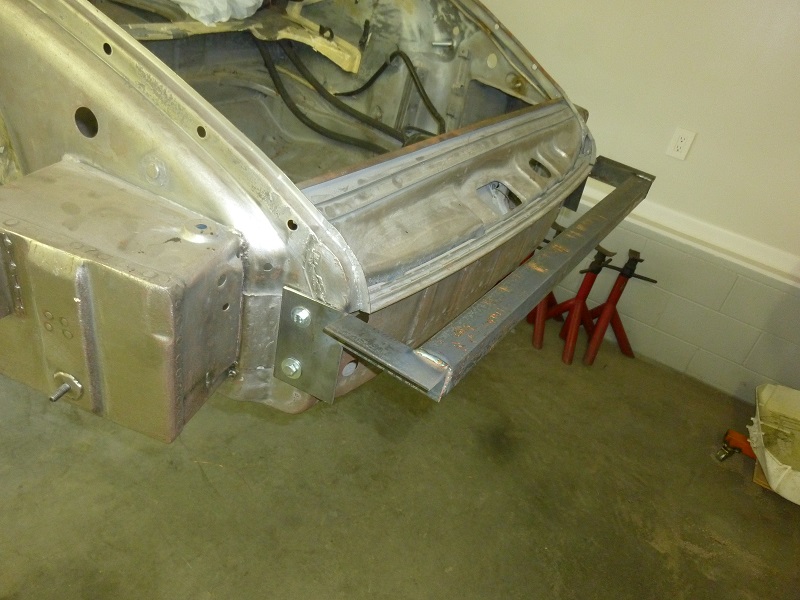 Rear 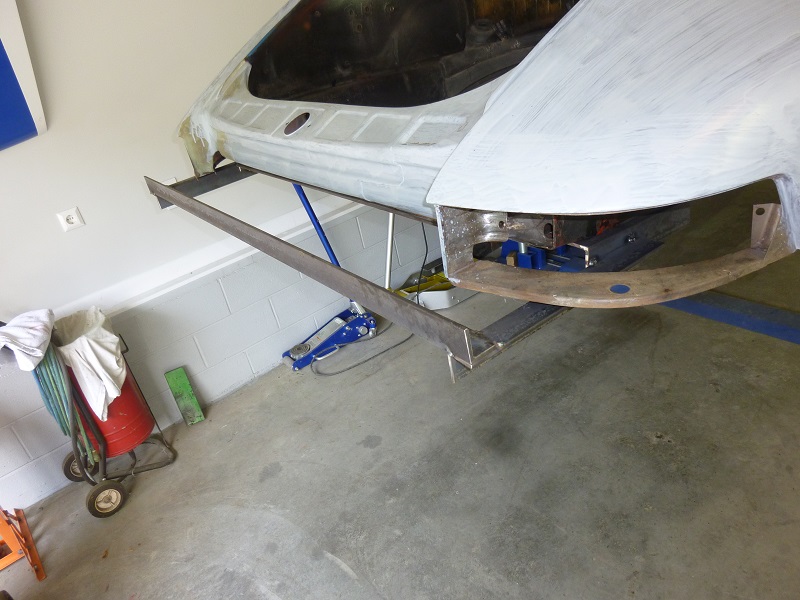 And here connected to the stand. 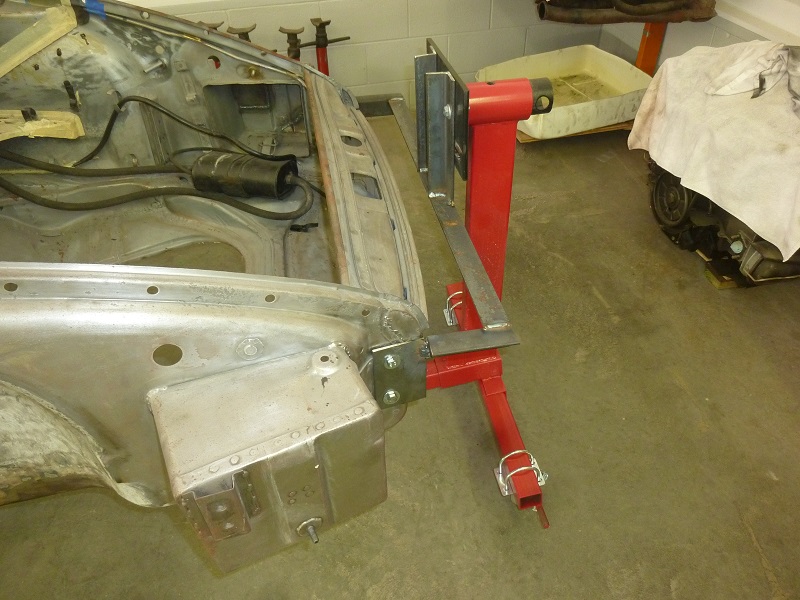  And here up on the grill 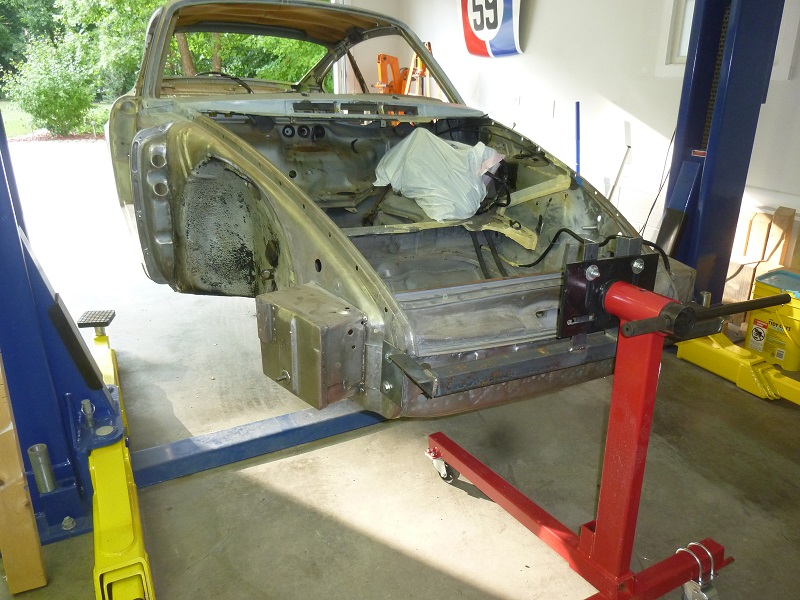 And flipped to the side.  And here you can see that crap I still have to remove, but having the car in this position will make it a bit easier, if that is even possible.  So now that I can easy look into the hole, I found a little surprise, which I don't like. 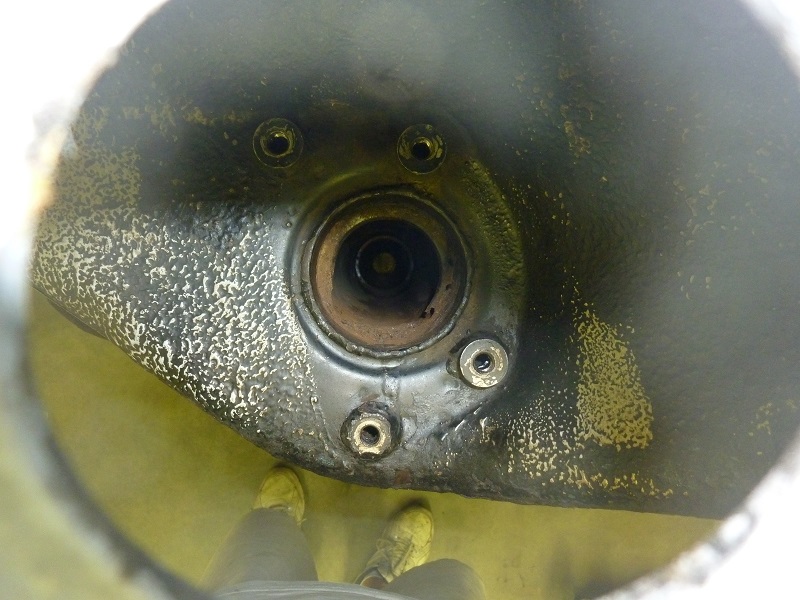 At the section where the bushing sits, is the ring at the bottom section rusted away.  I cleaned it up a bit and found that the ring is still solid, but has some pitting. The rest of the tube is very solid and has just some surface rust. 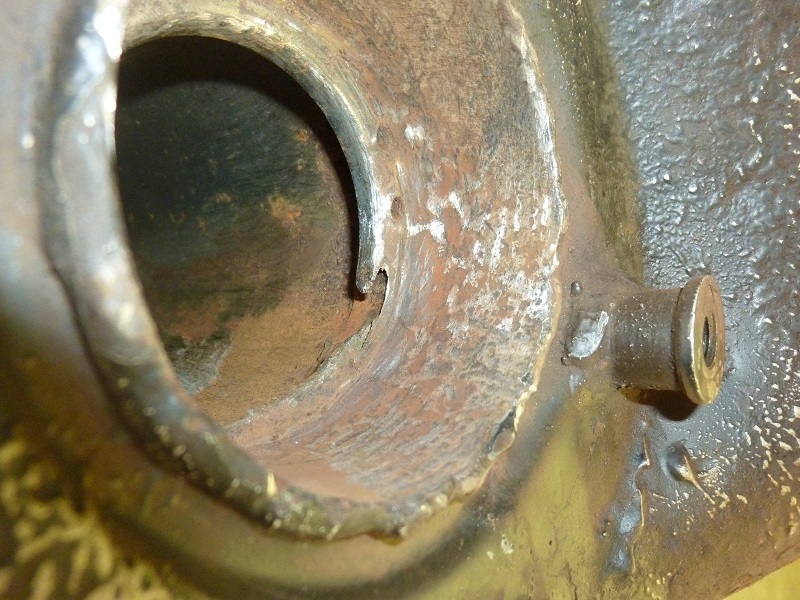 I'm thinking about to grind out that piece and make a sleeve with the ring, which is the stop point for the bushing. Once I have it out, I should see if the outer sleeve part is actually welded on the inside, which I don't think. I think it's only inserted and welded around the outside. This weekend I will make an attempt to get that black crap of the floor. If anyone want to come by and help, I got plenty of kerosene. Cheers Engelbert
__________________
For BA7s Dash LED, and External Marker LED go to carmagic.us - Now Luftgekühlt Emblems |
||
|
09-10-2015, 04:35 PM
|
|
|
911SC Tinkerer
Join Date: Nov 2013
Location: Jacksonville, FL
Posts: 768
|
Subscribed. I like this a lot. Keep it up man.
__________________
-'83 911SC Coupe SSIs, Dansk GT3, EFI ITB, Instagram: @ Zinnmetallic_sc |
||
|
09-10-2015, 06:02 PM
|
|
|
Wer bremst verliert
Join Date: Jan 2005
Location: Toronto, Ontario
Posts: 4,767
|
Wie Geht's Englebert!
Good to see progress on your project. That roller you sold me is also still in progress and in a similar shape, though I did get to spraying undercoating and primer last weekend. Keep up the good work.
__________________
2007 911 Turbo - Not a toy 1985 911 Cab - Wife's toy 1982 911 3.2 Indiash Rot Track Supercharged track toy 1978 911 3.0 Lichtbau toy "Gretchen" 1971 911 Targa S backroad toy |
||
|
09-10-2015, 06:24 PM
|
|


 Michael's Six
 1970 Porsche 911 T
 1971 Targa 911T
 1973 911 T
 Porsche 911
 LS6 Convertible- Sold
 1963 Convertible- Sold
 1969 Z/28- Sold
 1968 Camaro-Sold
 babysh*t
