|
|
|
|
|
| Author |
|
|
Registered
Join Date: Jun 2008
Location: Ontario, Canada
Posts: 2,145
|
Headlight problem and important info for 16v owners!
So! I think i got my lifter noise sorted out. Changed them all, removed the reground cams as an engine builder said they were doing more harm than good, had the scored journals massaged a little bit, and most importantly....
Cleaned the pressure reducing valve INSIDE the cylinder head and changed the o-rings. 16v owners, this is a MUST!  This was/has been the cause of my lifter noise and clearly why my cams and lifters were damaged after I purchased this rebuilt head from LINDSEY RACING. THEY DID NOT CHANGE OR INSPECT THIS VALVE! Please make sure to change the o-rings or you are losing pressure throughout your entire head. The o-rings were so brittle the just snapped right off. Anyway... After I got everything back together, my headlights aren't working  Not the motor, the actual lights. The high beams work great though, same with all the other lights. Last year I installed the Rennbay wiring harness with the relays so I don't think it is that... Not the motor, the actual lights. The high beams work great though, same with all the other lights. Last year I installed the Rennbay wiring harness with the relays so I don't think it is that...How do I test the electrical system? I have a multi-meter, but not exactly sure how to use it to test for that. I searched and found that people test to see if there is 12v at the fuse, 12v at the switch 12v at the light, but I need some direction on HOW to go about testing everything, and where to start. Anybody??? |
||
 10-01-2015, 07:22 AM
|
|
|
Registered
Join Date: Feb 2003
Location: SF East Bay
Posts: 1,856
|
Test electrical system in segments along the way. I assume the Rennbay kit is similar to IceShark's with taking power from alternator and using relays triggered by the stock headlight wiring?
1. Check fuses 2. Test for power from stock headlight wires that trigger relay for low-beams 3. Test for power at relay-end of cable from alternator 4. Test for power at relay-outlet after being triggered ON by factory low-beam wire (step 2) 5. Test for power at low-beam bulb connector If you have power at the bulb connector, but the bulb's not lighting, then all wiring is Ok, bad bulb. |
||
|
10-01-2015, 01:02 PM
|
|
|
Registered
Join Date: Jun 2014
Posts: 800
|
Clark's
Click on the manual list. (Second listing on the left of the page) and go to body05 for the headlight motor circuits. |
||
|
10-01-2015, 01:45 PM
|
|
|
Registered
|
Quote:
|
||
|
10-01-2015, 03:14 PM
|
|
|
Registered
Join Date: Jun 2008
Location: Ontario, Canada
Posts: 2,145
|
Quote:
1) Prevent oil from draining out of the head when the car is turned off 2) Prevent oil from getting TO the head until sufficient pressure is built. It feeds the oil galleys that surround the head. Oil passes through this thing first! Super important and a must change. The o-rings will surely be dead and your oil flow will be suffering in the head. Last edited by JD159; 10-01-2015 at 04:43 PM.. |
||
|
10-01-2015, 04:38 PM
|
|
|
Registered
Join Date: Jul 2014
Posts: 405
|
Check the headlight connectors that are just underneath the buckets that rotate down to raise the headlights.
The connector is about an inch in diameter and about two inches long. They get intermittent. You can get to them when the headlights are on and raised up. |
||
|
10-01-2015, 10:34 PM
|
|

|
|
Registered
Join Date: Jun 2008
Location: Ontario, Canada
Posts: 2,145
|
Quote:

|
||
|
10-10-2015, 04:30 PM
|
|
|
Registered
Join Date: Jun 2008
Location: Ontario, Canada
Posts: 2,145
|
Ok so this is how I have my meter set. I pulled out the high beam fuse to see if I know what I'm doing. I pulled the steering wheel stock to activate the highbeams (didn't turn on because fuse 20 and 21 removed)
I put the negative lead to the chassis and touched the positive lead to the metal part on the fuse box for 20 and 21. Meter didn't read anything. What am I missing?? 
|
||
|
10-10-2015, 05:12 PM
|
|
|
Registered
Join Date: Jun 2014
Posts: 800
|
is your key turned to run when you check the lights?
|
||
|
10-10-2015, 08:01 PM
|
|
|
Registered
Join Date: Jun 2008
Location: Ontario, Canada
Posts: 2,145
|
Quote:
What am I doing wrong??  Here I pulled the left turn signal front fuse and wanted to see if I could get my meters to read what I am supposed to. I'm clearly putting something where I'm not supposed to |
||
|
10-11-2015, 06:35 AM
|
|
|
Registered
Join Date: Jun 2008
Location: Ontario, Canada
Posts: 2,145
|
Update! Wasn't inserting the probe far enough into the fuse hole.
Fuse 22 and 23 both have power!!! What does this mean? Relay on the new harness???? |
||
|
10-11-2015, 07:38 AM
|
|
|
Toofah King Bad
|
Quote:
__________________
» 1987 924S Turbo - Got Boost? « "DETERMINATION. Sometimes cars test us to make sure we're worthy. Fix it." - alfadoc |
||
|
10-11-2015, 08:40 AM
|
|

|
|
Registered
Join Date: Jun 2008
Location: Ontario, Canada
Posts: 2,145
|
Quote:
|
||
|
10-11-2015, 10:24 AM
|
|
|
Registered
Join Date: Feb 2003
Location: SF East Bay
Posts: 1,856
|
Quote:
1. Test the new harness for power feeding the relay #30 terminal. 2. Test that the relay-coil ground is actually connected to chassis ground. 3. Test for +12v power on relay-coil from factory harness when you turn lights on. 4. Test for power-output from relay when activated, #87 terminal most likely. 5. Test that power from relay makes it to the headlight socket. Here's good article on headlight relay harnesses and how they're wired up along with a clear schematic: Daniel Stern Lighting Consultancy and Supply Last edited by DannoXYZ; 10-11-2015 at 09:20 PM.. |
||
|
10-11-2015, 09:12 PM
|
|
|
Registered
Join Date: Jun 2008
Location: Ontario, Canada
Posts: 2,145
|
FIXED.
Relay on new harness corroded... Luckily harness is still good as I swapped relays and the low beams worked and high beams failed. Will relocate harness and buy a new relay! CLOSED |
||
|
10-13-2015, 03:16 PM
|
|
|
Registered
Join Date: Feb 2003
Location: SF East Bay
Posts: 1,856
|
Was it the relay contacts that were corroded? Or the relay itself internally? I used another vendor's headlight harness that comes with sealed waterproof relay & sockets. Such as this one: Amazon - ZFE waterproof relay & socket.
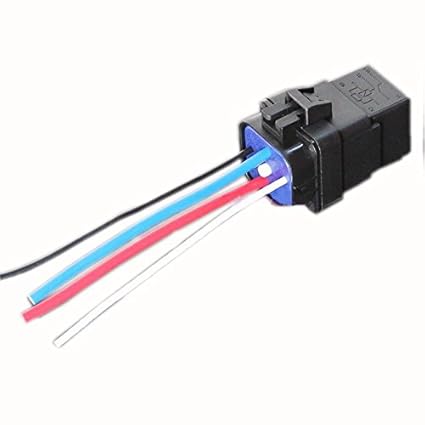 Wouldn't be too difficult to integrate that into your existing headlight harness. |
||
|
10-14-2015, 12:27 PM
|
|
 |
| Thread Tools | |
| Rate This Thread | |
|
|


 Shaggy
 Red
Red Chumpy
 Weiße Scheiße


