|
|
|
|
|
| Author |
|
|
Registered
|
Possible to remove 964 carpet without cutting?
I was just curious if it was possible to remove the carpet in a 964 without cutting it? If not, is it obvious when it is replaced that it has been cut? I'm looking at a nice unmolested original 964 with custom factory interior color, but the carpet is just too hideous to live with. I was wondering if I could just swap it out with another and then replace the original when it is time to sell?
Thanks! -Eric
__________________
1969 911E (Under Restoration) 1970 911T (Pending Restoration) 1990 C2 Coupe 1996 Carrera Coupe |
||
 03-17-2011, 03:26 AM
|
|
|
Registered
Join Date: Jun 2009
Location: tokyo
Posts: 67
|
Quote:
there are likely lots of DIY threads re carpet removal/replacement both here or over at rennlist forum. be forewarned porsche used very tough adhesive, so carpet removal (& lining) is labor intensive, and to get to bare floor for reinstall involves lot of scraping & chemicals. recommend you read those threads...price out carpet sets. |
||
|
03-17-2011, 12:52 PM
|
|
|
Kartoffelkopf

|
I was told a very good tip the other day by one of the very well known Porsche re-trimmers here in the UK - use a domestic wallpaper steam stripper to soften the adhesives....use a nozzle (not a flat plate) to aim steam underneath the carpet whilst peeling it back (don't apply steam through the carpet).
Awaiting my new carpet set as we speak - will know if this tip is a good'un or not in the next week or so. |
||
|
03-21-2011, 05:56 PM
|
|
|
Registered
Join Date: Jun 2009
Location: tokyo
Posts: 67
|
Quote:
there is a fresh post over at "other porsche forum" re carpet install, that seems to contain some good info on carpet going in ....here's cut & paste: Default Carpet install Just though I would post a few pics of my carpet install and give a few quick comments. 1. I purchased the carpet from AppBiz in the US (no affiliation). Quality is ok, but no instructions so I referred to the DIY section here and also this 964 section - thanks to everyone, very helpful. 2. Reading through everyone's thoughts, it made sense to work from the rear forward as everything then over laps well. Start on the rear side walls and work inwards and then forward. 3. Interior removal was pretty straight forward, I must admit it did help I had a double garage to be able to lay all the parts out once removed and also to be able to lay out the old carpet once removed. 4. I got stuck for a while removing the centre console, the hidden screw under the hand break leaver had me for a while. A quick search of this site, and I quickly found the problem. 5. The best tip I got from this site was to alway offer up the next piece before you glue, this saved me a few times and I was able to create line up points and it made every thing pretty straight forward. 6. There is plenty of trimming involved, but you have the old carpet as a template. 7. Cutting the centre console carpet in to two pieces helped fitting it around the gear shift etc, just make sure you don't trim back the excess too much as you need to be sure the centre console will cover it when you reinstall. I almost made this mistake! All in all it was a good weekend job (I say that but I still need to reinstall the seats tonight and have to make the new plywood driver side floor board (thanks to the other thread) this weekend. A few photos to follow. Thanks to this site for its help |
||
|
03-21-2011, 08:59 PM
|
|
|
Kartoffelkopf
|
Thanks for the C&P^^ gbc, will go thread hunting for the whole conversation when I come to install it. Have seen the DIY on Rennlist, but am told that the kit I'm getting does come with tips. Was also told that because this outfit source and use the original materials that Porsche used, there's an element of stretchiness to it that you don't get with other materials...which helps to keep it taught in certain places....we'll see!
Cheers S |
||
|
03-22-2011, 02:14 AM
|
|


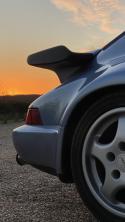 1993 Porsche 911 (964) Turbo 3.3
 2006 Lotus Exige Cup 240 (#45 of 50)
 BMW M2 Competition
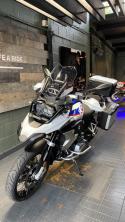 BMW R1250 GS Rallye HP
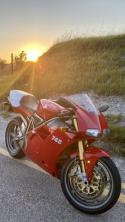 Ducati 748R
