|
|
|
|
|
| Author |
|
|
Registered
Join Date: Oct 2014
Location: Bordeaux, France
Posts: 310
|
leather steering wheel resto tutorial
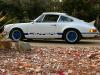
This is my first attempt at a tutorial, but since the result came out pretty well I thought I would share the journey. I'm restoring a '72 in which it seems that just about everything needs work.
This of course includes the 40cm steering wheel, which is covered in black leather. It is not in too bad a shape, but worn in several places and the sticking needs replacement I could live with this (some call it patina), but paint was chipping anyway, so off I went.  Here you can see the original cross pattern stitching that will need to be reproduced.  I have seen the kits (not that expensive) for leather recovering of the 911 steering wheels. But, the results did not seem that tight. Plus, I wanted to learn. First, the parts were sanded and repainted with two component polyurethane. The color was matched to the original, which had a somewhat lighter flat black than elsewhere. The horn button comes off with a putty knife.  Here are Chefalo's tutorials that were incredibly useful to help me understand how recovering steering wheels work. They are long, and do not have sound. Turn them to X2 otherwise you will go nuts. https://www.youtube.com/watch?v=Wp5GVDWsyV4&index=4&list=PLoSIdv1C9uySIPJabsfvX-qYc3vEBaAaC Basically, the strip of leather must have a length equal to the INTERIOR diameter of the wheel. It will then stretch over the outside and there will be no wrinkles inside. Some extra rounded bit (2mm) at the ends is necessary for the stitching. As you can see, the template (white chalk) is shorter than the original leather (which has stretched). Be sure to find a good quality leather that is perpendicular to the length of the hide (the leather stretches more in this direction).  The width at the ends should be exactly the diameter of the wheel at the largest point (on top of a ridge) + 2.5 mm per side. I came to 72 mm.  This is now cut out with a small (2 mm) rounded extra at both ends  The factory thinned (skived) the leather at the ends to stitch it together, but I went for a different technique: no skiving, but cut a channel into the rubber of the wheel in which to lodge the seam:  The two ends were stitched using a high-strength black thread and special leather needle. The sewing machine was a normal household version and it coped just fine. A piece of cloth glued with PU reinforces the leather where it will be stitched. Once this is done, cut the extra material so that the weld is as small as possible.  Here, you can see how the welt fits inside the channel (It was cut out wit a small saw) 
__________________
___oOo___ 1972 S 911 Targa kit http://forums.pelicanparts.com/porsche-911-technical-forum/863768-thats-my-first-911-restoration-thread-72-911-s-back-grave-maybe.html Last edited by florio; 10-24-2018 at 03:18 PM.. |
||
 10-24-2018, 02:19 PM
|
|
|
Registered
Join Date: Oct 2014
Location: Bordeaux, France
Posts: 310
|
Now it's time to draw a white chalk line on the inside of the wheel exactly where you want the stitching to go. It is easy enough to follow the line of the original stitching as it is imprinted on the soft rubber.
You can now carefully stretch the leather over the wheel. Gently, no ripping the leather! Make sure the welt is in the cut at the bottom, and that everything is nicely square.  Then pinch the leather with your finger and mark where that line goes onto the leather. This is where you will need to cut. Go slow and carefully, the leather can be stretched so a little short is ok, but not too much. Tape is great to hold it in place while you go around the inside.  Once the top is marked and cut, go around and do the bottom.  You can "feel" the ridge of the top as a guide to cut the bottom.  The end result should have the leather properly fitted and nicely tight when the top and bottom edges are closed.  Now it's time to start stitching'! You need to make a cardboard template with the distance between stitches (5mm) clearly marked. Then, place this on the seam and mark each point on both sides. It is important to note that the stitching cannot be evenly spaced on the spokes as these are at a sharp radius. Use the template on the top, and transfer straight down to the other piece.  Once removed, you should see all the markings for the stitches:  Then, take an owl and poke the holes at a fixed distance (2.5mm) from the edges. 
__________________
___oOo___ 1972 S 911 Targa kit http://forums.pelicanparts.com/porsche-911-technical-forum/863768-thats-my-first-911-restoration-thread-72-911-s-back-grave-maybe.html |
||
|
10-24-2018, 02:50 PM
|
|
|
Registered
Join Date: Oct 2014
Location: Bordeaux, France
Posts: 310
|
Next, you have to thin the leather at the ends of the part that cover the spokes. This part is visible and if you just cut it square, it will show. I do not have a skiving machine, so I clamped the leather onto a piece of wood and used 80 grain sandpaper to thin the leather ends to 1/2 their thickness.
  Now, put the leather back on the wheel and tape everything up so that it does not move. The welt goes in the channel and everything should line back up square as before. A little PU glue smeared between the leather and the rubber will keep everything in place  Mark where you need to fold the end on the stalk and glue it folded.  A clamp will hold it in place nicely flat while the glue sets.  Now, take a looong piece of thread (like 5x the length that you will stitch over) and use two blunt needles to stitch the halves together. I used a steering column to hold the wheel during the stitching.  Start at one of the stalks and work you way to the other end. Be patient as the first stitches are the hardest.  Use tape to keep the ends close as you stitch. 
__________________
___oOo___ 1972 S 911 Targa kit http://forums.pelicanparts.com/porsche-911-technical-forum/863768-thats-my-first-911-restoration-thread-72-911-s-back-grave-maybe.html |
||
|
10-24-2018, 02:57 PM
|
|
|
Registered
Join Date: Oct 2014
Location: Bordeaux, France
Posts: 310
|
Here is a step-by-step of the stitching:
 Take the bottom thread and bring it to the top, through the two holes so that it comes out on the bottom again.   Then, the top thread is poked through the same holes, but in the opposite direction. This gives you the X pattern. Always start with the same thread, so that the same thread is on top. Otherwise, it will look messy.  Here is the finished steering wheel back in the car, it looks like a million bucks! The leather is smooth, no wrinkles, and the stitching even and straight. No more paint chips and a very nice feel.  I got the best auto leather I could find, but as a surplus piece which made it very cheap. You will need a piece about 130 cm and 20 cm wide (remember the spokes!), sharp chalk pencil, thick thread, extra-strong thin thread, an owl, and two blunt needles. All in all, this repair costs less than 50$ in parts. Good luck!
__________________
___oOo___ 1972 S 911 Targa kit http://forums.pelicanparts.com/porsche-911-technical-forum/863768-thats-my-first-911-restoration-thread-72-911-s-back-grave-maybe.html Last edited by florio; 10-24-2018 at 03:19 PM.. |
||
|
10-24-2018, 03:12 PM
|
|
|
Registered
|
Wow, beautiful workmanship!
You have made it look easy in your tutorial but I know it's not. Very nice.
__________________
Lou |
||
|
10-24-2018, 03:34 PM
|
|
|
Speed Metal Army General
Join Date: Apr 2012
Posts: 457
|
 That is great! Nice work. |
||
|
10-24-2018, 08:50 PM
|
|

|
|
Registered
|
Great job, thanks for the tutorial, will come in handy when I get to this fase.
__________________
1973 2.4 MFI bone-stock 911T |
||
|
10-25-2018, 02:31 AM
|
|
|
Registered
Join Date: Oct 2015
Location: Iowa
Posts: 943
|
Excellent. Thanks for taking the time to document!
__________________
1983 SC Coupe Chiffon White 3.0 rebuilt by me 9.5:1 964 Cams. SSI's. Backdated heat. KEP sports clutch. |
||
|
10-25-2018, 04:37 AM
|
|
|
Registered
Join Date: Oct 2015
Location: Eastern Pa.
Posts: 695
|
Wow,this effort redefines professional grade.
My "6 beers on the deck in the sun" steering wheel project looks like a 2nd grader did it compared to this -very nice! 
__________________
1979 SC 1986 Carrera 3.6 L+ |
||
|
10-25-2018, 06:28 AM
|
|
|
Registered
|
I have a suede covered MOMO wheel that needs some work. Leather is worn through in one are.
But the MOMO wheel leather is glued on with no stitching!! Do you just use glue and careful trimming??
__________________
RGruppe #79 '73 Carrera RS spec 2.7 MFI 00 Saab 95 Aero wagon stick 01 Saab 95 Aero wagon auto 03 Boxster 90 Chevy PU Prerunner....1990 |
||
|
10-25-2018, 09:15 AM
|
|
|
Registered
|
Wow. Amazing work! But I'm never trying that.
__________________
Derrick |
||
|
10-25-2018, 09:33 AM
|
|
|
Registered
Join Date: Oct 2014
Location: Bordeaux, France
Posts: 310
|
Quote:
 Dick: maybe you can post a pic of the mom wheel. Once trimmed, it would have been easy to paint some glue on and just glue the two flaps on. Keep a bottle of solvent handy to wipe off excess glue before it hardens and lots of tape to keep it together so that it does not come out looking "wavy"
__________________
___oOo___ 1972 S 911 Targa kit http://forums.pelicanparts.com/porsche-911-technical-forum/863768-thats-my-first-911-restoration-thread-72-911-s-back-grave-maybe.html |
||
|
10-25-2018, 12:20 PM
|
|

|
|
Registered
Join Date: Jun 2015
Location: Chicago, IL
Posts: 3,175
|
Great tutorial! Thanks for posting this.
But how did you get the owl to cooperate?
__________________
'80 SC Targa Avondale, Chicago, IL |
||
|
10-26-2018, 07:44 AM
|
|
|
Bitte ein Bit
|
excellent travail! (Hope that's right)
Agree with the others - Thanks for taking the time, excellent post! Last edited by Bitte ein Bit; 10-26-2018 at 08:18 AM.. |
||
|
10-26-2018, 08:12 AM
|
|
|
Bitte ein Bit
|
Quote:
I couldn't even begin to undertake a project like this. So...kudos to you sir! |
||
|
10-26-2018, 08:14 AM
|
|
|
Science is NOT optional
Join Date: Aug 2008
Location: West and further west
Posts: 1,987
|
Quote:
You sir, are a real asset to us all. Well done. I did a very basic cover once but the next time I do it I hope to bring it up to your level. Cheers!  
__________________
PCA member since 1993 |
||
|
10-26-2018, 09:38 AM
|
|


 1983 911 SC
 Wib
Wib
 RS Homage
 Street Beast
 1996 Ford Mustang
 07 GT3RS
 1986 Porsche Targa
 1986 Porsche 911
