|
|
|
|
|
| Author |
|
|
Registered
Join Date: Aug 2020
Location: Belgium
Posts: 324
|
DIY Singer style Dash build
I have my 86 Targa since end of summer, and from the start I planned to do something about the dash. I am particularly charmed by the Singer design. Who wouldn't? I know there are some kits available, but non of them came close enough to what I had in mind. Rennline has this extrusion panel in aluminum. But I wanted something more sophisticated than aluminum strips. Moreover, they stop at the square vents, whereas part of the beauty of the Singer design lays in those going full left to right.
I will cover my progress in this thread, so it may inspire you. And if I get stuck you may help me. Just one upfront apology: I will not have time to reply to posts on the spot all the time, I have a busy life. Plan is to have it finished in a month or so. My 86 has a 'green/grey' interior. Let me start with the pictures of a Singer finish that inspired me.  
Last edited by alexandervdr; 01-21-2021 at 04:57 AM.. |
||
 01-21-2021, 04:33 AM
|
|
|
Registered
Join Date: Aug 2020
Location: Belgium
Posts: 324
|
Step one was to fabricate the knee protection pads. I find the ashtray, apart from not needed, totally ruining the looks. I wanted a continuous design. Again, one can be bought at rennline , but it does not have the strips above and below the square vents of the 86.
 So I made one myself. Start is a panel of home insulation foam, cut and sanded into shape , then covered with several layers of glasfiber fabric and epoxy. Note that I use laminating epoxy and not polyester. Polyester attacks the foam, smells terribly, shrinks while curing, and is less shape stable over time.    
|
||
|
01-21-2021, 04:56 AM
|
|
|
Registered
Join Date: Mar 2003
Location: Arlington, VA
Posts: 325
|
Looking good. Following.
__________________
- James 1975 3.6 RS 2015 F10 535i 2011 911 C2 |
||
|
01-21-2021, 06:20 AM
|
|
|
Registered
|
Please keep posting pictures of progress. I want to see how you will be eliminating the glove box . I'm planning to do the same.
|
||
|
01-21-2021, 08:16 AM
|
|
|
Registered
Join Date: Aug 2020
Location: Belgium
Posts: 324
|
Quote:
 It's actually much easier to do the conversion scrapping the glovebox rather than keeping it, I'll come to that later |
||
|
01-21-2021, 08:39 AM
|
|
|
Registered
Join Date: Aug 2020
Location: Belgium
Posts: 324
|
for finishing the ends, a vertical web is laid up
 then the foam is removed  A ribbon of 2 component bumper glue is added to strengthen the bond. I love this glue, sticks very well, and stays somewhat flexible. 
|
||
|
01-21-2021, 01:06 PM
|
|

|
|
Registered
|
Once the base is done to you intend on putting some sort of foam or upholstery material of 3.5 mm or so prior to covering with vinyl or leather? If not any imperfection will show through and you also need a "softened" feel to the finished product.
I'm soon to put a how to post of repair and re-cover vinyl w/o seams dashboard. |
||
|
01-21-2021, 05:56 PM
|
|
|
Registered
Join Date: Aug 2020
Location: Belgium
Posts: 324
|
Quote:
The soft touch won't be there, but it's not really there with the original pads neither. They are in foam for security legislation reasons. Looking forward to read your post on recovering. |
||
|
01-21-2021, 09:06 PM
|
|
|
Registered
Join Date: Aug 2020
Location: Belgium
Posts: 324
|
One of the challenges is to have the chromed strips above and below the dash panels perfectly aligned. That would have been easier if I had opted for glovebox-delete. But with the glove box in, the strips are cut in tree pieces from the right door to the steering column. An extra challenge is that the square vents are spring centred, and that does not guarantee a perfect positioning.
So my first exercise is to define a straight line that spans the das from left to right. Using that line I can then position the vents perfectly aligned. It may be an overkill, but I used a hobby laser level. It worked out great. Once I had that reference line I did modify the outer casing of the vents to fit perfectly in between the dash top and bottom of the dash metal chassis. First went the springs. I then glued on some wooden shims. The top edge of the dash opening must be filed so it is perfectly horizontal (I call horizontal anything that is parallel to the laser line). The bottom edge can be bent and twisted. Now, the vent frame drops in perfectly. I'll need to find a way to fix it, will do that later. Note that when I modify something, I make sure it is 100% reversible, so I can go back to my original dash if this whole exercise fails  Here is the laser level  Used to set the bottom edge of the opening straight, see the red line  springs removed and shims added top and bottom |
||
|
01-22-2021, 05:43 AM
|
|
|
Registered
Join Date: Aug 2020
Location: Belgium
Posts: 324
|
the dash has these vinyl covered foam pads that are expensive to replace. So I don't want to ruin them when taking off.
I use a very thin and flexible putty knife. I bent it in a curve so it slides in easier. Cover went of in 5 minutes, no damage   The decorative strips are made from messing U profiles that I will have chromed. The panel is made from PC board. The fabric is vinyl from a VW seat, but used in Porsche too I think. This is just a test fit to see the effect. I did look for the leather basket weave the Singer is using, but at the end I found the vinyl more in line with the styling I wanted.   
|
||
|
01-22-2021, 10:21 AM
|
|
|
Registered
Join Date: Aug 2020
Location: Belgium
Posts: 324
|
and now test fit with the knee bar. I covered it partly with some leather style vinyl just to see the result. Vinyl is black, but dyed with original Porsche 'graugrün' (greygreen). My wife thought it was the OEM bar...The dye is from an upholstery specialist that has an incredible amount of kit to repair your car's interior. I repaired some deep scratches on my leather seats , and the dye is exact the color of the original. Impossible to see where I corrected.
Alignment needs some more work but start seeing where we are heading at..  These guys have all the upholstery Porsche colours made to spec. Not sure they ship to the US.  
|
||
|
01-22-2021, 01:59 PM
|
|
|
Registered
Join Date: Aug 2020
Location: Belgium
Posts: 324
|
When I decided to go look for a Porsche 911 to add to my (very modest) classic car fleet, I wanted a car that I could drive immediately without the need for a long restoration (which I have done on other cars). It meant too that anything I would want to change, should be relatively wel defined jobs that limit the down time of the car.
For this dash mod, I took the time to prepare the works so as to have all the major decisions taken and parts identified and/or prepared before tearing stuff apart. One of those decisions was what sound system to install. I drive the Targa mainly with the open top, and then it is a quite noisy experience. Especially at speeds above 40mph. If I wanted clear music at higher speeds, that would require a powerful sound system to go above the driving noise. At least for me, that creates extra ear fatigue as I learned from another car. I tend to record music as a hobby, it does impact my expectations on how 'undamaged' the radio sound reaches my ears. I decided it's unrealistic to expect anything that would satisfy me on a highway, so I focussed on driving around in town and neighbourhood. Nothing very exotic is required so I settled for a Restrosound set retromanufacturing.com. They have this sober classic look, it's not too intrusive when integrated in the dash, and I found that the chrome bezel of a 70-80-ies Blaupunkt Frankfurt fitted perfectly over it. Another hint to the Singer legacy... The sound of the Retrosound is not the best around, but it's ok for the purpose defined. I found some stylish knobs to fit too here retrosound.be/en/?controllerUri=index Pleasant surprise when I bought myself some Apple AirPods with noise cancellation. I installed an radio station app on my iPhone, and with the AirPods and the noise cancellation , music has never been clearer in my ears even at 80mph. Beats any high end high dollar sound system to me. the radio installed with the corresponding backplate.  here with the chrome bezel  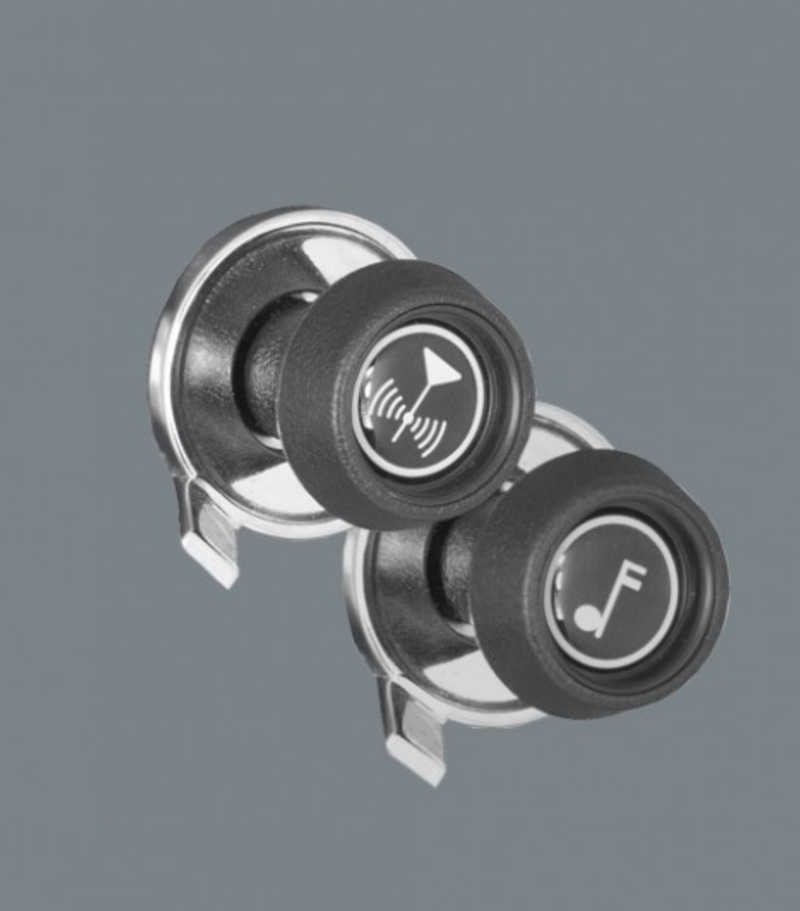
|
||
|
01-24-2021, 02:02 AM
|
|

|
|
I'm good with tools.
|
Great Job. I built my own Singer inspired dash. I know how muck work it can be.

__________________
72 911 Coupe "OILDOOR" 24 INEOS Grenadier (daily) 13 991.1 Coupe 2S 3.8L (currently undergoing mods) 02 996 4S |
||
|
01-24-2021, 01:03 PM
|
|
|
Registered
Join Date: Aug 2020
Location: Belgium
Posts: 324
|
Quote:
|
||
|
01-24-2021, 02:15 PM
|
|
|
I'm good with tools.
|
Thank you. Lots of hours.
__________________
72 911 Coupe "OILDOOR" 24 INEOS Grenadier (daily) 13 991.1 Coupe 2S 3.8L (currently undergoing mods) 02 996 4S |
||
|
01-24-2021, 06:26 PM
|
|
|
Registered
Join Date: Aug 2020
Location: Belgium
Posts: 324
|
I really want to make sure that what I take off does not get damaged, even if I don't need it anymore. The black front foam frame on the dash is one of those items that cost a fortune. The center one alone is quoted 420 here in Europe. Using the same thin flexible putty knife as for the glovebox, I could detach it quite easily. But I could not remove it cause the seatbelt/brake alarm assembly was holding it against the frame. In another thread I learned how to solve that. First take the clock dial out, then the electric harness to the seatbelt alarm assembly can be unplugged. Pushing from the back, the assembly comes out with the foam frame. To separate the two, 4 small plastic clips moulded in the plastic chassis need to be depressed to unlock everything.
  
|
||
|
01-25-2021, 12:40 PM
|
|
|
Registered
Join Date: Apr 2006
Posts: 2,102
|
Quote:
Enjoying your progress and talent.
__________________
Ass-engine Nazi slot car -- PJ O'Rourke |
||
|
01-25-2021, 01:01 PM
|
|
|
Registered
Join Date: Aug 2020
Location: Belgium
Posts: 324
|
Quote:
|
||
|
01-25-2021, 02:56 PM
|
|
|
Registered
Join Date: Aug 2020
Location: Belgium
Posts: 324
|
All the front covers are off , none got damaged. The hardest part was the removal of the heat/vent control pannel. There are 3 piano wires in guiding tubes connected that need to be released. Small hands would have helped (mine are not...).
Here is a video that helped me out https://www.youtube.com/watch?v=Uu-6g-p_Nj4 
|
||
|
01-26-2021, 07:51 AM
|
|
|
Registered
Join Date: Aug 2020
Location: Belgium
Posts: 324
|
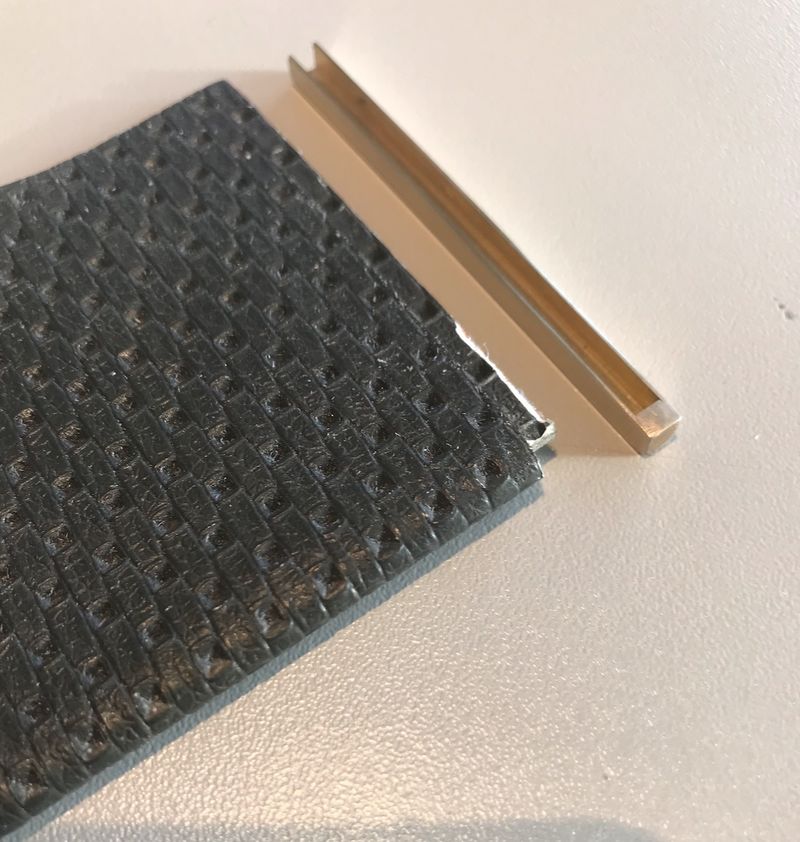
As mentioned earlier, I prepped and experimented in advance. This is a testpanel that I made to see how it could all work out nicely. The panel itself is PCB, the strips are cut from 4x4mm brass U-channels. The ends are capped off with soldered in 3mm lengths of brass rod. Where the caps are, the PCB has an indent. The vinyl is cut flush here, for the rest of the panel the U channels fit perfectly over the vinyl-PCB giving a nice and professional finish. All the 8 messing strips needed have been cut to length and capped upfront, then sent to the chrome shop (there is a 6 weeks lead time). I actually went for a nickel finish, including for the radio and heater panel surround. That gives a slightly softer look over chrome, goes well with the dark green of the interior and vinyl. The ones in the pictures are not plated yet.
|
||
|
01-26-2021, 08:08 AM
|
|


 Porsche 911 Coupe
