|
|
|
|
|
| Author |
|
|
Registered
Join Date: Jul 2011
Posts: 14
|
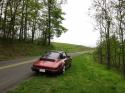
She finally got a wash and wax ...

|
||
 09-01-2016, 07:55 AM
|
|
|
83 911 Production Cab #10
|
Got her some early X-mas presents.
She can have the F.E. now but will have to wait for the rest... 
__________________
Who Will Live... Will See  83 911 Production Cab #10, Slightly Modified: Unslanted, 3.2, PMO EFI, TECgt, CE 911 CAM Sync / Pulley / Wires, SSI, Dansk Sport 2/2, 17" Euromeister, CKO GT3 Seats, Going SOK Super Charger |
||
|
09-02-2016, 05:33 AM
|
|
|
Registered

|
I finally fixed my driver's door rattle. The brace for the bottom of the forward power window rail had dropped its bolt and washer into the bottom of the door. I took the door apart, put the bolt and washer back, checked general bolt tightness. Then I lubed up the window rise mechanism, but it is still horribly slow. Finally spent 30 minutes making a new moisture barrier.
I'm sure I'll have the door open again next year, but I think we are set for a while.
__________________
Lillie - 1979 911 SC Targa, The Original 911 SCWDP Car. Rebuilt and roaring to go! |
||
|
09-02-2016, 09:13 AM
|
|
|
Fahren mit dem Wind.

|
Leather Dash Redye
The next step in sorting my 83 SC Cabriolet is the interior. These cars were shipped with all leather. My interior is two-tone - brown dash and arm rests and champagne seats and door panels with brown carpet. Like any 33 year old car, the leather is worn and a little faded with lots of spiderwebbing on the seats. After investigating reupholstering and several leather dye options and seeing some really excellent dye results I've decided to go down that path first. After all, my car is a driver, I don't need a garage queen! That said, I do like things to be clean and as good as they can be, but patina is acceptable.
My car was owned by an LA area "B" actress for a while. She's not a big name and I hadn't heard of her. But, she must have had a BIG diamond ring because the top edge of the dash behind the steering wheel had huge divots and scratches in it, exposing the undyed leather underneath. Also, the knee pad below the glove box was similarly scratched up. I started with that piece since it can be easily removed. I also wanted to reglue the leather/pad on the glove box door - it had started pealing off well before I owned the car. I used and followed the Leatherique instructions and used their leather treatment products and cleaner. I sanded the part with 400 grit to smooth it out and then used a sponge brush (1") to apply the dye. I applied two coats at 30 minute intervals and when it was dry, it looked good except the larger scratches were still visible. The dye does not fill defects.  Leatherique offers a filler so I got some and filled the scratches with several thin applications of filler. Then redyed the part and the scratches miraculously disappeared. The new dye is an exact match for the original brown and the knee pad looks as good as new. So next I removed the three plastic plugs on the top of the dash. These conceal holes where Tenax fasteners would be inserted for a tonneau cover. The plugs can be gently pried up but new replacements are available if you break them (part #999.703.182.40). I gently cleaned and treated the dash leather as per the Leatherique instructions. A week later I removed the steering wheel sanded the dash with 400 grit and cleaned with the cleaner. Don't go crazy with the sandpaper, you don't want to turn the leather to suede. After cleaning, I removed the steering wheel and masked the windshield and vents with tape and paper as you can see in the photos. You can see the result of sanding leaving color in the grain (low spots).   (this photo also shows the finished knee pad) The conditions were perfect for the dye - low humidity and 75°F. I used foam brushes to apply the dye. I started with a 1/4" brush and worked the seam between the front and back part of the dash - you can see it in the photos. Once this dye was applied, I coated the perimeters around the masked areas and finally filled in the remaining areas. I went slowly and was careful not to over stroke the dye or introduce streaks or bubbles. I applied two coats at 30 minute intervals. After an hour I removed the masking and cleaned any areas where I inadvertently got dye. While the steering wheel was off, I used foam brushes and detailer swabs and cleaned the instrument panel and all the instruments including the heater controls and radio. I cleaned the horn cover and the steering wheel too. Everything looks really nice and clean now!    I'm really pleased with the finish and color. It's also nice to have a really good detailing on the dash to get all the crud out of the vents and gauges! I discovered that you can pop the center vents out carefully. Once removed, I cleaned 33 years of dust and dirt out of the main duct and also cleaned the vents carefully. There is a little spring washer that goes on the post towards the middle between the vents (so they face each other). I was missing one, that's why my vent flopped around. Just so happens that I have 1000 of these that I use in my fly reel making business so now my passenger side vent stays put!
__________________
Keeper of the 1983 911SC Cabriolet Registry (http://911sccabrioletregist.freeforums.net) Caregiver to: 1983 911 SC Cabriolet - Fahern mit dem Wind. (Moss Green Metallic over Champagne and Brown Leather) Last edited by mhackney; 09-03-2016 at 10:08 AM.. |
||
|
09-03-2016, 07:31 AM
|
|
|
Fahren mit dem Wind.
|
Can folks see my pictures above? I see them here but do not see them on my iPhone.
__________________
Keeper of the 1983 911SC Cabriolet Registry (http://911sccabrioletregist.freeforums.net) Caregiver to: 1983 911 SC Cabriolet - Fahern mit dem Wind. (Moss Green Metallic over Champagne and Brown Leather) |
||
|
09-03-2016, 09:41 AM
|
|
|
83 911 Production Cab #10
|
Quote:
__________________
Who Will Live... Will See 83 911 Production Cab #10, Slightly Modified: Unslanted, 3.2, PMO EFI, TECgt, CE 911 CAM Sync / Pulley / Wires, SSI, Dansk Sport 2/2, 17" Euromeister, CKO GT3 Seats, Going SOK Super Charger |
||
|
09-03-2016, 09:48 AM
|
|

|
|
Fahren mit dem Wind.
|
Thanks JJ, it was a permissions thing, I've fixed them so they should show up now.
__________________
Keeper of the 1983 911SC Cabriolet Registry (http://911sccabrioletregist.freeforums.net) Caregiver to: 1983 911 SC Cabriolet - Fahern mit dem Wind. (Moss Green Metallic over Champagne and Brown Leather) |
||
|
09-03-2016, 10:09 AM
|
|
|
Registered User
Join Date: Jan 2014
Posts: 703
|
Quote:
I also have the same issues with the leather on the knee part as well as the doors by the window switches. Woman and jewelry LOL. There's a few other parts inside, like the edge on the back of the door entry. Looks as if it got a little beat up with people or stuff going in and out. After seeing your results, I'm guessing a pro could really clean mine up too.
__________________
1979 911SC Euro Tub/1982 Euro 3 Liter PCA E Class Race Car 1985 911 Carrera Coupe-Grand Prix White/Red |
||
|
09-03-2016, 04:53 PM
|
|
|
Registered
Join Date: Jul 2016
Location: Pismo Beach, CA.
Posts: 677
|
Did all sorts of pcar stuff.....
- pulled my clock, and will try to fix it with a couple new capacitors - lowered the rear, --- too much, gotta revisit that tomorrow, i'm at 23 1/4" about an inch lower than i aimed for...... - while i was there i removed and cleaned the oil level sender and now have a steady needle that looks like it's doing it's job for a change..... Feeling productive 
__________________
1987 911 Carrera Coupe 1987 Buick Grand National 1971 Plymouth Roadrunner |
||
|
09-03-2016, 06:50 PM
|
|
|
Cars Ruined My Life
Join Date: Feb 2013
Location: Right in your face
Posts: 1,881
|
Quote:
|
||
|
09-03-2016, 08:15 PM
|
|
|
Registered
Join Date: Jun 2000
Location: bottom left corner of the world
Posts: 22,880
|
You guys prompted me to re-glue the 3rd/high mounted brake light onto the back window. So I'm less likely to get run into now.
|
||
|
09-03-2016, 09:58 PM
|
|
|
83 911 Production Cab #10
|
Quote:
__________________
Who Will Live... Will See 83 911 Production Cab #10, Slightly Modified: Unslanted, 3.2, PMO EFI, TECgt, CE 911 CAM Sync / Pulley / Wires, SSI, Dansk Sport 2/2, 17" Euromeister, CKO GT3 Seats, Going SOK Super Charger |
||
|
09-04-2016, 03:52 AM
|
|

|
|
Registered
Join Date: Apr 2008
Location: Miami
Posts: 963
|
 Hint hint Near 90 degrees F, near 100% humidity
__________________
1979 SC, Slant nose wide-body cab conversion. AEM Infinity EFI, COP, supercharged! |
||
|
09-04-2016, 05:39 AM
|
|
|
Cars Ruined My Life
Join Date: Feb 2013
Location: Right in your face
Posts: 1,881
|
Quote:
|
||
|
09-04-2016, 08:02 AM
|
|
|
Registered User
Join Date: Jan 2014
Posts: 703
|
Quote:
Did you upgrade your torsion bars or just rotate the stock one?
__________________
1979 911SC Euro Tub/1982 Euro 3 Liter PCA E Class Race Car 1985 911 Carrera Coupe-Grand Prix White/Red |
||
|
09-04-2016, 08:26 AM
|
|
|
Registered User
Join Date: Jan 2014
Posts: 703
|
Quote:
__________________
1979 911SC Euro Tub/1982 Euro 3 Liter PCA E Class Race Car 1985 911 Carrera Coupe-Grand Prix White/Red |
||
|
09-04-2016, 08:27 AM
|
|
|
Registered
Join Date: Apr 2008
Location: Miami
Posts: 963
|
Quote:
If you had cold air before then it seems you might just have a leak and not need a complete system. A good AC shop should be able to diagnose. You can also borrow gages from auto part store and do some diy. You would definitely get help from the experts in this board.
__________________
1979 SC, Slant nose wide-body cab conversion. AEM Infinity EFI, COP, supercharged! |
||
|
09-04-2016, 10:23 AM
|
|
|
Registered
Join Date: Jul 2016
Location: Pismo Beach, CA.
Posts: 677
|
Quote:
It's not as difficult as all the posts lead it to be. I reclocked the torsions.
__________________
1987 911 Carrera Coupe 1987 Buick Grand National 1971 Plymouth Roadrunner |
||
|
09-04-2016, 10:34 AM
|
|
|
Registered
|
adjusted valves ! Partial drop but 100% success. Time consuming, spent almost 10 hours in the driveway but extremely satisfying. Sounds so sweet now with that annoying ticking noise gone. Followed by a remap of the MS on a 100 mile drive through the mountains driving it to the limits of the suspension.
__________________
80SC (ex California) Last edited by trond; 09-04-2016 at 01:28 PM.. |
||
|
09-04-2016, 12:43 PM
|
|
|
Registered
|
 Bring this home
__________________
1966 912 with 2.2 911 motor 1986 wide body 911 1995 993 Polar Silver |
||
|
09-04-2016, 05:28 PM
|
|
 |
|
|
| Tags |
| fuchs are ugly , stock sucks |


 Das Babe
 Das Babe Metalberiech
 Lillie
 1962 Porsche 356B Roadster S 90
 911SC
911SC cutey with all that bootey
 1995 porsche 993

