|
|
|
|
|
| Author |
|
|
Registered User
|
Well, the new motor mounts were waiting patiently by the backdoor when I got home (thank you 928RUS). All the way home I was talking myself out of working on the car, but the package inspired me.
Well, the room required to remove flat as a pancake old mounts and the room required to slip in a new set...is the difference between night and day. After trimming off some excess threads on the bottom of each mount, the drivers side went right in. The passenger side was not looking good and I even started looking at what would need to come out to drop the crossmember. Then I took one more look and try and I got the bracket and mount into place. Success! Started a few bolts and said that's enough for tonight. Man does the engine set higher now...I hope the hood will close. Edit...there was one disappointment while opening the box from 928RUS...there was no cool 928RUS stick inside to stick on my tool box...lol. Brian. |
||
 12-04-2015, 06:24 AM
|
|
|
European Shark
|
How did you support the engine while replacing the mounts in order to lift it high enough to not remove the x-member? And I suppose your oil pan gasket was in good order...
__________________
1978 Porsche 928 Euro 5spd. Silver metallic/Black 1986 Porsche 928 S2 Euro 5spd. Meteormetallic/Grey. *Crashed* Owning a 928 is risky business - but sometimes you just gotta say "what the fudge". |
||
|
12-04-2015, 07:56 AM
|
|
|
Registered User
|
Quote:
Basically, removed the upper portion of the fan shroud, engine cross member, air filter housing and went below, then removed the sway bar from body mounts, motor mount bolts, one small bolt off the wiring harness going to the starter, oil filter, dropped the cross member bottom plate to allow the steering rack to drop down and the heat shields along the motor mounts. (I'd already had the alternator, air pump and A/C compressor off for other repairs to them...so these need to come off too.) Then jacked it up as far as I could (until it was just about off the jack stands). It was tight going and I had to manipulate the brackets and motor mount to work them into place. I used the Volvo mounts and the threaded portion of the mounts seemed longer, so I shorten them about a quarter inch. The driver’s side went in as one unit (bracket loosely mounted to the mount, but the passenger side went in separate and got bolted together after wiggling them together (this side was by far the worse end of the deal). The only thing I got a bit nervous about was the heater control mechanism between the engine and firewall...it got a bit tight. Completely, adding in the time for front engine components being removed earlier…the whole job was probably about four hours total (but, I do mechanical work for a living). No re-alignment required though…and this was what I was after. Yes, oil pan gasket was in good order and I'll save that job for some day when the head gaskets start leaking and the engine comes out completely. Remember, this is an 84...so other models may not apply. Brian. Last edited by The Deputy; 12-15-2015 at 01:06 AM.. |
||
|
12-04-2015, 09:55 AM
|
|
|
Registered User
|
Before...
Notice you can see the silver strip of metal on the firewall just above the air cleaner easily.  After... Not so much. (Complimentary/copycat invisible man Rob Edwards photo)  Previously, the oil pan was about 3/4 of an inch below the cross member...now it's the opposite. Now, the engine crossmember has to come out to remove the air ducts. Granted, it may settle some after driving. One thing I didn't mention before; while assembling, bolt up the heat shields along motor mounts prior to tighten up the motor mount bolts that run into the block. Start the motor mount bolts, leave them about a half inch loose, tighten both ends of the mounts on the crossmember and upper motor mount bracket (studs) and then lift the motor slightly. This allows more room for getting the two little heat shield bolts started. Then drop the engine down and tighten the eight (four each side) engine motor mount bolts.  Time for a celebratory cigar!  Thought about firing her up, but I'm still waiting on a alternator. Brian. |
||
|
12-07-2015, 09:27 AM
|
|
|
Kool
|
Good work
|
||
|
12-07-2015, 11:46 AM
|
|
|
Registered User
|
Rear Struts and Axle Boots.
These axle nuts were pretty tight, but 235 lbs behind a 3/4 drive breaker bar made short work of their stubbornness. Joints seem smooth, so new boots, clamps and grease should do the trick.
 Mystery solved... While steam cleaning last spring the nozzle disappeared off the wand. Looked all over the garage floor and never found it...until today.  Right strut out...  Left side out...  Everything came apart easily, pushed/pulled the bottom strut bolts out without much effort. Time to order parts now. Brian. |
||
|
12-14-2015, 06:14 AM
|
|

|
|
Registered User
|
Well, the new alternator arrived. So, I cleaned and painted up the fan and pully and assembled it yesterday at work. Rushed home somewhat excited about seeing if the old girl will charge properly with its new alt.
Hook up a couple wires, using great care not to scratch any of my freshly painted bits, then lift the alternator into place and slid the upper bolt through the bracket and alternator...where...the head of the bolt goes all the way to the bracket surface. Hmmm, that's weird. Normally, and this preconceived notion is based on 37 years of wrenching, the bolt head would stop short of the bracket...once it hits the threaded hole in the block. So, I immediately assume I've missed the hole...hey that's happen once or twice before, or maybe the wrong one...which has happen only once...lol. Anyhow, very carefully the alt. gets dropped back down. Look up at the hole in the block...and there isn't any threads in the hole and the hole is much larger than it should be. I'm like???...I could have sworn there were threads there before. So, after a bit more studying...I can see where this hole on the engine has been drilled out...and the helicoil that they inserted, assumingly when the alternator went bad last time, was pushed all the way to the bottom of the hole. So, when I was loosing the bolt during removal, it must have pushed the helicoil back into the hole...which was drilled to deep...instead of the bolt just coming out. Hopefully, after a stop at the parts store today, I'll get this straighten around tonight and all will be well. Brian. |
||
|
01-07-2016, 09:46 AM
|
|
|
Registered User
|
The helicoil and alternator are in and charging correctly. The warning lights and light within the charging gauge are now, again, on when the ignition is turned to the first position.
Before, the warning lights would come on for a second and immediately go out, and the charging light (at the 10 volt position) didn't come on at all while turning on the key. Plus, as a bonus...the voltage drain while parked has disappeared (which the car never had before). Brian. |
||
|
01-07-2016, 09:46 AM
|
|
|
Registered User
|
And just for *****s and giggles...I thought I'd compile a list of work done and costs.
Mechanical Repairs and Cosmetic Improvements. Between 11/2014 and 11/2015 WP and TB = $750.00 Fuel/Vacuum lines = $50.00 Tune-up = $500.00 Oil change/filter = $75.00 Belts = $75.00 Headlight/fog-light bulbs = $50.00 HVAC relay = $15.00 Hood insulator pad = $125.00 Hood/hatch struts = $100.00 Jump post cover = $15.00 Coolant flush/fill = $50.00 Tie-rod ends/ball-joint boots = $100.00 Polished seven slot rims = $500.00 Burgundy floor mats = $40.00 (used, but in good shape) Rear hatch lower receiver guide = $50.00 Window/Sun-roof/Rear wiper switches = $100.00 Grand total = $2,595.00 Between 11/2015 and 11/2016 Motor mounts = $150.00 Alternator = $175.00 Trans filter/fluid = $100.00 Axle shaft reboot = $100.00 Rear struts = $275.00 Air filter = $40.00 Steering rack boot = $25.00 Total (so far) = $865.00 Now, should this information fall into enemy hands...certain death will follow. But, it was fun while it lasted...lol. Brian. |
||
|
01-07-2016, 09:47 AM
|
|
|
Registered User
|
Quote:
The original helicoil that was installed...was not done by me, and it seemed like they used the wrong sized drill bit, or something, and it was just sloppy. Now, I've sleep like a baby the past few days. Just waiting for my inner tie-rod assembly and that will be it for this winter...besides a few odds and ends...but nothing serious or expensive. Brian. |
||
|
01-14-2016, 01:33 PM
|
|
|
Registered
Join Date: Jun 2007
Location: Pittsburgh, PA
Posts: 650
|
Good go Brian. That is the right thing to do for sure. I am not a fan of helicoils. They work in a pinch, but the more permanent solution is definitely the timesert.
__________________
Ed 85 928 5 spd (guards red over tan) 07 Shelby GT500 6 spd (torch red over two tone black and red leather) |
||
|
01-15-2016, 07:25 AM
|
|
|
Registered User
|
A little up-dating...
Door panel off, no hitches, came apart smoothly.
 The bad...  The good...  Realized I had taken the passengers side door apart on the 78, but not the drivers and I'm working on the drivers at the moment...so out to the corn crib I went...and dug out the drivers door...which was the first thing stored there, behind the hood, hatch, fender, other disassembled door, both rear and front bumpers, push mower, snow blower, etc, etc. Top regulator PS (78), bottom one DS (84).  78 donor door, still saving lives well after its death.  Yes, I am a big fat liar... My assistant or apprentice or grandson, whichever is preferred, actually took the door apart. Monroe, getting the job done. Not bad...for a 7 year old.   Oh, and he's the one that organized the wrenches on the work bench, too. Just want the topic to be factual...lol. Brian. |
||
|
06-13-2016, 04:07 AM
|
|
|
Registered User
|
New look...
 Old look...  Me, I'm leaning towards the old. My wife voted the same way, but said drive it that way for a while...maybe it will grow on you. Went for a little "settle the suspension" ride, still needs a few more miles but she's getting close.  Looking forward to getting insurance and plates back on old blacky, now that the weather has finally, supposedly, hopefully changed for the better. Two weekends ago, we got three inches of snow.  It is absolutely unbelieveable the difference the motor mounts made, seems so, so much smoother. 2016's driving season is just about to begin. Well, after doing a quick measurement of the ride height...it was right where it was before (before new rear struts). 151mm front and 156mm rear, so the difference in ride must be the tires/rims. Yes, this is on the low side...but the car looks right (to me) there...so that's where I set it. Anyhow, did a bunch of searching, reading, debating, deciding and thought I'd add 10mm front and rear. Just to see if this help free-up some of the suspension, and help absorb the harsher ride. Didn't make a bit of difference, but the extra height did come in handy...when my mom (82) got in the car to go see her sister at the nursing home. Even though the trip was only fifty some miles round-trip, my mom commented several times on the cars nice ride and being very comfortable. When we got home, I told dad he may have to step up his game when he buys mom a new vehicle...since she was spoiled now...lol. The car has picked right up where it left off last driving season, turn key operation. I've logged about three hundred miles over the last few drives, confidence is surely building with each mile. Brian. |
||
|
06-13-2016, 04:12 AM
|
|
|
Registered User
|
Another up-date...
Didn't feel like going to Friday-last-day-of-school-lunch with the other guys, so I hung around the garage and puttered on a couple things. I've never checked the intensive or headlight washers, filled intensive, worked, flipped headlights on, and those washers worked, too.
Since that didn't take much effort...my mind started studying the sunroof. I'd pressed the switch before, but only got a moan from the motor. Gave the panel a little help today, while holding the switch and she opened up ever so slowly. Well, the lube that was in there...was rock solid...so, a little degreaser and solvent were in order. After about twenty minutes of cleaning and relubing...she is opening back and forth with lightening speed. Had to adjust the level of the inner panel, which was dragging slightly, three screws along the back edge cured that. Drove home from work with the roof open, what a difference in air-flow. Anyhow, like they say..."didn't happen unless there are pictures".  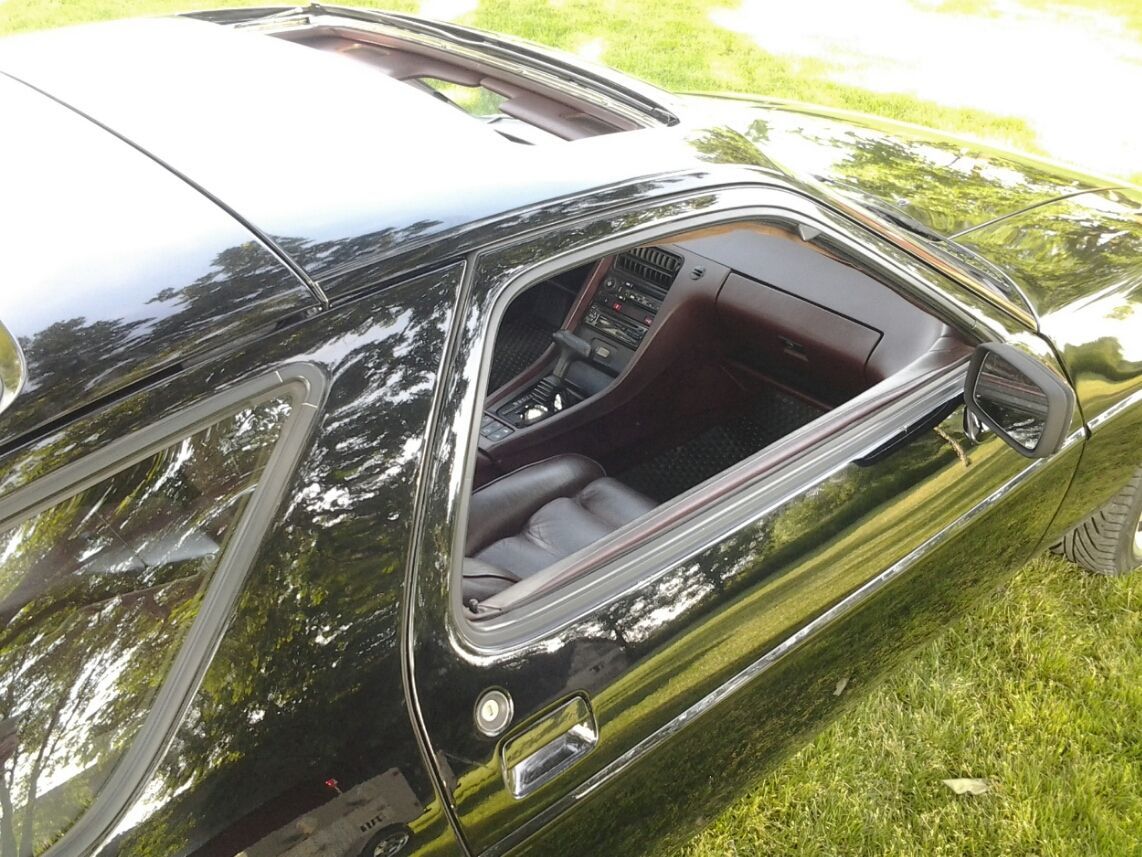 This picture is...the "money shot".  Then old red wanted in on the act...for the "double money shot". 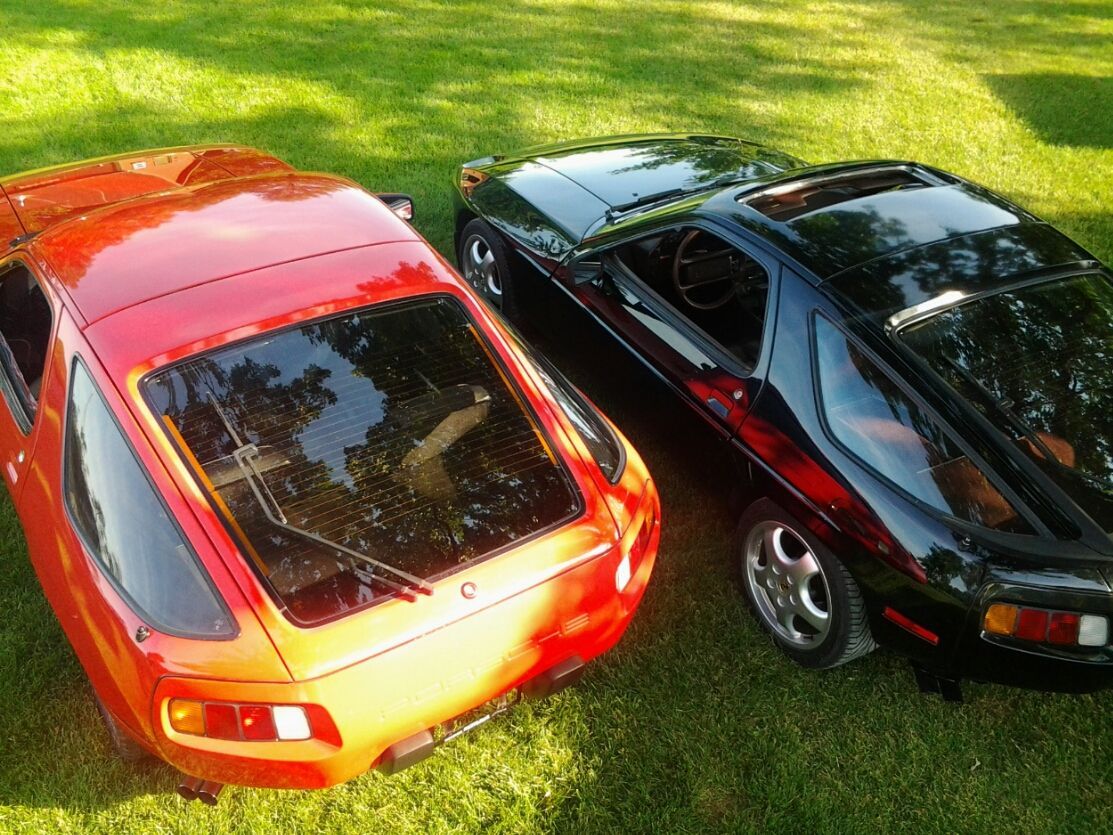 Old blacky has been giving me nothing but joy. Been pretty much my daily driver for the last month and she just starts and goes where I point her. Time for a little evening shade drive to the thumb. See ya later alligator! Brian. |
||
|
06-13-2016, 04:12 AM
|
|
|
Registered
|
hey brian - that's a pair of great looking cars you got there - good work - I too noticed a huge difference in the feel of the car after new mounts and struts - the roads here in Colorado are terrible (and getting worse every day) so driving can be busy but on the occasional smooth new surface this car is very nice to drive - enjoy your rides
__________________
84 928 S - SOLD 2012 Cayenne S |
||
|
06-13-2016, 08:40 AM
|
|
|
Registered User
|
Waiting on this little do-dad for my 84, door exit light, and I will reassemble passenger side door panel. Re-glued carpet and vinyl and installed homemade steel door handle re-enforcements and adjusted window guides...so I'm ready when it gets here.
 Homemade sounds hokey...so I'm calling them..."hand crafted steel door panel re-enforcements" now...lol. Made these support brackets up at work. The two bottom bolting areas of this panel were broken, drivers side, so I added these brackets.  Really stiffen up the door panel. You can clearly see the crack in this picture.  These brackets and the pop-rivets will not be visible. Brian. |
||
|
06-17-2016, 09:20 AM
|
|


 1999 BMW 520i
 1986 Porsche 928
 TBA
TBA Whitey
 Pontoon

