|
|
|
|
|
| Author |
|
|
Registered
Join Date: Feb 2011
Location: San Diego
Posts: 453
|
Awesome build. I remember that 993 when it used to reside in San Diego, cool car.
__________________
(kg/lb) |
||
 07-21-2021, 07:39 AM
|
|
|
I would rather be driving

Join Date: Apr 2000
Location: Austin, TX
Posts: 9,108
|
Glad to see builds like this still happening. Backyard shed. Home made jigs.
I am sure you had loads of fun climbing around the cage to cut rear seat pans out. Next you will be slotting the heel panel to fully circumference weld that torsion tube. Fun part is laying upside down for the underside. Don't forget to tie the tunnel and torsion tube for bonus points.
__________________
Jamie - I can explain it to you. But I can not understand it for you. 71 911T SWT - Sun and Fun Mobile 72 911T project car. "Minne" - A tangy version of tangerine #projectminne classicautowerks.com - EFI conversion parts and suspension setups. IG Classicautowerks |
||
|
07-21-2021, 09:55 AM
|
|
|
Registered
Join Date: Aug 2009
Location: Costa Mesa, CA
Posts: 1,181
|
Quote:
I dont have high confidence in my welding . so I went a bit overboard on the reinforcement. Fitting with the rest of the car at this point I guess. |
||
|
07-21-2021, 10:28 AM
|
|
|
Registered

Join Date: Oct 2005
Location: Idaho
Posts: 2,357
|
100% Awesome! I'm excited to follow along with your progress.
Best, Tom
__________________
'74 911 Red Sunroof Coupe, 3.6L, etc... '76 912 Yellow SPEC 911/911CUP |
||
|
07-21-2021, 03:56 PM
|
|
|
Registered
Join Date: Aug 2009
Location: Costa Mesa, CA
Posts: 1,181
|
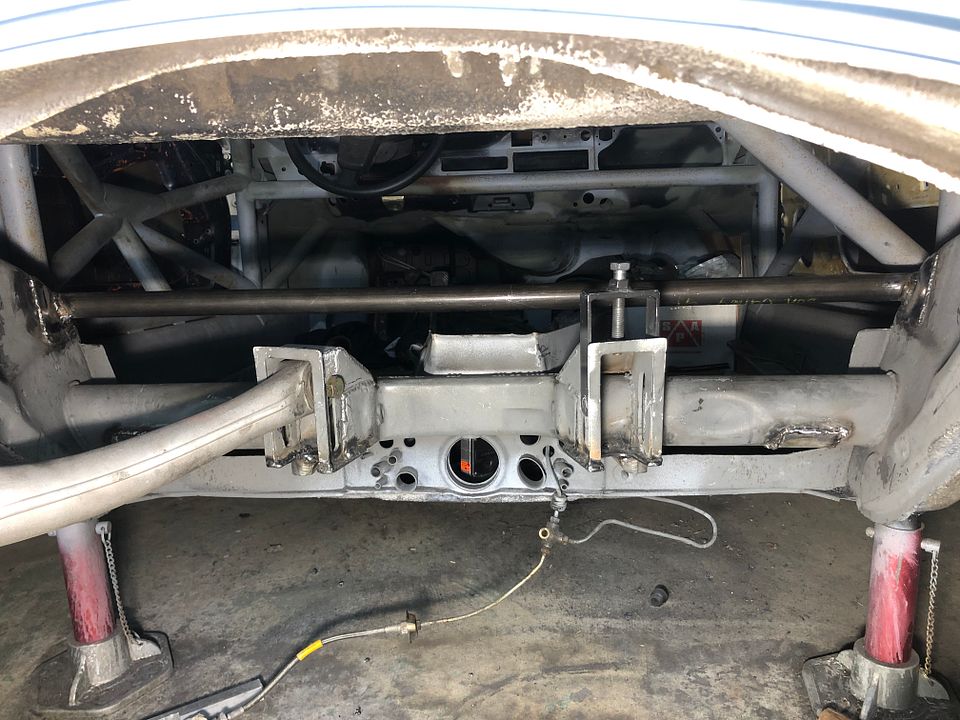
After welding in the G50 torque tube with plug welds to my inner sleeves and a butt weld to the stub of the old tube in the car it was time to mock up the wheel again and see if things still fit.
  With the wheel fitting about how it did before and feeling confident, I figured that meant I needed another chance to screw it up! Step 10, enter fixture number 2! 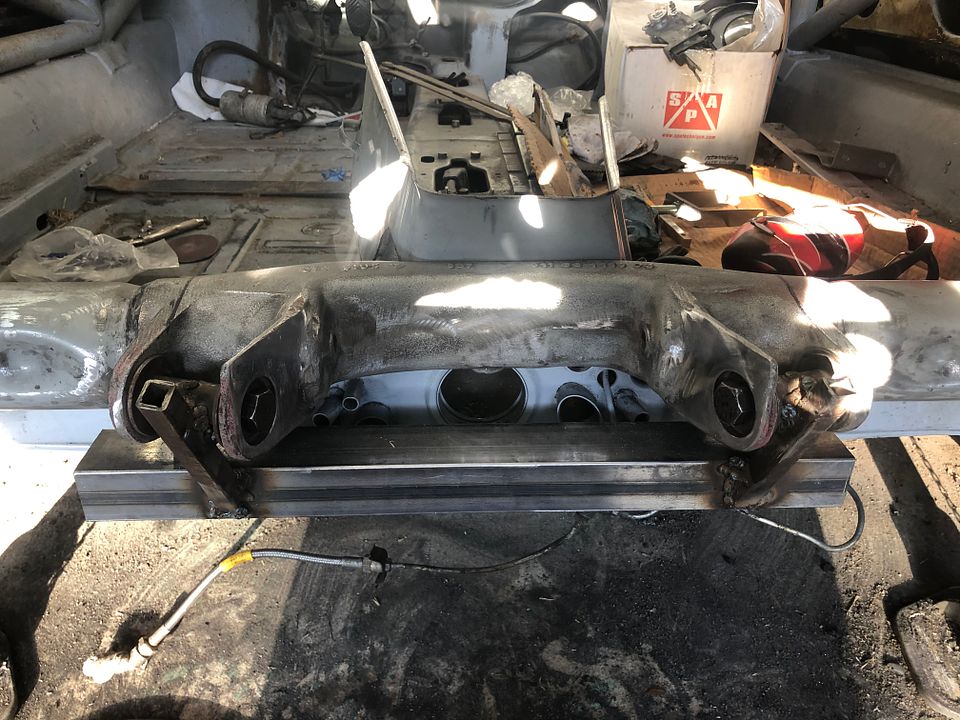 Step 11, mocking up my rough cuts. I kinda guesstimated on the angles but I laid the slider back slightly so that as the pivot point moves up, it moves back a little to maintain the same wheel base. 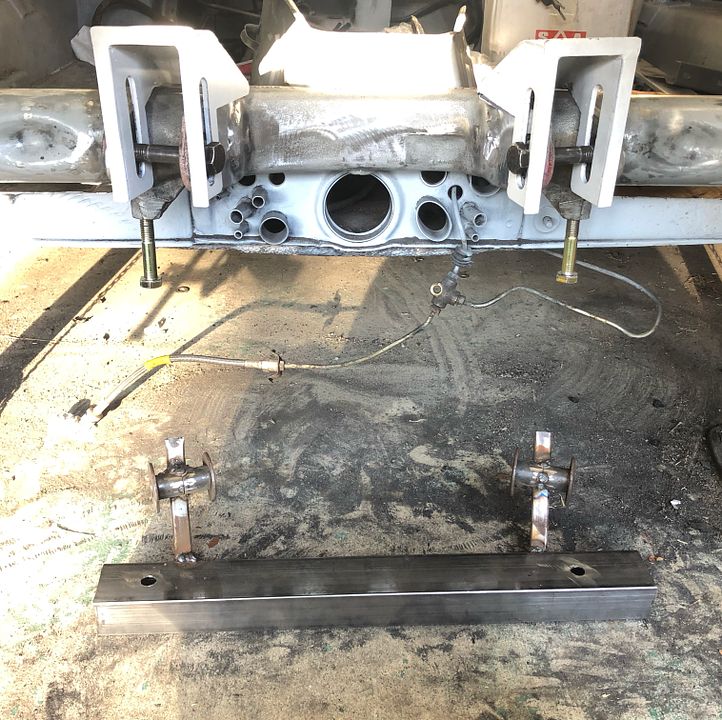 and cutting off some perfectly good mounting points. No going back now! 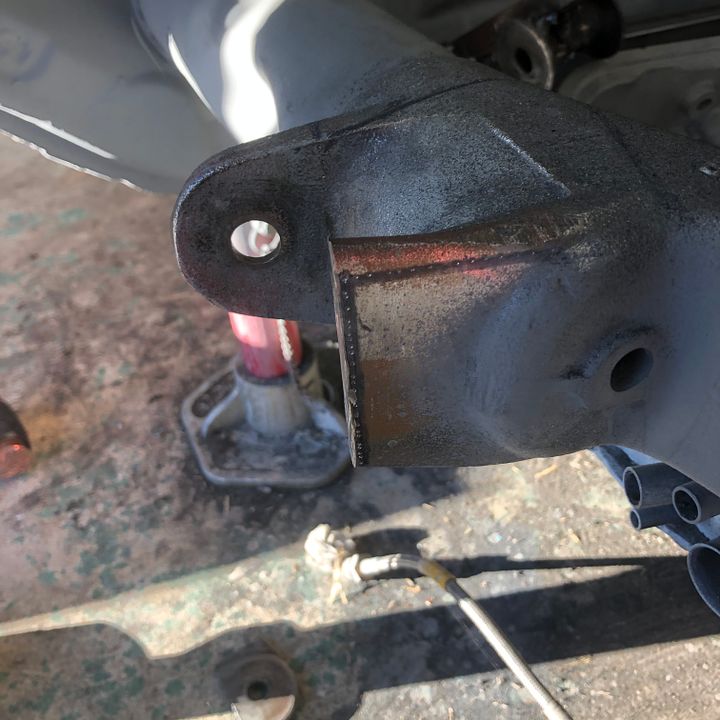 One down! 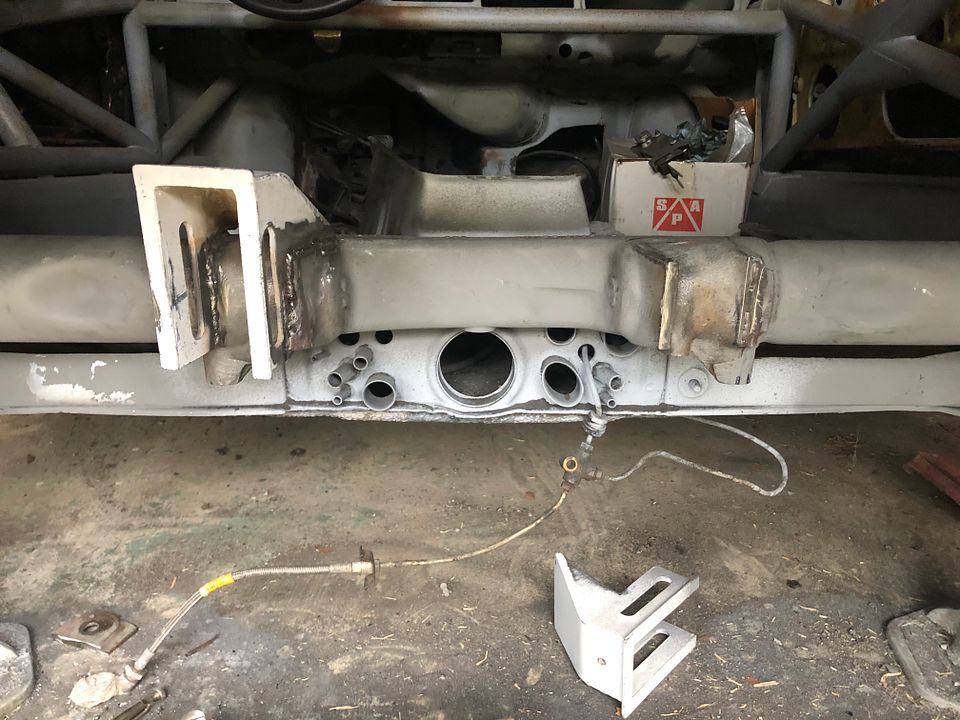 And the other side! 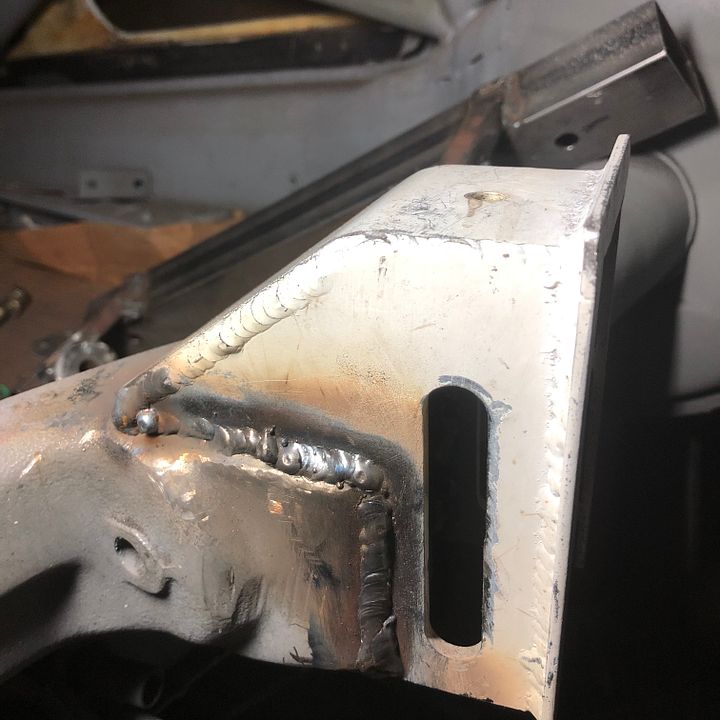 Are we on step 12 now? If some reinforcement is good, more is better! That seems to be the theme here. Call it PTSD from all the cracks I had to have welded up in my 914 auto crossing it on Hoosiers for a few years. I made these closing plates to reinforce the bottom of the box section of the camber box roll center correction thing. I should never need to bring the trailing arm down to the bottom of the range unless I put on Safari suspension some day but I made sure the arms would clear at full droop. 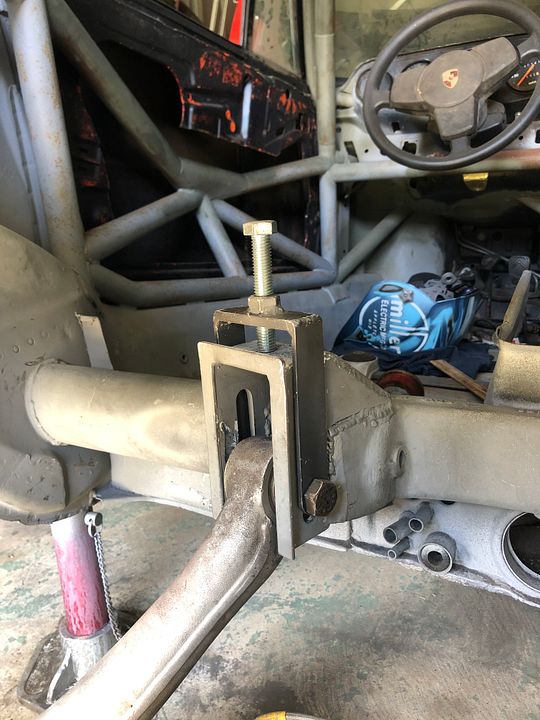 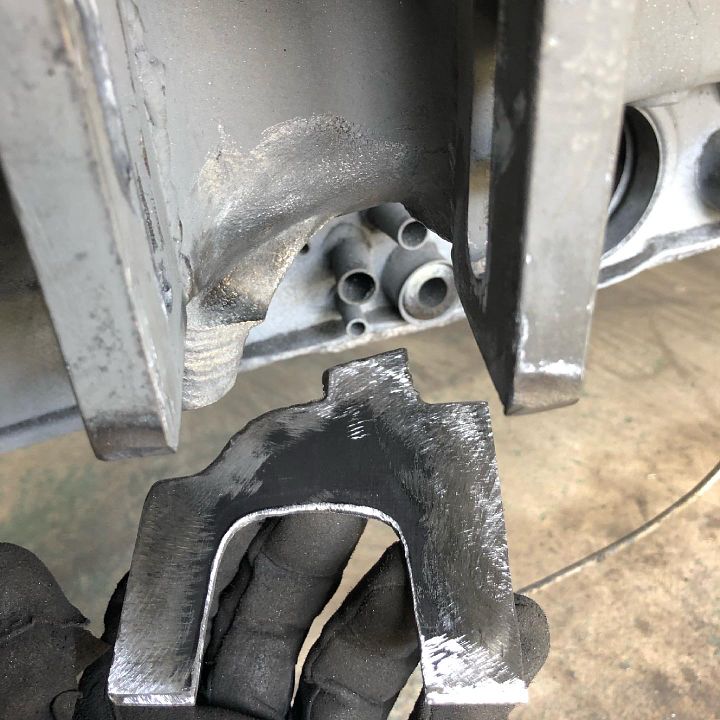 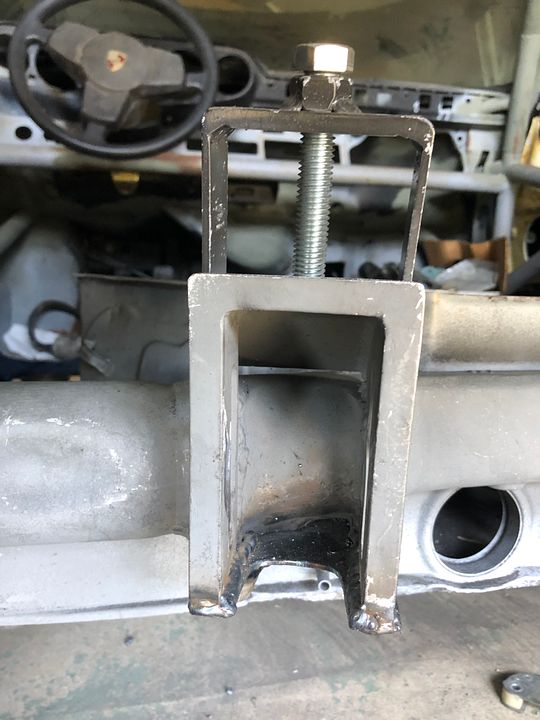
Last edited by Evan Fullerton; 07-22-2021 at 09:56 PM.. |
||
|
07-22-2021, 09:47 PM
|
|
|
(man/dude)

|
Quote:
I recently sold off one of my cars - it was "too nice" to play with and sorta ceased to be any fun for me. Builds like this one and cars that are a little less precious are still out there if you are willing to put in a little work, and WAY more fun than the numbers matching, COA touting, paint meter crowd. Keep up the great work and thanks for sharing!!!
__________________
Heavy Metal! Part Deux - The Carbon Copy Project Heavy Metal https://tinyurl.com/57zwayzw (SOLD) 85 Coupe - The Rot Rod! AX beater Quality Carbon Fiber Parts for Classic 911s: instagram.com/jonny_rotten_911 |
||
|
07-23-2021, 11:59 AM
|
|

|
|
scumbag
|
Quote:
My car is [mostly] numbers matching and I have a COA...and a thick coat of "paint".  Evan, I know the thread is close to real-time. The weekend is upon us! Let's see some progress.
__________________
My first Porsche - http://forums.pelicanparts.com/porsche-911-technical-forum/989493-my-low-budget-dream-car-build.html AchtungKraft #009 - IG: @doktor_b |
||
|
07-23-2021, 01:34 PM
|
|
|
Registered
Join Date: Aug 2009
Location: Costa Mesa, CA
Posts: 1,181
|
Not quite up to real time Chris but I am getting there.
I am pretty jealous of you guys with garages. Building this thing in a shed with no lights and needing to run a 50ft extension cord every time I need a power tool that isn't cordless relegates me to being a daylight hours weekend warrior...... well that and an at time demanding work schedule. This unscheduled optional build step to have exploratory surgery to remove a metal splinter that needed 20 stitches also slowed me down for a few weeks. Note to all those watching, sweep up the wire wheel bits off the ground before rolling around under the car again. After all these years one of those finally disappeared in deep enough I couldn't get it out. 
|
||
|
07-23-2021, 09:17 PM
|
|
|
Registered
Join Date: Aug 2009
Location: Costa Mesa, CA
Posts: 1,181
|
Back at project overkill, I needed a radius for the back seat sheet metal to make the turn from the vertical to sloped up to the firewall, why not use some 1 1/4" .065 tube. I also added a partial torque tube sleeve to the outside...... because I had some tubing the right size. It will make a nice jack stand pad.
 .....and I added some landing pads to the camber boxes/roll center correction for tubes to drop down from the shock towers. 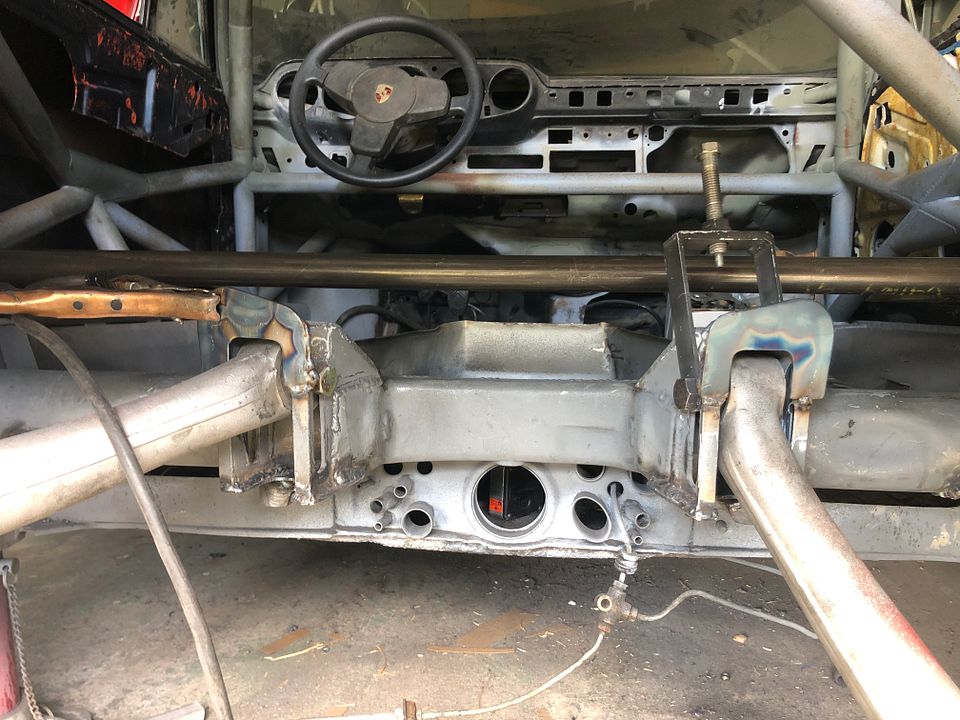 .....and of course the tubes I wanted to add fouled the heater ducts so those had to go. 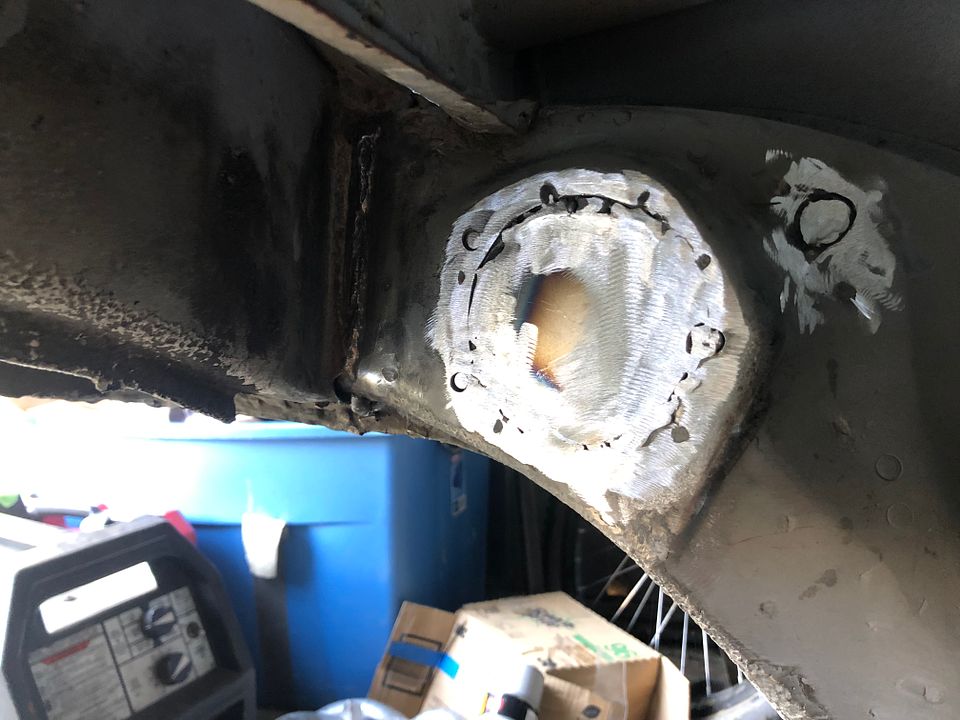 So this bar could go in.  Lots of fun coping tubes with an angle grinder. 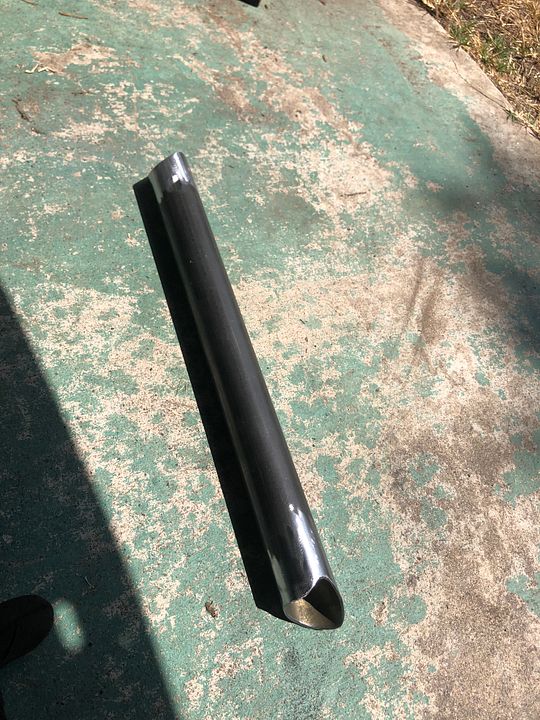 And....... for the complete overkill factor maximum triangle creation achieved. The welding could be better but I'm pretty confident nothing is going to fall off now. I'm still blaming PTSD of my 914 and e36 BMW both of which I cracked all the rear suspension mounting points on. 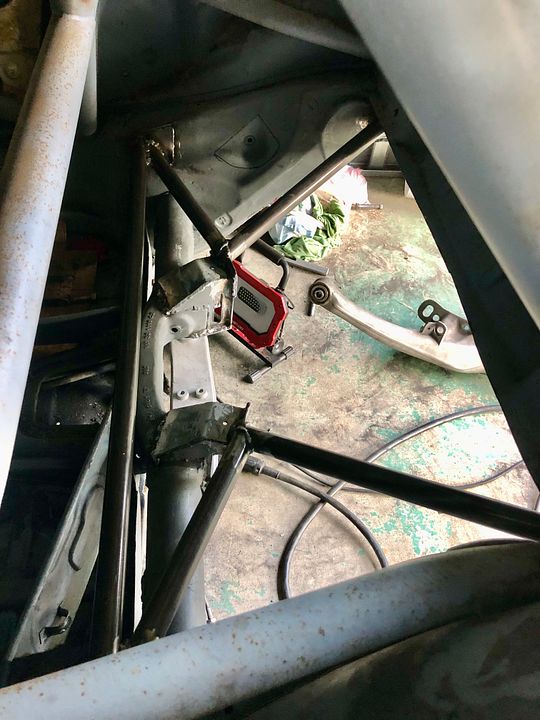
Last edited by Evan Fullerton; 07-27-2021 at 07:33 AM.. |
||
|
07-26-2021, 09:44 PM
|
|
|
scumbag
|
I like the n+1 approach to chassis rigidity overkill.
__________________
My first Porsche - http://forums.pelicanparts.com/porsche-911-technical-forum/989493-my-low-budget-dream-car-build.html AchtungKraft #009 - IG: @doktor_b |
||
|
07-27-2021, 05:14 AM
|
|
|
Registered
Join Date: Aug 2009
Location: Costa Mesa, CA
Posts: 1,181
|
With the trailing arm mounts sorta done, it was time to turn my attention to fitting the ERP 935 spring plates to match.
I should know by now that "bolt on" parts on cars does not imply that they fit, only the attachment method....... and so I now have 30 more hours of grinding, cutting, welding, and stripping under my belt. Yea for no hidden chassis cracks I guess.  but the round part of the torque tube sticks out too far for the bracket to sit flat on the threaded studs. So several hours of grinding got me here to where it would fit.  But the weld to the central tube had been ground through so I need to grind that back more and weld the end of the tube back to the car.... and the "while you are in there's" set in.  It got ugly........ things got warped, lessons were learned, not the least of which is I need to start wearing a real breather when welding on weld thru primer.  But lots more grinding and a little paint later..... it's not looking soooo bad and things fit!  A little undercoating back on there will hide the ugly. Now just repeat on the other side!  And then I started in welding the seat pan back together.   And that's how things will stay for a few weeks as I'm flying to Germany on Saturday to propose to my Girlfriend. Covid over the last year and a half really hasn't made the long distance thing easier but if we survived that..... I'm taking it as a sign. 
|
||
|
08-04-2021, 09:53 PM
|
|
|
Registered
|
Congrats on your upcoming proposal. German sports cars & German girls — probably a great combination. Safe travels.
|
||
|
08-05-2021, 04:50 AM
|
|

|
|
Registered
Join Date: Aug 2009
Location: Costa Mesa, CA
Posts: 1,181
|
Seeing as I'm off to Germany again for the Holidays, seems like a good time to update what slow progress I managed this fall.
The last trip was a success, she said yes! And now the race is on to get the car at least close to done before we get married.  but back to the car.... I must have 4 solid weekends getting these ERP spring plates fitted. Once finally getting everything to bolt on, I had to dent the chassis quite to bit to get clearance for the toe adjuster nuts to spin freely...... what a pain. I sure hope the raised roll centers help noticeably with squat and roll oversteer because they have added a TON of work.  Now that they fit, off they came again for drilling the old toe adjuster hole for the JWE swaybar.  and just like that it is a roller again!!!......... if but temporarily. Bonus news, the wheels are pointing the right direction with the ability to get some toe in still! LOTS of sweeping of the shed and vacuuming out of the car after nearly a year's worth of grinding, cutting, and welding dust.  In order to fit the new swaybar mounts, I mocked up the gearbox and after all this work, I am happy the G50/01 also fits! Knowing what I know now, I don't know as I would do a torque tube swap again. There is a reason SBH G50s are a thing but I wanted to be able to use all GT3 clutch and flywheel parts and I think I have achieved that other then come to find out modifications to the bell housing will be required to fit the late model starter..... more on that to come.   Using the JWE high clearance swaybar mounts I tucked everything up as high as I could with the 20mm bar. If I end up going bigger later, I can shim up the gearbox or down the swaybar. Clearance is tight but it is tucked up behind the trans crossmember.   With that job done...... the trans will go off to Tyson of ProMotorsports for a checkover and LSD instal. I don't think I want that aggressive of a lockup as I would like the car to still work at Autocross. We will have to see what option Matt at Guard has, maybe some 993 ramp angles? And now onto my next daft plan because I seem to like to make everything difficult. My headers like to occupy the same space as the factory S oil line and I need to do what I can to offset the beastly weight of the G50 so enter the 993 oil tank.... or rather 2 of them. One for me to play with and one that is out with a local fabricator to braze on AN-16 bungs on as many outlets as he can. A bit of an experiment to see how that goes.  The 993 tank fits in an early car well...... the pipe routing just becomes an issue. I think I have a good plan that involves a 993 tank with a 964 oil filter console, a 911 thermostat, custom hardline on the passenger floor, and modifying the oil tank to fill though the passenger door jam... but we will see. LOT more fabrication to come I am sure. 
Last edited by Evan Fullerton; 12-19-2021 at 10:50 PM.. |
||
|
12-19-2021, 09:55 PM
|
|
|
Registered
Join Date: Oct 2019
Location: Denver, CO
Posts: 188
|
Awesome stuff, can't wait to see more!!!
|
||
|
12-20-2021, 09:32 PM
|
|
|
Registered
Join Date: Aug 2009
Location: Costa Mesa, CA
Posts: 1,181
|
Progress has been slow but it has been happening!
Vertical part of the rear seats are back together  Bought a tubing bender for hard the oil line fabrication and reinforcing the front inner fender area similar to 964/993 and 911 Targa reinforcements  Still thinking I will weld some sheet metal between the reinforcement with some dimple die holes  Started mocking up the oil system for AN16.... I think the oil filter will stay here but the thermostat I think will end up in the smugglers box. Not a lot of room once all the giant AN16 lines are in there. I went with a 911 thermostat and a 964 oil filter console as there isn't much aftermarket setup for AN16 fittings and I like the pressure release circuit in the stock thermostat.  
|
||
|
03-26-2022, 06:35 PM
|
|
|
Registered
Join Date: Aug 2009
Location: Costa Mesa, CA
Posts: 1,181
|
Not that I have been particularly productive the last few months but I got some motivation today with getting my heads back from Bill at Xtreme after their extended Florida vacation.
Not cheap and a long wait but this is some mechanical art. 930 RR350 castings 42mm intake ports 39mm exhaust 53mm, 8mm stem Stainless intake valves 42.5mm, 8mm stem Inconel exhaust valves AASCO springs and Titanium retainers And of course twin plug These aught to help make some decent power.  
|
||
|
06-02-2022, 07:39 PM
|
|
|
Registered
Join Date: Feb 2011
Location: San Diego
Posts: 453
|
Things of beauty those heads.
__________________
(kg/lb) |
||
|
06-03-2022, 12:40 PM
|
|
|
Registered
Join Date: Aug 2009
Location: Costa Mesa, CA
Posts: 1,181
|
Working on this thing, I sure am tempted to buy a lot of tools. One day I will have a lathe, mill, and bandsaw at home but until then, it's hand tools.
Got one of the closing plates for my fender well reinforcements made. Dimple dies make everything look better!  Rear swaybar "nuts" for the JWE high clearance mounts   Got those knocked out so I could mount up the rear swaybar again to check for clearance with the proposed oil filter location/bracket. Anyone have a good reason why this is a bad place to put the oil filter? It clears all the suspension in full bump and droop, comes off fairly easily, should be reasonably well protected there, it's low, and running a 993 oil tank, space is somewhat limited without mounting it like a 964 which seems like running oil 3 sides of a square for no good reason.  
|
||
|
06-20-2022, 12:24 AM
|
|
|
scumbag
|
Evan,
That's where my fuel filter is. The only caveat I have to share is that it gets dirtier there than you'd expect. You have to clean up the area before you pull the filter. Otherwise, you encourage detritus to fall into the fresh filter as you install it.
__________________
My first Porsche - http://forums.pelicanparts.com/porsche-911-technical-forum/989493-my-low-budget-dream-car-build.html AchtungKraft #009 - IG: @doktor_b |
||
|
06-20-2022, 03:56 AM
|
|
|
Registered
Join Date: Aug 2009
Location: Costa Mesa, CA
Posts: 1,181
|
That’s, good feedback Chris. Hadn’t considered that aspect of it.
Really tempted to buy that GT3 Cup Motor on BAT today…….. that would solve my where to mount the oil filter and thermostat dilemma real quick. Haha. |
||
|
06-20-2022, 07:56 AM
|
|


 1979 Porsche ROW 911 SC
 P912E 3.0
