|
|
|
|
|
| Author |
|
|
Registered
Join Date: Feb 2008
Posts: 1,438
|
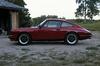
My toy is a '67S with glass rear bumper, front and rear lids and dash; lexan windows; aluminum window frames and aluminum inner panels behind the driver's seat. The window winder mechanism is gone, replaced with very light cable drive system. No undercoating at all, anywhere. I scraped then blasted away coating and vacuumed/blowed and still get occasional sand deposits through the tunnels after 6 years. Steel doors, front bumper and fenders. The Recaro sports seats have light weight support frame without tilt mechanism.
Vehicle weight with 150 lb driver, 8 gallons of fuel and 18 quarts of fuel (in an aluminum oil tank that wraps around spare tire in trunk (opposite of the battery)) is 2130 lbs with 43/57 distribution. I selected 20/25 mm torsion bars which for this car provide a balanced speed of 76mph. My next choice was 22/28 with a balanced speed of 69mph. "Balanced speed" is the vehicle velocity at which the car will rise at the same rate (front and rear) when hitting a bump. Original R's used 19/23 mm torsion bars.
__________________
Paul Abbott Weber service specialist www.PerformanceOriented.com |
||
 02-27-2008, 08:07 AM
|
|
|
Registered
|
Crossmember repair...this is boring...but needed.
Grady pointed out a missing piece of my updated aluminum crossmember
 As this is cast aluminum, a weld fix didn't make sense. The gap was greater than an inch and a welded "beam" might not have the strength to resist the tbar cover with a lateral load. I could have riveted a bridge across the gap, or dremeled into the aluminum and laid a strip of aluminum across the gap...and then used an adhesive to bond it in place. I recognize that the potential for much of a load on the repair will be minimal...but I want to fix it once. I decided to use steel, but tie it in to the structure (webbing) of the crossmember. I sorted through my steel rod, and ended up grabbing a 16 penny nail  The plan is to step drill into the aluminum and insert the nail, and bond in place.  First cut is the deepest  I gradually stepped up the drill bit size so that I didn't ruin the material needed to support the steel  Once I had the correct size  I'll use JB Weld to secure the reinforcement 
Last edited by speedo; 03-03-2008 at 06:34 PM.. |
||
|
03-03-2008, 06:26 PM
|
|
|
Registered
|
More
I cut the steel to length...it goes into the aluminum about 3/4s of an inch on both ends
  This will be stronger than the cast aluminum when done  And done...good clearance with the adjusting bolt reinstalled   ...sorry for the blurred picture...you get the idea. ...sorry for the blurred picture...you get the idea.Nice and solid...maybe this will help someone else with an "ailing" crossmember. Chances are that it was an errant ratchet that did the initial damage, but it won't happen to this side again. Last edited by speedo; 03-03-2008 at 06:35 PM.. |
||
|
03-03-2008, 06:33 PM
|
|
|
Registered
|
Rear suspension install
Last thing to do before flipping
 Rear control arm cleaned and painted...axle flanges ready to assemble  These are the replacement e-brake bushings...very stiff.  They need to be made more flexible to install...maybe soaking in very hot water  Bingo...soften right up and easy to install...note flanges cleaned and installed too  New bushings, modified SWB adjustable spring plates and tbar covers  
Last edited by speedo; 03-04-2008 at 06:21 PM.. |
||
|
03-03-2008, 06:45 PM
|
|
|
Registered
|
Assembly time
Grease and instal 28mm rears
 Control arms rebushed, springplates rebushed and installed   Adjustment bolts  Fresh dust guards  Installed  Finally the rear calipers...freshly rebuilt and powdercoated  
|
||
|
03-03-2008, 06:50 PM
|
|
|
Registered
|
Heater ducts need help
Nasty
 Sandblasted  Painted  New gasket needs to be trimmed to fit  And installed. I had to run a tap over the threads to remove undercoating and paint    Master cylinder and brakes next... |
||
|
03-03-2008, 06:54 PM
|
|

|
|
AutoBahned
|
Al front bar but steel rear arms?
Did you do anything special to get the JB Weld to stick to the Al? and... nice Cat Stevens/ P. P. Arnold / Keith Hampshire / Rod Stewart / Sheryl Crow song allusion |
||
|
03-03-2008, 09:43 PM
|
|
|
Registered

Join Date: May 2003
Location: Winnipeg
Posts: 750
|
The calipers were powder coated? They look great. Any info on the color?
Keep up the great work. Tim K |
||
|
03-04-2008, 07:21 AM
|
|
|
Slumlord
Join Date: May 2001
Location: Canada
Posts: 4,983
|
I'll say this diplomatically: the 'nail fix' is not in keeping with the quality of all your other work.
I'll put some thought into an alternate fix. I know what you've done will work, it just doesn't fit with all the great job you've done elsewhere. |
||
|
03-04-2008, 07:43 AM
|
|
|
Registered
|
Quote:

__________________
Robert Currently Porsche less (but the wife has 2) |
||
|
03-04-2008, 08:58 AM
|
|
|
Registered

Join Date: Dec 2003
Location: Arapahoe County, Colorado, USA
Posts: 9,032
|
Randy,
It is a SWB car (alu trailing arms won't fit) but Lars has modified some LWB adjustable spring plates to acomodate the SWB trailing arms. (He has another set for me.) The front is all late (LWB) front suspension - except the steering rack. I suspect that will become the later part after it is driven. Best, Grady
__________________
ANSWER PRICE LIST (as seen in someone's shop) Answers - - - - - - - - - - - - - - - - $0.75 Answers (requiring thought) - - - - $1.25 Answers (correct) - - - - - - - - - - $12.50 |
||
|
03-04-2008, 09:02 AM
|
|
|
Registered

Join Date: May 2004
Location: Encinitas (San Diego CA)
Posts: 4,495
|
Quote:
Do they make Aluminum SWB arms? Or are the 911 trailing arms all one size? In contrast to PBH, I think the JB weld fix was nicely done. I'm not sure what other cast aluminum repairs are really solid? Congratulations on approaching the finish line! It is looking great! Doug
__________________
1971 RSR - interpretation |
||
|
03-04-2008, 09:02 AM
|
|
|
Registered
Join Date: Dec 2003
Location: Arapahoe County, Colorado, USA
Posts: 9,032
|
Doug,
There are basically three 911 trailing arms for early cars ('89 and earlier). The SWB steel arm, the LWB steel arm for '69-'73 and the aluminum arm '74->. The '69-'73 and the '74-> will interchange with a few simple mods. You cannot use either LWB arms on a SWB car without changing it to LWB. That is a BIG deal. The mounts on the torsion bar tube are different location, the rear shock towers are larger and repositioned and there many parts to change (spring plates, axles, transmission axle flanges, rear fenders, rear quarter bumpers and much more). Within each of the three trailing arms there are some subtle differences - mostly the rear sway bar attachments. The racing versions of the steel arms (both SWB and LWB) were significantly reinforced. Many LWB racers changed to the Turbo trailing arms. That was dificult and expensive because it required different attachments to the torsion bar tube and more. The parts are now almost impossible to source. Best, Grady
__________________
ANSWER PRICE LIST (as seen in someone's shop) Answers - - - - - - - - - - - - - - - - $0.75 Answers (requiring thought) - - - - $1.25 Answers (correct) - - - - - - - - - - $12.50 |
||
|
03-04-2008, 09:20 AM
|
|
|
Registered
Join Date: May 2004
Location: Encinitas (San Diego CA)
Posts: 4,495
|
Grady,
That is what I had assumed (three versions) when I saw the steel arms. Once again you have confirmed an assumption. Thanks! Doug
__________________
1971 RSR - interpretation |
||
|
03-04-2008, 09:26 AM
|
|
|
AutoBahned
|
Yes - I'd forgotten it was a SWB car - as an excuse I'll cite the very long length of the thread. Not that I want to see less info or pics on this excellent build!
|
||
|
03-04-2008, 11:10 AM
|
|
|
Registered
|
Last of the rear suspension...and front brakes
I finally got the Bilsteins sports that were ordered...they went on without a hitch. The "butt end" upsidedown complete...
  The oil lines as they came off the car with a filthy master cylinder  starting to clean up the individual lines...before and after  I decided to retain the 19mm master cylinder and rebuild it. The exterior cleaned up easy enough  The basic ingredients of the rebuild kit  Inside ...after 41 years, it is pretty clean  open wide  All buttoned up...pretty painless 
|
||
|
03-06-2008, 06:15 PM
|
|
|
Registered
|
Elusive brake filler grommet...
FYI...the PET and Porsche are very vague on the 911/912/356 19mm master cylinder filler grommet. Local Porsche dealer claimed it didn't exist. Told me it only came with a new master cylinder...right. The local 356/early 911 shop couldn't find it in PET. My resource in Denver found the part number, but ordered the wrong part...twice. Stoddard suggested I swap out to a 23mm master cylinder...I resisted. That would have meant ...new lines, new brake fluid resevoir...etc. The early master cylinder has exits and coresponding lines specific to those exits and I didn't want to "frankenstein" the front brake system. I waited unpatiently and Dart finally found one (actually 4) on his shelves and sold me the correct one. This grommet needs to really be forced into the cup in the top of the master cylinder, and as the master cylinder is cleaned and painted on my bench...I wanted to do it the easy way instead of going ahead and installing the master cylinder without the grommet...and fighting to do the install (when the grommet finally surfaced)from under the car.
Last few pieces to put together including the right angle fill line and the elusive grommet  Installed  Now, master cylinder and remaining line bolt up easily    All done...  
|
||
|
03-06-2008, 06:30 PM
|
|
|
Registered
|
However...small problem
The idea of going from the heavy earlier steel crossmember to the later aluminum one was to shed weight. The brackets that support the early crossmember to the chassis are built onto the crossmember. Also built into the early crossmember are the holes for the front mount of the steering rack/suspension cover. The aluminum crossmember has seperate supports, and no facility for attaching the front of the cover. So, I need to make both the supports and create a to attach the cover. Here is the front of the cover...with nothing behind it to attach it to...
 Fabrication time...measure  Grab some flat stock  And start to shape it    I decided to notch the cover to allow acces to the bolts that secure the crossmember to the supports and allow the pan to lay flat.   Perfect  
|
||
|
03-06-2008, 06:41 PM
|
|
|
Registered
|
Almost there
The supports fit well, but now I need to create an attach point for the cover bolts
 Some barrel nuts 3/4" tall will work. Here are the shaped supports ready to have the nuts welded on...  And done   Trial fitment  Everything looks good, so they get trimmed, cleaned up and painted  Final fit...perfect  This thing needs to have some dents massaged out of it, get degreased and painted on the inside, then under coated  We come off the rotisserie this weekend....don't worry...no more "I rolled my car this weekend threads" 
|
||
|
03-06-2008, 06:51 PM
|
|
|
Registered
Join Date: Oct 1998
Location: Denver, CO
Posts: 1,335
|
So that's why you bailed outta work so early today. Looks like the shocks are figured out.

__________________
- '72 911T - '81 911SC Euro |
||
|
03-06-2008, 08:30 PM
|
|


 1974 Porsche 911 2.7
 1968 Porsche 911T
 1986 Porsche Carrera

