|
|
|
|
|
|
|||||||
 |
|
|
LinkBack | Thread Tools |
Rating: 
|
| Author |
|
|
Registered
Join Date: Aug 2002
Location: Tucson AZ
Posts: 1,119
|
I used heavy duty eye bolts, thru the engine mount bolt holes, fabbed a chain to them got the engine hoist connected to the chain and jacked it straight up and pulled that engine right out from under the car,..10 min. and it was free ....FM
|
||
 02-01-2008, 04:20 PM
|
|
|
Registered

|
Well done - great feeling removing the engine and gearbox at home, by yourself. Thanks to all who posted tips and articles here a few years back. Will get Wayne's book for my rebuild.
While you are in there......number 4 and 5 Replace "flapper boxes", the heater control valves Skim flywheel, check balance, fit Sachs clutch kit yourself Fit new gearbox mounts if your stick was shaking.
__________________
01 Maserati 3200 GT Assetto Corsa 84 3.2 cabrio - gleaming 99 Alfa Romeo 166 3.0 V6 super - still going 03 Fiat Punto 1.2 http://www.pelicanparts.com/gallery/rob911 |
||
|
02-01-2008, 04:28 PM
|
|
|
Registered

Join Date: Jun 2003
Location: Southwest Indiana
Posts: 217
|
Subscribed
__________________
'89 3.2 Carrera Coupe-Silver Anniversary-sold '06 GTI/DSG |
||
|
02-01-2008, 04:41 PM
|
|
|
Registered
|
Quote:
LET the impact wrench on the CV bolts be a lesson to all reading this....my buddy did the same thing recently...cost a few hours extra. At any rate, good luck on this. You'll find a lot of satisfaction in this project.
__________________
Ed Hughes 2015 981 Cayman GTS 6 speed,Racing Yellow Past:1984 911 Targa (Ruby), 1995 993C2 (Sapphire), 1991 928S4 |
||
|
02-01-2008, 06:39 PM
|
|
|
Registered
|
Subscribed...best of luck.
__________________
Michael 1987 3.2 Carmine Red Carrera 1995 Midnight Blue 993 C4 1957 Silver Speedster Outlaw (replica) |
||
|
02-01-2008, 07:35 PM
|
|
|
Registered
|
Excellent post. I'm following this one myself. I really need to drop mine to reach the many oil leaks and most likely replace the clutch. 100k+ miles on this one.
I have a question on the CV/axle bolt removal. Do you just remove the bolts at the tranny and let the axle hang down or do you remove both ends? I only ask because it appears (to the inexperienced) that the axles would interfere with the drop unless they are completely out of the way.
__________________
1979 Porsche 911SC Targa 1996 Porsche 993 C4S 2005 Porsche 996 Turbo S 2020 BMW X3M Competition 2003 BMW M5 |
||
|
02-01-2008, 07:59 PM
|
|

|
|
Tired Member

|
Quote:
__________________
Glenn Daily Driver - '78 911SC RoW Endurance Racer - '85.1 944 Street/Track Project - '86 951 Race Project - 944 Spec |
||
|
02-01-2008, 08:08 PM
|
|
|
Southern Class & Sass
|
Karma is finally paying me back. Yesterday I got the exhaust off. No torch, no snapped studs, no stripped bolts. Yeah, ½ the studs came out of the heads, but so what? I’d be fool not to replace every single exhaust stud anyway. Guess I'm due after 30 years of broken exhaust bolts and studs.
I did notice each bank has one black, oily, nasty, exhaust valve. One sports some early stalactite formations in the port. All the other exhaust valves sport the usual white-ish residue. Here's a shot of the RH exhaust ports. Note the valve on the right is black and sticky looking. The other two are white. 
__________________
Dixie Bradenton, FL 2013 Camaro ZL1 |
||
|
02-04-2008, 03:44 PM
|
|
|
Registered

Join Date: Dec 2004
Location: Novato, CA
Posts: 3,064
|
Quote:
ianc
__________________
BMW 135i. Nice. Fast. But no 911... "I will tell you there is a big difference between driving money and driving blood, sweat and tears." - PorscheGuy79 Last edited by ianc; 02-04-2008 at 07:32 PM.. |
||
|
02-04-2008, 07:29 PM
|
|
|
Registered

Join Date: Apr 2006
Location: Newcastle, WA
Posts: 966
|
I agree with ianc. If you try to remove the existing studs you might snap it in half and then you will have to drill out the remaining half with Christian's tool. I didn't get as lucky as you and only succcessfully removed 11/12 nuts from the studs. The one that snapped was my first one and it set me back a few months!
__________________
James 1969 911E Slate Grey 1981 911SC Wine Red 1997 911C4S Ocean Blue |
||
|
02-04-2008, 09:57 PM
|
|
|
Southern Class & Sass
|
Actually, since the heads will go to a machine shop, I thought I'd be bright and let them replace the studs.

__________________
Dixie Bradenton, FL 2013 Camaro ZL1 |
||
|
02-05-2008, 04:14 AM
|
|
|
Registered
Join Date: Jan 2004
Location: Charleston, SC
Posts: 821
|
Robert, Sounds like you are well on your way. I am signed up for March at CMP and have requested your assistance. Certainly looking forward to that. let me know if you need a hand before then.
__________________
Kevin '79 Coupe |
||
|
02-05-2008, 05:35 AM
|
|
|
Southern Class & Sass
|
Thanks Kevin,
__________________
Dixie Bradenton, FL 2013 Camaro ZL1 |
||
|
02-05-2008, 04:10 PM
|
|
|
Southern Class & Sass
|
They're off!
Between family and work, time for this project has been scarce. To rectify the situation, I took off from work today. The goal was to finish getting the heads off.
By 8:30am I had the valve covers off the engine.  By 4:00pm the engine looks like this. The heads are off and ready to go to the machine shop.  As you can tell, theres quite a bit of carbon in the cylnders. Number 1 looks extra nasty 
__________________
Dixie Bradenton, FL 2013 Camaro ZL1 |
||
|
02-08-2008, 02:52 PM
|
|
|
Southern Class & Sass
|
As the tear-down progressed, it became apparent which guides are leaking the worst. Each bank has one cylinder that stand s out for copious quantities of oil. For example, head #5 Nice and dry,
 And heres head #4. slick with oil. 
__________________
Dixie Bradenton, FL 2013 Camaro ZL1 |
||
|
02-08-2008, 03:00 PM
|
|
|
Southern Class & Sass
|
Questions
Now for a couple questions:
How does the chain look? Pretty good, or stretched to the limit?  How about the wear in these cam journals? Look acceptable? I cant catch anything with my fingernails. (My theory is this. If the journals look good, then the bearings are good too.) 
__________________
Dixie Bradenton, FL 2013 Camaro ZL1 |
||
|
02-08-2008, 03:04 PM
|
|
|
Registered

|
Rob:
Good information here! One dumb question, since I am late to the party, how did you get the engine from the floor to the engine stand? What was the strategy there? If one is working by himself, can you simply safely jack the engine up and put some blocks underneath then jack some more and blocks again? Looks like that clutch did need to be replaced and JIT too! Good luck with this one! Cheers 
__________________
Ed Paquette 1983 911SC 1987 944S 1987 944 Manual (Donated to the Nat. Kidney Foundation) 1987 944 Automatic (Recently sold to another Pelican) |
||
|
02-08-2008, 08:13 PM
|
|
|
Registered
|
Now there is an argument for regular use of Techron, and spirited driving to go with it. An engine should not have to collect carbon built up like that.
__________________
Ed Hughes 2015 981 Cayman GTS 6 speed,Racing Yellow Past:1984 911 Targa (Ruby), 1995 993C2 (Sapphire), 1991 928S4 |
||
|
02-08-2008, 08:35 PM
|
|

|
|
Make My Day
Join Date: May 2003
Location: Northern NY
Posts: 1,305
|
Rebuilding the top end in my spare motor soon, subscribed.
__________________
74 911S Targa ROW Building Designer/Business Owner |
||
|
02-08-2008, 10:14 PM
|
|
|
Registered
|
TibetanT,
I'll jump in here and tell you that the safest way is to use an engine hoist to get your engine from the floor to the engine stand. If you had some way of attaching a "come along" to the ceiling of your shop or garage that would also work. However "come alongs" can be tricky and they can get away from you when coming down... I just saw an ad in the new Harbor Freight catalog for a scissor bench that lays flat and will elevate to work bench height. I think it was $299.
__________________
Mitch Leland "03" 996 C2S-LS3 V8-480 HP "84" 911 Turbo Look-Sold w/ found memories |
||
|
02-09-2008, 07:16 AM
|
|
|
| Thread Tools | |
| Rate This Thread | |
|
|


 1984 Porsche 3.2 carrera cabriolet 3.2
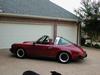 1984 Porsche 911 Targa 3.4L
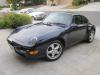 Sapphire
 2020 BMW X3M competition
 1979 Porsche 911SC
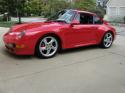 1996 Porsche 993 C4S
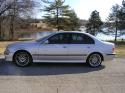 2003 BMW e39 M5
 2005 Porsche 911 Turbo S
 "The Porsche"
 Endurance Racer
 944 Spec "The green car"
 Scalded Cheetah?
 My Camaro
 1983 Porsche 911SC Targa
 Eggplant
 2003 Porsche 996 C4S
 Interior
 996 C4S - LS3 V8
 006 C4S - LS3 V8
 LS3/480 HP


