|
|
|
|
|
| Author |
|
|
Moderator

Join Date: Dec 2001
Posts: 9,569
|
Mark, great! I have an important question. What did the finish look like before the black dye? A yellowish "chem film" appearance? Did you take any photos of the process at that step? This relates to the finish on my carb manifolds.
__________________
'66 911 #304065 Irischgruen 96 993 Carrera 2 Polarsilber '81 R65 Ex-'71 911 PCA C-Stock Club Racer #806 (Sold 5/15/13) Ex-'88 Carrera (Sold 3/29/02) Ex-'91 Carrera 2 Cabriolet (Sold 8/20/04) Ex-'89 944 Turbo S (Sold 8/21/20) |
||
 05-08-2009, 05:31 PM
|
|
|
Registered
|
This stuff is soooo friggin' cool. It also makes me really upset that the PO replaced the original 2.4 MFI motor with a 3.0 CIS. Well, maybe not entirely, I could really enjoy a 3.0 MFI
 Keep up the great work! Keep up the great work!
__________________
1973 911T | Four owner car | My stewardship (2008-Present) 1972 VW Super Beetle | Two owner car always in the family | Gone, but not forgotten |
||
|
05-08-2009, 05:32 PM
|
|
|
Registered User
|
John, I was too worried about the timing of all the dipping process's so I did not get any pictures during the Mag treatment dip. But, Yes the color was a yellowish to light yellow/gray chem film look. I actually liked the color after that dip but had the black dye all warmed up to 140 degrees and ready, so I dip it in for the black color. I was a little lean on the black dye mix so the color, as you can see, is a very light coat of black. I know what to do next time for a darker color. The photo's don't show the inside of the pump head very well and that area turned out great. Very clean and smooth inside the whole fuel head. Next step: Put it all back together and calibrate.
__________________
Mark Jung Bend, OR MFI Werks.com |
||
|
05-09-2009, 08:04 AM
|
|
|
Registered
Join Date: Sep 2007
Posts: 500
|
Mark - Pump looks great - looks like you've retained (recreated ?) that lovely black factory finish!!
Do I understand that you ran the pump through the alodine and dye treatment with the rack bush and fuel in/out threaded bushings (epoxied) in situ ? They don't appear to have take on any colour, or other ill effects, or were they cleaned post treatment? I took a look at the Henkel site and MSDS - carefully does it with the Cr6 !!! Well done, and thanks again for posting the gritty details. John |
||
|
05-10-2009, 03:12 PM
|
|
|
Registered User
|
John, I called Henkel and told them about the steel parts that I couldn't remove from the Mag assembly, and they said it shouldn't be a problem. And it wasn't, and turned out great. Cleaning up all the piston assemblies now and waiting for the pump to govern housing gasket to arrive from Gus. Hope to start putting it back together this week.
__________________
Mark Jung Bend, OR MFI Werks.com |
||
|
05-10-2009, 04:26 PM
|
|
|
Registered User
|
Some pictures of the MFI pump pistons and cylinders after cleaning the corrosion from them. Notice the "number" on the pistons. The pistons on this 2.2E pump are numbered "1/403 004" for number 4-5-6, and "1/303 030" for numbers 1-2-3. The cylinders are numbered "02" for 1-2-3 and "90" for 4-5-6.
     
__________________
Mark Jung Bend, OR MFI Werks.com |
||
|
05-11-2009, 06:17 PM
|
|

|
|
Registered
Join Date: Sep 2007
Posts: 500
|
Piston & cylinder Markings
Mark - the numbers on your pistons and cylinders are abbreviations
For 2.0 and 2.2L 1 418 303 030 1 418 403 004 and for 2.4L+ expect 1 418 303 033 1 418 403 005 l'd expect additional markings for tolerance groups to aid match sorting and assembly at the factory for the extremenly fine clearances required of this assembly. It is refered to in the repair instructions (P19, to the right of figure 47) as VDT-WJP 011/3B - I don't have a copy of the doc. |
||
|
05-11-2009, 07:37 PM
|
|
|
Registered User
|
Thanks John. So maybe the numbers "90" & "02" on the cylinders could be the tolerance group markings? I will check through my manuals tomorrow.
__________________
Mark Jung Bend, OR MFI Werks.com |
||
|
05-11-2009, 08:26 PM
|
|
|
Autodidactic user

Join Date: May 2003
Location: Summerfield, NC
Posts: 1,298
|
Quote:
 Thanks to John and Mark, the answers are getting less elusive. Thanks to John and Mark, the answers are getting less elusive. A fairly bad copy of the "repair instructions" John refers to can be found here. If anyone has any of the the missing documents or manuals, or better copies of the one's we already have, (posted here) please send me a PM and I'll make sure we get it posted to help us all. Thanks again for this great thread Mark.
__________________
Please help the MFI community keep the Ultimate MFI resources thread and the Mechanical fuel injection resource index up to date. Send me a PM and I'll add your materials and suggestions. 1973 911E Targa (MFI) |
||
|
05-12-2009, 02:56 AM
|
|
|
Registered User
|
David, I was lucky to have a good copy of the Repair Instructios EP VDT-WJP 711/1B.
Reading pages 15 thru 22 last night so I can get the plungers/pistons and realted parts back in place. This will be fun. I will measure the plunger OD and document it because I remember John or Philippe had information on larger OD assemblies for some of the racing pumps.
__________________
Mark Jung Bend, OR MFI Werks.com |
||
|
05-12-2009, 08:02 AM
|
|
|
Registered
Join Date: Sep 2007
Posts: 500
|
Plunger diameters
Mark
The pump plunger diameters are easily identified by the pump part number nomenclature Pump Nomenclature PED6KL & PES6KL applications PES8KL applications The normally aspirated Porsches (inc RSR, 906 to 917) used PED6KL or PES6KL with 6mm (except for the 901/21 used in type907 which was 7mm). Turbos (eg 917, 935) may have used 7mm (I don't have any pump reference numbers...yet) 7mm was commonly used in PES6KL pumps for NA Mercedes. The AM and MB V8's used a 7.5mm assembly. |
||
|
05-12-2009, 03:17 PM
|
|
|
3 restos WIP = psycho
Join Date: Feb 2005
Location: North of Exit 17
Posts: 7,665
|
"Studly" is the only descriptor for this effort.
__________________
- 1965 911 - 1969 911S - 1980 911SC Targa - 1979 930 |
||
|
05-12-2009, 04:36 PM
|
|
|
Registered User
|
Thanks John, I measured mine this morning anyway and of course got 6mm OD on the plunger/pistons. Great information on the documents you posted. I'm printing those right now and I'm sure David is too.
Quite the challenge assembling the main rack and plungers; clamps; cylinders; etc. I was hoping to get all 6 in this evening, no way. Lots of measurements have to be checked and adjusted in this procedure. Great leaning experience.
__________________
Mark Jung Bend, OR MFI Werks.com |
||
|
05-12-2009, 06:13 PM
|
|
|
Registered
Join Date: Sep 2007
Posts: 500
|
Another reference
Mark - a reference as to the markings on the pistons/cylinders - this one from EP EVP 711/1 Service Parts/Fuel Injection Pumps
 Regards John Last edited by jcge; 05-13-2009 at 03:31 PM.. Reason: Added URL |
||
|
05-13-2009, 03:24 PM
|
|
|
Registered User
|
It's amazing how important the OD of the plunger rollers are for the right height of the plunger. 15 different size's from 14.4mm to 16.08mm.
__________________
Mark Jung Bend, OR MFI Werks.com Last edited by 356RS; 05-23-2009 at 08:08 AM.. |
||
|
05-13-2009, 03:37 PM
|
|
|
Registered
Join Date: Sep 2007
Posts: 500
|
Increments of 0.12mm to achieve lash at TDC (OT) of 0.5mm to 0.6mm
|
||
|
05-14-2009, 03:06 PM
|
|
|
Registered User
|
Last Friday I finally finished the reassembly of the 2.2E pump that was corroded. Installing the plungers was a challenge for the first three but finely figured out the correct assembly procedure and the rest were easy. The manual does not really help that much, especially on the orientation of the plungers base that fits into the cam roller. And also the fine wound spring that connects the base to the plunger. For a moment I thought that I should wind it up one full turn? Well I found one real good reason for that so I installed them in a neutral position. Photos of the process as of Friday. Finished the rest this weekend and will start calibration. More to follow..
      
__________________
Mark Jung Bend, OR MFI Werks.com |
||
|
05-18-2009, 11:22 AM
|
|
|
Moderator
Join Date: Dec 2001
Posts: 9,569
|
Mark, I was corresponding with Bosch today, they are searching the archives for the english-language repair manuals.
__________________
'66 911 #304065 Irischgruen 96 993 Carrera 2 Polarsilber '81 R65 Ex-'71 911 PCA C-Stock Club Racer #806 (Sold 5/15/13) Ex-'88 Carrera (Sold 3/29/02) Ex-'91 Carrera 2 Cabriolet (Sold 8/20/04) Ex-'89 944 Turbo S (Sold 8/21/20) |
||
|
05-18-2009, 11:47 AM
|
|
|
Registered User
|
I hope they find some John. That would be great news.
__________________
Mark Jung Bend, OR MFI Werks.com |
||
|
05-18-2009, 12:38 PM
|
|
|
Autodidactic user
Join Date: May 2003
Location: Summerfield, NC
Posts: 1,298
|
Quote:

__________________
Please help the MFI community keep the Ultimate MFI resources thread and the Mechanical fuel injection resource index up to date. Send me a PM and I'll add your materials and suggestions. 1973 911E Targa (MFI) |
||
|
05-18-2009, 12:54 PM
|
|
 |
|
|
| Tags |
| calibration , mfi |


 1973 Porsche 911
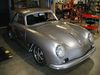 1957 Porsche 356 A Coupe 2.7 Short Stroke
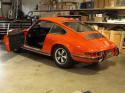 1972 Porsche 72 Coupe

