|
|
|
|
|
| Author |
|
|
Registered User
Join Date: Oct 2010
Location: BRONX NY
Posts: 1,485
|
Ok I am drooling now.........
__________________
Tony 91 964 c2 black/ Work in progress/Finally back on the road 85 EURO 930 Black slightly moded slowly reviving her 77 911tt EFI wide body red/ Slightly modified  SOLD SOLD
|
||
 01-03-2013, 08:42 PM
|
|
|
Registered
|
powder coat the exterior mirror? NOPE as the oven temps are too high. Good catalyzed epoxy paint will have to do.
nice project and thanks for sharing
__________________
1970 914-6 street"evil cockaroach" 1970 911 Targa "ST" Jade Green IROC Tribute (ready to race) |
||
|
01-03-2013, 08:47 PM
|
|
|
non-whiner

Join Date: Aug 2012
Location: Slightly right of center
Posts: 5,235
|
Thanks, Dave, I thought that might be a problem.
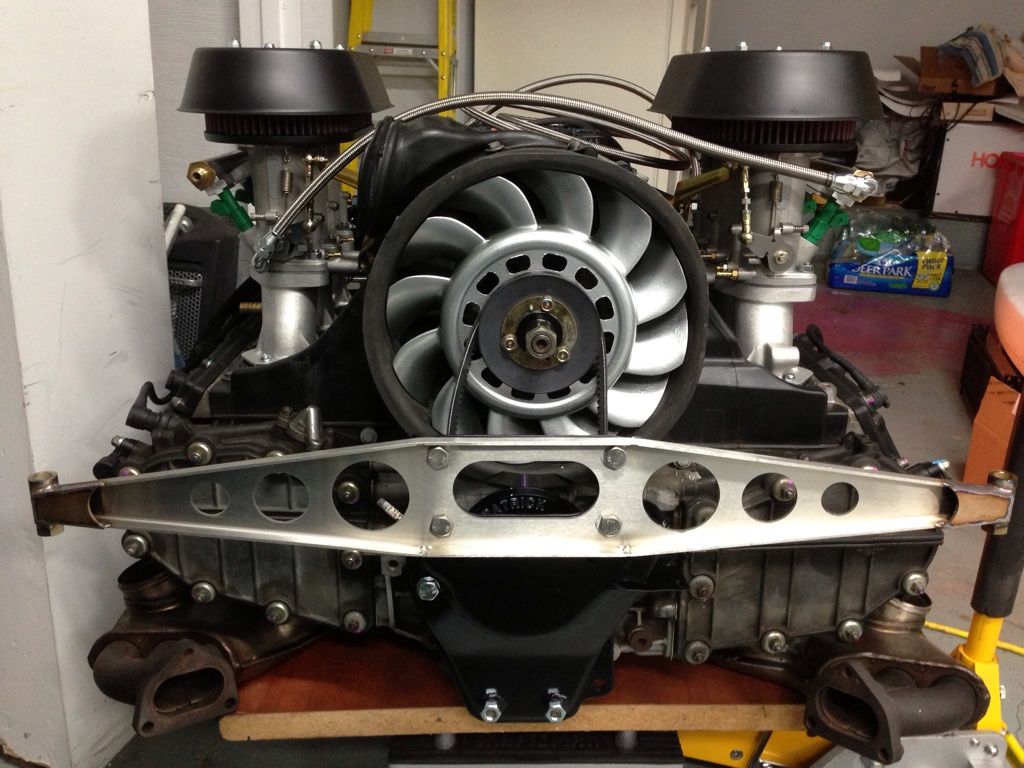
Today was the first moment of truth. 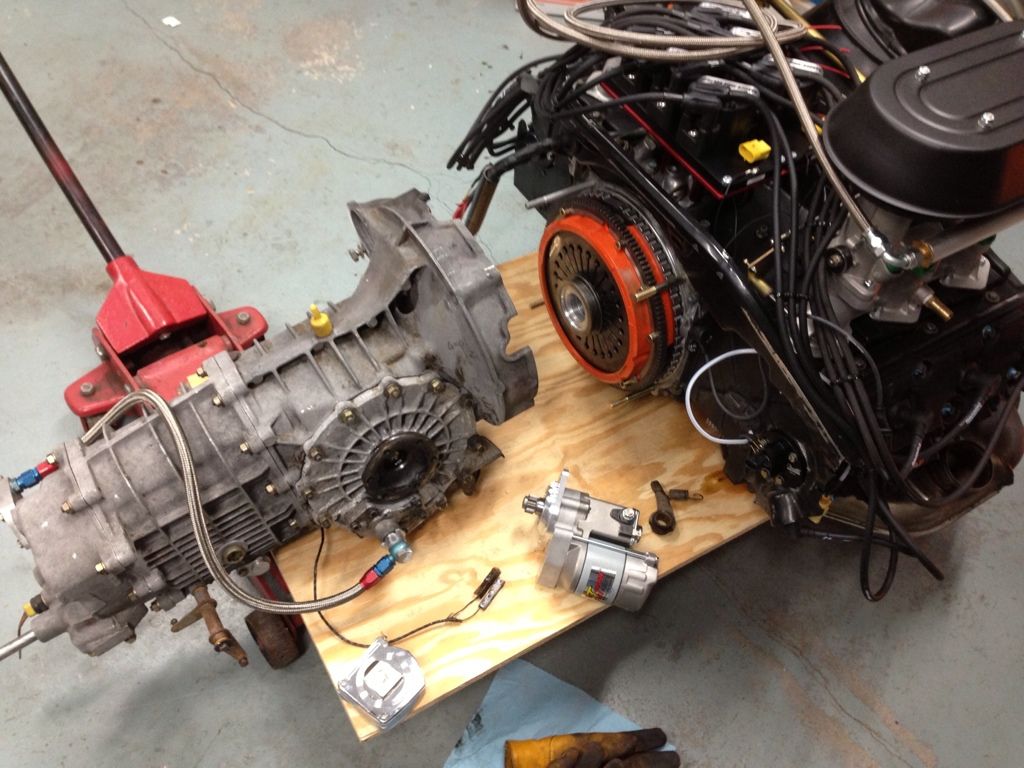 I've always felt there are three big milestones in any build: 1. Installing the engine 2. First start 3. First drive I guess attaching the tranny is often one of the more challenging parts of getting the engine ready.  This one slid right in with only a little hesitation as I made sure the fork engaged the t/o bearing properly and I turned the output flange slightly until the splines on the input shaft lined up and it went right in.   My hardware is pretty crusty. I think the barrel nuts are the same ones used on the heads? I'll have to check that out. 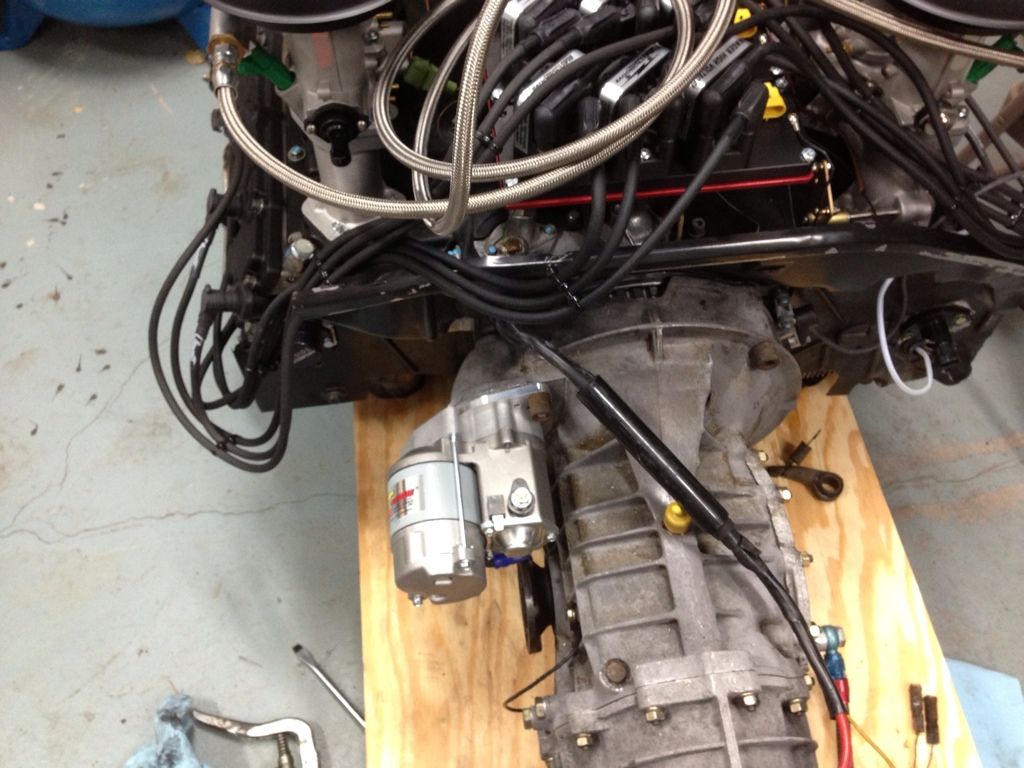
__________________
"Too much is just enough." Last edited by mreid; 01-04-2013 at 08:02 PM.. |
||
|
01-04-2013, 07:58 PM
|
|
|
PhD on Pending Projects

|
Quote:
 that looks frigging sick! that looks frigging sick!
__________________
Drive safe! 1967 - Porsche 912 1981 - Porsche 911 SC 1991 - Porsche 911 C4 Wide-body Cabriolet |
||
|
01-05-2013, 07:41 AM
|
|
|
non-whiner
Join Date: Aug 2012
Location: Slightly right of center
Posts: 5,235
|
Spent most of today preparing the rear quarter panels. The driver's side was pretty straight forward. A little more grinding and I can finish stripping the paint, smooth, and prime the panel.
  Its almost a perfect fit. The passenger side on the other hand, required a good 6 hours of work.  I had to split the panel and reconture it to match the rear bumper, cut the bottom flange off to make it parallel to the bumper flange, and fabricate and weld a new one back on. It was a real pain, but it will look good once the body work is finished. It was interesting that the drivers side stamping was nice and crisp, while the passenger side looked like the stamping form was worn out. No crisp corners or straight flanges. All part of the fun. I want to be on the road in the late Spring, so chop-chop! Got to move it!
__________________
"Too much is just enough." Last edited by mreid; 01-07-2013 at 03:55 PM.. |
||
|
01-06-2013, 05:09 PM
|
|
|
non-whiner
Join Date: Aug 2012
Location: Slightly right of center
Posts: 5,235
|
This pile of goodies showed up on Friday.
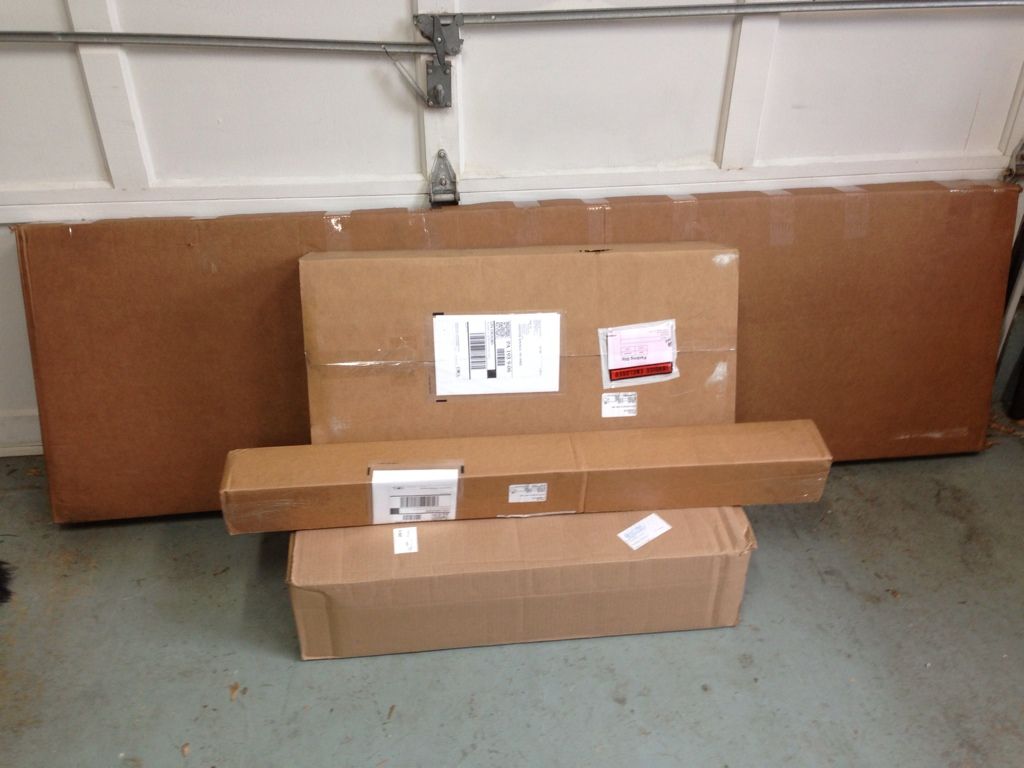 Looks like an elephant took a big dump!  Suspension and oil lines. Brakes got here last week. Man, the projects just keep piling up! |
||
|
01-12-2013, 01:56 PM
|
|
|
Brando

|
What a fun build
__________________
Turbo powa! 1977 911s. it's cool |
||
|
01-12-2013, 02:53 PM
|
|
|
Air Cooled
|
Sweet!! I'm doing an ER suspension rebuild right now. Realized how crushed my oil tubes are....so I'll be ordering the same set you've got soon. Good luck and have fun!
__________________
'78 911 SC "Blackjack" & '76 914/4 2.0L "The Brat" - - '99 Honda VFR800Fi, '98 Honda SuperHawk '88 Honda Hawk GT, '77 Honda CB750K Cafe '69 Honda CL350 |
||
|
01-12-2013, 02:58 PM
|
|
|
non-whiner
Join Date: Aug 2012
Location: Slightly right of center
Posts: 5,235
|
Thanks men!
Craig, I've been following your suspension build closely. Really nice job! I think I'm ready. Of course I'm doing brakes at the same time. |
||
|
01-12-2013, 04:19 PM
|
|
|
1984 Porsche Carrera
Join Date: Dec 2012
Location: Adelaide, South Australia
Posts: 321
|
Nice work Mark did you go Bilstien sports all round
|
||
|
01-12-2013, 04:26 PM
|
|
|
non-whiner
Join Date: Aug 2012
Location: Slightly right of center
Posts: 5,235
|
That I did, Oz, that I did. Also 22/29 on the TBs. Got to account for the larger engine and need for speed!
__________________
"Too much is just enough." |
||
|
01-12-2013, 06:44 PM
|
|
|
non-whiner
Join Date: Aug 2012
Location: Slightly right of center
Posts: 5,235
|
This pile of crap is actually really good news.
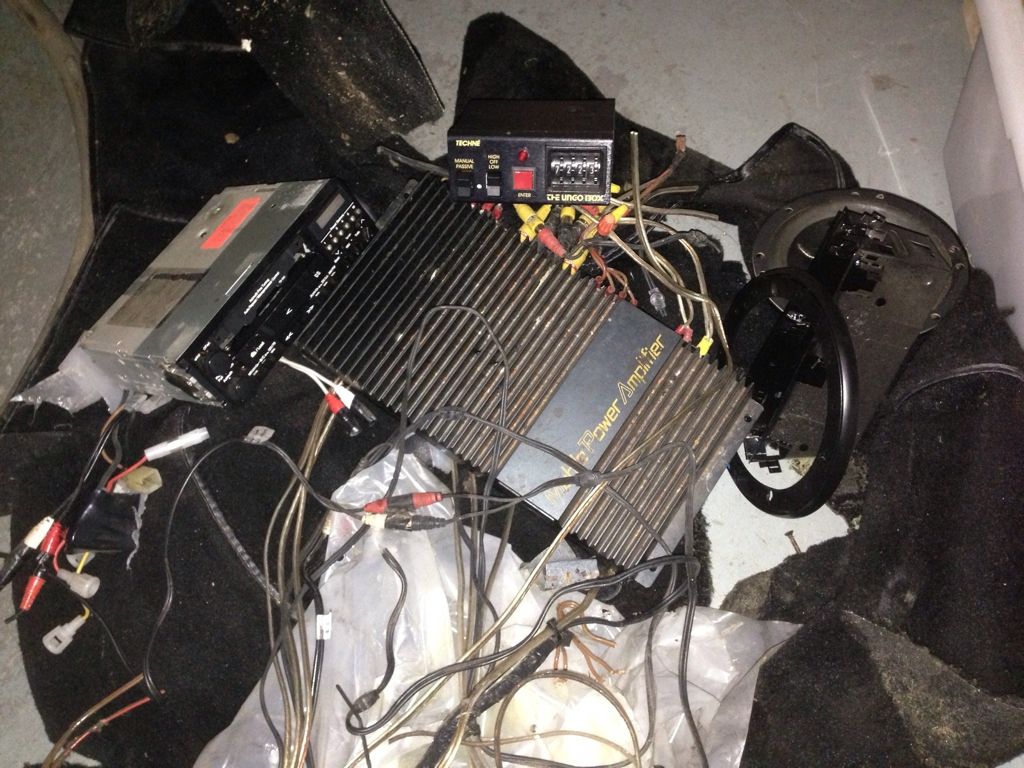 You see that demon box from Hell in the upper center? Innocently calling itself the Ungo box, it is just that. It was installed in the 80's and turns your car into a lump of dead meat. I bought the car and didn't realize it was lurking in the glove box. First time I went to start it after I got it home and the battery was dead. This evil medusian device interpretted that as someone attempting to steal the car and shut everything off except a low pitched stuttering growl eminating from the front bumper. I couldn't figure out what that was until I attached the battery charger and the growl turned into a full fledged blarring of both horns. The beast was sounding the alarm! To make a long, woeful tail short, it turns out the failing 1980s installed stereo amp had gotten wet and shorted out drawing battery current when the ignition was off. I spent two hours last night removing the entire mess including the two door speakers that were completely blown. Who ever wired the devil box used 18 gauge black wire for everything, so tracing the wires was a royal pain. They also used those should be outlawed blue clamp splices to tie into the horns, battery power and ground. They even used the same wire to cut the starter wire at the plug below the ignition switch. I found everything and ripped it all out. Very satisfying!!! Here's the result:  You can barely see the plug with the cut yellow start wire hanging to the left of the steering wheel. I left it out so I remember to splice it back together. On a happier note, my BB 1 3/4" headers showed up today! 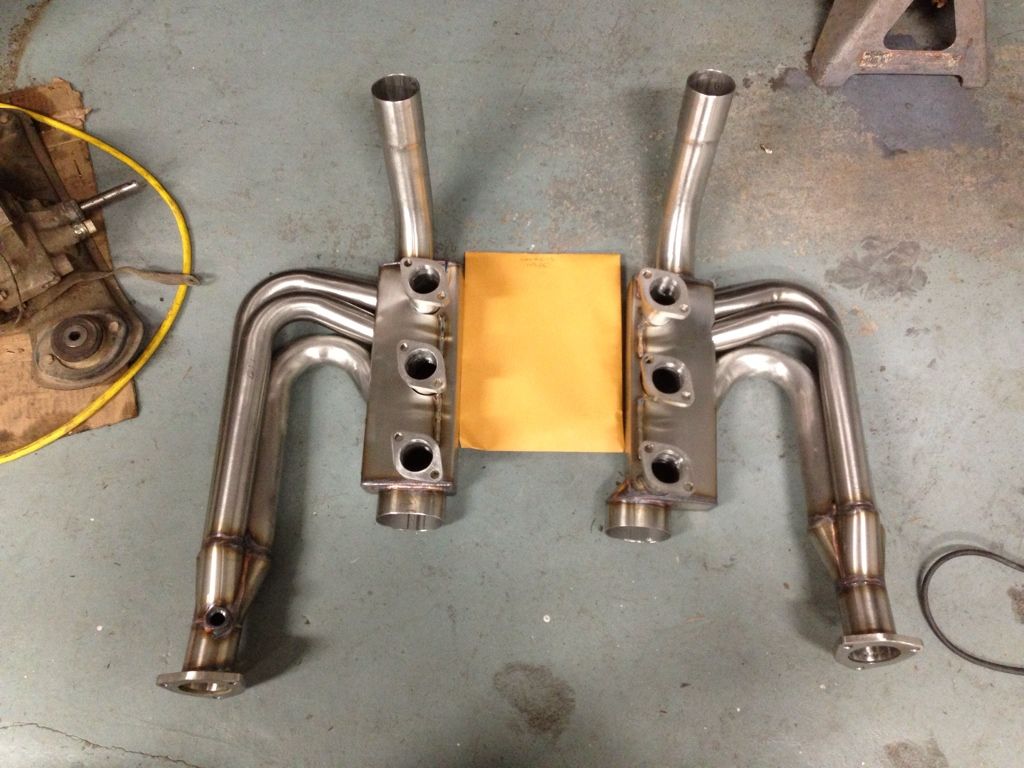 Now that is exciting!
__________________
"Too much is just enough." |
||
|
01-15-2013, 02:50 PM
|
|

|
|
Mike Ginter

Join Date: Aug 2001
Location: Denver CO.
Posts: 564
|
Those are pretty. Nice build man!
__________________
Ginter's 914 stuff |
||
|
01-15-2013, 06:36 PM
|
|
|
non-whiner
Join Date: Aug 2012
Location: Slightly right of center
Posts: 5,235
|
Thanks Gint. It's a labor of love and I wish I had more time to work on it.
|
||
|
01-16-2013, 05:49 PM
|
|
|
non-whiner
Join Date: Aug 2012
Location: Slightly right of center
Posts: 5,235
|
Started the suspension and brake overhaul today. Got the driver's side apart and rebuilt the trailing arm.
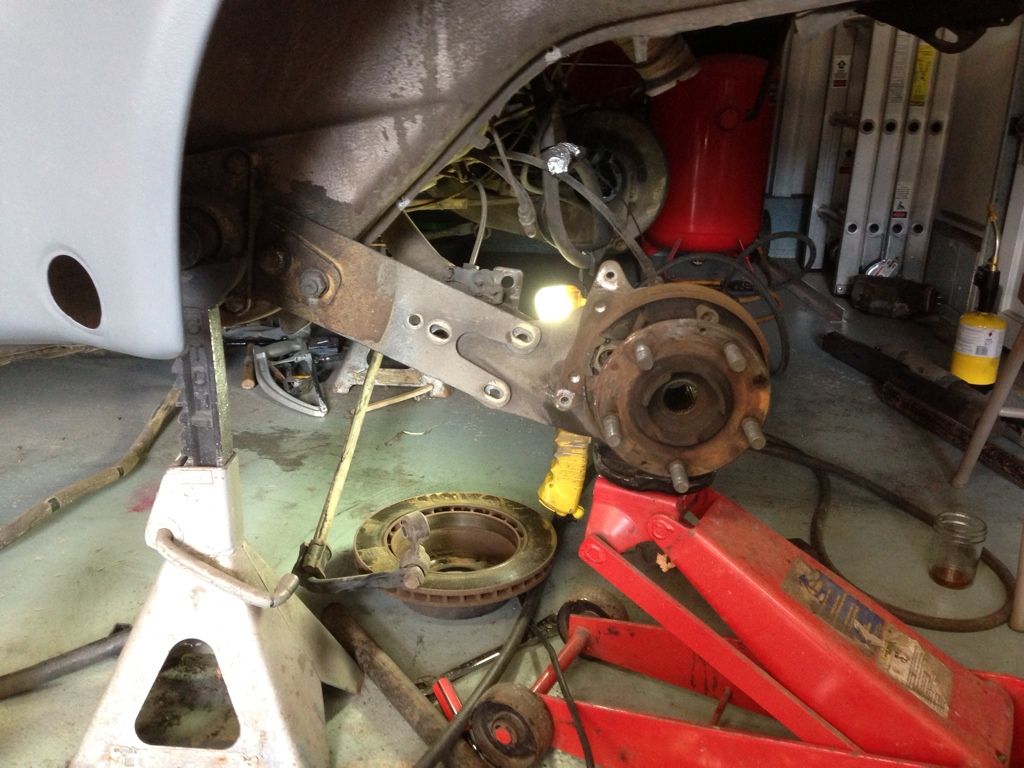 When I pressed the hub out, half the inner bearing race came with it.  Fortunately, there was just enough of a lip that I could grab it with the puller and off it came. 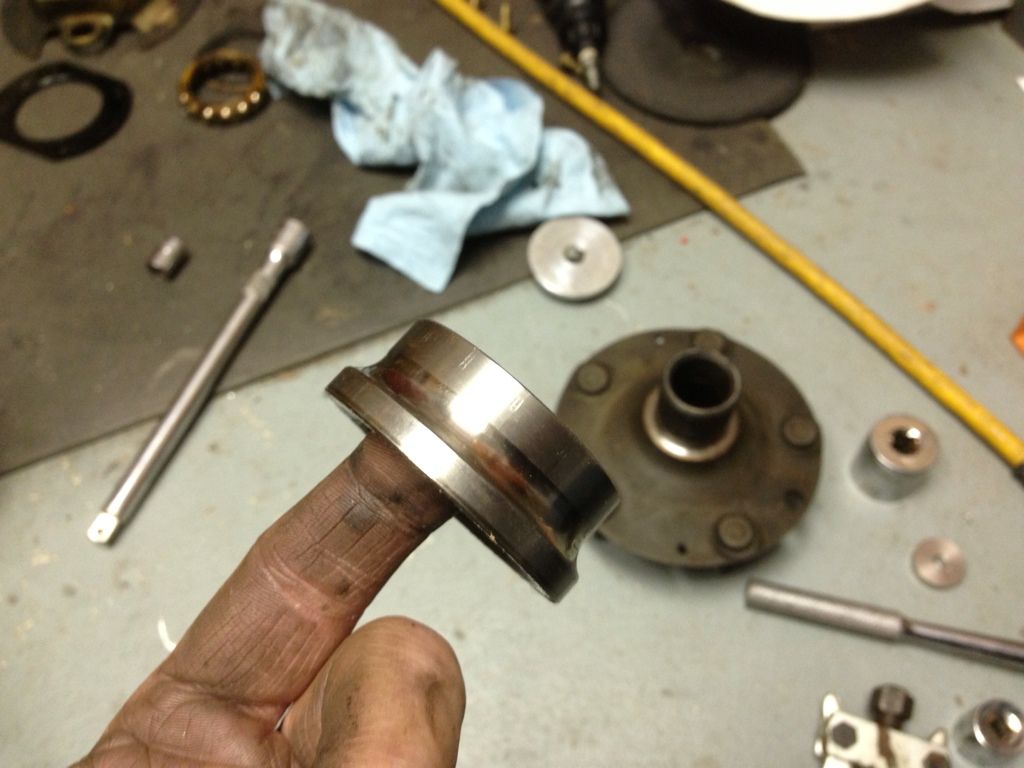 I heated the oem rubber bushing, pried each half of the sleeve out, pushed the rubber bushing out, and then drove each half of the stubborn outer sleeve out of the trailing arm pivot. Then pressed the Elephant monoball into place and secured it with the circlip.   I was able to press the rest of the wheel bearing out using the largest seal installer on the back side of the arm.  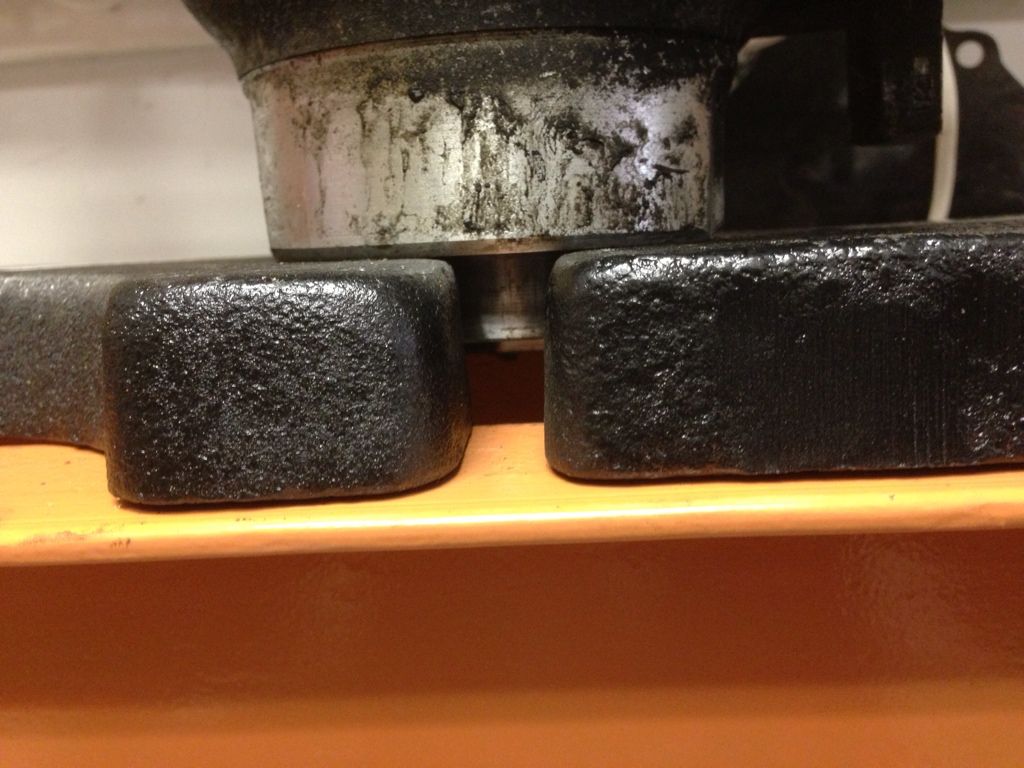 Victory! 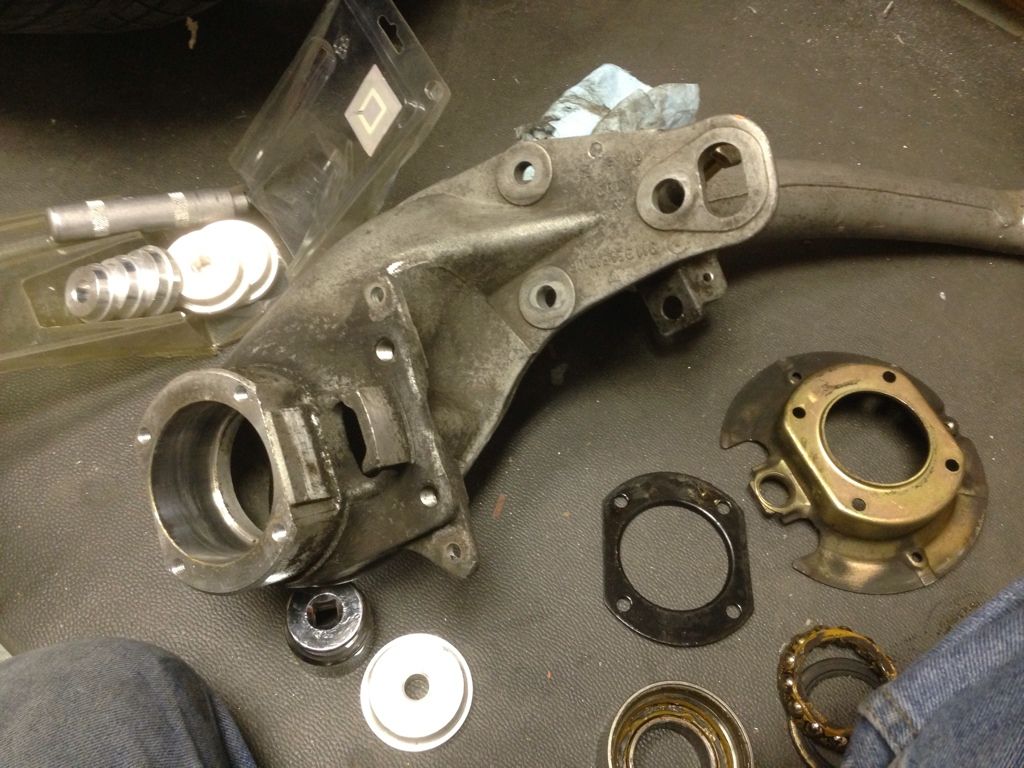 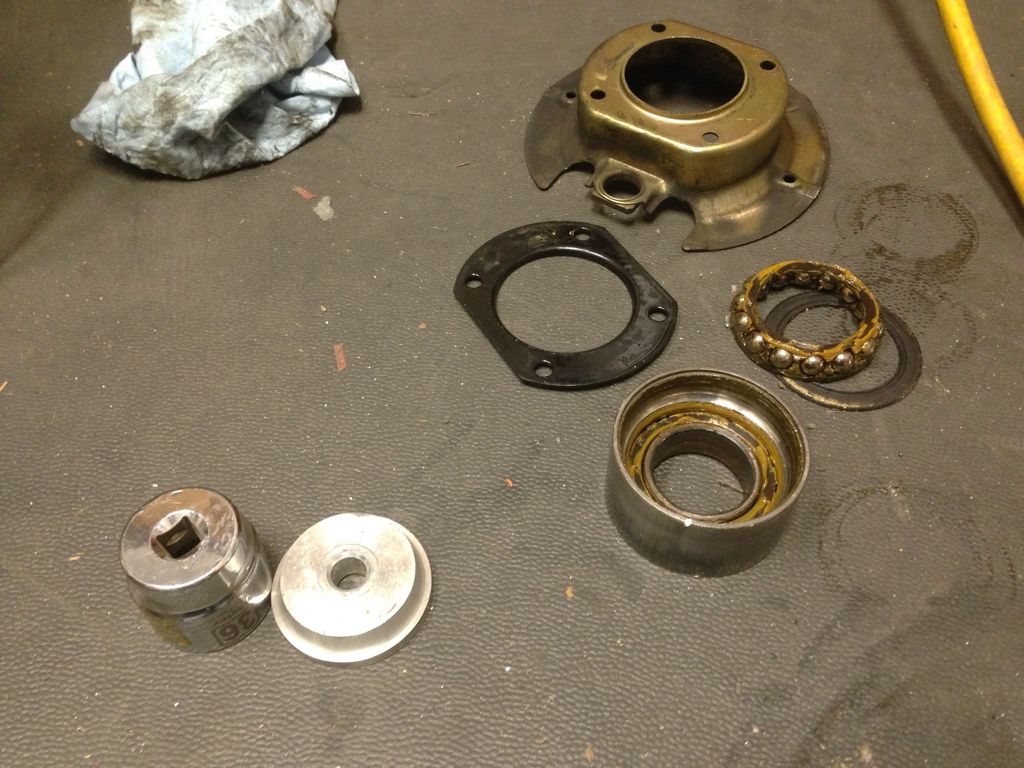
__________________
"Too much is just enough." Last edited by mreid; 01-20-2013 at 02:47 PM.. |
||
|
01-20-2013, 02:42 PM
|
|
|
non-whiner
Join Date: Aug 2012
Location: Slightly right of center
Posts: 5,235
|
I then pulled the new bearing out of the freezer and pressed it into the arm. Actually, technically I pressed the arm onto the bearing.
 Then pressed in the hub (after reinstalling the e-brake mount and bearing cover). The housing from the old bearing came in real handy for several operations including acting as a spacer to keep the wheel studs from hitting the press base.  Ready to be reinstalled after I change out the TB and replace the spring plate which should arrive tomorrow. 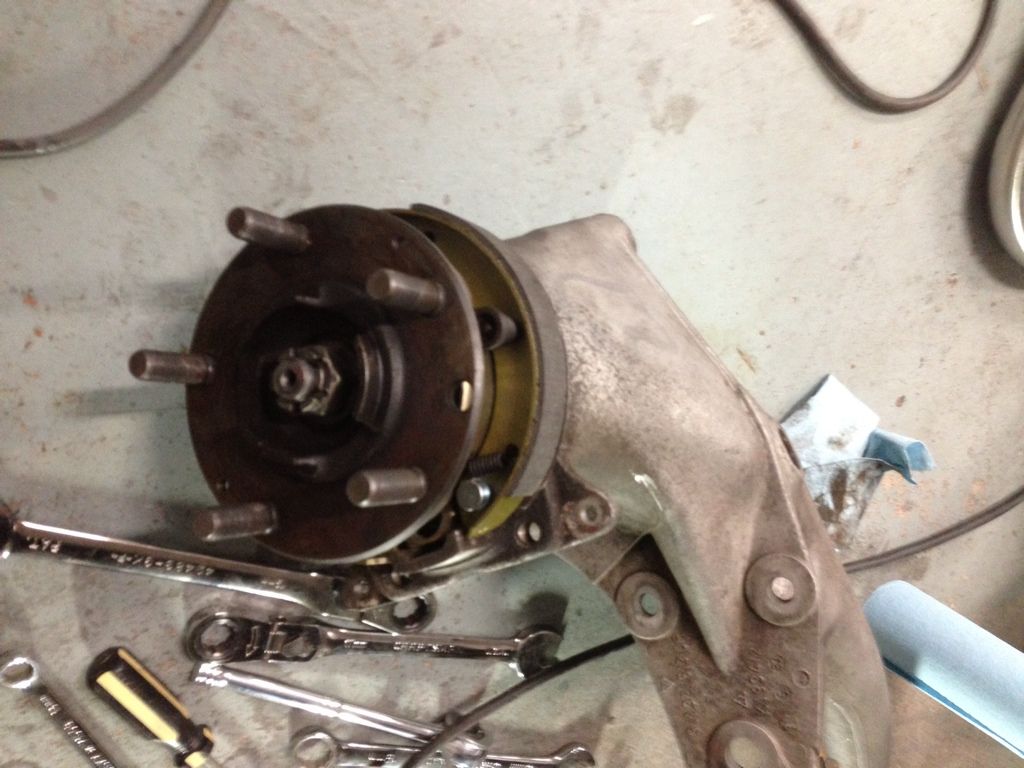 All said, it was a great day. I took the wife out for breakfast and she was happy. Got to work around 12:00, so a good 5 hours of work. If the spring plates and caliper paint show up tomorrow, I'll paint the calipers and rotors and replace the TB and spring plate. I have to go to Las Vegas for our annual sales meeting on Wednesday, so it won't go back together until next weeekend. Oh, I also have the remove the old sway bar mount and weld in the new heavy duty one. The work is just never done!
__________________
"Too much is just enough." Last edited by mreid; 01-20-2013 at 02:53 PM.. |
||
|
01-20-2013, 02:43 PM
|
|
|
non-whiner
Join Date: Aug 2012
Location: Slightly right of center
Posts: 5,235
|
I feel like Craig today. It was 22 degrees outside after a high of 55 yesterday.
So, all that's left to do is epoxy the bushing races onto my adjustable spring arms that came today. And what better place than the kitchen table!  
|
||
|
01-22-2013, 04:37 PM
|
|
|
non-whiner
Join Date: Aug 2012
Location: Slightly right of center
Posts: 5,235
|
So I pulled the cover, spring arm, and tb. Check out the difference between the 24mm stock tb and the elephant 29mm.
 I also ground off the weak stock sway bar mount and welded on the much beefier upgraded version.  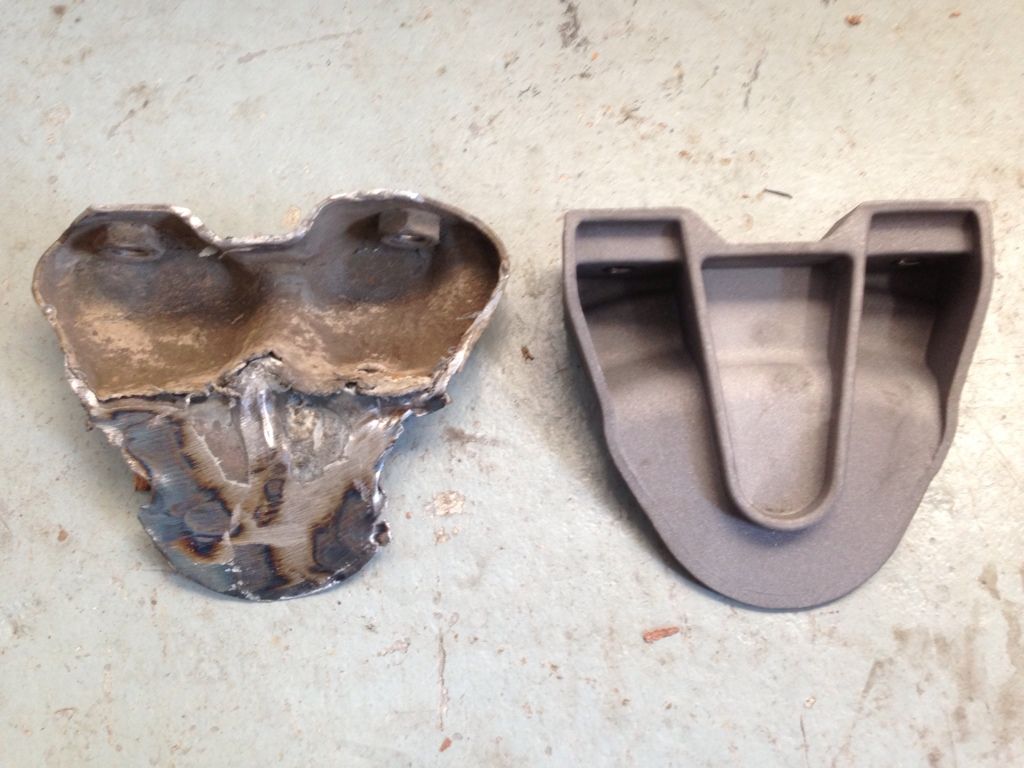 Here's the new one clamped: 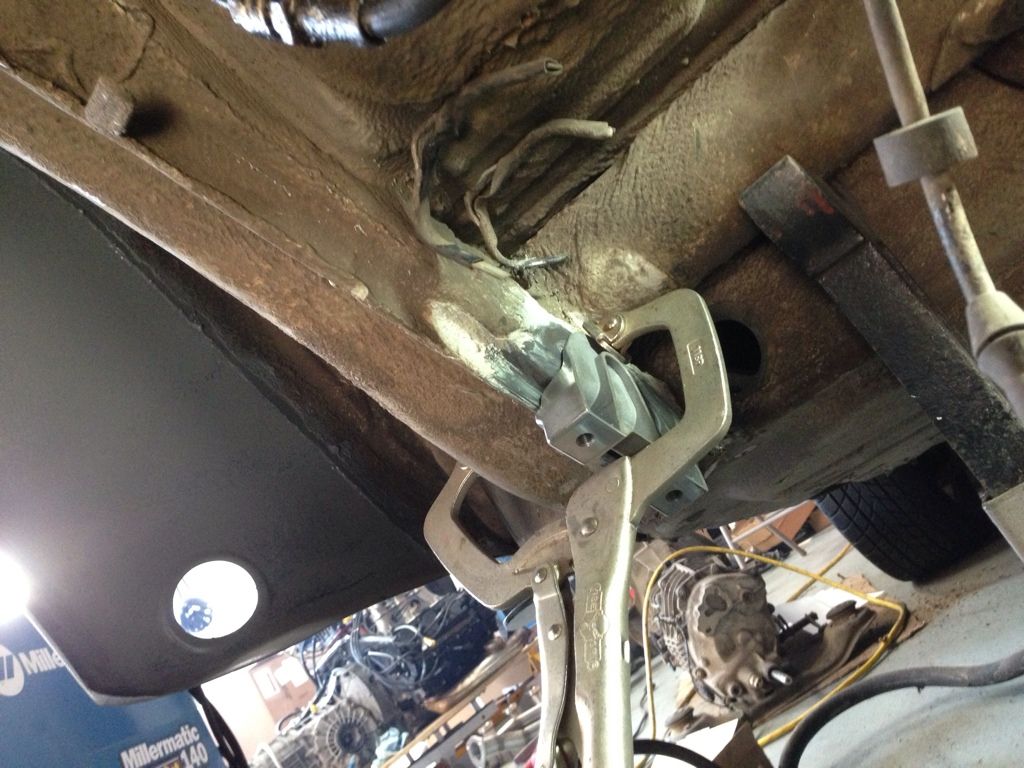  Welded in (with poly bronze bushing pressed in:  So tomorrow this side goes back together and I start on the other side! |
||
|
01-26-2013, 04:19 PM
|
|

|
|
non-whiner
Join Date: Aug 2012
Location: Slightly right of center
Posts: 5,235
|
So much for big plans! I don't think I was focused today. I put the trailing arm on, but had the spring plate too low. Took that back apart. Then I installed the e-brake cable (that was a *****), installed the rotor and caliper, and then realized I forgot the cotter pin in the e-brake cable nut. All back apart again!
Finally all is together and looks great! I decided not to paint the plating on the caliper. Turned out to be a good move as I leaked brake fluid everywhere. 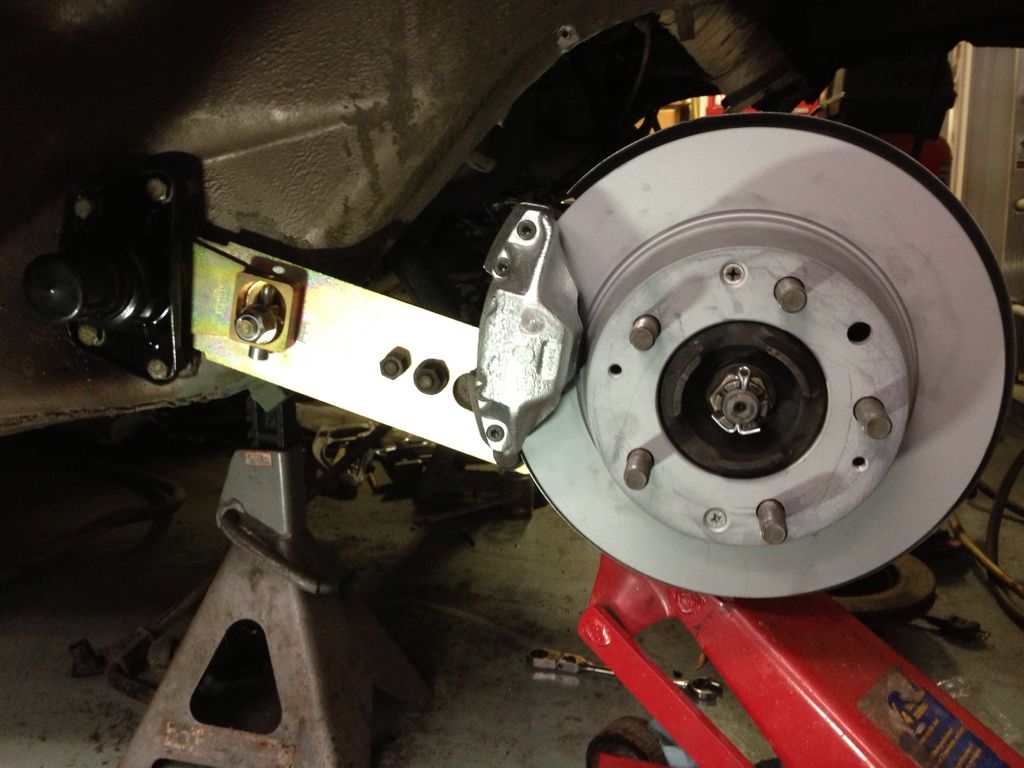 Tomorrow afternoon I'll start the other side. I need a break and a drink or two. |
||
|
01-27-2013, 02:37 PM
|
|
|
Registered
Join Date: Jun 2005
Location: Hot Houston
Posts: 307
|
How did you decide where to weld your new Wevo mounts? It turns out they are a diffent shape than the original ones so my markings don't really work? I still have my engine/transmission in the car and they come very close to the transmission mount. Any reference points?
__________________
Rob Richardson 1974 911S Carbed RS Clone engine Turbo flares 2009 Carrera S - Porsche Racing Green, PDK |
||
|
01-27-2013, 06:57 PM
|
|


 BlueFire
 1974 RSR Tribute
 Vrooom
 Franchesca
 Luigi
Luigi Oldie
Oldie


 hoonkraft
 Blackjack '78 SC
