|
|
|
|
|
| Author |
|
|
Registered
Join Date: Sep 2002
Location: Lake Tapps, WA
Posts: 3,070
|
Yes, you probably did

|
||
 11-14-2012, 08:47 PM
|
|
|
Registered

Join Date: May 2004
Location: Lake Cle Elum - Eastern WA.
Posts: 8,416
|
Quote:
Thanks.....I'll give him a hard time and keep it quiet. (The Sunroof patch was a good Clue).. 
__________________
Bob S. 73.5 911T 1969 911T Coo' pay (one owner) 1960 Mercedes 190SL 1962 XKE Roadster (sold) - 13 motorcycles |
||
|
11-14-2012, 09:19 PM
|
|
|
Registered
Join Date: Sep 2002
Location: Lake Tapps, WA
Posts: 3,070
|
He deserves anything you can throw at him!
|
||
|
11-14-2012, 09:32 PM
|
|
|
Registered
Join Date: Jan 2000
Location: Cumming, GA 30041
Posts: 883
|
Quote:
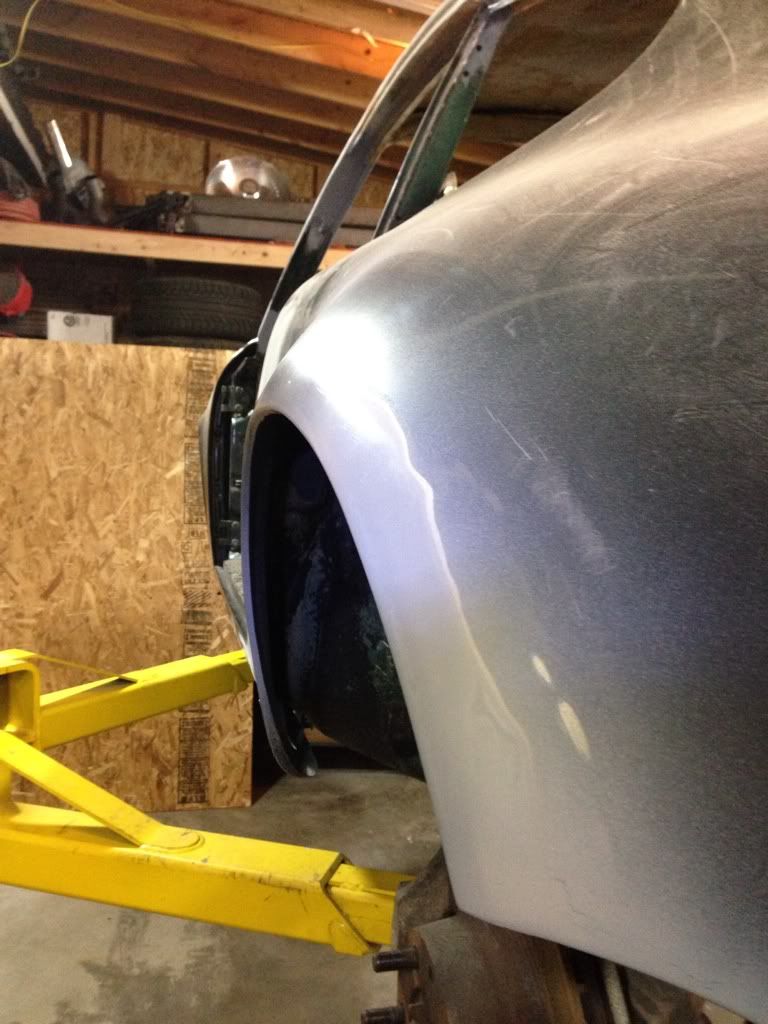
Thanks for the extra shots! Your flares look great. If 7R wheels and 225/50 is the widest I can - so be it. On yours you have left the inside lip. I was considering turning the lip entirely outward to use that metal and then weld in a wire lip for strength. What do you think? Any tips for the hammer and dolly work on this?
__________________
Terry |
||
|
11-16-2012, 09:58 AM
|
|
|
Registered
Join Date: Nov 2008
Posts: 13
|
awesome thread! Now if you could just explain to me how to convince my dad to do this to his SC that would be great
|
||
|
11-25-2012, 12:05 AM
|
|
|
Registered User
Join Date: Oct 2010
Location: BRONX NY
Posts: 1,485
|
Great thread keep the pics coming.
__________________
Tony 91 964 c2 black/ Work in progress/Finally back on the road 85 EURO 930 Black slightly moded slowly reviving her 77 911tt EFI wide body red/ Slightly modified SOLD
|
||
|
11-25-2012, 08:02 AM
|
|

|
|
East Coast R Gruppe
Join Date: Sep 2007
Location: Philly Area
Posts: 461
|
Chris,
I always enjoy reading/following your builds. They are always an inspiration for us shade tree mechanic's.Thank you for taking the time to share this one. A SC backdate? one that I hope is in my future. I will be watching this one very closely....one of the reason I still follow Pelican with the hope that artisans like Chris continue to share their work...thanks again... Mike
__________________
OGRP3 RGRPNE |
||
|
11-26-2012, 11:59 AM
|
|
|
Registered
Join Date: Jan 2012
Location: Erehwon
Posts: 3,369
|
Quite enjoying the parallel work, although I think you have done this a lot more than I. One question about the fender work, was that all hammer and dolly work or did you graft on new metal?
It looks like that it is all stretching and hammering out the crease that is there or was it a very large PITA to do? Dennis |
||
|
11-26-2012, 12:28 PM
|
|
|
Registered
Join Date: Sep 2002
Location: Lake Tapps, WA
Posts: 3,070
|
Thanks everyone...glad this is useful for all of you. I also look for threads when I'm doing a project and need some assistance do I need to do my part at posting.
The fender is just done with hammer/dolly and a little portable planishing hammer. No extra metal was used. Hopefully I can post a few more pics by the end of the week. I've been epoxy priming, schutz coating and painting the undercarriage. Then the fun part of bodywork starts! |
||
|
11-26-2012, 04:32 PM
|
|
|
Registered
Join Date: Jan 2007
Location: Baltimore
Posts: 597
|
Subscribed
|
||
|
11-29-2012, 07:21 AM
|
|
|
Registered User
|
I love these build threads...great work (and I'm sure it is hours of work).
|
||
|
11-29-2012, 09:57 AM
|
|
|
Registered
Join Date: Sep 2002
Location: Lake Tapps, WA
Posts: 3,070
|
I've been working on the car but I feel the progress has been not worthy of any updates or photos. The under carriage has been cleaned and painted as well as the trunk and engine bay. I opted to paint everything black for simplicity and keeping with the low budget theme
 The paint is called Polane. It's a catalyzed Sherwinn Williams Paint that many of the high end resto shops use for frames and under carriage components. So far, I am very happy with the results and touch ups should be easy if they are ever needed. I sprayed the large areas and brushed or rolled the smaller, hard to reach spots. The paint is called Polane. It's a catalyzed Sherwinn Williams Paint that many of the high end resto shops use for frames and under carriage components. So far, I am very happy with the results and touch ups should be easy if they are ever needed. I sprayed the large areas and brushed or rolled the smaller, hard to reach spots. A few photos and then hopefully I can get some sandable primer on the body and start prepping for paint. 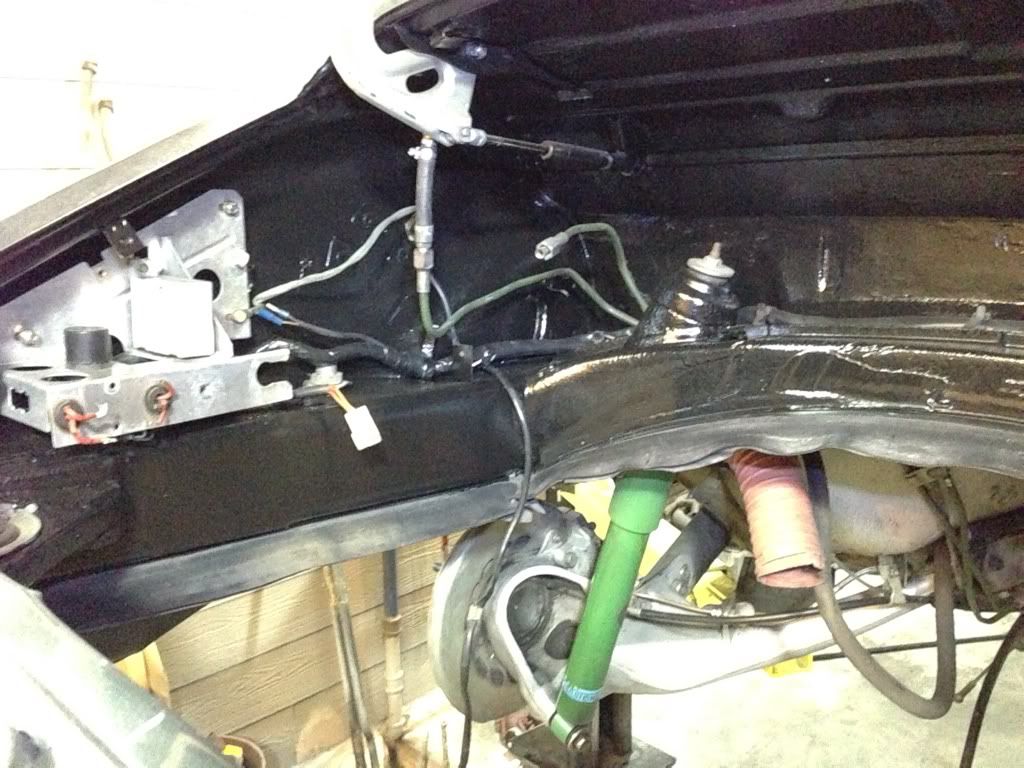 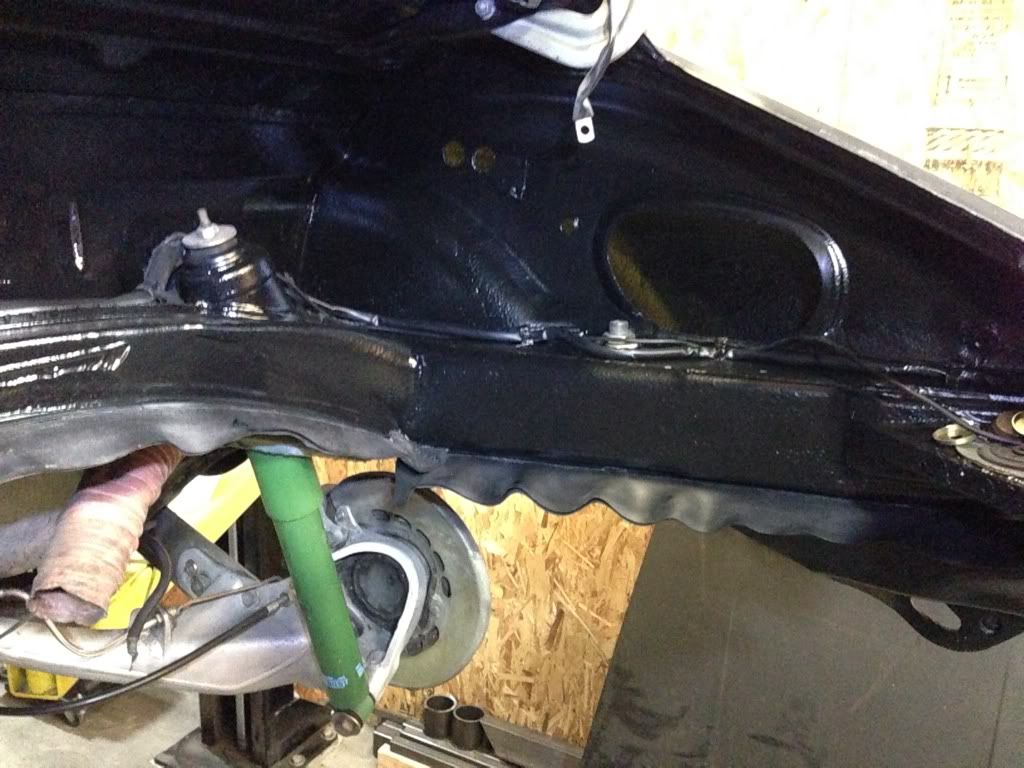 I don't want concours...just clean and functional. Kerosene cleans up the excessive brown cosmolene. I think Herman the German was messing around with that shock bolt so ill get it replaced with a new one.   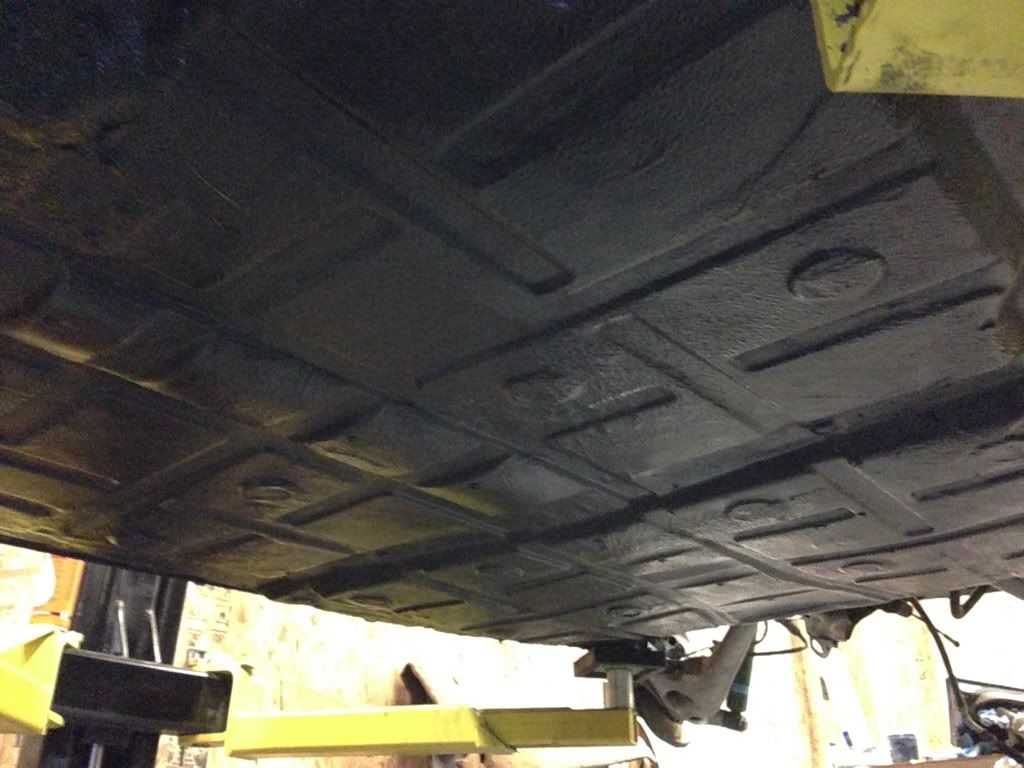 The black paint on the shock dust cover was there from the factory...not me 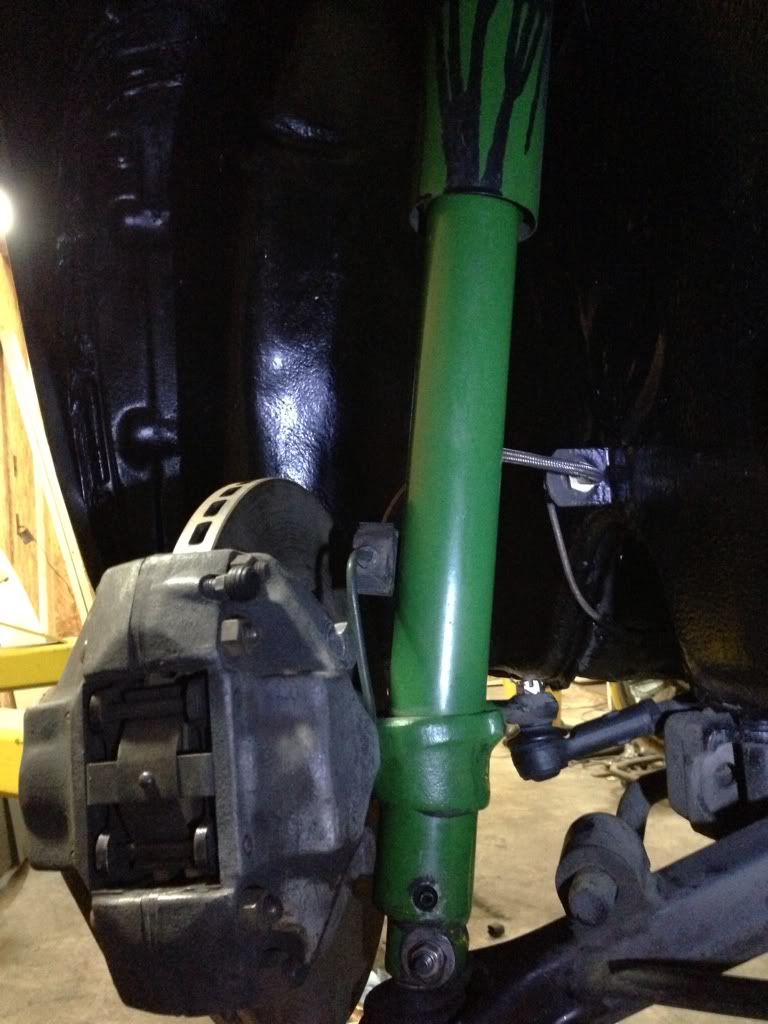
__________________
'67 911S '69 911S, '70 911ST '73 911T Targa Signal Yellow '78 911SC backdate Last edited by cnielsen; 12-15-2012 at 09:13 PM.. |
||
|
12-15-2012, 09:08 PM
|
|
|
Registered
Join Date: Sep 2002
Location: Lake Tapps, WA
Posts: 3,070
|
Cleaned, refurbished and installed the oil tank...
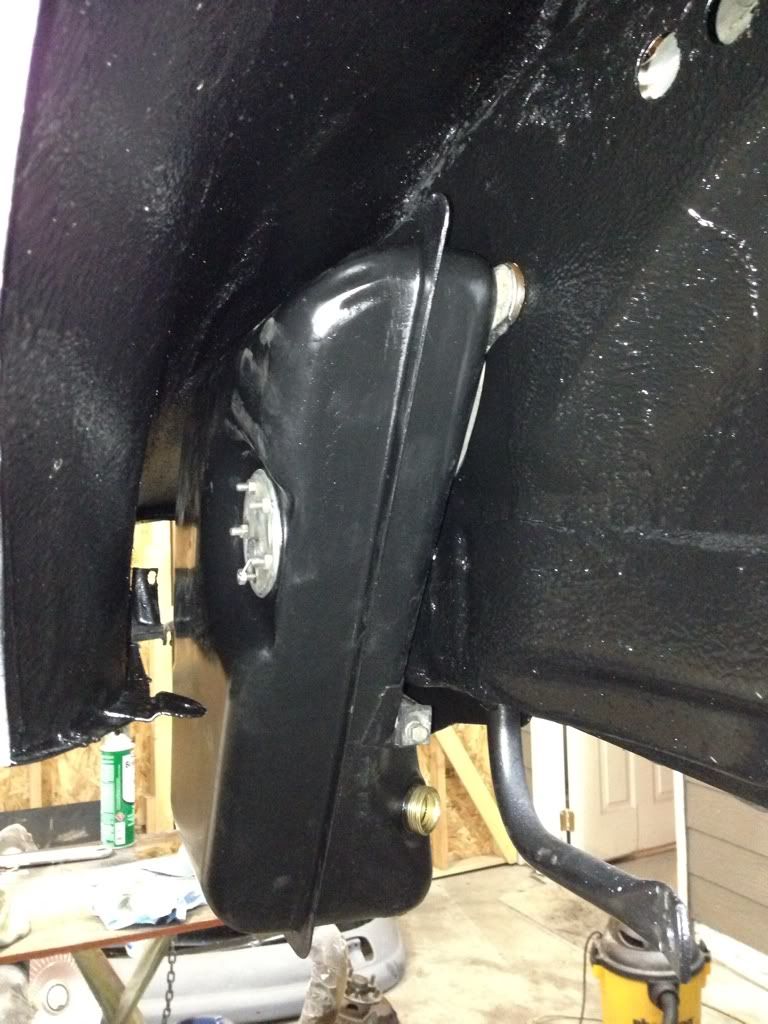 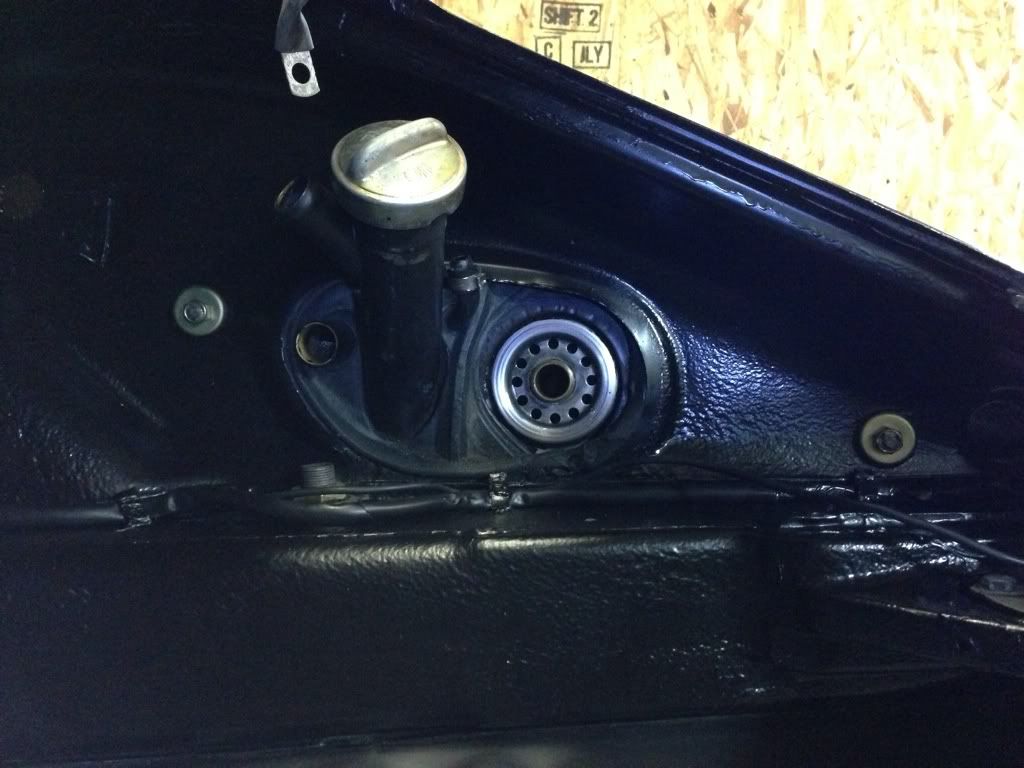 Trial fit of the hand made 100L fuel tank... This was the original tank to the 911SC. The old tank was stripped inside and out with Caustic acid and phosphate coated for rust prevention. Baffles were installed and we replaced the top section of the tank to replicate the shape of the 100L tank. The swirl pot and fittings remain so it will hook up to the original fuel lines. 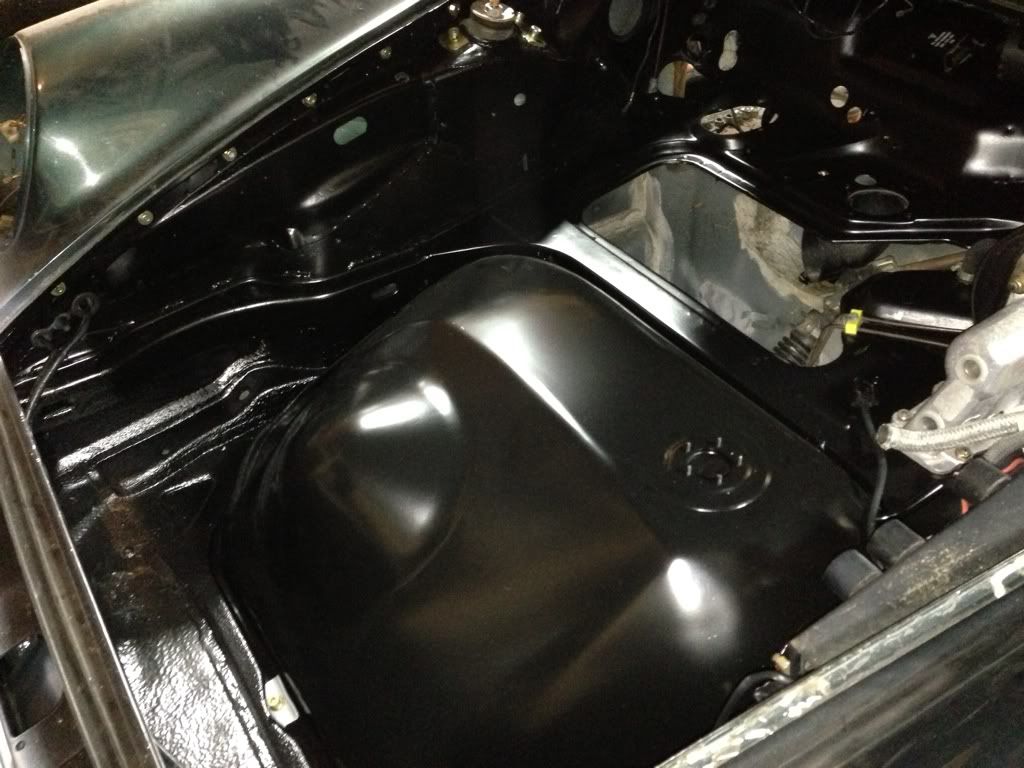
__________________
'67 911S '69 911S, '70 911ST '73 911T Targa Signal Yellow '78 911SC backdate |
||
|
12-16-2012, 04:57 PM
|
|
|
Registered
Join Date: Apr 2012
Location: Santa Monica
Posts: 172
|
Nice work, inspiring as I tackle my 68 refresh.
Question about painting engine bay and trunk areas, do you pull the wire loom out to spray, or just mask it?
__________________
roads? Where we are going, we don't need roads. |
||
|
01-12-2013, 06:17 PM
|
|
|
Registered
Join Date: Sep 2002
Location: Lake Tapps, WA
Posts: 3,070
|
Sorry about the lack of posts... Block sanding is one of those things...LOTS of work but really very little to show for and not very interesting to take pics of. I was able to strip most if the car down to its original primer and zinc coating but since the roof was off an older car, I opted to strip it to bare metal. The roof sat in a shop in San Fran for a while with stuff stacked on it so I had to use the "pick and file" technique to correct most of the dents. Sheesh, you can spend hours doing this!
I'm hoping to get the bulk of the car in primer before the end of the weekend. I need the lift for a motor swap on another car so this one needs to get out of the work shop. 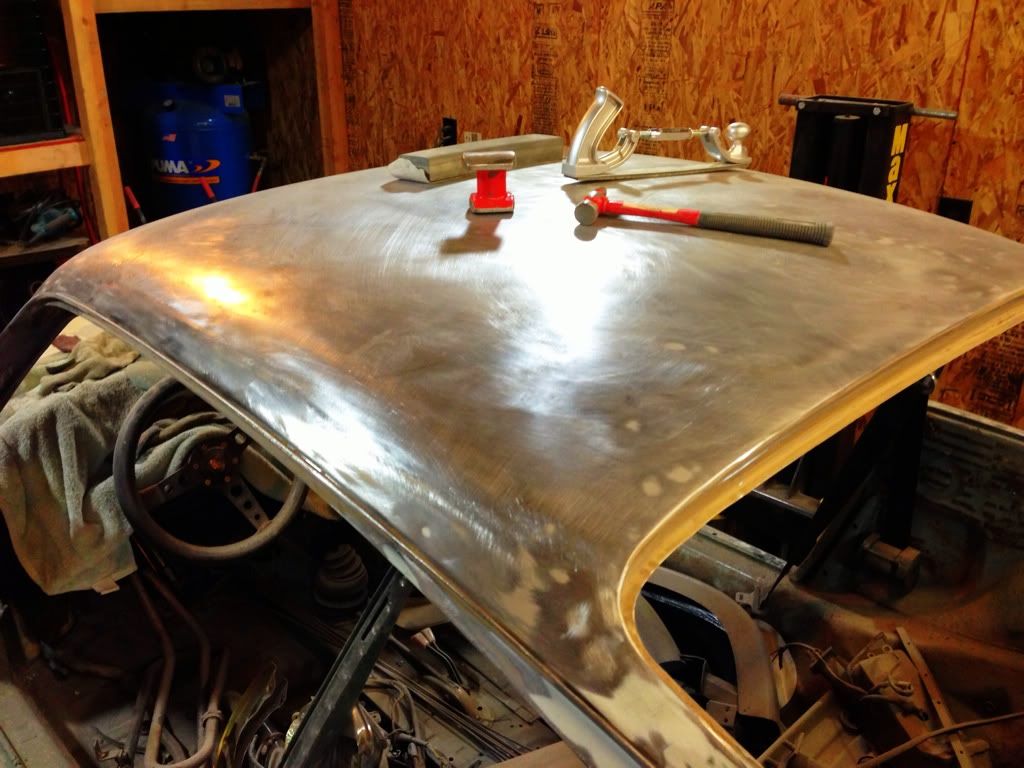
__________________
'67 911S '69 911S, '70 911ST '73 911T Targa Signal Yellow '78 911SC backdate |
||
|
01-24-2013, 10:24 PM
|
|
|
Registered
Join Date: Sep 2002
Location: Lake Tapps, WA
Posts: 3,070
|
Quote:
__________________
'67 911S '69 911S, '70 911ST '73 911T Targa Signal Yellow '78 911SC backdate |
||
|
01-24-2013, 10:28 PM
|
|
|
Brando

|
Sub
__________________
Turbo powa! 1977 911s. it's cool |
||
|
01-25-2013, 09:55 PM
|
|
|
Registered
Join Date: Sep 2002
Location: Lake Tapps, WA
Posts: 3,070
|
Lots and lots of sanding later................... I've come to the conclusion that there isn't an easy way to strip a car. DA, media blast, chemical strip...they are all a big PITA!
Although, I finally made some notable progress today. The chassis is in primer!!! Three coats of DP40 epoxy primer and 3 coats of high build sandable primer. The body seems very straight so block sanding should be pretty quick...did I just jinx myself? More sanding... 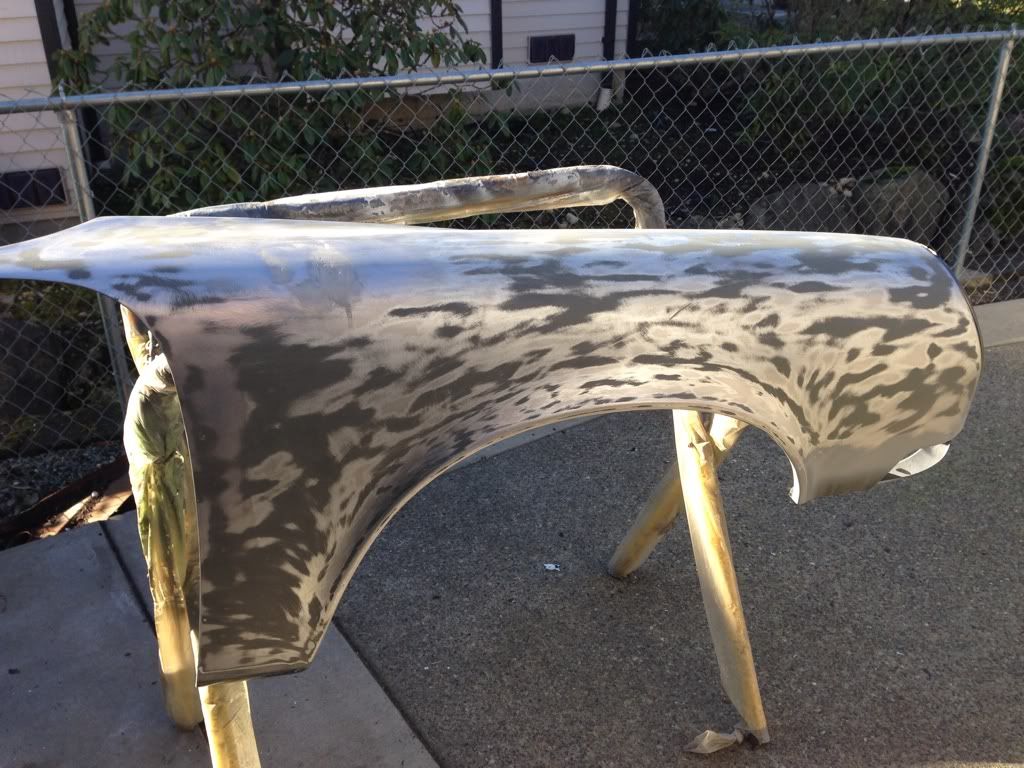 DP epoxy primer... 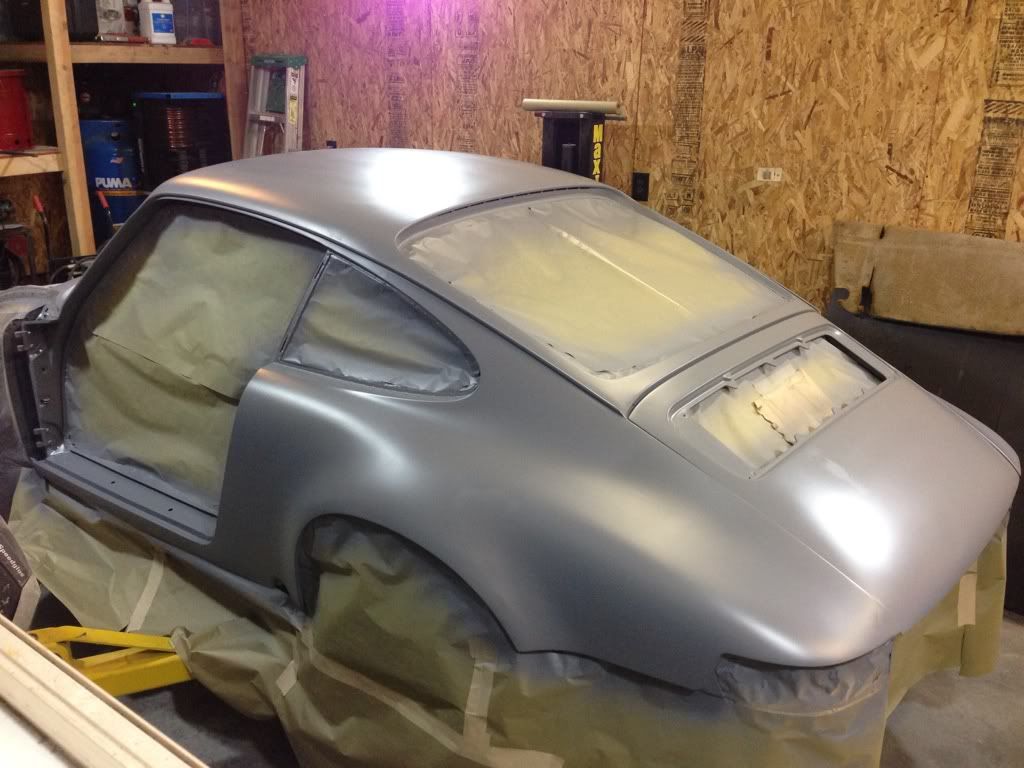 High build sandable primer... Also note my new heat lamp. This dramatically speeds up the drying time of any paint product. For instance, the primer usually takes 8 hours to cure...with this, 30 minutes! 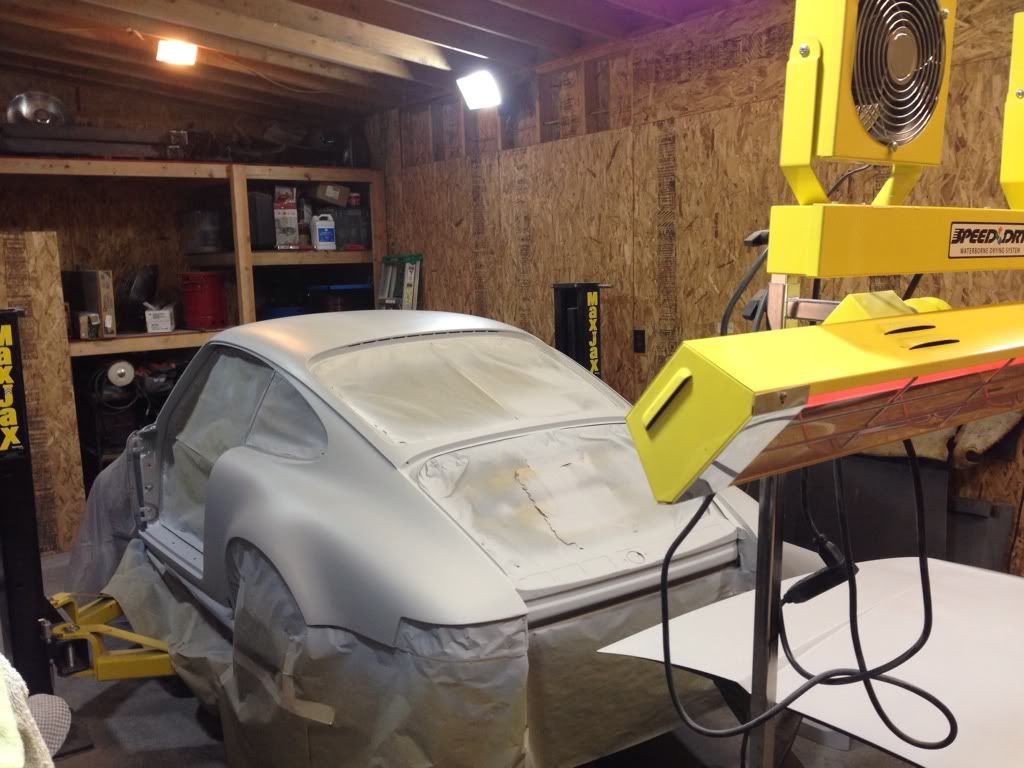  New toy... This is the 3M primer gun that uses the new PPS system. Wow, great primer gun! And the clean up with the PPS system is incredibly fast and efficient. They use disposable liners in the cup that form a vacuum seal with the air so you can spray upside down. Love it! Now I need to buy an adapter so I can use these cups on my paint gun. 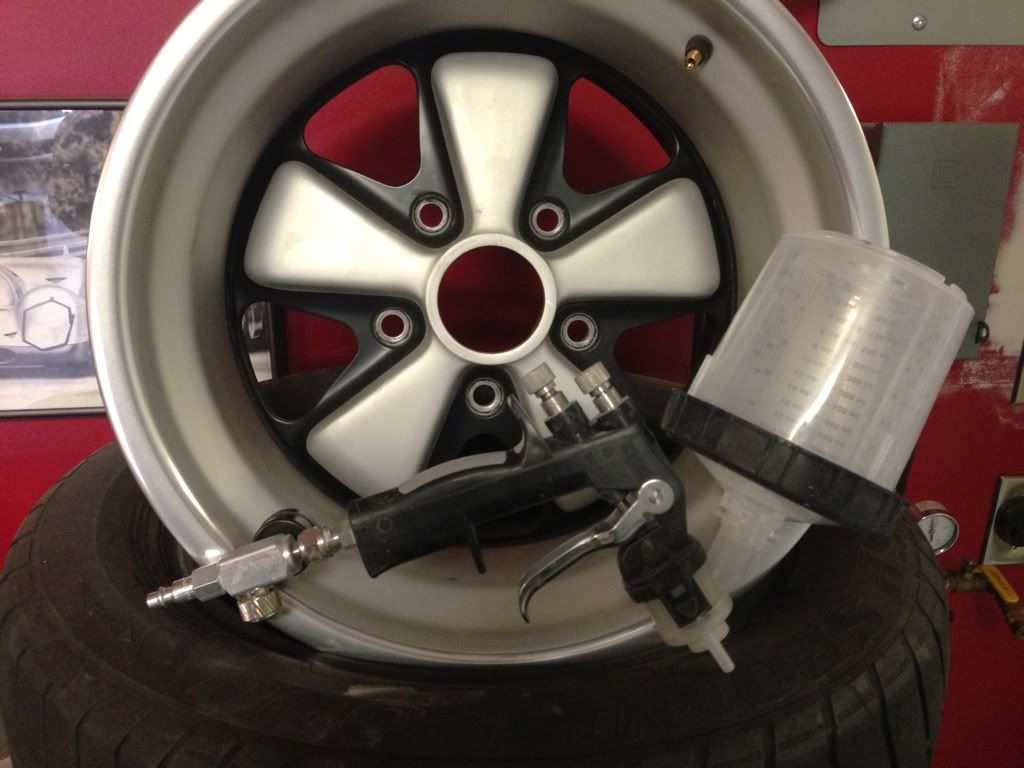
__________________
'67 911S '69 911S, '70 911ST '73 911T Targa Signal Yellow '78 911SC backdate Last edited by cnielsen; 02-17-2013 at 07:10 AM.. |
||
|
02-16-2013, 04:36 PM
|
|
|
PhD on Pending Projects

|
Very cool!!
__________________
Drive safe! 1967 - Porsche 912 1981 - Porsche 911 SC 1991 - Porsche 911 C4 Wide-body Cabriolet |
||
|
02-16-2013, 06:34 PM
|
|
|
Registered
Join Date: Mar 2004
Location: Snohomish, Wa
Posts: 365
|
Coolness
|
||
|
02-16-2013, 07:07 PM
|
|


 hoonkraft
 BlueFire
 1974 RSR Tribute
 Vrooom
 Franchesca
 Luigi
Luigi Oldie
Oldie


