|
|
|
|
|
| Author |
|
|
Registered

Join Date: Jun 2011
Location: Placerville, CA.... You know, the only place on Highway 50 between Sacramento and Lake Tahoe the you find signal lights. Above the fog most of the time and I can see the stars of the Milky Way 8 out of 10 nights. Kinda cool.....
Posts: 6,329
|
Lighted Key Head Conversion to LED
Hey Everyone,
In picking up our new old 78 911SC on New Years Eve, the PO only could provide us with a single key. Knowing how keys like to disappear, I decided to get a couple of duplicates made up. In contacting my friend Jason Harris who owns "***********, LLC" a parts source for our cars, and obtained two Porsche keys. One of them was a standard black plastic head key and the other a Porsche key with the light in the head. I quickly discovered just how dark the inside of the car is late at night when trying to unlock the door or even located the ignition. Anyway, when I received the keys, I was not to impressed in the light output of the small incandescent bulb. Well, with me being me, I began a search to find a way to improve the light. After searching high and low, I located a posting on Rennlist by "Borland". Following his direction and techniques I competed a LED upgrade to our new Porsche key head successfully and would like to personally thank him for such a great idea. I would just like to share with everyone what I did and to let everyone know it works great. If you would like to check out the original post, it can be found on the Rennlist site under the same heading. Please do not think for one moment I am trying to take credit for his original idea or technique. I just want to share with you my attempt to duplicate his work. Here is the original factory incandescent bulb output.  As you can see, it is not very strong.  In a dark room, it can barely illuminate the battery package. Project item list: 1. package of 5mm High Brightness White LED (2 per package) 2. one CR1025 battery cell 3. one 3/8" O.D. x 1/8" I.D. x 1/8" nylon spacer (I always get two just in case) 4. one 5/8" O.D. x 1/8" I.D. x 1/8" nylon spacer total cost for all items minus the initial cost of the lighted key head was a whopping $9.84. Everything shown except the LED package   Carefully separate the case housing, button, the battery and bulb on the original key.    The LED has a small flat spot on the bulb itself, remember that this is the negative side of the light and the longer lead is the positive. When you place the LED in the housing, it is important that the flat side is facing up and the longer positive lead is on the bottom. If this is reversed, then the light will not function properly.  Using some very fine snips, I cut a small notch out of the larger nylon washer. This washer will be used to keep the new CR125 battery from flopping around in the housing while allowing the LED contacts to touch the battery's negative side and positive side simultaneously when the button is pushed.  Then using fine needle nose pliers, GENTLY bend the LED's leads approximately 90 degrees. I don't recommend cutting them just yet because you may need to manipulate them slightly. Just remember the flat side of the LED indicates the negative lead and the longer lead is the positive side of the LED.  (Continued onto a second post) Last edited by bugstrider; 01-15-2014 at 03:39 PM.. |
||
 01-14-2014, 09:51 PM
|
|
|
Registered
Join Date: Jun 2011
Location: Placerville, CA.... You know, the only place on Highway 50 between Sacramento and Lake Tahoe the you find signal lights. Above the fog most of the time and I can see the stars of the Milky Way 8 out of 10 nights. Kinda cool.....
Posts: 6,329
|
Continued..........
As you can see, the LED's leads are positioned.  Then I carefully placed/inserted the LED into the key head making sure the flat side of the LED was facing upward or skyward. This picture is a little fuzzy, sorry about that. You will also notice that the notch in the nylon spacer is lined up with the bottom(positive) LED lead.    The final few steps is to trim the LED leads so that they have enough length to accommodate where you chose to route them. After trimming to the desired length, then place the battery in the center of the nylon spacer. As discovered by drleah, it may be necessary to shave down the inside edge of the spacer to get a proper fit with the battery. This can be accomplished by either a small knife or exacto blade. Using a small pair of needle nose pliers to hold the spacer can prevent one from inadvertently shaving your finger too, I'm just saying. Be sure to place the positive side "DOWN". Remember, the negative side it at the top and needs to touch the top of the negative pole on the battery. Once you have completed this, then place the small nylon spacer onto the battery and carefully place the black button on top. This is sort of tricky since it is a bit of a balancing act.  One more step and your done. Carefully place the cover onto and over the button and snap into place. There you go, a new battery, new LED and a blazing light source on your once wimpy key light. This is a killer upgrade that took all of ten minutes to put together. It look longer to get the parts and tools than it did to do the job.   This shot was taken 10-12" above the book in a dark room.  Final parting shot to show the difference between the two lights. BEFORE: incandescent bulb (notice how close I am to the package)  AFTER: LED bulb (12" away"  I would just like to send out a thanks for the original poster on Rennslist who gave me the idea and my buddy Jason Harris of ***********, LLC (jason@********************) for supplying me with the needed Porsche keys. And a huge thank you to our HOST at Pelican and the staff that have responded promptly to all of my dumb novice questions and provided needed parts, books and misc stuff. Cheers Last edited by bugstrider; 01-16-2014 at 08:10 PM.. |
||
|
01-14-2014, 11:07 PM
|
|
|
El Duderino

|
Nice!!! Thanks for the write-up.
|
||
|
01-15-2014, 05:03 AM
|
|
|
Registered User
|
This works so much better than the incandescent bulb. Had to whittle on the nylon washers to get the fit perfect but otherwise the directions are spot on! Thanks!
Sent from my iPhone using Tapatalk
__________________
Leah '82 Guards Red 911SC  '06 Ford Expedition - work truck ") '04 Ford F350 King Ranch - hubby's truck '07 Lincoln Navigator Ultimate - family |
||
|
01-15-2014, 03:00 PM
|
|
|
1988 Carrera

|
I did this today as well. Went well. I like it.
|
||
|
01-15-2014, 04:29 PM
|
|
|
Registered
Join Date: May 2005
Location: Houston
Posts: 5,475
|
Great thread! Thanks for sharing.
__________________
Ole Skool - wouldn't have it any other way |
||
|
01-15-2014, 07:20 PM
|
|

|
|
Registered User
Join Date: Jan 2011
Location: Long Island, NY
Posts: 456
|
Bookmarked for future reference. Thanks!
__________________
1983 Porsche 944 (Sold), 1986 Porsche 944 N/A (parts car), 1987 Porsche 944 Turbo (Sold), Mercedes ML55, 2011 BMW 328i X-Drive, 1987 Porsche 944 and a 1987 Porsche 911 Carrera |
||
|
01-16-2014, 04:36 AM
|
|
|
Registered
Join Date: Jun 2010
Location: North Bay, ON
Posts: 472
|
Bookmarked. Nice.
__________________
1986 3.2 to 3.4 conversion |
||
|
01-16-2014, 09:27 AM
|
|
|
Registered

Join Date: Feb 2006
Location: Ontario Canada
Posts: 2,948
|
i did this many years ago .. its amazing .. im still on the same battery

__________________
1976 Yamaha XS360 ( Beats Walkin') 1978 911 SC Targa ( Yamaha Support Vehicle ) 2006 Audi A4 2.0T (Porsche Support Vehicle ) 2014 Audi A4 2.0T Technik (Audi Support Vehicle) |
||
|
01-16-2014, 11:12 AM
|
|
|
Registered
Join Date: Jun 2011
Location: Placerville, CA.... You know, the only place on Highway 50 between Sacramento and Lake Tahoe the you find signal lights. Above the fog most of the time and I can see the stars of the Milky Way 8 out of 10 nights. Kinda cool.....
Posts: 6,329
|
Quote:
|
||
|
01-16-2014, 08:00 PM
|
|
|
Registered
Join Date: Jun 2011
Location: Placerville, CA.... You know, the only place on Highway 50 between Sacramento and Lake Tahoe the you find signal lights. Above the fog most of the time and I can see the stars of the Milky Way 8 out of 10 nights. Kinda cool.....
Posts: 6,329
|
Hi everyone,
Thanks for the feedback on this posting. I have gotten so much good info from this site in such a short amount of time, I was just happy to be able to contribute something back that others could successfully use. Cheers Trev |
||
|
01-16-2014, 08:02 PM
|
|
|
ROW '78 911 Targa
|
Bought the battery and led but didn't use washers. I used a couple of small properly sized
O-rings instead. Works great! Thanks for posting.
__________________
Dennis Euro 1978 SC Targa, SSI's, Dansk 2/1, PMO ITBs, Electric A/C Need a New Wiring Harness? PM or e-mail me. Search for "harnesses" in the classifieds. |
||
|
01-18-2014, 10:12 PM
|
|
|
Registered

|
Thanks Trev!
Bookmarked for a lazy Sunday...nice giving credit to the Rennlist guy and sharing with us. S
__________________
Scott "Houston, Tranquility Base here, the Eagle has landed" Silver 1984 M491 Sunroof Coupe |
||
|
01-19-2014, 12:16 PM
|
|
|
Registered
|
Great instructions. I just finished it in about 15 minutes while watching the pre-game show (go Broncos). The LED makes a big difference. Instead of whittling the inner surface of the larger washer with a knife or Exacto blade, I used a small round file. Thanks.
|
||
|
01-19-2014, 12:26 PM
|
|
|
Registered User
Join Date: Oct 2010
Location: BRONX NY
Posts: 1,485
|
Great info.
__________________
Tony 91 964 c2 black/ Work in progress/Finally back on the road 85 EURO 930 Black slightly moded slowly reviving her 77 911tt EFI wide body red/ Slightly modified  SOLD SOLD
|
||
|
01-19-2014, 08:07 PM
|
|
|
Registered
Join Date: Jun 2011
Location: Placerville, CA.... You know, the only place on Highway 50 between Sacramento and Lake Tahoe the you find signal lights. Above the fog most of the time and I can see the stars of the Milky Way 8 out of 10 nights. Kinda cool.....
Posts: 6,329
|
Hi everyone,
I'm really glad so many are able to use this idea, this is what make Pelicam so great, the sharing of useful intel Great ideas and add on's too. I like Timmy2's idea of using a properly sized rubber o-ring around the battery instead of the nylon spacer. I know from personal experience regarding our diving, I've got plenty of rubber o-rings hanging around. Steve84 also had a good idea of using a small file to shave the inside of the spacer. All great ideas to make this better and better. Cheers everyone, Trev |
||
|
01-20-2014, 12:30 AM
|
|
|
Registered
|
Did this Over the Weekend
Got this done over the weekend. Super easy.
Of course I started tearing things apart before searching the forum. I went a little different and stacked two 389 (1.5 volt) batteries, secured together with heat shrink. Ran the LED legs in a similar fashion. Brought the light from unusable to 21st century. I never would have thought of the nylon spacers or O ring. Might make my set up more stable with the smaller batteries. |
||
|
04-01-2014, 01:45 PM
|
|
|
Registered User
|
Thanks. Anyone know how to get the key itself (the metal part) out. Bought a new key head and cant seem to get the key out. Thanks
|
||
|
05-28-2014, 03:34 PM
|
|

|
|
Registered
Join Date: Nov 2010
Location: Missouri
Posts: 2,186
|
See photo below, the metal key is notched and the spring loaded plastic piece at the bottom of the pic holds it in ...either push the plastic piece back and pull key out or remove spring and push plastic piece back to release key from head

__________________
I think that maybe I'm dreaming.. Last edited by 964TargaC2; 05-28-2014 at 05:30 PM.. |
||
|
05-28-2014, 05:27 PM
|
|
|
Registered User
|
Thanks!
|
||
|
05-28-2014, 07:10 PM
|
|


 Porsche 912
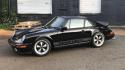
 1968 Porsche 912
 1978 911SC
 1983 Porsche 911SC Coupe
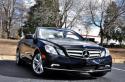 2011 Mercedes-Benz E350 Cabriolet
 Delilah
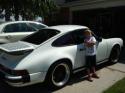 Porsche 911
 Heinz
Heinz 1985 Porsche 911
 Beast
Beast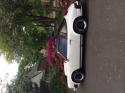 1984 Porsche 911
 1982 Porsche 911sc
