|
|
|
|
|
| Author |
|
|
1984 911 Targa - "Sabine"
|
So, the weekend is finally here again, and I've started what I expect will be the longest phase of the install itself. As I have to install the rear LH wheel well condenser which has hoses that require simultaneous installation, the car is now up on jack stands until all the hoses are complete - hopefully still done this weekend
 . .I took both left tires off (front and back) as well as the rear RH tire, which will be required as part of the hose install, vice doing them independently later. Here are some start pictures of the areas I'll need to work with. Am also contemplating removing the air filter from the engine and the engine blower / duct assembly for simpler access, as the car isn't moving now anyway - why fight the car unnecessarily, right?     I'm assuming that the taped up electrical line in the above picture, just behind and below the AC hose is the compressor connection. 
__________________
Skip 1984 (RoW) 911 3.2 Li Carrera - "Sabine" 2011 Cayenne S Last edited by Skip1; 05-25-2015 at 11:50 AM.. |
||
 05-23-2015, 06:14 AM
|
|
|
1984 911 Targa - "Sabine"
|
So, already some updates, as I have an appointment this evening. Had difficulty pulling the hose out from the engine bay on the drivers side once it reached the fitting at the end. Even with pushing from above and pulling from below (one person only), I had a challenge, so I resorted to the cut the hose solution. As I removed the clamps and moved from rear LH wheel well along the car to the drier, I used a *** CORRECTION 8mm NOT 9mm *** socket to remove the clamps, saving the self tapping bolts, clamps and rubber washers which stuck normally to the body on removal. I placed them below the car under each of their respective connection points, but will have to straighten and clean them up, as some are bent too flat.
  As I reached the drier area, I actually disconnected the hose connections (replacing all of it anyway), in order to remove the hoses in order. Of note, I'm taking pictures (my start point) to ensure I remember (or at least can reference) how the hoses were routed - my memory isn't that great . I also had to remove all the tie wraps along the hose where one of the fuel vents tubes was attached - so must remember to secure that again afterwards.  The hose follows a nice indentation in the body, but will have to clean it all up once all the hoses are off before reattaching anything - while I'm in there... As I moved forward, I was being pinged by about 30 years of dirt stuck around the hoses etc, so be careful of putting your face underneath, or ensure you wear safety goggles. I also put a plastic bag around the hub / brakes in order to stop any of the dirt from falling in there while I'm moving the dirt around. Here's 30 years of dirt sitting on the ledge behind the hoses above the front LH wheel.  Here are the rear condenser to front condenser and the front condenser to drier hoses, the dirt collected so far and all the tie wraps I have to replace.  I also cut the large diameter hose going above the water bottle, as it was wedged behind one of the metal brackets.
__________________
Skip 1984 (RoW) 911 3.2 Li Carrera - "Sabine" 2011 Cayenne S Last edited by Skip1; 05-25-2015 at 07:30 AM.. Reason: Correction in bolt size - 8mm vice 9mm in intro paragraph |
||
|
05-23-2015, 07:27 AM
|
|
|
Registered

|
Man, that is a lot of hoseage. Nice floor. Real interested in your rear fenderwell condenser install and how/where the lines run. Good job Skip.
__________________
Dan T '85 Carrera Dansk premuff/sport muffler 7's and 8's, Steve W chip Kuehl AC and fresh top end |
||
|
05-23-2015, 01:24 PM
|
|
|
1984 911 Targa - "Sabine"
|
Thanks for the kind words. Most garage floors here in Germany in new builds look like that - just have to be careful not to scratch / scrape them - so I have cardboard under the jack stands. Still have the evaporator to drier and evaporator to compressor hose to go too. I'll try to take a lot of pictures ofthe rear fenderwell condenser install - I'm quite curious too, but Griff's instructions are brilliant, so here we go (after cleaning the whole area of course

__________________
Skip 1984 (RoW) 911 3.2 Li Carrera - "Sabine" 2011 Cayenne S Last edited by Skip1; 05-23-2015 at 10:20 PM.. |
||
|
05-23-2015, 10:05 PM
|
|
|
Registered
Join Date: Oct 2009
Location: Montmorenci, SC
Posts: 557
|
Quote:
Don't concern yourself with the BS one person posts in all the A/C threads... Evacuation and charge of the system is critical to your result.. Feel free to pm me if you need to!!
__________________
70 911T Sold  81 911SC Coupe 81 911SC Coupe84 Mustang Turbo GT 66 Galaxy 500 Ragtop (my Mother bought it new) 88 Thunderbird Turbo Coupe 69 Torino Cobra (R) Code |
||
|
05-24-2015, 05:42 AM
|
|
|
Registered
|
What if, thinking out LOUD....
Opened the hood of a brand new RAV4, 4 cylinder, the other day and couldn't help but notice the high level of shielding of the exhaust manifold, and of course the radiator as a "shield" for the evaporator. What if the real problem with our A/C systems is actually the result of RADIANT heating of the rear condenser by the HOT engine and catalyst. Why is it that the 964/993 series gets by with a single fan cooled condenser and ours, seemingly, requires every improvement ONE can think up, imagine, less only the kitchen sink? Has anyone ever tried using a single highly efficient (PFC?) wheelwell, FORWARD in the rear wheelwell, mounted condenser/fan , leaving the front lip condenser/blower in place but removing the rear lid condenser...? We now have a vendor selling an IMPROVED, 70% thicker, front lip condenser, dual wheelwell mounted condenser/fan assemblies, more efficient evaporators and improved evaporator blowers. This is by no means a statement of fact, just scientific and logic based thoughts. Opinions..??? Last edited by wwest; 05-24-2015 at 07:43 AM.. |
||
|
05-24-2015, 06:32 AM
|
|
|
1984 911 Targa - "Sabine"
|
Well today was an 8 hour productive day, with limited breaks. Started at 0800 hrs this morning, with the cleaning of both the front and rear LH wheel wells - more dirt. As I further loosened off the drier and other hoses I was able to clean up quite a bit, it preparation for installation. As per Griff's instructions, I continued with the rear LH wheel well condenser, following and measuring as per instructions. I was concerned that my drill wouldn't fit into the wheel well, but with a bit of manoeuvring it all worked out. When drilling my power wire for the condenser through from the engine bay to the fender area, I had to remove the heater duct work, but all good.
First thing was to drill three holes through the heat shield tin edge to attach the hose heat shield. Very simple.  Next was to remove the nuts on the base of the valence support brackets and replace them with longer bolts and rubber bushings to set the condenser on. I was fortunate as my support brackets for the valance had fixed nuts attached, so it held the new bolts in place perfectly. At this point it was a test fit, and confirming location for an additional small support bracket between the top of the condenser and the outer fender wall. Again, no issues, just have to take your time to get it right.  Removed the condenser at this point in order to drill the requisite power wire hole in the uni-body behind the electrical panel.  Once completed, I had to run the barrier hose from behind the LH rear shock up through the hole, back into the engine bay - patience doesn't even begin to describe it. At this point, it you have a second person, it could probably be really handy - I did not. As you try to push the hose up, you will encounter (at least I did) two fixed metal fuel lines, and the air hose from the venturi that loops around the back of the engine bay. Between the two of these I had a heck of a time, but slowly and deliberately proceeded. It's easier if you go in very small increments, or you'll pretty much have to pull it back down as it gets wedged. Once through (and I did end up removing the engine heater blower and ducting, as some frustration set in). I should have done this first, but figured I didn't need too  . Pulling in about one foot of the hose carefully into the engine bay, I then connected the other end to the condenser to the port directed in the instructions. Alignment and finger use only, I found to be key, to ensure no undue pressure, nor cross-threading. Using the provided o-rings (after some lubrication) it was attached (ensure you use the two wrench method for snugging up all the connections). I then moved onto the hose to the front condenser. I didn't connect any of the clamps until the end either. . Pulling in about one foot of the hose carefully into the engine bay, I then connected the other end to the condenser to the port directed in the instructions. Alignment and finger use only, I found to be key, to ensure no undue pressure, nor cross-threading. Using the provided o-rings (after some lubrication) it was attached (ensure you use the two wrench method for snugging up all the connections). I then moved onto the hose to the front condenser. I didn't connect any of the clamps until the end either.Front new drier was next including the attachment of the drier to front condenser hose, giving me the two necessary hoses to head to the front of the water bottle. Griff recommended taping them together and push them through together, which worked for the most part (I also decided to use two tie wraps under the tape in an offset position in order to reduce the diameter a little. I could see the hoses when looking up from under the front lip but couldn't catch them even with a bent coat hanger, so decided to remove the front LH fog light main bolt to allow me the ability to reach the hoses and pull them down - well worth the 2 minutes I found.    Once the front condenser had it's two hoses connected, I re-installed the fog light, and removed the drier to evaporator hose and replaced it (including connecting it to the new evaporator). The only challenge on this piece was working around the metal brake lines for the last clamp.  Am quite pleased with the progress to date, and today specifically - you can see the rear LH wheel well condenser tucked in nicely behind the tire.  Next I have to reinstall the OEM rear deck lid condenser, but not quite sure how (may have to test assemble it on the floor first) - I think I have all the parts, including the two fin like rectangular metal pieces for either side, but I don't have a good picture of the mounting points - if anybody has a couple of each side, I'd appreciate it - rather not trial and error this part after following Griff's detailed instructions. Will try to do some work during the week, but can't guarantee. Enjoy
__________________
Skip 1984 (RoW) 911 3.2 Li Carrera - "Sabine" 2011 Cayenne S Last edited by Skip1; 05-25-2015 at 11:49 AM.. |
||
|
05-24-2015, 07:05 AM
|
|
|
Formerly known as Syzygy
Join Date: Mar 2008
Location: Calgary, AB
Posts: 4,420
|
I'm watching your upgrade closely as I need to do something with my AC. Keep up your documentation, it'll likely help when it comes time for me to do this.
On an other note, are you a Canadian ex-pat in Germany? Your jack stands appear to be from a Canadian Tire store over here. Motomaster is one of their brands and the logo appears to be the same. And your English seems is pretty good to be a second language... And the Can Tire website: 
__________________
Kevin 1987 ROW coupe, Marine blue, with a couple extra goodies. The cars we love the best are the ones with human traits, warts and all. |
||
|
05-24-2015, 07:27 AM
|
|
|
Registered
|
Would you consider, with Griff's possible approval, temporarily not reinstalling the rear lid condenser, use a bypass hose for the moment instead.
Test my theory? Griff has stated that non-barrier hose does not leak except post encountering an extreme pressure event, pressure high enough to rupture the hose inner liner. My own theory is that the primary, most probable, source for these obviously common extreme pressure events is SUPER-HEATING of the refrigerant via post engine shutdown RADIANT heating effects of a rear lid condenser that by pure happenstance is already at or near maximum compressor generated pressure. |
||
|
05-24-2015, 07:29 AM
|
|
|
Registered
|
Of what real good, functionality, is a "heat shield" that doesn't extend the shielding to cover the ~1400dF catalytic converter..?

|
||
|
05-24-2015, 07:38 AM
|
|
|
1984 911 Targa - "Sabine"
|
Canada Kev,
Will certainly keep the documentation coming - going well. WWest, First, am completing the install as per my purchased package (including the OEM deck lid condenser). As I've said before, I'm not AC savvy, and do not want risk anything, by trialling something new - maybe one day, but not now. Don't have a bypass hose either. As for the heat shield, it protects the hoses - they don't go any farther than the end of the metal plate.
__________________
Skip 1984 (RoW) 911 3.2 Li Carrera - "Sabine" 2011 Cayenne S |
||
|
05-24-2015, 07:42 AM
|
|
|
Registered
|
Quote:
Shielding the hoses from the ~300dF engine is a minor matter considering that the condenser is fully exposed to the full radiant heating of the ~1400dF catalytic converter. |
||
|
05-24-2015, 07:54 AM
|
|

|
|
El Duderino

|
Quote:
Go do the homework yourself and stop filling up the OP's thread with hypothesis and anecdotal stories. Start your OWN post when you have FACTS.
__________________
There are those who call me... Tim '83 911 SC 3.0 coupe (NA) You can't buy happiness, but you can buy car parts which is kind of the same thing. |
||
|
05-24-2015, 08:07 AM
|
|
|
Registered

|
Quote:
Have stated many times things like this: 'They leaked the day they came out of the factory because of the materials used in both the rubber and the fittings.' 'This old fashion hose line slowly leaks (permeates) refrigerant through its skin overtime; this is not a design flaw nor was the design intended to do so, it was simply the way things were.' Will, as you are aware, Skip started this thread so other forum members whom have an interest in what is involved in an AC overhaul an upgrade can get an idea of how it is done. This thread is not for you to rant about 'your ideas'; most of which have been posted on every AC thread you tend to annoy. So, for once in your life (god save us as we endure more of it), just sit back, be quiet, chill and learn something. |
||
|
05-24-2015, 09:07 AM
|
|
|
Registered
|
Then you weren't the source for this?...
Porsche 964-993 Barrier Hoses And what do you think of my suggested experiment? There is nothing to "learn" in blindly following someone else's instructions, learning involves understanding the how and why of those instructions. In short, experimentation "out side the box". Last edited by wwest; 05-24-2015 at 09:24 AM.. |
||
|
05-24-2015, 09:17 AM
|
|
|
Get off my lawn!
|
Quote:
This! Please just ignore Wwest and his inane drivel. I wish for the sake of future readers of this post he would delete his comments in this thread. I have driven my Griffiths equipped 911 in extreme heat. Drive for hours park and eat a meal and get back on the highway and cool down was rapid and wonderful. The Griffiths system works as designed. No need to try stupid experiments to prove a silly idea is really just that silly and stupid. Please Wwest just STOP. Start your own thread and leave this one alone.
__________________
Glen 49 Year member of the Porsche Club of America 1985 911 Carrera; 2017 Macan 1986 El Camino with Fuel Injected 350 Crate Engine My Motto: I will never be too old to have a happy childhood! |
||
|
05-24-2015, 09:21 AM
|
|
|
Registered
|
Quote:
But, join with me, please, in thinking outside the box, at least for the moment. Considering the single condenser/fan in the 964/993 series works so astoundingly well, why not the same, or like, approach to the pre-89 series? |
||
|
05-24-2015, 09:33 AM
|
|
|
Registered
|
Quote:
 Or the later plate and fin... Or the dual Kuehl...? Or with the now 70% improvement of the front lip condenser...? Grith's "learning" experience... Where does it end..?? Last edited by wwest; 05-24-2015 at 09:57 AM.. |
||
|
05-24-2015, 09:47 AM
|
|
|
Registered
|
There's a new front lip condenser that is 70% improved? Kuehl! Thanks for the heads up WWest! Going to check it out right now. Thank you so much for recommending the product!
__________________
2002 GMC Yukon SLE - 4AT - Purchased New in 2002 1988 911 Cab - 5MT - Purchased Used in 2005 2008 Cayman - 5MT - Purchased New in 2007 2014 911/50 - #1173 - 7MT - Purchased CPO in 2014 2019 Macan S - 7PDK - Euro Delivery/New in July 2019 |
||
|
05-24-2015, 09:51 AM
|
|
|
1984 911 Targa - "Sabine"
|
OK, so getting back ON TRACK please....
No need to provide instructions of installing the deck lid condenser, figured it out - quite simple using the PET parts program. I did have all the pieces, and here it is.   So, now based on further instructions, I can work to connect the rear LH wheel well condenser to the deck lid condenser and work out the hose / hinge aspects before tackling the final two hose aspects - Evaporator to Compressor / Deck lid condenser to compressor and the final electrics for the rear RH wheel well condenser and final compressor area wiring, but that will all have to wait till another day.
__________________
Skip 1984 (RoW) 911 3.2 Li Carrera - "Sabine" 2011 Cayenne S Last edited by Skip1; 05-25-2015 at 11:47 AM.. |
||
|
05-24-2015, 10:04 AM
|
|


 Sabine

 1985 Porsche Carrera
 Forever
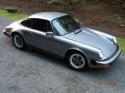 Whatever
 Fasst
Fasst 1983 Porsche 911SC Coupe
 2011 Mercedes-Benz E350 Cabriolet
 Carrera
 1988 Porsche 911 Cab
 2008 Porsche Cayman
 2014 Porsche 911 50th anniversary Edition
