|
|
|
|
|
| Author |
|
|
Registered

|
Quote:
All is good ,knew your voltage regulator was stuffed,thats the voltage range you should have and you didnt cook the altenator another bonus,ha ha you must be pleased.
__________________
1985 944 2.7 motor,1989 VW Corrado 16v,57 project plastic speedster t4 power,1992 mk3 Golf,2005 a4 b7 qt avant 3.0 tdi,1987 mk2 Golf GTI,1973 914,2.2t to go in. Past cars, 17 aircooled VW's and lots of BMW's KP 13/3/1959-21/11/2014 RIP my best friend. |
||
 08-12-2014, 07:02 PM
|
|
|
Certified Porsche addict
|
Mid engine madness.
I returned home about noon Saturday from a business trip and worked on Porsches pretty much the remainder of that day and Sunday. First on the list was a nagging issue with the wife's Boxster that had me remove the intake manifolds looking for vacuum leaks. I finished that job up this morning and went right to the 914. It's odd that a rusty race car is more enjoyable to work on that a modern daily driver. Maybe that's because I'm building the car the way I want it and not sticking to a form that's complex and highly engineered.
Anyway, I had painted the front calipers Saturday in between wrench turning on the Boxster so those were dry this morning. I loaded up the pads and installed them. They look pretty sweet with those Koni yellow strut tubes. Then I'm back into the fuel delivery system. I drilled a 3/4" hole in the pan to get a better insert on the braided fuel line going through the tunnel (that hole and the firewall will need grommets). After I fished that through, I put the AN fitting on and started looking at how I was going to tie that into the fuel pump. I have a nice Fram fuel filter that I wanted to use but there was a couple of brass fittings that were needed to mate that up so that's a trip to the auto parts store. Another thing I wanted to do was put a primer bulb in-line because the fuel pump is above the tank level. Did you know they have those at Walmart? So with a couple hands full of parts here's what I ended up with... fuel tank to fuel filter - steel braided 3/8" hose fuel filter to primer bulb - 3/8" fuel line primer bulb to fuel pump - 3/8" fuel line fuel pump to tee fitting - 38" fuel line I did have a fuel pressure regulator after the pump before the tee fitting but it failed and started leaking badly. So I eliminated that and I suspect I won't need one. After I plumbed all that up and used padded clamps to tiddy everything up - I gave the bulb a couple of squeezes and fired the engine up. Nice! I've got a combo timing/dwell/RPM/volt meter on order so next up will be to get dwell and timing set. Once I've done that, I'll sync the carbs and the engine should be ready to go into the car. 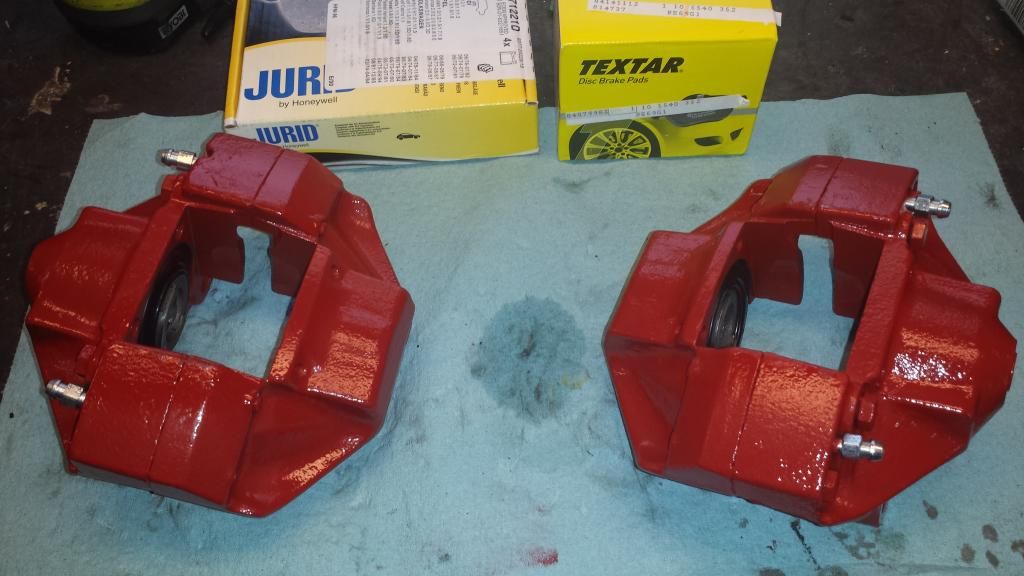  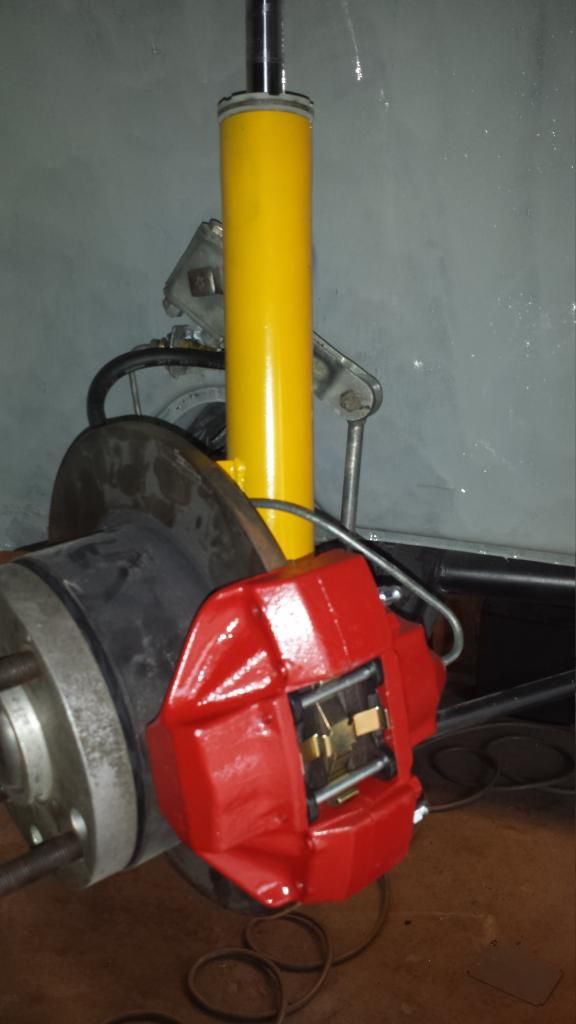 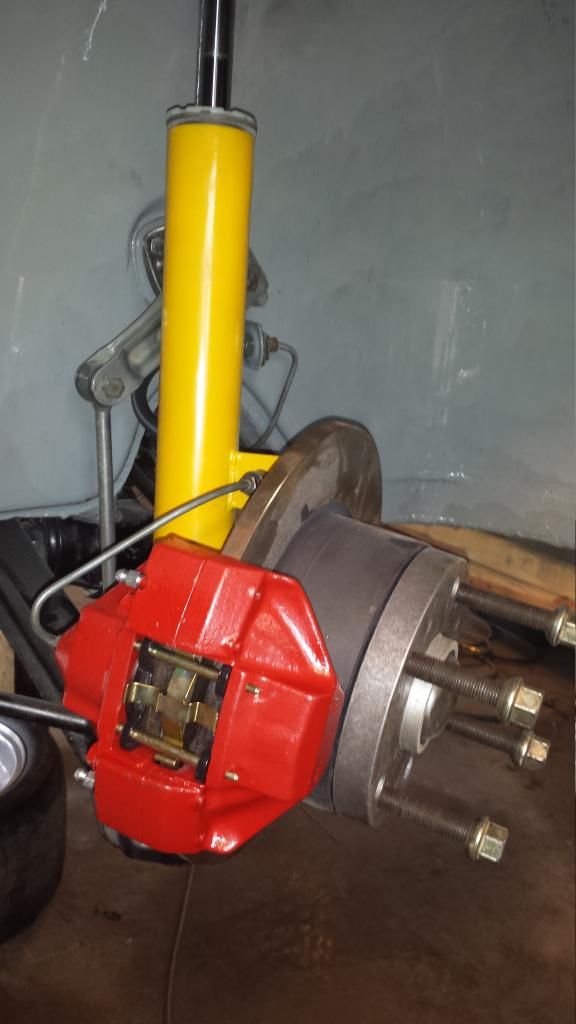 
__________________
Tennessee Region SCCA & PCA Current projects - '87 944 Turbo, '87 924S, '82 931, '10 Boxster (the girlfriend) Past projects - '83 944, '02 Boxster (x2), '99 Boxster, '14 Cayman,'72 Opel GT, '75 280Z, '90 300ZX, '87 944S, '87 944 Turbo, '88 924S (x2), '07 Cayman S, '73 914, '88 MR2 AW11 |
||
|
08-17-2014, 05:46 PM
|
|
|
Administrator

|
A few points to consider:
- I really hate the idea of running stainless-braided lines through the tunnel. The braid makes a surprisingly good file, especially when near wiring harnesses or brake lines. I would suggest using brake "hard line" through the tunnel. - The pump will not like being above the fuel level, even with the priming bulb. It is much more likely to live a long and happy life down at the base of the firewall. --DD
__________________
Pelican Parts 914 Tech Support A few pics of my car: http://www.pelicanparts.com/gallery/Dave_Darling |
||
|
08-17-2014, 08:57 PM
|
|
|
Certified Porsche addict
|
Quote:
The braided fuel line makes some contact with the clutch and throttle sleeves but is routed under the wire harness at the rear. And with it being a autocross only car, I think abrasion will be minimal. I agree with the pump location. I'm not fond of the cheapo after-market pump anyway. But this set up should get me through testing and tuning. If the chassis holds together the fuel delivery system will get improvements.
__________________
Tennessee Region SCCA & PCA Current projects - '87 944 Turbo, '87 924S, '82 931, '10 Boxster (the girlfriend) Past projects - '83 944, '02 Boxster (x2), '99 Boxster, '14 Cayman,'72 Opel GT, '75 280Z, '90 300ZX, '87 944S, '87 944 Turbo, '88 924S (x2), '07 Cayman S, '73 914, '88 MR2 AW11 |
||
|
08-18-2014, 03:31 AM
|
|
|
Certified Porsche addict
|
Dwell, timing, sycro and stuff.
Mid week I got the combo dwell/timing light and I'm glad I spent the extra cash over a simple timing light. This unit has the digital display with volts, rpm, dwell, timing and advance timing. I had a couple hours in the evening to take a look. When I first checked dwell, it was actually really close, 43. I tried to tweek it but loosening the screw just made it much worse. So I used a feeler gauge and got it back to 43. Then I set the light to zero advance and got the engine running about 850 rpm and the timing mark was right on the money. Then I set the advance timing to 27 and rev'd up to 3500 rpm, again, right on the mark. Having the rpm display right on the light is great! Then I got out my flow meter for the carbs to see how those were breathing. With the linkage off the passenger side is 7 and the drivers side is 3.5. That's with the idle adjustment 1 1/2 turns out like the Redline manual recommends. Tweeking that adjustment enough to move the flow meter on the drivers side only makes the engine run rough. Also, with the engine on the bench stand, it's bouncing about and hard to get a good flow reading. I set my target on this weekend to get the engine in the car.
I'm up early today to beat the heat. I get the hardware together for transmission and motor mounts and start lower the car down over the engine. That goes well and I bolt up the new solid transmission mounts first. Then I lower a bit more to get the engine mount bar to line up and bolt that to the chassis. I've also got the solid motor mounts so I loosened up the old rubber mounts, put a jack under the sump and swopped the mounts. After tightening everything up and making neat coils out of the electrical and fuel lines (those are a little long so I can drop the engine and test) I get in the car a fire it up. What a difference having the engine solidly mounted! Idle is much smoother because the linkage isn't floping about. I get the flow meter out again and I'm able to bring the drivers side carb up to 7 by carefully adjusting the linkage. Smooth! Now that the car is quite a bit lower, I decide to finish the peddle mounts. This floor pan is missing the peddle riser so there's a gap under the peddle assemble. I trim a couple of spacers to fit and bolt that proper to the pan. So now the gas peddle needs the same elevation. Instead of using more spacers, I had a piece of sheet metal that was a perfect shape (it's a segment of the floor pan cross member). I bolted the gas peddle to it and then pop riveted the sheet metal to the floor pan. Eventually I will need a large plate for my heels to rest on but that can wait. Before I gave into to the sweltering heat, I got under the transmission to look at the shifter linkage and clutch cable. I had gotten a refurbished shifter coupler and I installed that on the the rear bar. I got that bar inserted into the correct position but I'm missing some linkage at the transmission. I also put on the clutch cable pulley and housing on but the cable itself is too far gone. Tonight I'm getting a list of parts together for clutch and shifter linkage. All in all a very productive day! 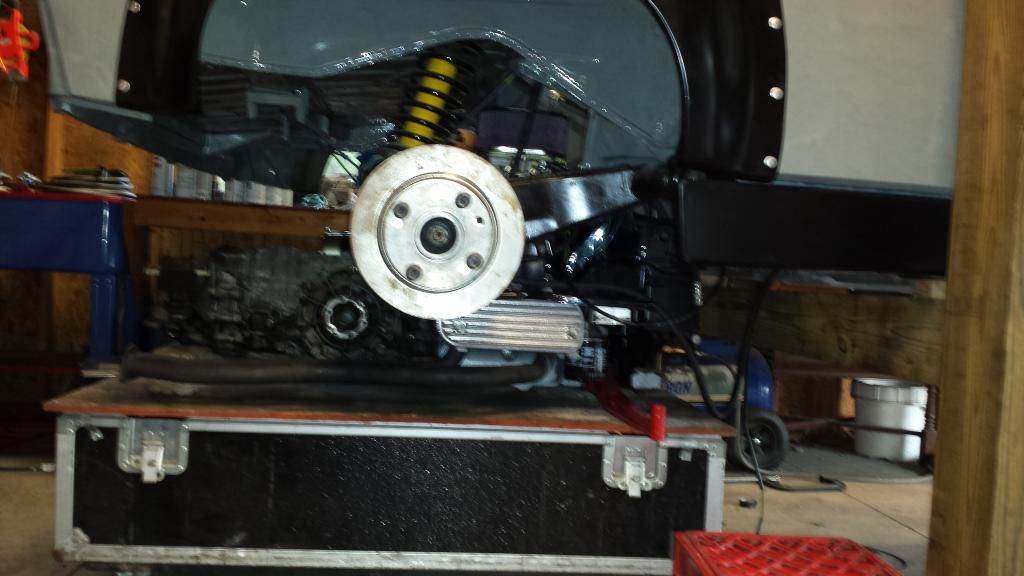 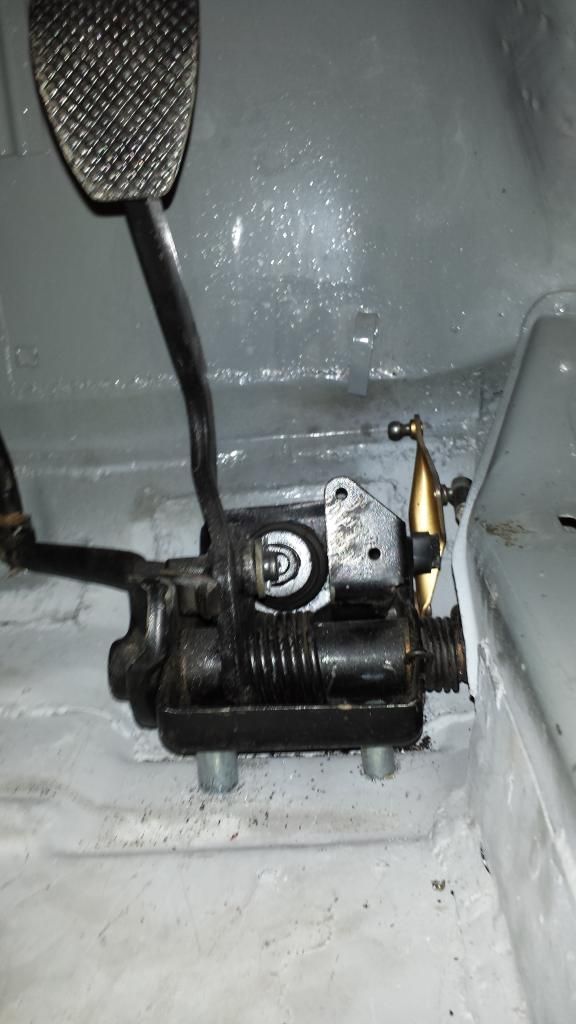 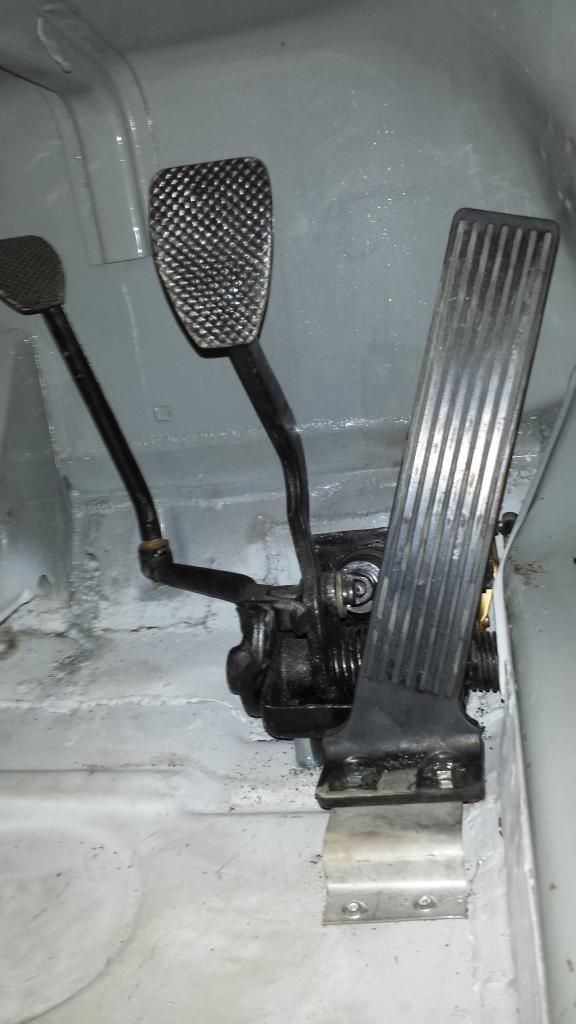 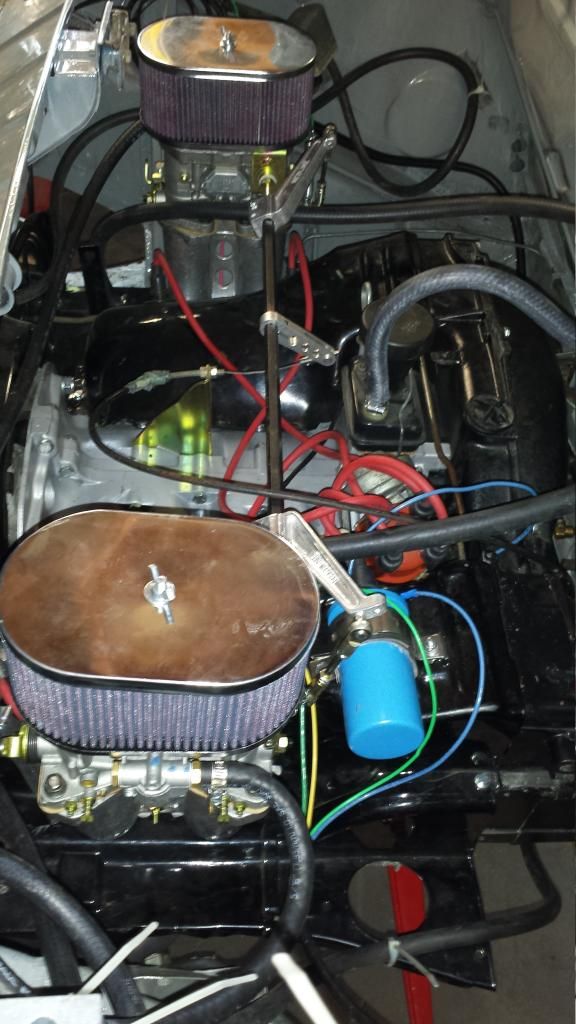
__________________
Tennessee Region SCCA & PCA Current projects - '87 944 Turbo, '87 924S, '82 931, '10 Boxster (the girlfriend) Past projects - '83 944, '02 Boxster (x2), '99 Boxster, '14 Cayman,'72 Opel GT, '75 280Z, '90 300ZX, '87 944S, '87 944 Turbo, '88 924S (x2), '07 Cayman S, '73 914, '88 MR2 AW11 Last edited by The Glademister; 08-23-2014 at 06:32 PM.. |
||
|
08-23-2014, 06:29 PM
|
|
|
Certified Porsche addict
|
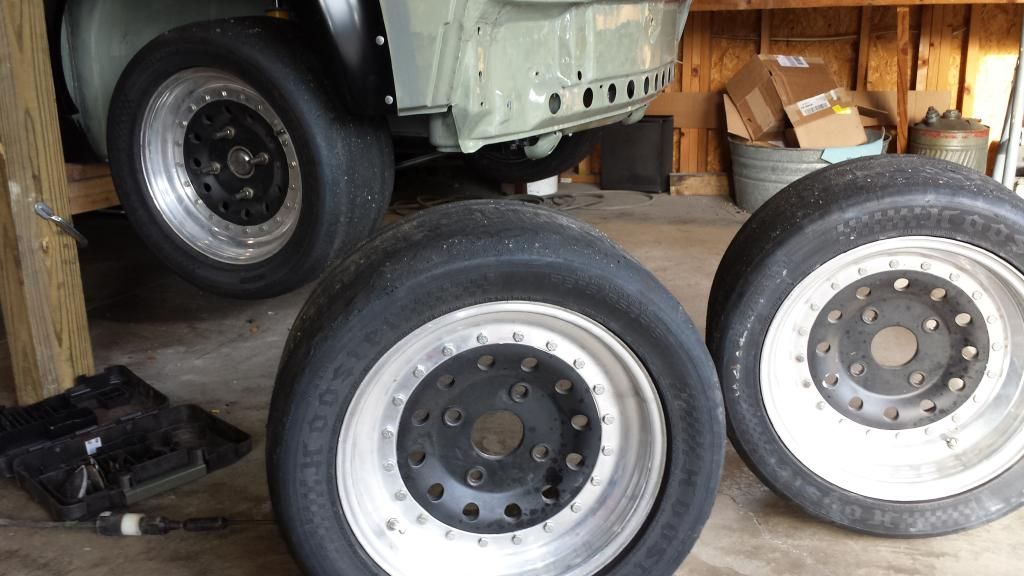
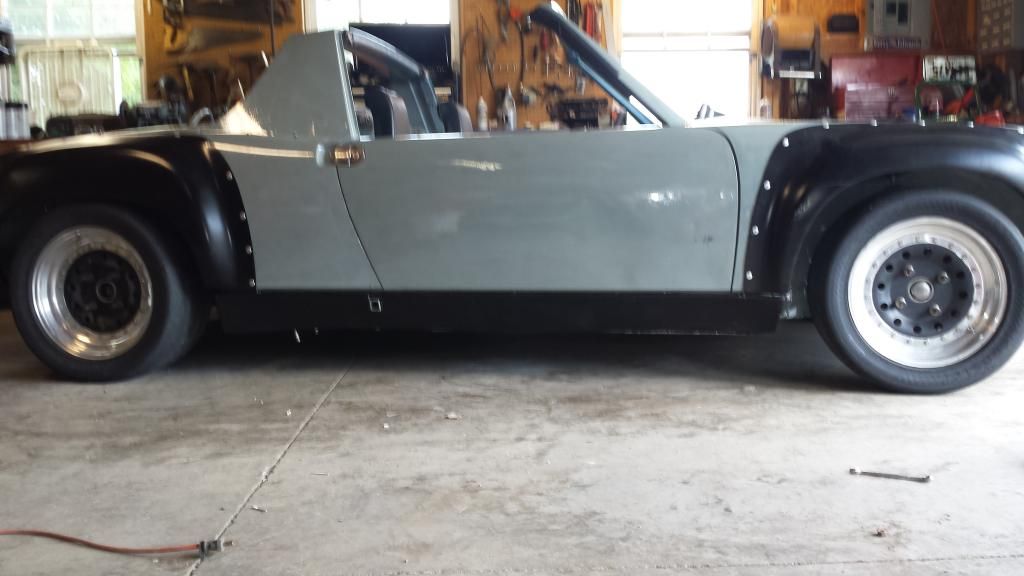
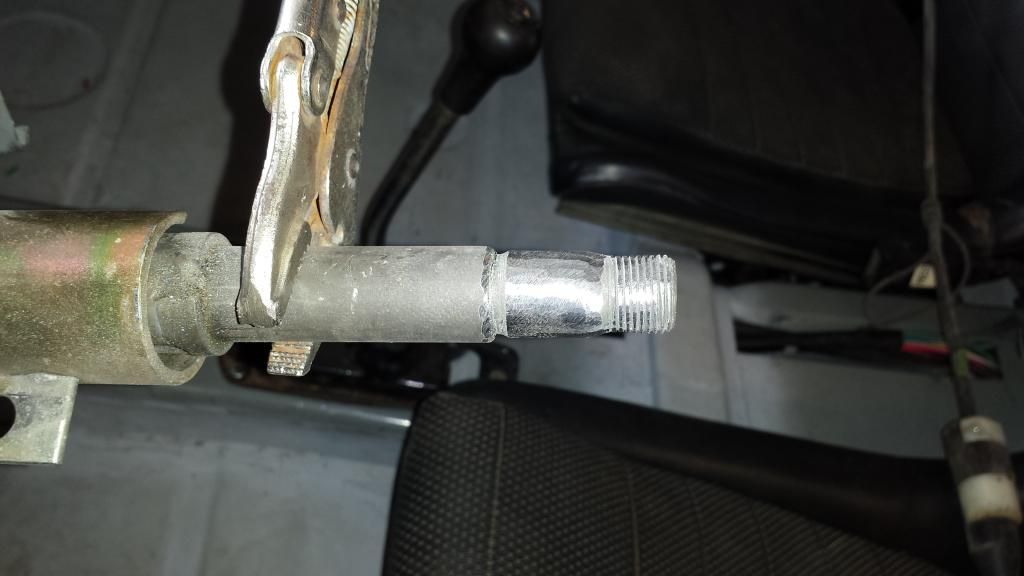
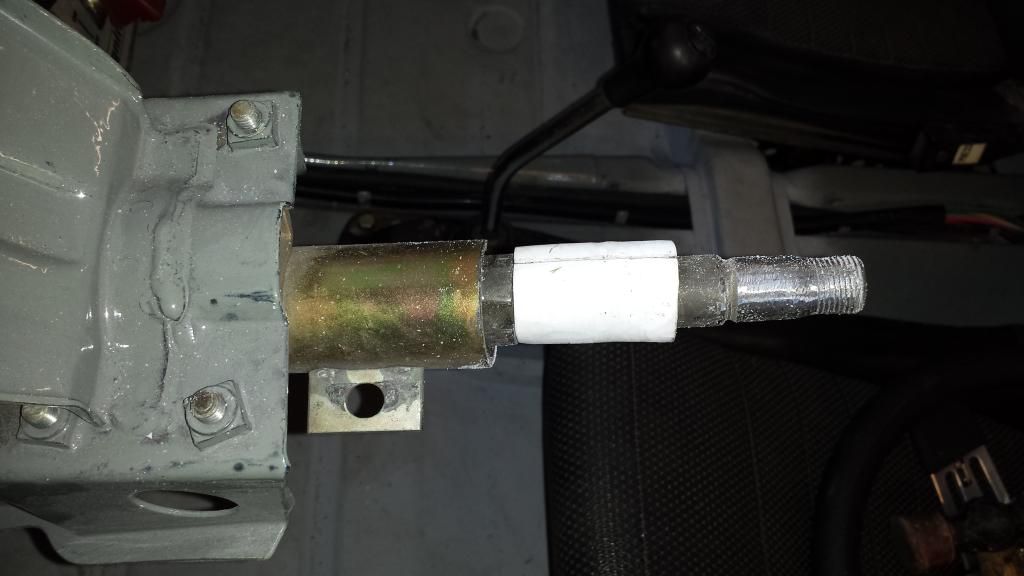
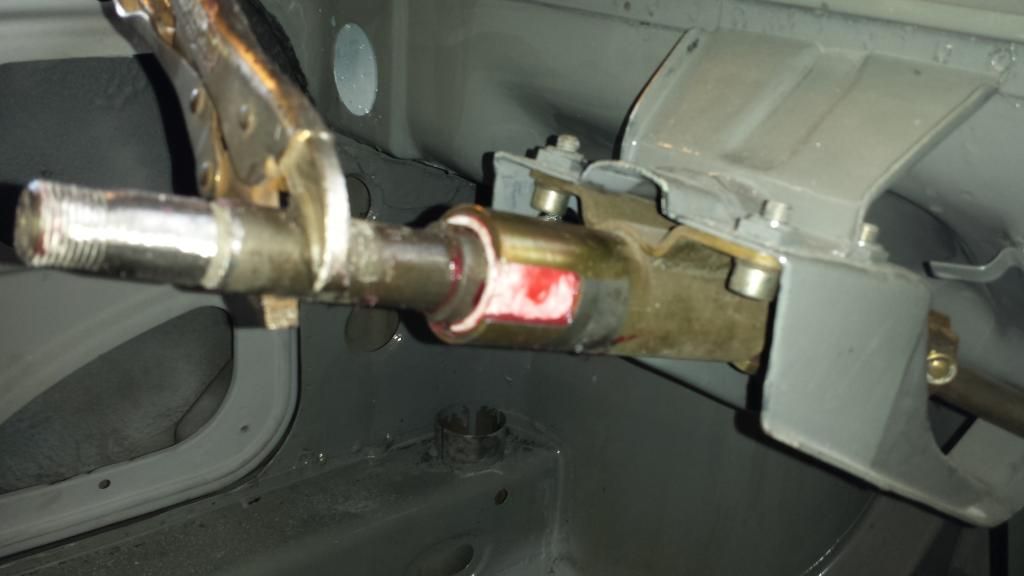
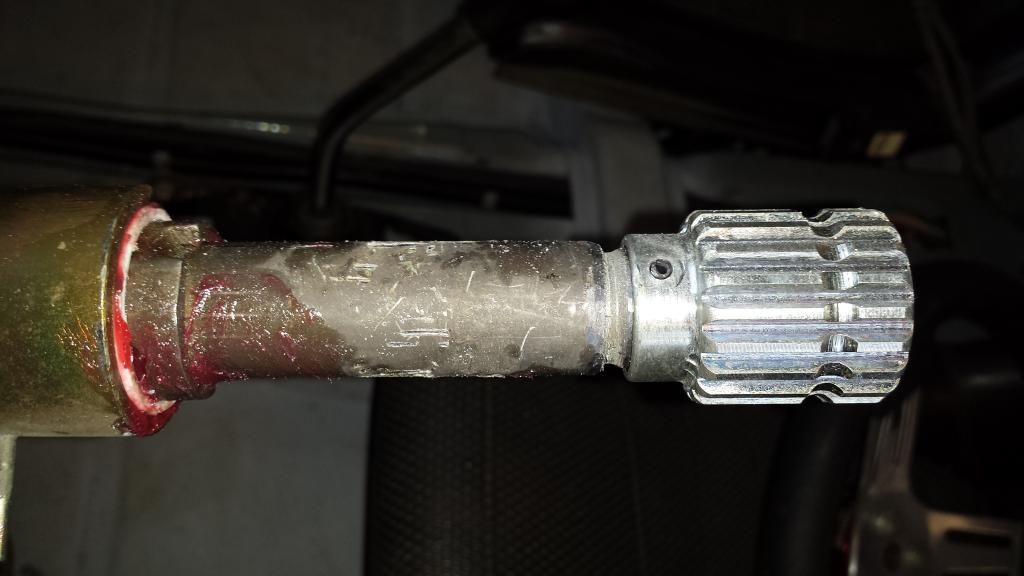
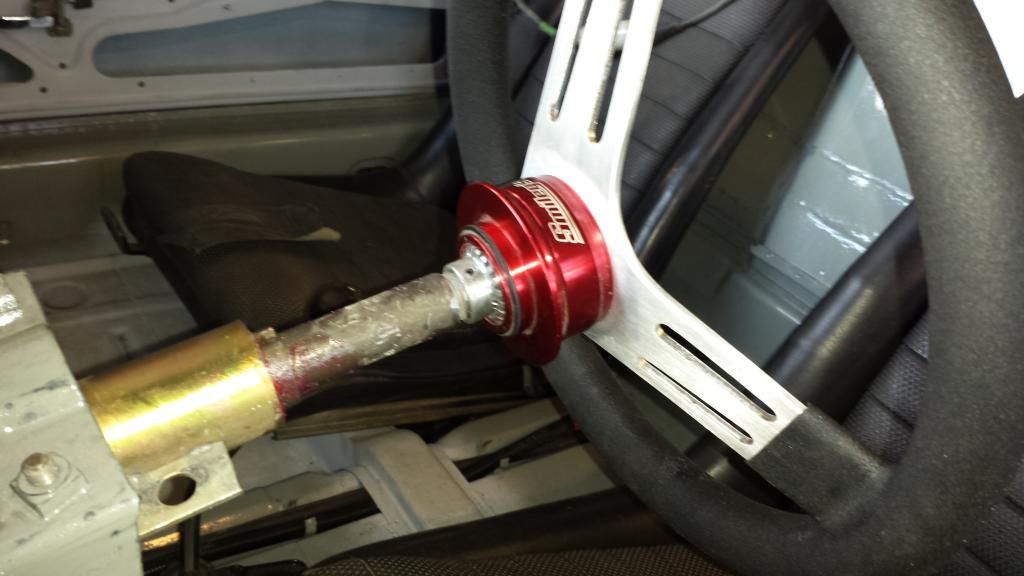
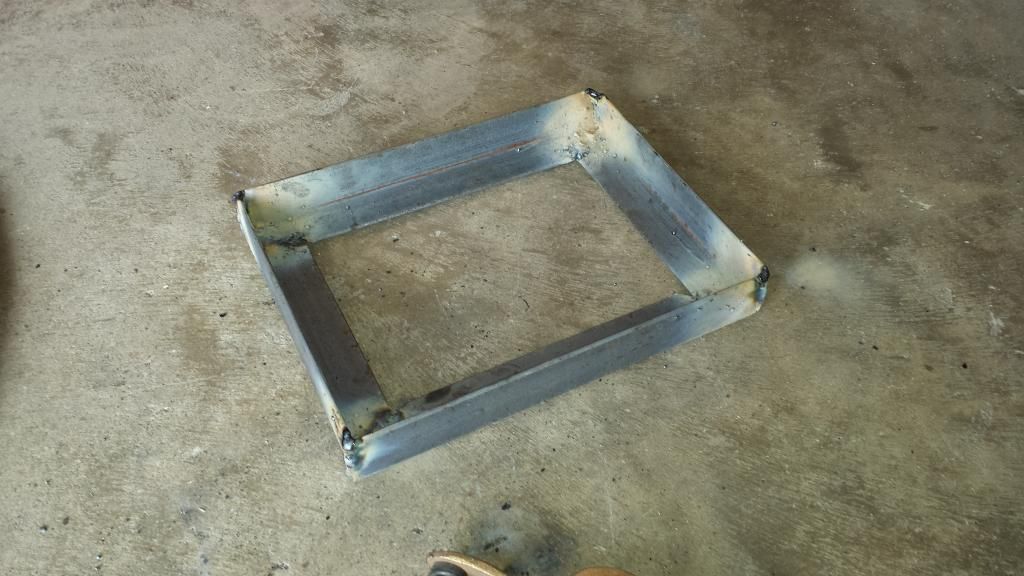
Lowering, steering wheel & battery tray.
Another productive day whilst the wife shops with a friend. I put the race wheels with the new (to me) Hoosier A2s on the car this morning and got it off the hill-billy lift. I put the Bilstien shocks on the lowest ride setting and re-indexed the torsion bars to achieve about 6" to the bottom of the kick panels. The left rear tire is contacting the flare so I'm probably going to have to raise the rear one notch. Then I went to work mounting the racing steering hub to the OEM steering rod. The opening on the splined adapter was 19mm and the splines on the rod were 21mm. So I set about with a mini grinder to remove those splines for a bare shaft that would match the adapter. Another issue in that area is the rod has play in it when you remove the turn signal/wiper assemble because that has a bushing that tightens the shaft up. So I got a 2" piece of 1" ID schedule 40 PVC pipe. The inner dimension was just a tad tight so I split it and the outer had do be thinned as well. Basically I formed that PVC to fit as a bushing on the steering shaft. Put a little grease and it works quite nicely. I had to do so very careful material removal to get the adapter to fit snugly. When I was satisfied with that fit, I followed up with a 1/8" hole and roll pin through the adapter and shaft. The steering wheel is a 14" aluminum cart wheel and I love it! My last task for the weekend was to fabricate a battery tray for the former fuel tank compartment. Using 1 1/2" x 1/4" angle iron I cut and welded up a base for the Optima red top battery. I actually used the old Lincoln buzz box and it was interesting to note how much easier I can weld on that after hundreds of sheet metal welds. I fitted the tray into the best spot in the compartment and bolted that for fitting a support. That was simply some 1/4" flat stock bent to conform. That's drying this evening after paint. It was a hot but very productive weekend in the shop!
__________________
Tennessee Region SCCA & PCA Current projects - '87 944 Turbo, '87 924S, '82 931, '10 Boxster (the girlfriend) Past projects - '83 944, '02 Boxster (x2), '99 Boxster, '14 Cayman,'72 Opel GT, '75 280Z, '90 300ZX, '87 944S, '87 944 Turbo, '88 924S (x2), '07 Cayman S, '73 914, '88 MR2 AW11 |
||
|
08-24-2014, 05:37 PM
|
|

|
|
Certified Porsche addict
|
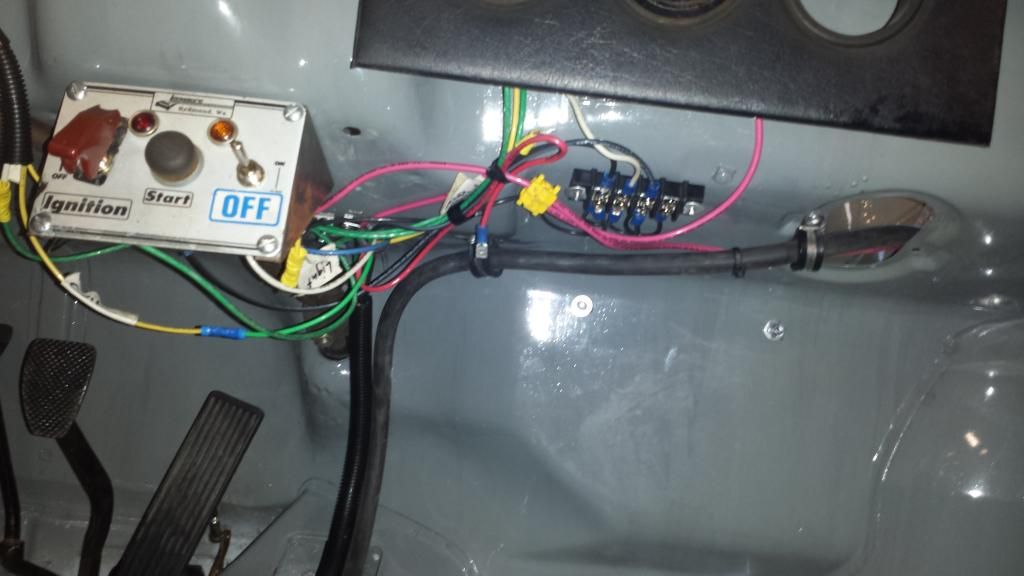
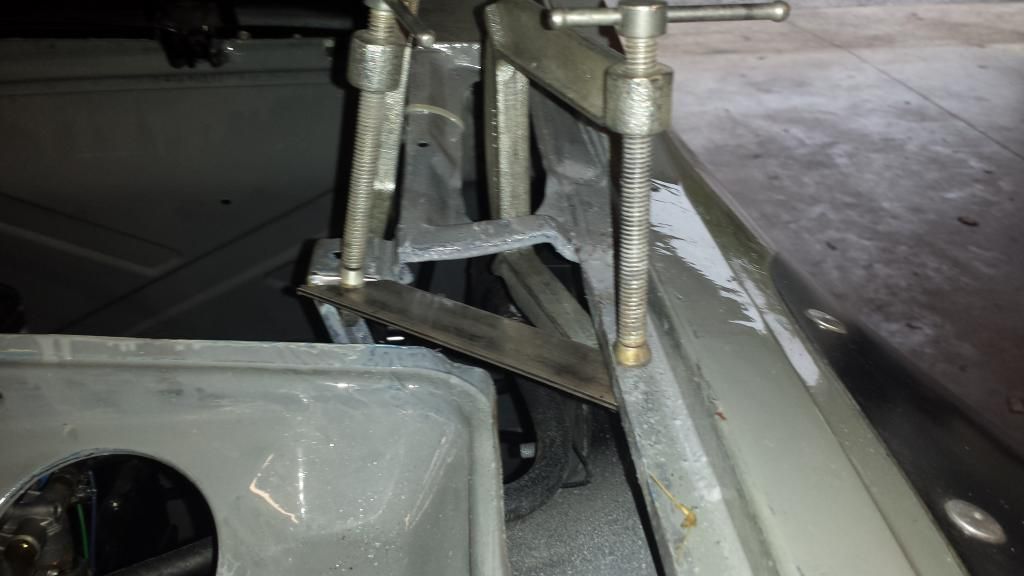
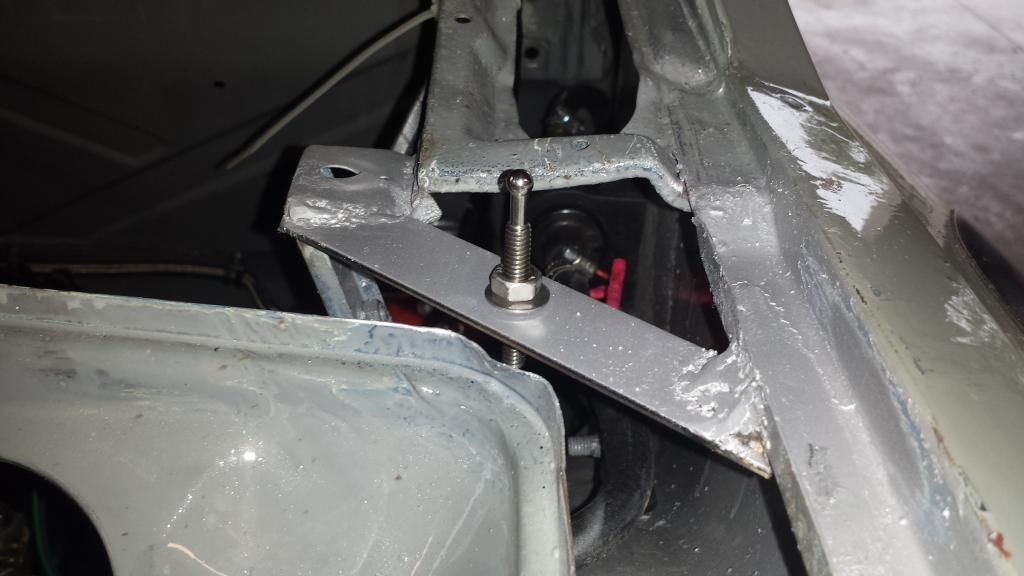
Finished tray.
Just a couple of quick photos to show the finished battery tray. I'm very pleased with the look and rigidity. All cables neat and tidy. I'm considering a master cut-off switch. Positive or negative lead on that?
__________________
Tennessee Region SCCA & PCA Current projects - '87 944 Turbo, '87 924S, '82 931, '10 Boxster (the girlfriend) Past projects - '83 944, '02 Boxster (x2), '99 Boxster, '14 Cayman,'72 Opel GT, '75 280Z, '90 300ZX, '87 944S, '87 944 Turbo, '88 924S (x2), '07 Cayman S, '73 914, '88 MR2 AW11 |
||
|
08-25-2014, 05:35 PM
|
|
|
Certified Porsche addict
|
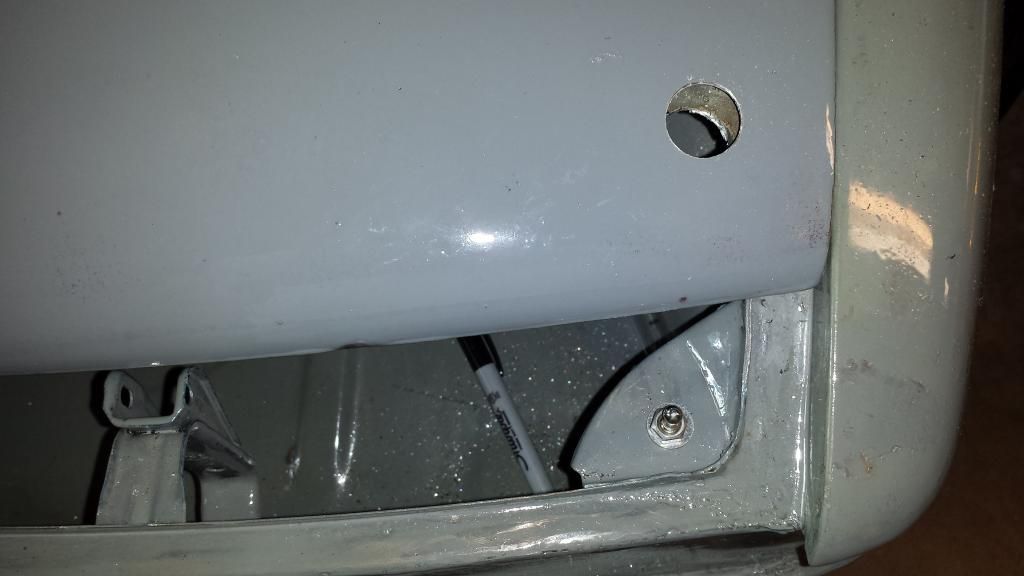
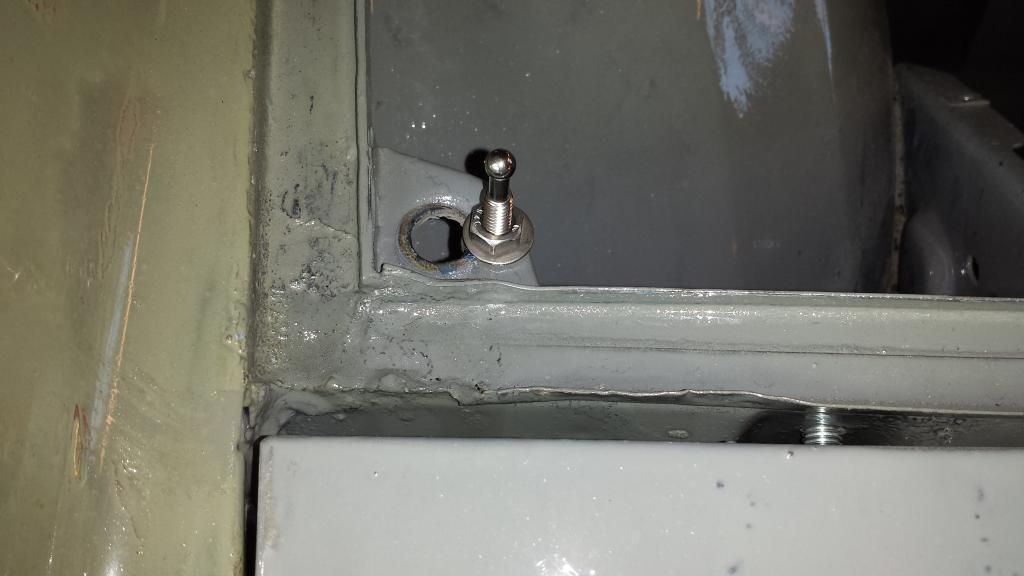
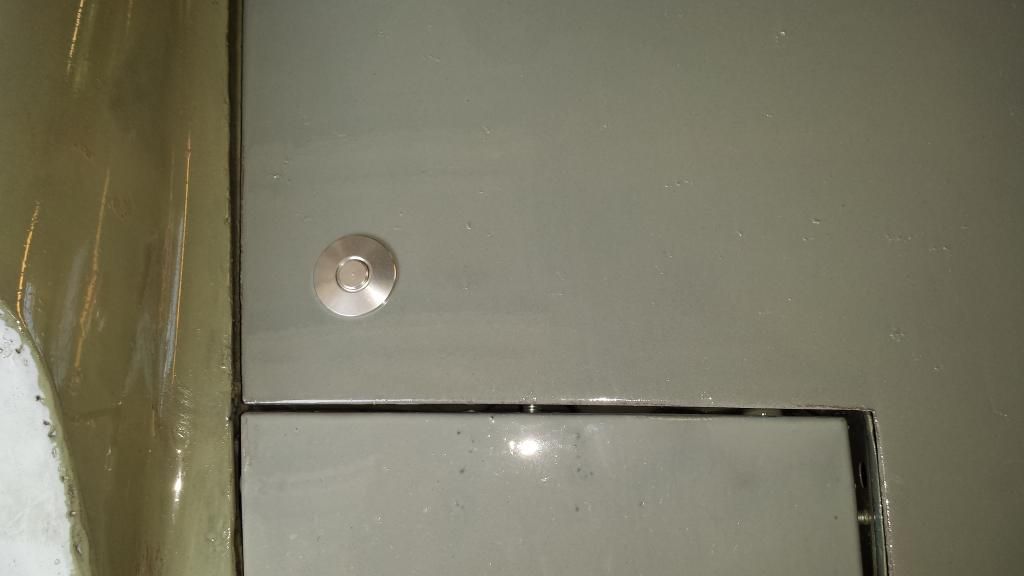
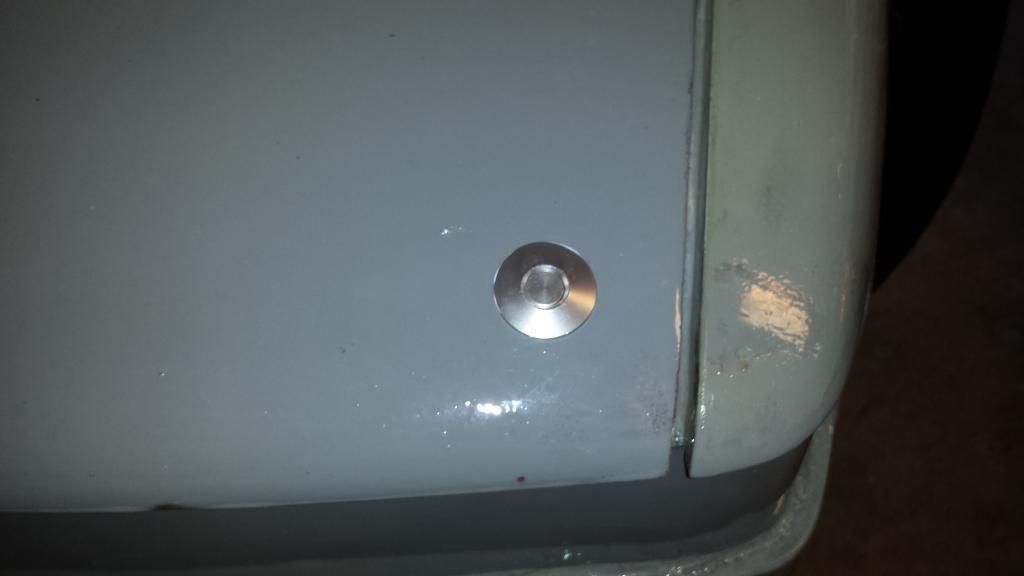
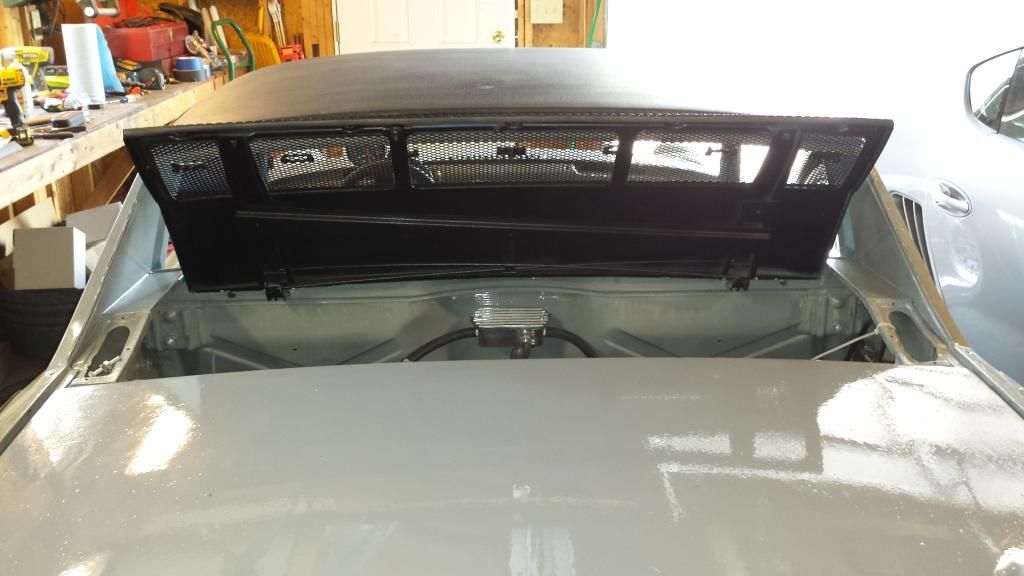
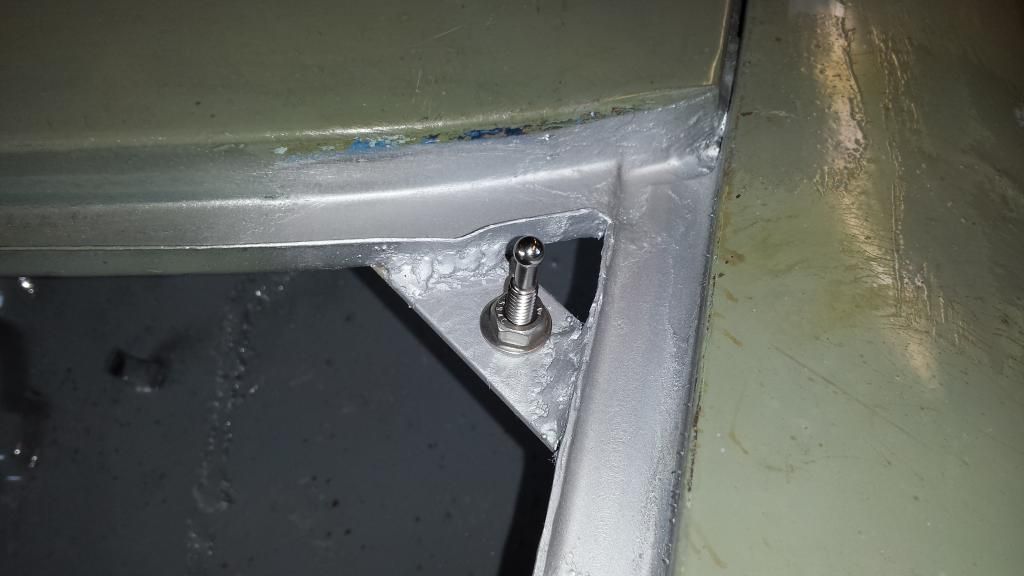
Quick Latch
I've had a few hours after work the last few days to start installing hood latches. I picked mini Quick Latches for size and cost. There's You Tube videos from the manufacturer but I thought I'd show how well it worked on the 914. On the rear trunk hood I started with the rear two latches because there's a great mounting spot already in the trunk. That's where the rubber stoppers fixed to the hood contact the body. After carefully measuring I drilled those plates out and put in the posts. Now the hardest part is measuring and cutting the holes for the receiver mechanism. There's supporting structure under the hood that has to be cut away. A hole saw will do the job but it's odd because you're cutting a contoured surface. That hole also has to be large enough to get a 20 mm socket to tighten up the retaining nut on the receiver. Once you've done that you can remeasure for the 3/4" hole in the hood top that the receiver fits in. I drilled a small pilot hole first and laid the hood down to see that the pin was in visible. If you've made a small error, you can correct as long as it's within the 3/4" area. After drilling that out, I put the receiver in and found a design flaw. The threaded portion of the receiver body doesn't allow the locking nut to tighten on thin metal. There's a 1 or 2 mm shoulder. That's dumb! Anyway, I found some large copper washers that fit fairly well and added the thickness needed to tighten. I'll get some proper washers when I do the top latches. Those will need some structure added inside the front and rear trunks for a mounting position for the posts. I'm thinking 1" x 1/4" flat stock cut to fit in the corners. The front trunk pins had a nice mounting point where the rubber bumpers are pushed in. Running out of garage time I got the engine lid and targa top on. The engine lid is a nice fit but the targa top will need that molding along the windshield top frame to fit tightly.
__________________
Tennessee Region SCCA & PCA Current projects - '87 944 Turbo, '87 924S, '82 931, '10 Boxster (the girlfriend) Past projects - '83 944, '02 Boxster (x2), '99 Boxster, '14 Cayman,'72 Opel GT, '75 280Z, '90 300ZX, '87 944S, '87 944 Turbo, '88 924S (x2), '07 Cayman S, '73 914, '88 MR2 AW11 |
||
|
08-28-2014, 06:11 PM
|
|
|
Certified Porsche addict
|
Exhaust and transmission
Today I installed the Sebring Exhaust purchased from our host. I went with that for cost and weight. Installation was simple. I got some exhaust hangers and clamps from a local car parts. I bent the hanger ends at a right angle, drilled and tapped two 8mm holes in the under rear trunk cross member. That was actually the hardest part having to work the tap pointed up. That metal is a little thin but I believe the 8mm bolts are getting a good bite. You can listen to the exhaust note here...
https://www.youtube.com/watch?v=68XvEeZ0zgY Then I moved to finishing the transmission linkage with parts that were missing. I buggered up the bushing on the shift rod at the transmission and I need to install a new clutch cable but I was able to jam though the gears with the car idling to confirm that the transmission does indeed work. There's some vibration in 4th but the wheels are turning so that's a good start. I also dug out the front targa top molding from storage, cleaned it up with Armour All and installed that. The targa top really needed that for a tight fit. 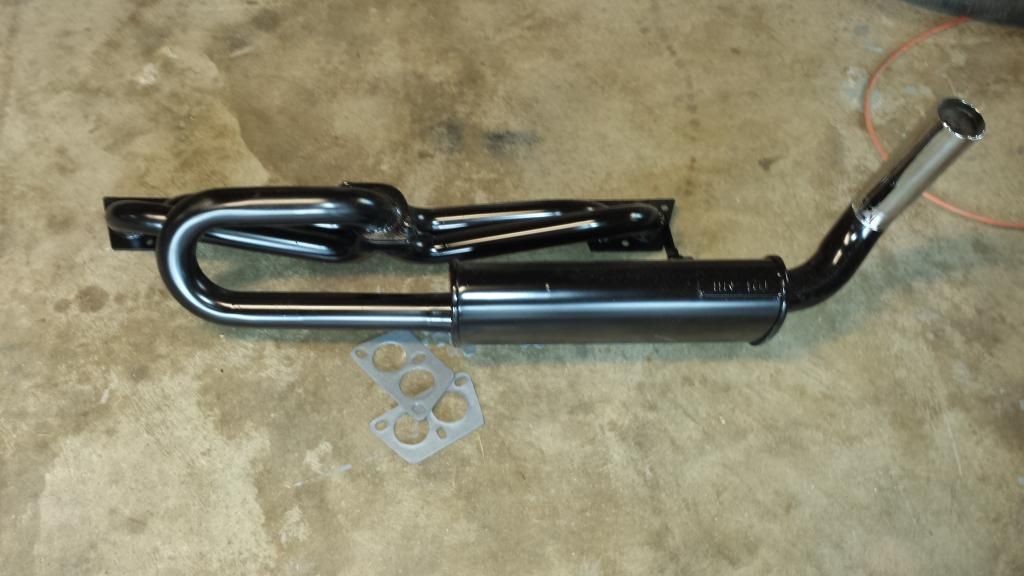 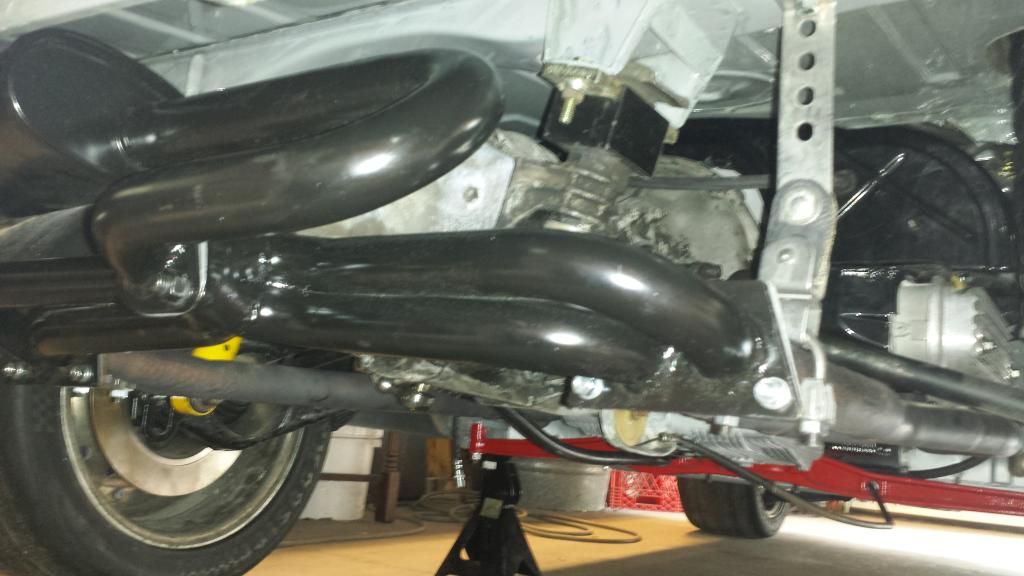 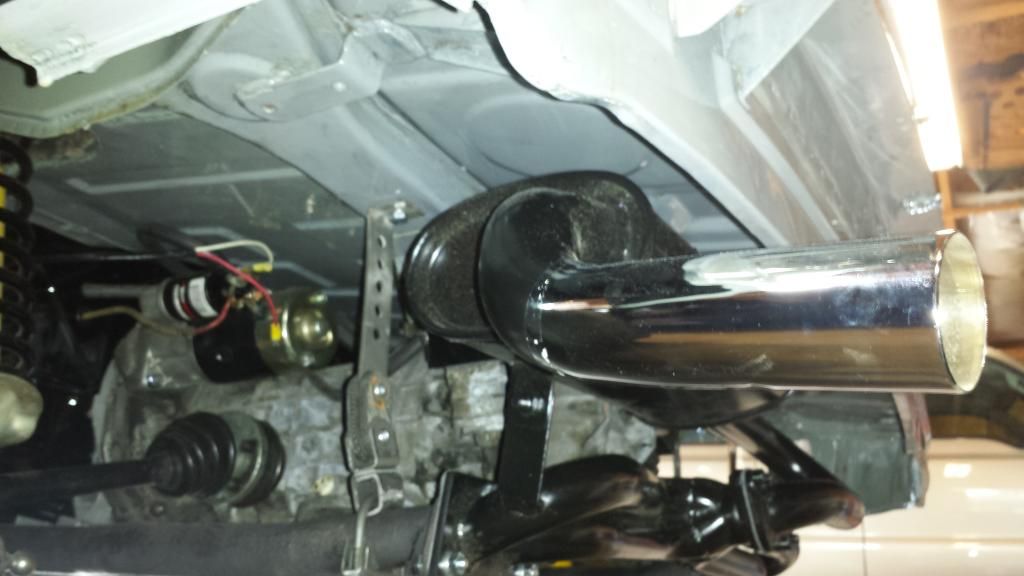
__________________
Tennessee Region SCCA & PCA Current projects - '87 944 Turbo, '87 924S, '82 931, '10 Boxster (the girlfriend) Past projects - '83 944, '02 Boxster (x2), '99 Boxster, '14 Cayman,'72 Opel GT, '75 280Z, '90 300ZX, '87 944S, '87 944 Turbo, '88 924S (x2), '07 Cayman S, '73 914, '88 MR2 AW11 |
||
|
08-30-2014, 03:46 PM
|
|
|
Administrator
|
The whole drivetrain will move under power, braking, and cornering. Your hangers will not, or at least not move much. The original setup had a boomerang-shaped piece of metal that went from the inboard muffler bolts to two bolts in the end of the transmission cover. Look for them. That let the muffler and exhaust move with the whole drivetrain, and did not put stress on the exhaust studs or the exchangers.
I would strongly recommend either duplicating the factory setup, or finding the real piece. --DD
__________________
Pelican Parts 914 Tech Support A few pics of my car: http://www.pelicanparts.com/gallery/Dave_Darling |
||
|
08-30-2014, 07:13 PM
|
|
|
Certified Porsche addict
|
Quote:
Ultimately (if the chassis holds together) I'll sell the OEM headers, aftermarket muffer and pipe for a true race exhaust system. That may be a year or so from now though. Thanks for the heads-up though!
__________________
Tennessee Region SCCA & PCA Current projects - '87 944 Turbo, '87 924S, '82 931, '10 Boxster (the girlfriend) Past projects - '83 944, '02 Boxster (x2), '99 Boxster, '14 Cayman,'72 Opel GT, '75 280Z, '90 300ZX, '87 944S, '87 944 Turbo, '88 924S (x2), '07 Cayman S, '73 914, '88 MR2 AW11 |
||
|
08-31-2014, 04:53 AM
|
|
|
Certified Porsche addict
|
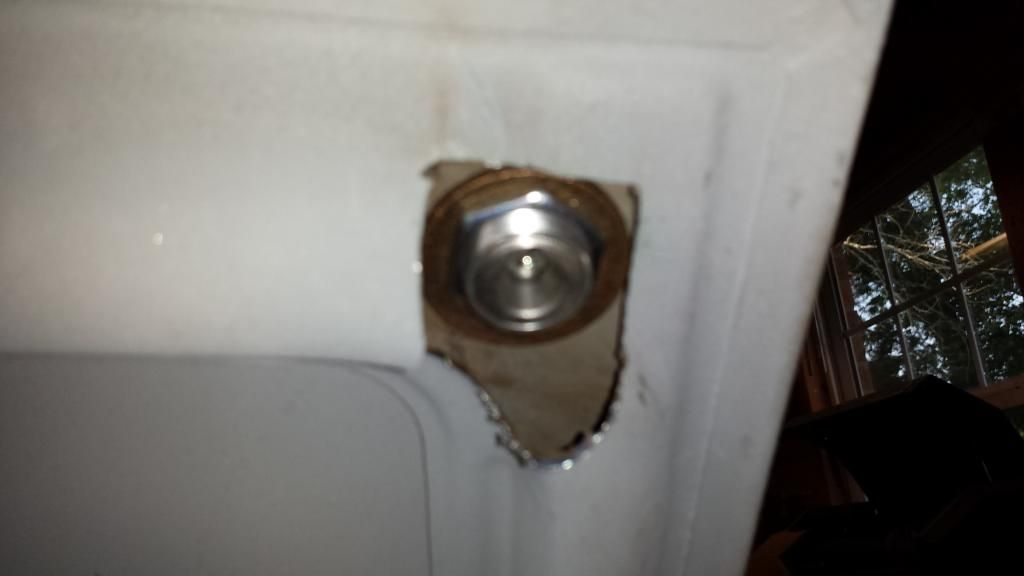
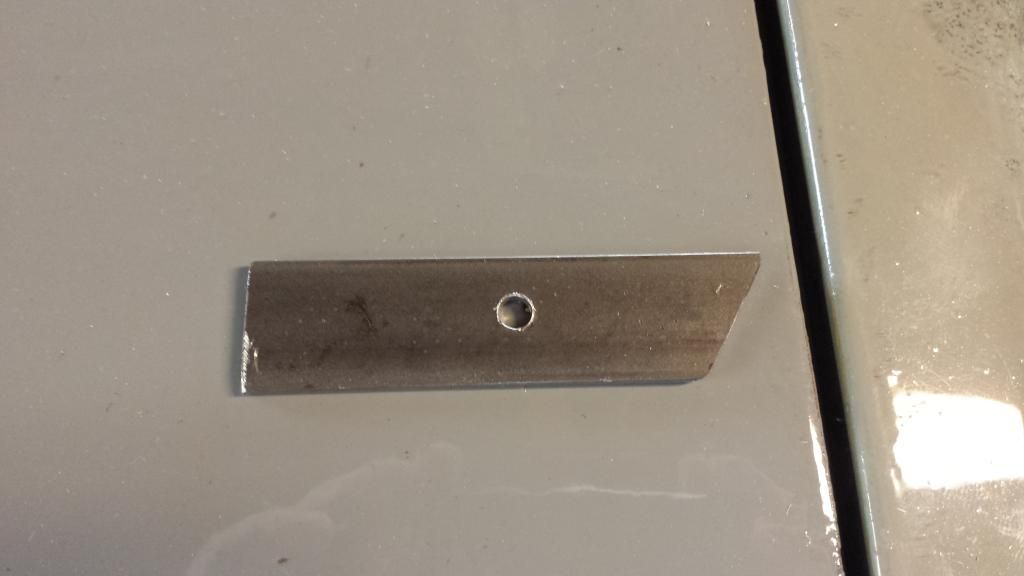
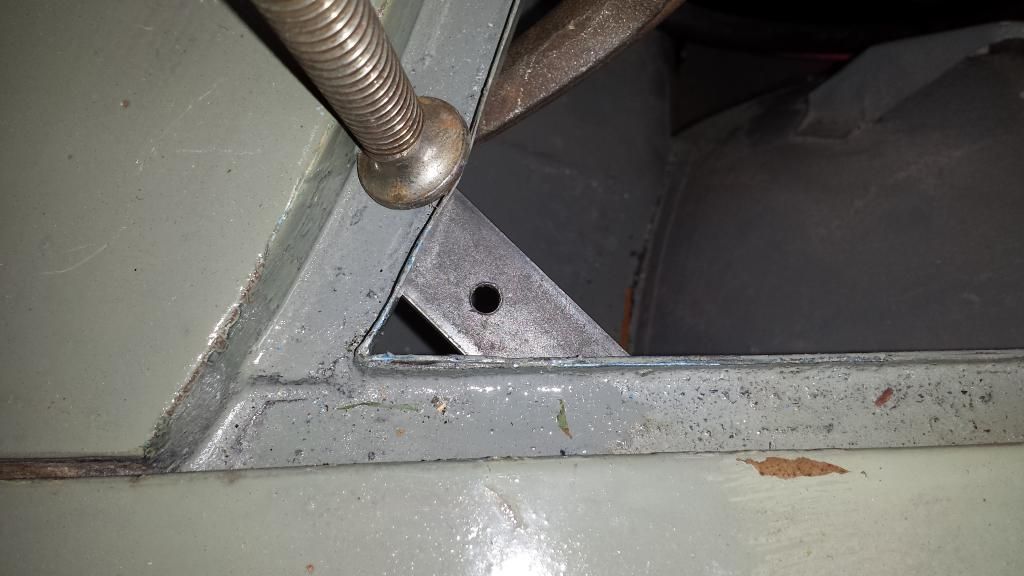
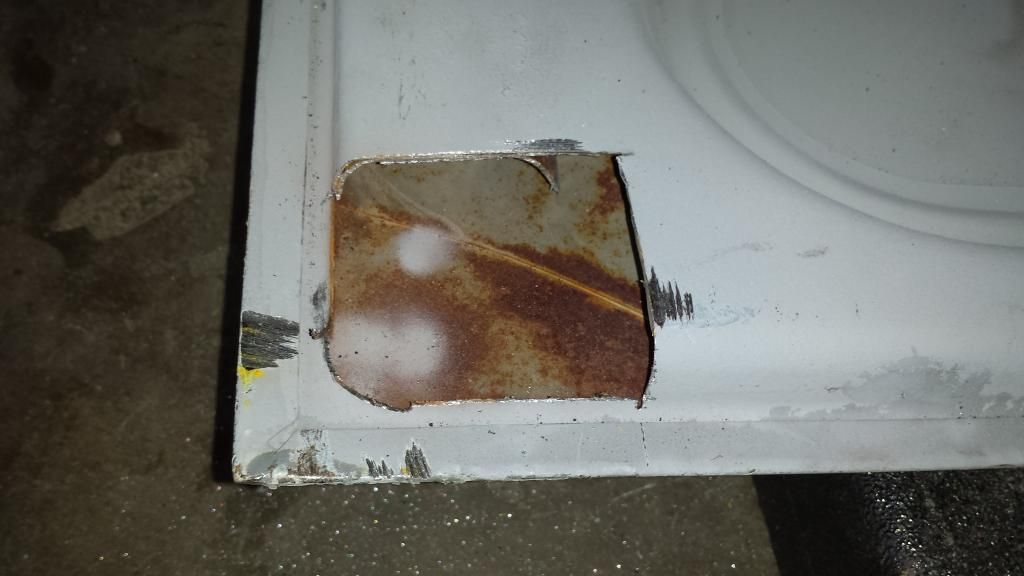
More mini latches
I've finished up the mini latch install. Last Monday I did the top two on the front hood and today I did the top two on the rear hood. I had to weld in bar stock for those posts. I'm fairly pleased with the results but it turned out to be a little more difficult than I thought it would be. I also opened up the supporting under-structure to install large flat washers. That's some real butchery but the receivers are now very tight. Note the rust inside of this structure. That just gives everyone an idea exactly how far one would need to go to have a truly rust free 914. I also installed a new throttle cable and the OEM seat belts. The new throttle cable has help settle down the idle even more.
__________________
Tennessee Region SCCA & PCA Current projects - '87 944 Turbo, '87 924S, '82 931, '10 Boxster (the girlfriend) Past projects - '83 944, '02 Boxster (x2), '99 Boxster, '14 Cayman,'72 Opel GT, '75 280Z, '90 300ZX, '87 944S, '87 944 Turbo, '88 924S (x2), '07 Cayman S, '73 914, '88 MR2 AW11 |
||
|
09-07-2014, 04:24 PM
|
|

|
|
Certified Porsche addict
|
Rolling in brake fluid
I hit a set back last night. Over the last few evenings I finished the prep and paint on the rear calipers. Last night I got those installed and started bleeding the system. I was using a power bleed but progress was slow. The rear calipers bled out fairly quickly but I was really struggling to get fluid out of the fronts. Then I found a loose fitting on the master cylinder. After getting that secure, finally I began to get fluid out of the front bleeders. After getting all the bubbles out bottom and top, I'm thinking "oh boy, stiff brake peddle" - not so much
 It's apparent that the OEM master cylinder isn't creating much (if any) pressure. So I'm biting the bullet and ordering a new master cylinder. It's going to be a 19mm which I really wanted to see how well the car braked with the OEM 17mm but those are $$$. I'm also not looking forward to pulling the master cylinder and fighting those grommets again. Just a small bump in the road... It's apparent that the OEM master cylinder isn't creating much (if any) pressure. So I'm biting the bullet and ordering a new master cylinder. It's going to be a 19mm which I really wanted to see how well the car braked with the OEM 17mm but those are $$$. I'm also not looking forward to pulling the master cylinder and fighting those grommets again. Just a small bump in the road...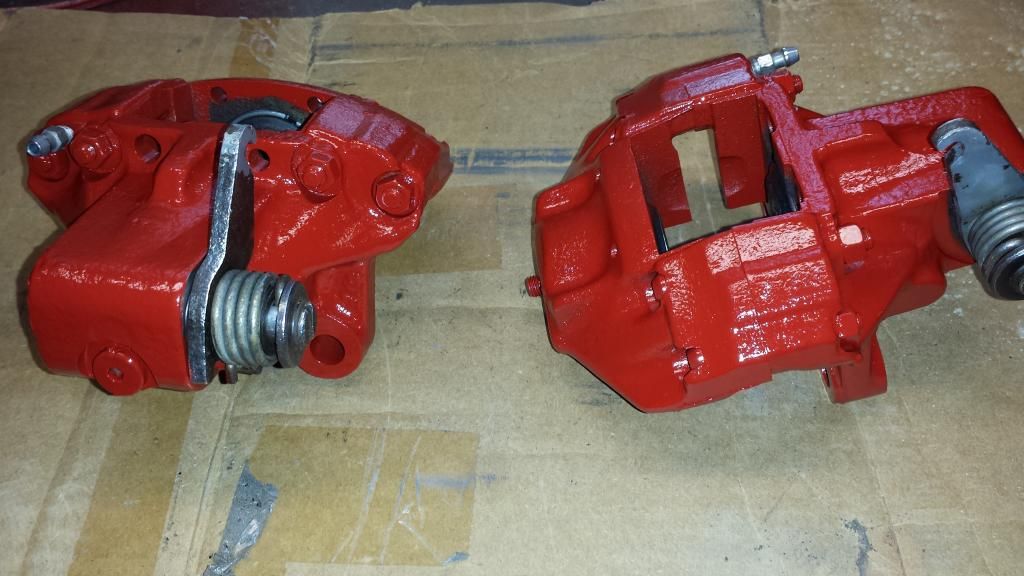
__________________
Tennessee Region SCCA & PCA Current projects - '87 944 Turbo, '87 924S, '82 931, '10 Boxster (the girlfriend) Past projects - '83 944, '02 Boxster (x2), '99 Boxster, '14 Cayman,'72 Opel GT, '75 280Z, '90 300ZX, '87 944S, '87 944 Turbo, '88 924S (x2), '07 Cayman S, '73 914, '88 MR2 AW11 |
||
|
09-11-2014, 11:49 AM
|
|
|
Administrator
|
Tip: If you can stand taking everything apart again, remove the feed lines from the car and put them into the MC on the bench. Then thread it all up into place and bolt the MC in and hook up the lines.
If you can't stand to take it all apart, at least unhook the reservoir so you can slide it down a ways and get more room to push things into place. I have heard that real brake lube paste works better than brake fluid for getting the lines into the grommets, but I don't know this for a fact. --DD
__________________
Pelican Parts 914 Tech Support A few pics of my car: http://www.pelicanparts.com/gallery/Dave_Darling |
||
|
09-11-2014, 01:57 PM
|
|
|
Certified Porsche addict
|
Quote:
__________________
Tennessee Region SCCA & PCA Current projects - '87 944 Turbo, '87 924S, '82 931, '10 Boxster (the girlfriend) Past projects - '83 944, '02 Boxster (x2), '99 Boxster, '14 Cayman,'72 Opel GT, '75 280Z, '90 300ZX, '87 944S, '87 944 Turbo, '88 924S (x2), '07 Cayman S, '73 914, '88 MR2 AW11 |
||
|
09-12-2014, 09:02 AM
|
|
|
Certified Porsche addict
|
Having a little fun!
I'm waiting on the new master cylinder but I couldn't resist taking the car our on the lawn. I'm glad I did because the suspension settled and the rear tires were rubbing the flares. I shaved as much off the flare inner arch as I comfortably could. It's still really close on the drivers side. I may need to have rear wheel spacers machined down 10mm. I also adjusted toe and ride height on the rears. I think the drivers side is lower than the passenger side. That may be due to the replacement suspension console on the passenger side. I ended up with the rear Bilstiens set 2 notches above lowest on the drivers side and 1 notch above lowest on the passenger side.
https://www.youtube.com/watch?v=43qr5FfPoxk
__________________
Tennessee Region SCCA & PCA Current projects - '87 944 Turbo, '87 924S, '82 931, '10 Boxster (the girlfriend) Past projects - '83 944, '02 Boxster (x2), '99 Boxster, '14 Cayman,'72 Opel GT, '75 280Z, '90 300ZX, '87 944S, '87 944 Turbo, '88 924S (x2), '07 Cayman S, '73 914, '88 MR2 AW11 Last edited by The Glademister; 09-14-2014 at 01:52 PM.. |
||
|
09-14-2014, 01:46 PM
|
|
|
Certified Porsche addict
|
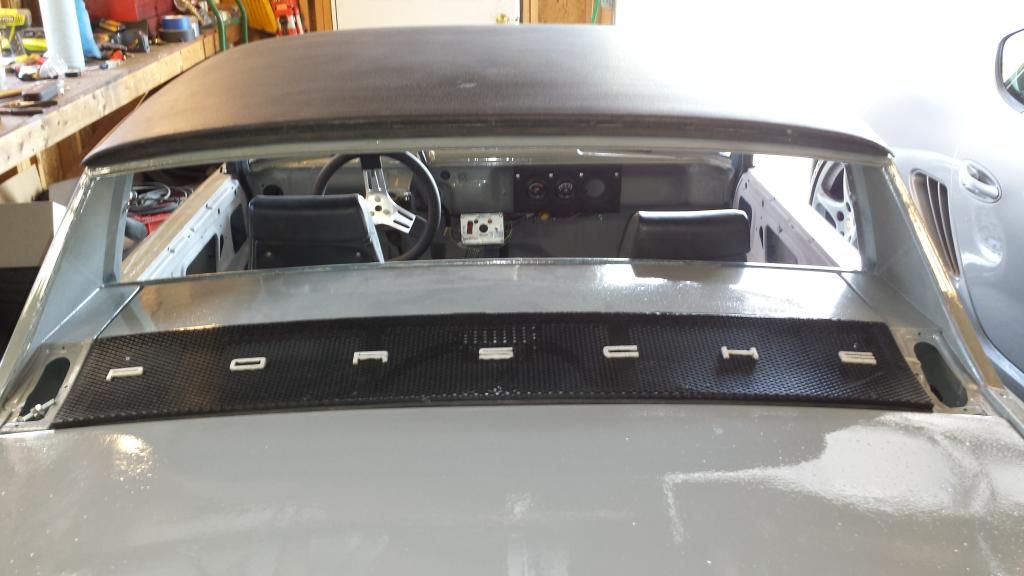
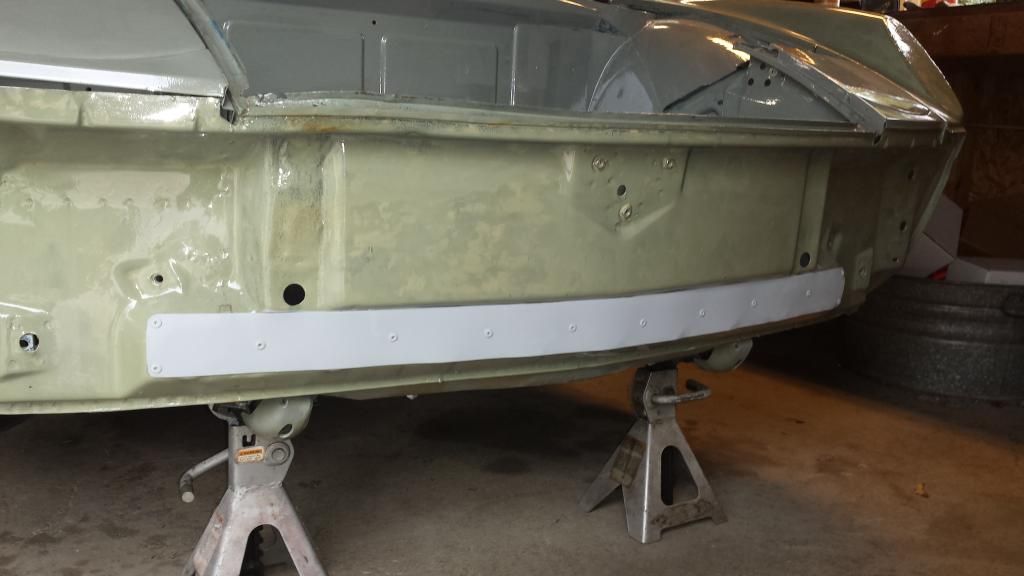
Some dental work too
I also fixed that snarly mouth with a 2 1/4" x 37 1/2" cut of 20 gauge cold rolled sheet metal. $10 in metal and some pop rivets verses the plastic plugs. More cash for go fast parts!
__________________
Tennessee Region SCCA & PCA Current projects - '87 944 Turbo, '87 924S, '82 931, '10 Boxster (the girlfriend) Past projects - '83 944, '02 Boxster (x2), '99 Boxster, '14 Cayman,'72 Opel GT, '75 280Z, '90 300ZX, '87 944S, '87 944 Turbo, '88 924S (x2), '07 Cayman S, '73 914, '88 MR2 AW11 |
||
|
09-15-2014, 05:13 AM
|
|
|
Certified Porsche addict
|
Ladies and gentlemen, brakes!
Installed the replacement 19mm master cylinder last night. That actually went better than I expected. I loosened the plastic feeder hoses from the reservoir and slid them out with the old MC. I discovered a new trick that make installing those hoses with grommets into the MC much easier. Lightly clamp a vice grip just above the grommet on the metal section of the feeder hose. That will keep the grommet from sliding up the hose as you try to stuff it in the MC hole. The vice grip also gives you some leverage while you use a small flat head screw driver to stuff the edges. Another use for the vice grip is to clamp it on the knuckle of the brake peddle post that goes into the MC. If you're doing this by yourself, that post can be very difficult to feed into the MC while dealing with the feeder hoses and branch pipes. Clamping it where it's positioned correctly will save a lot of cursing. The system bled out well and it took a few pumps on the peddle to get pressure but the calipers are clamping. I'll probably have to bleed one or two more times. I also installed the drivers side e-brake cable and attempted to adjust those. I'm not getting any bite on the e-brakes so I need to read up on that procedure.

__________________
Tennessee Region SCCA & PCA Current projects - '87 944 Turbo, '87 924S, '82 931, '10 Boxster (the girlfriend) Past projects - '83 944, '02 Boxster (x2), '99 Boxster, '14 Cayman,'72 Opel GT, '75 280Z, '90 300ZX, '87 944S, '87 944 Turbo, '88 924S (x2), '07 Cayman S, '73 914, '88 MR2 AW11 |
||
|
09-16-2014, 06:23 AM
|
|
|
Registered
|
The video is awesome. Congratulations on a great outcome and accomplishing as much as you did in such a short time. BTW, your front yard is also awesome. How much POR-15 did you actually go through?
|
||
|
09-16-2014, 02:28 PM
|
|
|
Certified Porsche addict
|
Quote:
 I didn't really keep count but I think about a half dozen pints and a couple of quarts (whatever that totals). I didn't buy large quantities each time because I was painting small segments and storing opened containers of POR 15 is problematic. If someone were to strip, prep and paint a complete 914 tub - surely one gallon of POR 15 would be enough. I didn't really keep count but I think about a half dozen pints and a couple of quarts (whatever that totals). I didn't buy large quantities each time because I was painting small segments and storing opened containers of POR 15 is problematic. If someone were to strip, prep and paint a complete 914 tub - surely one gallon of POR 15 would be enough.
__________________
Tennessee Region SCCA & PCA Current projects - '87 944 Turbo, '87 924S, '82 931, '10 Boxster (the girlfriend) Past projects - '83 944, '02 Boxster (x2), '99 Boxster, '14 Cayman,'72 Opel GT, '75 280Z, '90 300ZX, '87 944S, '87 944 Turbo, '88 924S (x2), '07 Cayman S, '73 914, '88 MR2 AW11 |
||
|
09-17-2014, 06:09 AM
|
|


 Porsche 914
 The tractor


 1999 Porsche Boxster
 1973 Porsche 914 2.0L
 1987 Porsche 924S
 2014 Porsche Cayman
 1982 Porsche 931
 1985 Porsche 928S
 74 Porsche 914 2.0

 Jacks Project
 The Ghia
 '75 Teener
