|
|
|
|
|
| Author |
|
|
Registered
Join Date: Dec 2001
Location: Cambridge, MA
Posts: 44,628
|
Great progress Randy, and I totally agree on playing in the mud. Not only fun, but getting your hands dirty on a job like this carries a bit more "job done pride" with it, which only lead to some well-deserved beer.
__________________
Tru6 Restoration & Design |
||
 05-27-2005, 05:06 AM
|
|
|
Semper drive!

|
Sorry, Randy, didn't mean to leave you hanging like that.
 Not really much to report. Took a lunch today and did some shopping. Picked up 5 ft. of galvanized 1.5 in. ID pipe, as suggested by Shaun. Also found a 3/4 in drive 20 in. breaker bar that will fit nicely into my new cheater. The store I purchased the breaker from didn't have much in the way of large sized metric sockets in the 3/4 in. drive variety so I think I may have to compromise. They had a 26 in. half-inch drive breaker bar in their on-sale bin for $8.00 so I figured that may be an expendable tool. Going to try my 32mm, 6 pt. socket along with that bar and the cheater and see if that will work. What they heck, it's only 300+ ft. lbs., right?  Soaking everything in PB Blaster and plan to hit it fairly early tomorrow morning. Unfortunately, that's all the progress I made today. But with three days ahead of me, hopefully I'll have plenty to post throughout the weekend. Randy
__________________
84 944 - Alpine White 86 Carrera Targa - Guards Red - My Pelican Gallery - (Gone, but never forgotten  ) )One Marine's View Igitur qui desiderat pacem, praeparet bellum |
||
|
05-27-2005, 07:37 PM
|
|
|
Semper drive!
|
I did have another question to ask. Earlier in this thread, I posted a few pics that showed the 2 in. spacers I have on my rear wheels. A few nights ago, when I was having difficulty removing the axle nut, I removed the lug nuts for the spacer to see about getting better access to the axle nut.
After removing all the lug nuts, I attempted to remove the spacer, but it didn't want to budge. Not wanting to mess anything up, I replaced the lug nuts for the spacer and left it at that. My question is: Should the spacer have come off with just a little coaxing, or are they usually on there pretty snug? I could understand why one would want them to not come off very easily, I'm just curious, I guess. Randy
__________________
84 944 - Alpine White 86 Carrera Targa - Guards Red - My Pelican Gallery - (Gone, but never forgotten )One Marine's View Igitur qui desiderat pacem, praeparet bellum |
||
|
05-27-2005, 08:24 PM
|
|
|
Registered
Join Date: Dec 2001
Location: Cambridge, MA
Posts: 44,628
|
Quote:
Did I miss a pic of your car? please post pics.
__________________
Tru6 Restoration & Design |
||
|
05-28-2005, 04:08 AM
|
|
|
Semper drive!
|
Shaun,
Pics of my car have been posted here on the BBS. There are also some in my profile. But hey, who am I to pass up a chance to post pics? Rear spacers:  My Car:  Randy
__________________
84 944 - Alpine White 86 Carrera Targa - Guards Red - My Pelican Gallery - (Gone, but never forgotten )One Marine's View Igitur qui desiderat pacem, praeparet bellum |
||
|
05-28-2005, 07:07 AM
|
|
|
Registered

Join Date: Nov 2004
Location: Greater Metropolitan Nimrod, Oregun
Posts: 10,040
|
it's in between 2 red trucks? is that all you or are the neighbors enamored of red?
__________________
"A man with his priorities so far out of whack doesn't deserve such a fine automobile." - Ferris Bueller's Day Off |
||
|
05-28-2005, 01:28 PM
|
|

|
|
Semper drive!
|
hehehe....all me, baby!!!! RED!!!!!!!!!
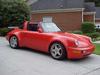
Here's a pic of the fleet pre-2003:  In April, 2003, we traded the RAM in for the Vette. Can ya guess what color it is? Randy Someone actually told me that you could get cars in other colors...besides red. I still don't believe him.
__________________
84 944 - Alpine White 86 Carrera Targa - Guards Red - My Pelican Gallery - (Gone, but never forgotten )One Marine's View Igitur qui desiderat pacem, praeparet bellum |
||
|
05-28-2005, 05:28 PM
|
|
|
Semper drive!
|
Well, spent the day putting finishing the job.
First things first. What everyone has been saying about using a half-inch drive anything to remove the axle nut is definitely CORRECT!. Started out this morning figuring I'd give that 26" half-inch drive breaker bar a try. Connected everything together. Inserted the cheater bar (5 ft of galvanized 1.5" ID pipe - Thanks Shaun!!!) and applied torque. All I managed to do was twist the half-inch part of the breaker bar. The nut did not budge. Okay, no worries. I don't have a 3/4" drive 32mm socket, but I thought a 1-3/16th socket would fit. ARGH!!!! Off to the store I go to trade up for a 1-1/4" socket. NOTE: The 1-1/4" is a perfect substitute for a 32mm. Back on the job, using the 1-1/4" socket, the axle nut came right off. PB Blaster i applied to the shock bolt the night before helped that to come off pretty quick too. In no time at all, I had the passenger side axle off and laying next to the drivers side. Now for the parts exchanges. Pressed the axles apart using a hydraulic press. One of the perks of being a retired Marine, living near a military base. Use of the press for as long as i needed it put me out a whole $1.50.  After cleaning up the CV joint, I wiped down the axle to remove as much dirt and grime as I could before sliding the new boots on. Squeezed a lot of greaseinto both CV joints. My directions specified 90g. Squished it around to work it all over the CV joints and then slid the boots on. I actually pressed the the outer CV joint on before greasing them up. Once the boots were in place, I worked on the end caps. T0 make sure the bolt holes were lined up, I inserted the cap head screws, along with the Moon clips and schnorr washers. Holding them in place with one hand, I positioned the end cap. Once I was sure it was lined up properly, I used a rubber mallet to knock it the rest of the way on.   After they were both assembled, I returned home to begin putting everything back together. Before putting everything in place, I still had to clean the damaged threads on the flange. Cleaned those up and was able to hand thread the screws into the holes. I was now ready to put it together. Inserted the stub axles and positioned the other end against the flanges on the transmission. Hand threaded the cap screws as far as I could and then with a new 8mm hex head socket, tightened them down to 60 ft. lbs. With the internals connected, i moved out from underneath the car to the axle nuts. Unfortunately, my torque wrench only went to 250 ft lbs. Using my cheater bar, I applied the 250, and then used my breaker bar to "fudge" the rest of the torque. I'm confident they are tight enough for spec. Saw the following tip in an article I linked to earlier in this thread. To hold the hub in place while applying the torque, I positioned a crowbar amongst the wheel studs to stop it from rotating. To prevent damaging the threads, I slipped pieces of 1/2 in. galvanized pipe over them. Worked like a champ!     With everything now back together. It's just a matter of taking her for a drive and trying her out. I did spin the tires while it was up on jackstands so i could listen for any kind of sounds that didn't seem right. Everything sounded fine to MY untrained ear so the drive to the gas station tomorrow morning will be the "shakedown cruise" THANKS to everyone who helped. Grady, as usual, you have been a wealth of knowledge. The way you freely share it with everyone is totally remarkable. Randy, a huge "Thank you!" to you as well. Always on the spot with timely advice that is always appreciated. Once again, Pelicans come through and a damaged P-car is brought back to health. Hopefully others will be able to use the guidance you guys have provided to help themselves if they're ever in this situation. Randy
__________________
84 944 - Alpine White 86 Carrera Targa - Guards Red - My Pelican Gallery - (Gone, but never forgotten )One Marine's View Igitur qui desiderat pacem, praeparet bellum |
||
|
05-28-2005, 07:06 PM
|
|
|
Semper drive!
|
Oh, one more thing. Is there a special tool for installing the boot clamps?
I managed to get these installed by squeezing the heck out of them with my fingers, but it seems there has to be some sort of tool for this. They're tight enough to keep the boots from turning on the axles, so I'll leave it at that. Randy
__________________
84 944 - Alpine White 86 Carrera Targa - Guards Red - My Pelican Gallery - (Gone, but never forgotten )One Marine's View Igitur qui desiderat pacem, praeparet bellum |
||
|
05-28-2005, 07:10 PM
|
|
|
Registered
Join Date: Nov 2004
Location: Greater Metropolitan Nimrod, Oregun
Posts: 10,040
|
yes, special pliers for the boot clamps
__________________
"A man with his priorities so far out of whack doesn't deserve such a fine automobile." - Ferris Bueller's Day Off |
||
|
05-28-2005, 07:31 PM
|
|
|
Semper drive!
|
Quote:
Circlips on the axles. New schnorr washers and moonclips installed with properly torqued cap screws. Torqued axle nuts. Torqued shock bolts. Torqued lug nuts on the spacers. Torqued lugnuts on the wheels. Spun the wheels to listen for noises. Also noticed they seemed to roll pretty freely. Lowered car, will drive it to the gas station tomorrow and see how she rolls. What did I forget?  Think I'll hold off on the pliers for now. Randy
__________________
84 944 - Alpine White 86 Carrera Targa - Guards Red - My Pelican Gallery - (Gone, but never forgotten )One Marine's View Igitur qui desiderat pacem, praeparet bellum |
||
|
05-28-2005, 07:59 PM
|
|
|
Registered
Join Date: Jul 2001
Location: Atlantic Beach, NY
Posts: 317
|
Don't hold off on the pliers. They are readily available at Autozone and the like. Made by Lisle Corp(lislecorp.com for pics-PN 30800 ear-type cv clamp pliers). I tried other means of squeezing the clamp tight. and they just get all bent up. With the pliers it's a 30 sec job and it's done right. You've come to far to not finish the job. Good work and perseverance.
__________________
Mike 1986 930 |
||
|
05-28-2005, 08:36 PM
|
|

|
|
Semper drive!
|
Thanks, Mike.
About those pliers. Just how tight should those clamps be? I was able to get them pretty snug using just my fingers. The two hooks that grab are in the 2nd and third spaces. Does it need to be tighter than that? I realize I need to keep road grime and other contamination out of there. Just figured they'd be snug enough. If I need to go tighter, I will. Randy
__________________
84 944 - Alpine White 86 Carrera Targa - Guards Red - My Pelican Gallery - (Gone, but never forgotten )One Marine's View Igitur qui desiderat pacem, praeparet bellum |
||
|
05-28-2005, 08:40 PM
|
|
|
Semper drive!
|
After a few unsuccessful stops at a couple of local parts houses, I was finally able to find the pliers for the CV Joint Boot Clamps. Now I understand what that little "square" part that sticks up was for.
It was actually a lot easier to access the clamps thann I thought it would be. I was afraid I was going to have to pull the axles back out just to crimp the clamps, but I was able to get to all of them. Got a good full squeeze on each one. It wasn't difficult by any means, but it would have made sense to do this BEFORE installing the axles.  This is the outboard boot on the passenger's side:  Thanks again, Mike, for the suggestion and advice. Gotta love the peace of mind that comes from knowing you did the job 100%. Randy
__________________
84 944 - Alpine White 86 Carrera Targa - Guards Red - My Pelican Gallery - (Gone, but never forgotten )One Marine's View Igitur qui desiderat pacem, praeparet bellum |
||
|
05-29-2005, 03:27 PM
|
|
|
Registered
Join Date: Nov 2004
Location: Greater Metropolitan Nimrod, Oregun
Posts: 10,040
|
good photo - some of the 1,000 views will profit from this...
__________________
"A man with his priorities so far out of whack doesn't deserve such a fine automobile." - Ferris Bueller's Day Off |
||
|
05-29-2005, 10:30 PM
|
|
|
Registered

Join Date: Dec 2003
Location: Arapahoe County, Colorado, USA
Posts: 9,032
|
Randy,
Have you been back and torque the CV bolts again (63 ft-lbs)? Hint Hint It has been almost 30 days. I ran across this in a Bentley the other day: IMAGE BentleyWrongSpec01 "  " "(C) Bentley The correct torque for CV bolts is 33 ft-lbs for M8 bolts and 63 ft-lbs for M10 bolts! I wonder why so many CVs come loose? Best, Grady |
||
|
06-21-2005, 12:32 PM
|
|
|
Semper drive!
|
Hey, Grady!!! Thanks for the concern. Hope you're doing better, yourself!!!
The answer to your question is a resounding "yes AND no" After putting everything back together, I noticed another clunking noise. Got underneath and was checking everything else out and found the drive flange on the passenger side of the tranny seemed to be loose. I tried tightening up the bolt for it, but it was pretty snug. JW suggested pulling the differential to have a look so that's what I did. Just last night I was able to get it all back together. In the process I ended up with new drive flange seals and a fresh fill of Swepco. While I had it out, I dropped by a local P-car shop and asked what they thought and the mech said he had seen that kind of play before and that it wasn't anything to worry about. Basically, the gear that the flange bolt threaded into had about 1/16th inch of in and out movement on it. So, the CV bolts have been torqued down again, but this would actually constitute an initial torque. Time to reset my CV bolt clock. Randy
__________________
84 944 - Alpine White 86 Carrera Targa - Guards Red - My Pelican Gallery - (Gone, but never forgotten )One Marine's View Igitur qui desiderat pacem, praeparet bellum Last edited by rcecale; 06-21-2005 at 01:04 PM.. |
||
|
06-21-2005, 12:58 PM
|
|
|
Semper drive!
|
Grady,
We must have different printings of our Bentley's manuals. Here is a shot from mine regarding CV bolt torque.  Randy
__________________
84 944 - Alpine White 86 Carrera Targa - Guards Red - My Pelican Gallery - (Gone, but never forgotten )One Marine's View Igitur qui desiderat pacem, praeparet bellum |
||
|
06-21-2005, 01:08 PM
|
|
|
Registered

Join Date: May 2004
Location: Encinitas (San Diego CA)
Posts: 4,495
|
Do you have any photos of your setup used to press the CV joint OFF?
OR could you explain how that is done? Do you just cradle the axle side of the joint and use a hydraulic press to press out the center? I'm at the beginning stages of this process, well actually have removed both drive axles and have all of the boots, grease, etc from Pelican. Your help will be appreciated! Thanks, Doug
__________________
1971 RSR - interpretation |
||
|
06-21-2005, 01:24 PM
|
|
|
Registered

Join Date: Apr 2003
Location: Carnation, WA
Posts: 623
|
Special tool for crimping is neat but a cheaper alternative is to simply take a normal pair of pliers and hollow them out near the tip.

__________________
David |
||
|
06-21-2005, 01:33 PM
|
|


 1986 Porsche Carerra Targa 3.2


