|
|
|
|
|
| Author |
|
|
Registered
|
I have been having intermittent problems with my 84 for well over a year. Decided to dig into it deep today. Several mechanics have looked at the problem, swapped a switch here or there.. but no one was able to fix it.
I tested each switch, and I found some of the wiring was wrong/and loose. Validated the wiring, and crimped down the spade connectors to make sure nothing was loose. I was then able to put the window down, but not up (on passenger side) swapping the blue wires in the middle of the switch on the passenger side allowed me to put it up but not down. Looking at the wire layout, i decided that the runners between the switch must be the issue. I then swapped the red-black and red-white and reversing these allowed me to put the window down or up depending on the position of the wires (hope that makes sense) Next i did a continuity test on the red-white/red-black wires between the drivers and passenger door. One wire is bad! Running a jumper wire (just as a test) to replace the red-white wire returned all window switches to normal operation. Next I need to decide if I am going to replace the red-white wire or try to trace where its broken/damaged. I cant really follow the wire, so probably replacing it is the way to go. Anyone else need to do this? I assume a mouse munched it someplace |
||
 09-12-2012, 06:50 PM
|
|
|
Registered

Join Date: Feb 2004
Location: Littleton, Colorado
Posts: 366
|
I had my car at a "renewal" shop earlier this year. When I got it back, the car had shiney paint, renewed leather on the seats, shiney tires, and the windows did not work at all. I tried to check the connections, which they had terribly handled. Even after I put the right wires on the right connections, it did not work. Three days at the local wrench, John Eisenbud again!, they figured out that the little wires that connect to the switches fail on a regular basis and they had to splice new connections onto each of the wires. Now all the windows work and all is good with the universe. Check the continuity while fiddling with the wire as it might make a connection while unstressed, but when you hook them up to the switch and force it into position, the connection might be broken on one of the wires.
Good Luck.
__________________
1984 3.2 Cab (now toy) 1975 911S (old toy) Mercedes E350 W4 (snow car) 2007 911 Turbo (water and air pumper) 2012 Panamera 4S (for the wife, I swear) |
||
|
09-12-2012, 07:34 PM
|
|
|
Registered User
Join Date: Oct 2014
Posts: 3
|
Best info on 911 electric windows i've found and thanks to this I've fixed them this evening - everything working perfectly. Used this to fix a 3.2 carrera.
Quote:
|
||
|
04-08-2015, 01:36 PM
|
|
|
Registered
Join Date: Dec 2002
Location: So Cal and So Oregon
Posts: 2,209
|
|||
|
04-08-2015, 03:00 PM
|
|
|
Registered User
Join Date: Jan 2015
Posts: 9
|
86 911 Targa,
5 years later and extremely helpful, thank you for taking the time to put your post together back in 2011!! Thank you! Quote:
|
||
|
05-01-2016, 01:07 PM
|
|
|
Registered
|
Bumping this old thread because it just helped me get both my windows up and running after prior owner took out the wiring harnesses for both windows. Pelican forums saves the day again

__________________
'79 930 turbo RoW - Oak Green Metallic - k27-7200 Raptor - Kokeln Intercooler - RarlyL8 headers/muffler - Tial 46mm - 964 turbo WuR - Rebel racing bushings front/rear - ER Monoballs front/rear - ER adjustable spring plates - 29/23mm TBs - Vons level 2 - Raised spindles w/weld on racing bump steer knuckle -Wevo engine mounts - Rebel racing transmission mounts - Ruf speelines 17x9-10 - Classic retrofit electric A/C |
||
|
02-11-2017, 01:23 PM
|
|

|
|
Vintage Owner
|
If there was ever a need for a multiple pin connector, the back of these switches would top my list.
__________________
84 Targa (sold) 70 914-6 (sold) 73 914-6 2.7 conversion (sold) 75 GMC Motorhome (sold) 2016 Cayenne |
||
|
02-11-2017, 04:32 PM
|
|
|
Registered
Join Date: Dec 2017
Posts: 65
|
Thank you Mysterytrain, great diagram, very easy to follow, saved me at least 2 hours. 1979 911SC
Quote: Originally Posted by Mysterytrain View Post I was attempting to help a fellow Pelican with a power window problem and in the process attempted to figure out how those nasty little switches worked. Armed with a Fluke meter I came up with the following: |
||
|
01-01-2018, 05:45 PM
|
|
|
Registered
|
The thread that keeps on giving..
Helped me with my speaker install - as I went through and corrected a red/white to red/black snafu from PO
__________________
1981 911SC |
||
|
05-13-2019, 04:56 PM
|
|
|
Registered User
Join Date: Sep 2017
Location: South Africa
Posts: 132
|
I need some help. My passenger door will not close without slamming the door an few times. However it closes perfectly the first time if the drivers door is open or the passenger window is open.
I want to install a time delay relay using the door light switch as a trigger. When the door is open the trigger will lower the window for a few seconds (x) and when closing the door the window will close the window for x seconds. Which wire/s on the switch controls the up and down function movement ? |
||
|
11-24-2019, 07:14 PM
|
|
|
Registered User
Join Date: Sep 2017
Location: South Africa
Posts: 132
|
Can someone point me to the location of the door switch wire inside the front hood. I need to tap into that wire. What colors am I looking for and where can I find it without undoing the tricky door switch ?
Thanks |
||
|
12-16-2019, 09:34 PM
|
|
|
Perpetual Reassembler
|
Fantastic thread. Here's a question to add to this:
On each of the 3 photos:  Is the correct orientation with the unused terminal pointing up for all 3 switches? Meaning, rather than rotating the switch body 180 degrees and shoving it back in the door card, if the window is going the wrong way, its time to take a closer look at the switches themselves or the way they are wired? Edit: Nevermind, per the diagram already provided below, the orientation of the unused terminal is UP. 
__________________
Jose - 1983 911SC Coupe Instagram: @joe_engineer 911 D I Y Blog: joe-engineer d o t c o m D I Y Vids: https://www.youtube.com/joeengineer Last edited by 2jmotorsports; 01-09-2021 at 03:23 PM.. |
||
|
01-05-2021, 08:04 PM
|
|

|
|
Registered
Join Date: Mar 2005
Location: Northern CA
Posts: 4,703
|
Quote:
__________________
Sold: 1989 3.2 coupe, 112k miles |
||
|
06-01-2021, 11:16 AM
|
|
|
Registered
Join Date: Mar 2005
Location: Northern CA
Posts: 4,703
|
Very Old Thread Alert.... :-)
My situation - pass window doesn't go up or down with either switch in either direction. I turn on the key and I get 12v at 4 places on the pass side switch. I get 0 ohms from the brown wire to the door pivot pin. Key off - I get 0 ohms in one direction and about 2.0 ohms in the other direction on both blue wires rel. to the brown wire. I think this is because I'm reading the motor resistance in one direction. Not sure what to try next. Any ideas? Thanks. -Henry
__________________
Sold: 1989 3.2 coupe, 112k miles |
||
|
06-03-2021, 05:12 PM
|
|
|
Registered
Join Date: Oct 2003
Location: Northside, Brooklyn
Posts: 2,361
|
This thread should be a 'sticky' or what ever kids are calling them these days.
__________________
jt '83 SC '96 M3 6 Bicycles 2 Sailboats |
||
|
08-27-2021, 10:58 AM
|
|
|
Weapons grade dickhead.
|
Quote:
Took me a while to find it. Then I went and copied & pasted it into my own build thread. lol
__________________
1978 911 SC Coupe Build thread: http://forums.pelicanparts.com/porsche-911-technical-forum/1069069-i-always-wanted-one-these-78-sc-build.html
|
||
|
08-27-2021, 03:01 PM
|
|
|
Registered
|
Reviving an old thread. I am installing power windows in a 1973 911T. I plan to use the old style chrome bezel Bosch window switches which have 4 connections rather than 5 as depicted in the photos above. Does anyone have the wiring diagram for the old 4-connector switches? Thank you
|
||
|
02-20-2022, 09:34 AM
|
|
|
Registered
|
I had my passenger side switch out last week to fix a non-functioning window. It turned out that one of the rivets that hold the connecting spade to the switch was loose.
I thought I'd pass on a couple of tricks to give a bit more reliability to the switch. First, while you have the switch out you can solder the spades to the rivets. This will greatly strengthen that connection. Second, resist the temptation to rotate the switch to get the window to operate in the direction of the toggle. As was already pointed out just swap the position of the two middle wires (to the motor) on the switch. To ensure good load capabilities Porsche used very heavy gauge wire. The down side is that the wire is stiff and twisting it will place a lot of strain on on the fragile switch connections and because of the age of the cars will lead to cracking of the insulation. Keep the switch as straight as possible. As an aside remember that you can test the motor functions by simply connecting a 12 volt source to the window motor leads. |
||
|
02-20-2022, 11:03 AM
|
|
|
gduke2010

|
Im covering my door panels with leather and ran into a problem. Also, restoring seats. Took the drivers seat out and when taking a the passenger seat out, realized I headed to roll down the passenger was window in order to open the door enough. The window needs to be down to clear my work bench. Reinstalled the switches, now the windows dont work.
Drew diagrams while removing switches. Wonder if I made a mistake. Heres the diagrams. 
|
||
|
03-05-2022, 02:16 PM
|
|
|
gduke2010
|

|
||
|
03-05-2022, 02:18 PM
|
|
 |
| Thread Tools | |
| Rate This Thread | |
|
|


 1984 Porsche 911 3.2 Turbo
  Green Monster


 1979 Porsche Turbo
 1999 Toyota 4Runner
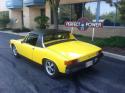 1970 Porsche 914-6 (sold)
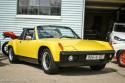 1973 porsche 914-6 conversion (sold)
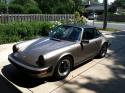 1984 Porsche 911 Carrera Targa - sold
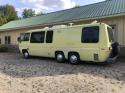 GMC Motorhome
 1981 Porsche 911SC
 TBD
TBD 2013 Toyota Tacoma 4x4
 1978 Porsche 911 SC 3.0 Coupe
 1985 Porsche 911
 2011 BMW 550i


