|
|
|
|
|
| Author |
|
|
Registered
Join Date: Jul 2013
Posts: 1,104
|
So great to see other designers her doing killer work! I'm a product designer here in Michigan and recently picked up an '81 SC as my next rally car project...
LarryParkerDesign |
||
 10-06-2013, 05:08 AM
|
|
|
Registered
|
Beautiful, beautiful work!
|
||
|
10-06-2013, 07:30 AM
|
|
|
Exotic Vehicles are here
|
Just WoW!!! Great work....
I like your windshield fluid ...  who makes whose? Thank you. who makes whose? Thank you.
__________________
"Y" <- My favorite question... + '68 911 + Helping your business to get more business: http://myWWWapp.com |
||
|
10-06-2013, 06:10 PM
|
|
|
Registered

Join Date: Mar 2008
Location: Portland, OR
Posts: 323
|
Washer bottle is nothing special, I got it from:
Windscreen Washer Bottle Kit 1.2 ltr - WBOT I then made a custom bracket for it. The bottle is nice as the pump motor is integrated into the mold, making everything clean and simple. Chris |
||
|
10-06-2013, 11:37 PM
|
|
|
Registered

Join Date: Jul 2009
Location: Chattanooga, TN
Posts: 118
|
I have been hoping for an update on your project for a while now. So glad to see that it's still coming along. I can't wait to see how it's all going to turn out. As always Chris, great work.
__________________
Chase Birks 67 911 project 307691 74 914 2.0 Maker of Race Track Topographic Maps www.etsy.com/shop/TopoTrac |
||
|
10-07-2013, 01:45 AM
|
|
|
Registered
Join Date: Jan 2007
Location: Baltimore
Posts: 597
|
Quote:
Who was the source of the Repa Harness?
__________________
Rob |
||
|
10-07-2013, 04:48 AM
|
|

|
|
Registered
Join Date: Mar 2008
Location: Portland, OR
Posts: 323
|
Thanks Rob.....I will PM you the details of the Harness maker.
Chris |
||
|
10-07-2013, 05:23 AM
|
|
|
Registered

Join Date: Feb 2003
Location: Black Rock, CT
Posts: 4,345
|
Love the horn button, and the lap belts now make much less concerned! Stout anchoring too.
__________________
Jake Gulick, Black Rock, CT. '73 yellow 911E , & 2003 BMW M3 Cab. Ex: 84 Mazda RX-7 SCCA racer. did ok with it, set some records, won some races, but it wore out, LOL[/B] |
||
|
10-07-2013, 03:56 PM
|
|
|
Registered
Join Date: Sep 2004
Location: Canada
Posts: 287
|
Great job - thanks for sharing.
Brent 79 - 911 |
||
|
10-07-2013, 05:36 PM
|
|
|
Registered
Join Date: Aug 2008
Location: chealsea, quebec, canada
Posts: 345
|
this is very motivating.
i should get to the garage and put my engine back in my car. it is your attention to details that makes this bare car so interesting. good job, great stuff. |
||
|
10-08-2013, 05:10 AM
|
|
|
Registered
|
There are guys here who really have gold in the hands.
Congrats for the work done (and to come).
__________________
LIGHTER = FASTER !!! |
||
|
10-08-2013, 05:36 AM
|
|
|
Registered User
Join Date: Dec 2013
Posts: 1
|
Holy wow, this is so inspirational!
I registered here just to post this 
|
||
|
12-10-2013, 07:18 PM
|
|
|
Registered User
|
great BUILD.
__________________
Childhood dream car: Porsche 959 |
||
|
12-10-2013, 07:50 PM
|
|
|
Registered
|
Did I read this right that you did not know how to weld and do body work prior to this? This is absolutely a beautiful work of art... KUDOS to you...
|
||
|
12-10-2013, 08:36 PM
|
|
|
Registered
Join Date: Mar 2008
Location: Portland, OR
Posts: 323
|
Thanks for the kind words guys, its always encouraging to get positive feedback. Yes, I did learn to weld on the car.....Lego as a kid has alot to answer for
Afew recent updates... Always good meeting up with old Friends...  Afew months ago David Hanning dropped in to say hello....Who is David ? The story is that I bought the Grey car off David back in 2007 in Portland USA, I had previously bought the set of Fuchs' off him which are now on the red car. David transported the car to my house free of charge, and when the time came showed me how to set up the Welder to get me started. A year later, when I was getting ready to move back to the UK, I sold the original Wings, Bonnet, Decklid and my Welder back to David.....and passed on some Welding advice :wink: So yes, the guy above is responsible for getting me in this mess We have stayed in touch over the years, and shared many ideas. David decided to come over to Germany this year as part of his Self-Birthday present and visit Relatives he has here. After visiting Porsche, Mercedes, BMW, VW Factories and Museums, he found time to drop in to say Hi. An afternoon of Coffee ( Tea for me ) and cake, with an evening of German Beer, Steak and much Car chat and Tyre kicking inbetween. Abit of a personal story I know, but I like it Chris |
||
|
12-12-2013, 11:58 AM
|
|
|
Registered
Join Date: Mar 2008
Location: Portland, OR
Posts: 323
|
Accelerator rod, guide bushings for the centre tunnel.
10 euro each from Porsche.....Or 1 euro for 3 when using Hard-Rubber Home brew bungs, and then whittled down on the sanding wheel  I am not cheap, but every little helps Chris |
||
|
12-12-2013, 12:00 PM
|
|
|
Registered
Join Date: Mar 2008
Location: Portland, OR
Posts: 323
|
Always good picking up something much needed for Gratis ( Thanks David
 ) )Petrol sender plug sent from the USA. Custom form said Auto Electrical, Value $ 3.00  HOWEVER It didn't mention the free Scorpion that came with it !!   Chris |
||
|
12-12-2013, 12:01 PM
|
|
|
Registered
Join Date: Mar 2008
Location: Portland, OR
Posts: 323
|
Rear screen went in like a dream-ish.....at the 2nd attempt
") Tools for the job: - Plastic coated Clothes Line - Childs Ikea Plastic knife - A modified hanging 'S' thing I found in the Kitchen  Missing from the picture: - Spray Bottle with diluted soap solution - Rubber Mallet - Patient Assistant with strong Thumbs! - Afew choice words 2 hours later, it is in   As everyone says, ONLY use genuine Porsche Seals. There is a cheap Ebay seal now in the Cellar, whilst trial fitting it the fit was shockingly bad! Great care was taken to make sure that the Chrome was properly inserted before starting the fitment, but it still required abit of tapping down with a Rubber Mallet after the seal was finally in place.  Hopefully I won't need these now, but I couldn't resist fitting the Check 'Rabbit' Straps.....I do like the look of them  Available from a Builders merchant near you :wink:  Chris |
||
|
12-12-2013, 12:02 PM
|
|

|
|
Registered
Join Date: Mar 2008
Location: Portland, OR
Posts: 323
|
And abit more of an in depth look...
This is only my method but it seems to have worked. As I said before, I was too busy swearing and trying to stop the bleeding to take any pictures during the process....not to put you off I am not sure how to remove the existing glass and seal, from memory I cut out the seal with a Stanley knife when I first bought the car. Also you may need to buy new chrome trim, it is difficult to remove and reuse without bending it too much. So the Process: - A Patient Assistant with strong thumbs....and a solid box to stand on, so they can apply more pressure when needed. - Have a bowl and spray Bottle of diluted Washing-up liquid ready - Place glass topside up on an old car tyre - Fit a GENUINE Porsche seal to the glass - Insert Clothes Line into groove. Start on bottom edge at 6 inches to left of centre. Leave about 12 inches hanging out (don't start ) and run around whole seal, overlap when you get back to the bottom, leaving another 12 inches free and put tape on this end. - Fit Chrome trim. Wet finger with Washing-up liquid and rub along groove first. Take time to make sure it is properly fitted into the Groove, you will hear it 'Click' in. It will Pop out again slightly during fitting, but it is worth the effort to fit it correctly at this stage - It should now look like this:  - Place some Washing-up liquid on the Lip around window frame of the Car. - Place Glass with everything fitted onto Car. Spend time to make sure it is central, and make sure the hanging ends of the Clothes Line sit onto the Parcel Shelf. - The Seal will sit proud of the body and nowhere near the frame Lip. Push on top of the seal, especially by the roof to get it somewhere near the Lip. Careful not to Pop out Chrome Trim - Now the FUN abit ! - With your assistant pushing here, and you inside the car:  - Start pulling out the length of Clothes Line with tape on. Pull at 90 degrees to the Rubber, pulling directly towards yourself. GO SLOWLY...The idea is that the assistant follows you along the seal, applying pressure as you pull. Go really slowly around the corner. Continue 6 inches up the side, and then repeat the process with the other Clothes line Hanging end. - This is what you are trying to achieve:  - Now it gets tricky. Go back to the other side and continue up to the top corner. The seal will sit Concave on the glass, but it needs to sit Convex against the body. Spray some Washing-up liquid against the seal and body. We managed to continue fitting the screen and then run a Childs Ikea Plastic Knife under the seal to pop it into the Concave position. HOWEVER I think it would be possible to do this process with the Knife whilst pushing down on the seal, just depends how strong your assistants thumbs are:    - I also made a Hook which helped 'Tweak' the seal into place from inside: - Copy on the other side, and you should be DONE ! |
||
|
12-12-2013, 12:05 PM
|
|
|
Registered
Join Date: Mar 2008
Location: Portland, OR
Posts: 323
|
- You will now probably need to Tap down the Chrome trim with a Rubber mallet, just take it easy
- Final look inside should look like this ( I have no Headliner )   - It took us 2 attempts. The Tricky area is around the those top corners ! Chris |
||
|
12-12-2013, 12:06 PM
|
|


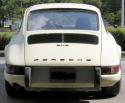 Porsche 911 - then
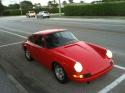 Porsche 911 - now


 Porsche 996 turbo Techart GT street TA096 / T3
