|
|
|
|
|
| Author |
|
|
Registered User
|
First Project thread: 88 Cab A/C retrofit on the Cheap
I've been hanging around here for almost a year, and have 10 months ownership of my 1988 Cabriolet. I am a complete newbie mechanic, and bought the car intending to learn some wrenching skills -- and this website has been awesome for that. I have done a few minor things -- rebuilt the front brake calipers, put on new pads, replaced a leaky oil pressure sender, etc. But this is my first "job" thread - inspired by the crazy number of questions about A/C repair by newbs like me.
I bought my car in northern Virginia last August, and have put almost 5k on it since...almost every mile with the top down. However, now with summer here, the full time open air motoring is getting brutal in the afternoons. The A/C system theoretically "worked" when I bought it: the previous owner had it serviced and recharged with R12 in 2008. But by the Spring of 2013, there was zero pressure in the system. I love a convertible, but 95 degrees with 80% humidity is no fun with the top down -- and I intend on driving the 911 every day (when it isn't raining or snowing). So I started going through the 500 A/C threads -- most suggesting you either spend $1500+ or just pull the system and save the weight...then degenerating into an argument by folks with differing opinions over how best to upgrade the system. My first intention was to go with the Griffith kit, including barrier hoses, new evaporator, front condenser, and receiver/dryer -- keeping my OEM Nippondenso compressor, which appeared to be functional. But with a daughter graduating high school, the frau balked at the money, so I decided to try an interim solution, and see what I could do on the "cheap" -- yea, I know...pay me now or pay me later, good money after bad, etc. However, the car has been well maintained & garaged all its life. The hoses all appeared in good shape, all of the fans & electronics work, and the A/C functioned in recent memory -- so I thought it was worth a small investment to see if I could get minimum functionality on a budget of $300. First step, I bought the following: 1) new Receiver/ Dryer 2) basic R134 conversion kit including new fittings, green o-rings, and label 3) bottle of Behr PA Oil 68 (with UV Dye) -- works with R12 & R134 and any residual oils This was $78 shipped. 1) 3 x 12oz cans of the cheap R134 (without oil) 2) 1 brass R134 valve (pierces the can and connects to the gauge set below) $41 from Advance Auto parts.  Next I went to Harbor Freight and bought: 1) a Pittsburgh Automotive 2.5 CFM vacuum pump (had great reviews on web for just $89) 2) a US General gauge set ($43 on sale) for a total of $148 with tax. So heading into the job, I am in for around $270. Step 1 -- Preliminary inspections and Prep. I figured that everything I bought could go toward a "full" upgrade if I found a terminal problem, so with this in mind I started by removing the compressor to empty it of the old mineral oil. After double checking both the high & low side valves to ensure there was no pressure in the system (there wasn't -- so I didn't bother with evacuating) I removed the three bolts with a 12mm socket, slid it off the belt, and used an adjustable wrench to remove the A/C lines to the rear condenser and evaporator. The compressor spun without noise, and there was no external oil residue indicating a blown seal. No oil came out, but there was still residue in side -- so I gambled the compressor would serve. With it off, I replaced the o-rings on the hoses, putting a little oil on each, poured 2 ounces of oil into the compressor, then reassembled everything. I figured the next "show stopper" was the evaporator -- so I removed the carpet and the aftermarket amp to access the smugglers box. I also looked under the passenger footrest to check things out. Good news -- all the hoses looked good: no oil residue, corrosion, or indicators of leakage -- all the original coating was still in place on the expansion valve, so I left it alone. Bad news -- some evidence of rodents -- acorn shells and some very old droppings, and a little mildew in the bottom layer of carpet in the passenger footwell. But no nests apart from the man-made kind:  All after-market alarm installers should be hanged. And then shot. But that is a future project, and with all electronics working (even the clock!) it is best to leave well enough alone. I vacuumed up what I could, closed everything, and then sought more professional guidance from my Porsche guru and fellow Pelican: Gordo.
__________________
07 Boxster 88 Carrera Cabriolet 3.2 (sold) 05 Boxster S (sold) Last edited by COLB; 06-10-2013 at 08:57 PM.. |
||
 06-10-2013, 06:24 PM
|
|
|
AAEEEEE!
|
Keep the update coming ... Nice write up that will certainly help folks
__________________
Steve Laissez les bons temps rouler |
||
|
06-10-2013, 06:31 PM
|
|
|
Registered User
|
Step 2 - O-Rings and Receiver Dryer
My friend Gordo generously offered me the used of his workshop and tools, since as a newbie mechanic my kit is pretty limited. He has an awesome setup:  The mini fridge is a kegerator that had a batch of Gordo's homebrew: a Marzen that I swear is the best homebrew or microbrew that I had ever had...and I've drunk a lot of beer. Hard to beat a guy who lets you use his garage AND provides the beer!  With a beer to get things lubed up, we started replacing all the O-rings and inspecting the hoses and fittings. The rear condenser looked great so I swapped the o-rings and left it in place. The front condenser had some bent fins and dirt, so we removed that -- the grill bolts came off pretty easy. We used shop air to clean the fins and blow out some of the old oil. We got about an ounce out -- but luckily no debris or evidence of internal corrosion. Swapped the o-rings, then reassembled -- putting the grill on was a bear -- one bolt didn't want to thread. While Gordo tackled this, I did the Receiver/Dryer. We broke the lug nuts, jacked the front up on jack stands and removed the tire. The old R/D looked to be the original -- it was a little rusty & beat up:  The R/D is mounted on a bracket that is fixed to the inner fender with two sheet metal screws. The R/D mounts to the bracket with hose clamps. These were rusty, and the screws didn't seem to open them all the way. Unable to remove the R/D from the bands, I loosened them as much as I could, removed the A/C hoses, then unscrewed the bracket from the fender -- where I was able to work the hose clamps loose and take the pieces apart. Bad idea. Once out, the mounting screws wouldn't tighten the bracket down -- the inner fender holes were stripped (maybe there were nuts on the back side?)  I used a field expedient repair -- I drilled two small holes about a quarter inch above the old holes, found two sheet metal screws in Gordo's parts box, and screwed the bracket down:  Good as new. I then swapped o-rings on the A/C hoses, cracked the caps on the R/D fittings, and quickly hand-tightened the hoses -- before trying to mount it. This makes it a lot easier to get it back in place, and minimizes exposure to air -- it was the last thing we did before evacuating the system. Once I tightened up the clamps, I tightened up the A/C hoses:  With the R/D in place and all of the o-rings replaced, we were ready to go to the next step.
__________________
07 Boxster 88 Carrera Cabriolet 3.2 (sold) 05 Boxster S (sold) Last edited by COLB; 06-10-2013 at 09:02 PM.. |
||
|
06-10-2013, 07:03 PM
|
|
|
Registered User
|
Step 3 -- Evacuate and Charge
With all the o-rings replaced, and the compressor refilled with new oil -- compatible with any R12 oil residue, it was time to evacuate the system. Since this was a R134 conversion, I needed to put on new fittings. *****WARNING -- NEWBIE MISTAKE****** Eager to see if the system would leak or hold the vacuum, I failed to double check the fittings -- which can be screwed on to either the low pressure (marked with an "S" for suction) or the high pressure side (marked with a "D" for discharge). I initially inverted them, which could potentially have really bad results. Here are the fittings and the o-rings:  The thin one on the right is the "low side" or "suction" fitting, and takes the blue gauge. It goes on the bottom compressor valve, leading to the evaporator in the smuggler's box. The fat one on the left is the "high side" or "discharge" fitting. It goes on the top compressor valve leading to the rear condenser. Here is what the correct setup looks like, with the gauges attached on a Nippondenso compressor:  Next, connect the vacuum pump tot he center line -- but make sure you add oil to the pump. It came with 250ml bottle, but the max fill was only 200ml -- it would be easy to overfill if you are not careful. With the gauges attached to the compressor, we turned on the pump, opened all the valves, and let the pump work for about an hour. If you look closely between the red & black caps, you can see the water vapor coming out of the pump as the system is evacuated of moisture:  The pump quickly pulled a vacuum to over 30 microns -- which is better than the spec on the box (visible on the blue, low side/suction gauge:  After an hour, we closed the both the red & blue valves on the gauge set, then turned off the pump. We left open the valves attached to the compressor to check and see if the system would hold the vacuum -- trying to test if there were any leaks. Luckily, the system maintained the vacuum at 30 microns for over 30 minutes -- so we did a preliminary charge. We closed all the valves, then removed the vacuum pump, and screwed the first can of R134 onto the yellow gauge hose. Gordo loosed the yellow hose at the top, and released a little R134 to clear the air out of the line, then opened both the red & blue valves on the compressor, and only the blue/low side/suction valve on the gauges. This feeds the refrigerant into the "low side" but provides a pressure reading on both. We released some R134 into the system since it was totally empty -- with the vacuum pulling it in. Then we started the car, turned the A/C all the way up, and fed in about 20 ounces -- just under two cans. Since it was about 84 degrees , we were shooting for between 45-55 of pressure on the blue/low gauge. With the rear deck lid partially open due to the hoses, the high side/red gauge pressure kept rising over 300 -- with no air flow through the condensors, it will overheat the system quickly. But with around 20 ounces in, the system was blowing cold air, and holding steady at around 40 on the low/blue side, but running over 300 on the high/red side. At this point we had been at it for almost five hours, and the ribs Gordo had been smoking were ready:  We let the car cool down, and ate dinner -- awesome. Gordo is the man. After dinner, I drove the 40 miles back to the house with the A/C running, and all seemed pretty well -- with decent vent temps, with the intent to recheck the pressure the next day to see if the system was still holding, and finish the charge.
__________________
07 Boxster 88 Carrera Cabriolet 3.2 (sold) 05 Boxster S (sold) |
||
|
06-10-2013, 08:03 PM
|
|
|
Registered
Join Date: Nov 2000
Location: Dallas
Posts: 3,601
|
Excellent article, can you clarify what you meant by open the valves at the compressor? Does your compressor have valves that can be closed? I have the same vacuum pump...I have trouble figuring out what the function of the black "cap" is...is it supposed to be loosened or tight when in use?
Thanks
__________________
Buck '88 Coupe, '87 Cab, '88 535i sold, '19 GLC 300 DD Warren Hall, gone but not forgotten |
||
|
06-10-2013, 08:11 PM
|
|
|
Registered User
|
Step 4 - Check system and Complete the charge.
The next day, it was warm but raining hard -- so low 80s temp, and 100% humidity. At a break in the weather, I reattached the gauges, opened the valves on the condensor, and checked the pressure -- it was 25 on the low/blue side, and just under 200 on the high/red side:  Given that the car was cool, and we had only put in about 20 ounces -- this reading seemed appropriate. The owner's manual says that a full charge of R12 is 47.6 ounces. The sources I read seem to agree that you should use around 85% of that when using R134 -- which would be 40 ounces. So I started the car, cranked up the A/C, and repeated the above fill procedure with another can of R134, monitoring the pressures. The low/blue side increased to 40-50, but the high/red side shot up to 360:  At that point I remembered the rear deck lid was open because of the hoses, and closed the lid, and wrapped a blanket around it to help provide a seal that would improve air flow from the engine fan through the rear condenser:  This really helped -- I cranked up the engine RPM to 2000 for a minute or so, and the pressures dropped quickly. I finished the third can, and part of another, bringing the charge to around 40 ounces -- with the pressure reading hovering between 40-50 while I was adding the refrigerant, then stabilizing at 35 low/blue and 275 high/red when I finished adding and closed the blue valve at the gauges and monitored the system while it ran for about 10 minutes:  At this point, outside temperature was 82.6 degrees. My thermometer was designed to measure ambient air temperature, but it matched my home thermostat reading, so I expect it is close to within a degree or two:  This was with super high humidity -- close to 100% given the rain. After idling for so long the car was heating up, so I took it for a short drive, and then checked the vent temp -- which was a decent 46.5!  Not the frigid 33-38 degrees that some are claiming (at significant cost), but with a straight stock system running R134, it is not a bad result for about 6-7 hours labor...and at a cost of less than $270. The question will be how long the system maintains the charge, and how it performs when it starts to approach 90. I still may do a full upgrade later, but if I decide to do so, I have additional tools I will need (vacuum pump & gauges), and will not have really wasted anything except the cost of the Receiver/Dryer, $5 worth of o-rings, and the cost of the refrigerant. More important, I learned a lot, drank some incredible beer, had some great chow, and had fun. Pretty nice weekend project! Best, Brad COLB
__________________
07 Boxster 88 Carrera Cabriolet 3.2 (sold) 05 Boxster S (sold) |
||
|
06-10-2013, 08:44 PM
|
|

|
|
Registered User
|
Quote:
I mean the red/blue knobs/valves from the gauge set that are attached to the compressor fittings -- not anything physically on the compressor. The black cap on the vacuum pump has an air filter inside. We lifted it up a bit to get some air flow in there. You can unscrew it and take it apart to clean the filter inside, if needed. Hope that helps. I doubt I am getting all the technical terms right. Lots of discovery learning....
__________________
07 Boxster 88 Carrera Cabriolet 3.2 (sold) 05 Boxster S (sold) |
||
|
06-10-2013, 09:10 PM
|
|
|
Registered
|
One small, but possibly important point.
As you already noted, R-134a will run significantly higher pressures vs R-12. So I would recommend, as do many, many others, some much more highly qualified than myself, add a pressure sensor to the high side fitting. A "binary" switch was once the primary sensor in use for this purpose. But almost all modern day automotive systems now use a "trinary" switch which is typically to power cooling fans once the pressure level has risen to that requiredfor optimal heat transfer efficiency. You can buy an R-134a retrofit compressor high side fitting that accepts either the binary or trinary sensor for ~$20, and the sensor itself for about $30. Hate asking to recharge the system yet again, but the return in protecting the compressor alone probably makes it worthwhile. Or you could always wait until next spring as history indicates that you will need a recharge at that time anyway. History indicates that the non-barrier legacy hoses will leak, but you might be able to easily alleviate that potential via preventing system pressures from exceeding the hose design specifications. Oh, KUDOS! Damn good job, write up, pictures Last edited by wwest; 06-10-2013 at 10:34 PM.. |
||
|
06-10-2013, 10:32 PM
|
|
|
Registered User
|
Agreed on the binary pressure switch. I would have liked to add one, but I couldn't find the right part.
Our host doesn't appear to offer one, and links to the other vendors I found are dead. One vendor sells one attached to a new compressor-to-condenser hose, but that was $160 plus shipping. which put me well over budget. If I can find a plug N play switch as you describe I will install it next time I have to get into the system.
__________________
07 Boxster 88 Carrera Cabriolet 3.2 (sold) 05 Boxster S (sold) |
||
|
06-11-2013, 04:26 AM
|
|
|
Registered

|
RIBS ... A+. Any chance of Gordo sharing his recipe with the forum?
AC .... Nice documentation there Colb. Your 46F vent temp at 83F outside temperature is typically what can be expected on a stock system (Stock System Results) 1) How much refrigerant oil in total did you put in the system? 2) So, at 83F, with a full charge, your high side is 275? Keep us all posted on your vents temp experience as the weather warms, and let us know if you need to add refrigerant over the summer. Last edited by kuehl; 06-11-2013 at 05:00 AM.. Reason: I'M COLLECTING RIB RECIPES |
||
|
06-11-2013, 04:50 AM
|
|
|
Get off my lawn!
|
Good post.
I went through similar work when I first got my 911. With the stock system working as designed it was fine in the evenings and OK in the sun in temps below 90. It for sure is better than no AC. It will be interesting to see if you fixed your leaks. Keep us posted.
__________________
Glen 49 Year member of the Porsche Club of America 1985 911 Carrera; 2017 Macan 1986 El Camino with Fuel Injected 350 Crate Engine My Motto: I will never be too old to have a happy childhood! |
||
|
06-11-2013, 06:03 AM
|
|
|
Registered
|
Great Write-Up
You should submit the write up to ES - might get you another award/pay for your next project
. Jumping in both feet is always a great learning experience - enjoyed having you over.No photo/mention of grinding the low side R134 fitting to get it to connect? Kuehl, I pretty much followed this recipe (Weber kettle @225 deg F) Classic Baby Back Ribs from Weber Grills and Accessories. I normally do a 2-1-2 for ribs.
__________________
Don "Gordo" Gordon '83 911SC Targa |
||
|
06-11-2013, 06:33 AM
|
|

|
|
Registered
|
Great work! Welcome to the forum.
Quote:
__________________
83 SC Targa -- 3.2SS, GT2-108 Dougherty Cams, 9.5:1 JE Pistons, Supertec Studs, PMO ITB's, MS2 EFI, SSI's, Recurved Dizzy, MSD, Backdated Dansk Sport Stainless 2 in 1 out, Elephant Polybronze, Turbo Tie Rods, Bilstein HD's, Hollow 21-27 TBs, Optima Redtop 34R, Griffiths-ZIMS AC, Seine Shifter, Elephant Racing Oil Cooling. |
||
|
06-11-2013, 06:41 AM
|
|
|
Registered
|
Great write up and good pics too!
Nice work and bang for the buck, so lets see just for fun to get to say 34 from 46 degrees add another grand for on of the kits out there......that works out at $83 per degree cooler. Jeez BTW driving around I felt the plastic hose going to the drivers side vent and it was very wet. I think it might be a good idea to sleeve the a/c ducts to keep the cold in and cut on this condensation. Right? George |
||
|
06-11-2013, 07:27 AM
|
|
|
Registered
|
Quote:
Male Trinary Safety Switch For Electric Fans - A/C Pressure Switch There is a reasonable possibility that the reason for long term refrigerant leakage in our A/C systems is system pressures beyond the hose design specifications. Compressor over-run due to a malajusted or failed thermstatic control switch might cause that result. But adding the binary switch should prevent compressor over-run. The other possible causative factor for over-pressurization of out systems arises only "post" engine shutdown. A supposition, a RARELY occuring event: By pure happenstance you shut off the engine "just" as the compressure cycles off, (FULL charge of liquid + gas refrigerant in the high side), AND the TXV is mostly closed due to the evaporator core already operating sub-freezing (compressor would/will cycle back on after, ONLY after, the evaporator core temperature rises above freezing). Now we not only continue to get radient heating of the rear lid condensor, the engine temperature begins to rise, as does convection heating of the rear lid condensor. As a result the pressure in the system goes into ORBIT. A second unlikely, RARE event. Just a few moments ago you parked the car long enough for the above conditions to arise but the pressure doesn't rise above the design specifications. Now you restart the engine, the compressor starts up IMMEDIATELY, pumping refrigerant GAS into a TO HOT rear lid condensor. Note: With the binary pressure switch controlling the compressor the compressor would in all likelihood NOT START until enough time has elapsed for the engine fan to cool the rear lid condensor back down into the normal operating temperature range. Binary pressure switch..Win-Win-WIN. Last edited by wwest; 06-11-2013 at 10:00 AM.. |
||
|
06-11-2013, 08:41 AM
|
|
|
Registered
|
Quote:
Clean the front blower squirrel cage wheel vanes. These operate in open airflow and accummulate a LOT of debriss over time and use. Might consider new commutator brushes and inspect the commutation segments for groving. If it's not very bad you can turn the commutator down on a small lath. Fully soaking the bronze bushings/bearing and their "wicking" material in light oil might also be a worthwhile effort. I used a drill press and a "fine" rat-tail file to "renew" the commutator segments.. Same things apply to/for the evaporator blower motor/fan vanes. Except if you're in there it will likely be beneficial to clean the evaporator itself using a low pressure air hose. If you are experiencing a mould/mildew odor on occassion when initially starting up the A/C then a rinse of the evaporator with a light bleach/water mixture will be of help. Last edited by wwest; 06-11-2013 at 09:26 AM.. |
||
|
06-11-2013, 09:00 AM
|
|
|
Banned
Join Date: Aug 2011
Location: The Wet Side
Posts: 5,675
|
Very nice write up, and good pics. Thanks!
|
||
|
06-11-2013, 09:02 AM
|
|
|
Registered
|
2 good reasons for upgrading to the trinary pressure switch.
 1. Add a condensor cooling fan as above and power it with the extra trinary switch function. That will provide some additional "make-up" cooling airflow for the rear lid condensor at times wherein the engine fan does not quite suffice. 2. Provide fused power to the new trinary switch contacts directly to/from the battery. The fan will only run "post" engine shutdown if the systems pressures rise high enough. NO harm, NO FOUL..! Even should event #2 NEVER occur you still have the #1 WIN..! If you wish to go to the effort it would also help if the front condensor were also tied into the 24/7 trinary pressure switch circuit. That way rather than running continuously whenever the A/C is on, it would only run once the pressure on the high side has risen to the optimal pressure for transfer of heat. Or you could add a thermal switch on the provided "stub" on the dryer and control the front fan 24/7 that way. Last edited by wwest; 06-11-2013 at 10:26 AM.. |
||
|
06-11-2013, 10:12 AM
|
|
|
Registered User
|
Quote:
I was hesitant to add more, as I got none out of the compressor, and only a little bit out of the front condenser.
__________________
07 Boxster 88 Carrera Cabriolet 3.2 (sold) 05 Boxster S (sold) |
||
|
06-11-2013, 10:47 AM
|
|
|
Registered User
|
I'll see if Gordo will weigh in on the Rib recipe!
So today I went out to run errands -- involving about 60 miles of driving in the heat of the day -- low to mid 80s with high humidity. After driving about 20 miles to get the car up to operating temperature, I checked the A/C to see if my charge is holding. I hooked up the gauges and started the car -- with the A/C off -- and got these readings: 40 psi on the low side, and 200 on the high side.  When I turned the A/C on max and let it run for 5 minutes with the rear hatch closed and gasketed with a blanket, the pressure dropped to around 25 blue/low and increased to 250 red/high:  This puts the system at the borderline "needs a recharge zone" according to the tech article, so I am starting to think I am buggered. It is 2:00pm now, so I finish my day -- driving on highways and in traffic in DC, with the A/C running on the mid fan speed, and the compressor on high -- and I am getting really cold air. Better than the previous night -- it actually bottomed our at 37 .4 degrees after I took the photo (driving 65 on I395):  When I get home, I let the car cool off, walk the dog, take my kid driving, then come back and check the A/C again at around 7:00PM -- it is still around 82 degrees. And the readings are higher than at 2:00PM -- around 30 on the low side, and 300 on the high side:  This is with the engine lid close, car idling, with the A/C on max. Cranking the RPM to 2000 drops the low side pressure, but the high side remains the same. I went over the whole system and see no evidence of leaks. I have vented some refrigerant by attaching and removing the gauges several times, but I doubt enough to really matter. The ball on the Receiver drier is just below the middle of the glass (it is a 134A specific RD, so maybe the glass/float is calibrated fr 134?) Pressure seems low, but the system is cooling well. So, am I buggered or not?
__________________
07 Boxster 88 Carrera Cabriolet 3.2 (sold) 05 Boxster S (sold) Last edited by COLB; 06-11-2013 at 06:52 PM.. |
||
|
06-11-2013, 06:48 PM
|
|


 1988 Porsche 911 Carrera Cabriolet
 2007 Porsche Boxster


 Forever
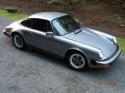 Whatever
 Fasst
Fasst Carrera
 Alfa Romeo
 Peugeot
 Porsche 911
 Audi Allroad
 Porsche
