|
|
|
|
|
| Author |
|
|
Registered
Join Date: Apr 2003
Location: Houston
Posts: 567
|
Triumph ITB - AEM Infinity Project
Very interested to see what you come up with from RHD, Al.
For now the Triumph's are working great! http://s35.photobucket.com/user/c_hundley86/media/porsche/5EF29283-3FFC-4699-866B-4AA08FF17633_zps6xd3l3qg.mp4.html Last edited by Clay.0; 02-19-2017 at 03:54 PM.. |
||
 02-19-2017, 03:51 PM
|
|
|
Registered
|
Beautiful setup! I was considering doing a job like this on my 190E 2.3 16V back in the day, but a PCS and engagement killed that project off... Curious to know, how much of a HP/TQ gain did you realize? Did you do a before and after dyno?
|
||
|
04-15-2017, 09:22 PM
|
|
|
Registered
Join Date: Apr 2003
Location: Houston
Posts: 567
|
Quote:
|
||
|
04-21-2017, 10:13 AM
|
|
|
Registered
Join Date: Apr 2003
Location: Houston
Posts: 567
|
It's been awhile since i've updated this thread, but I have continued to tinker with my setup.
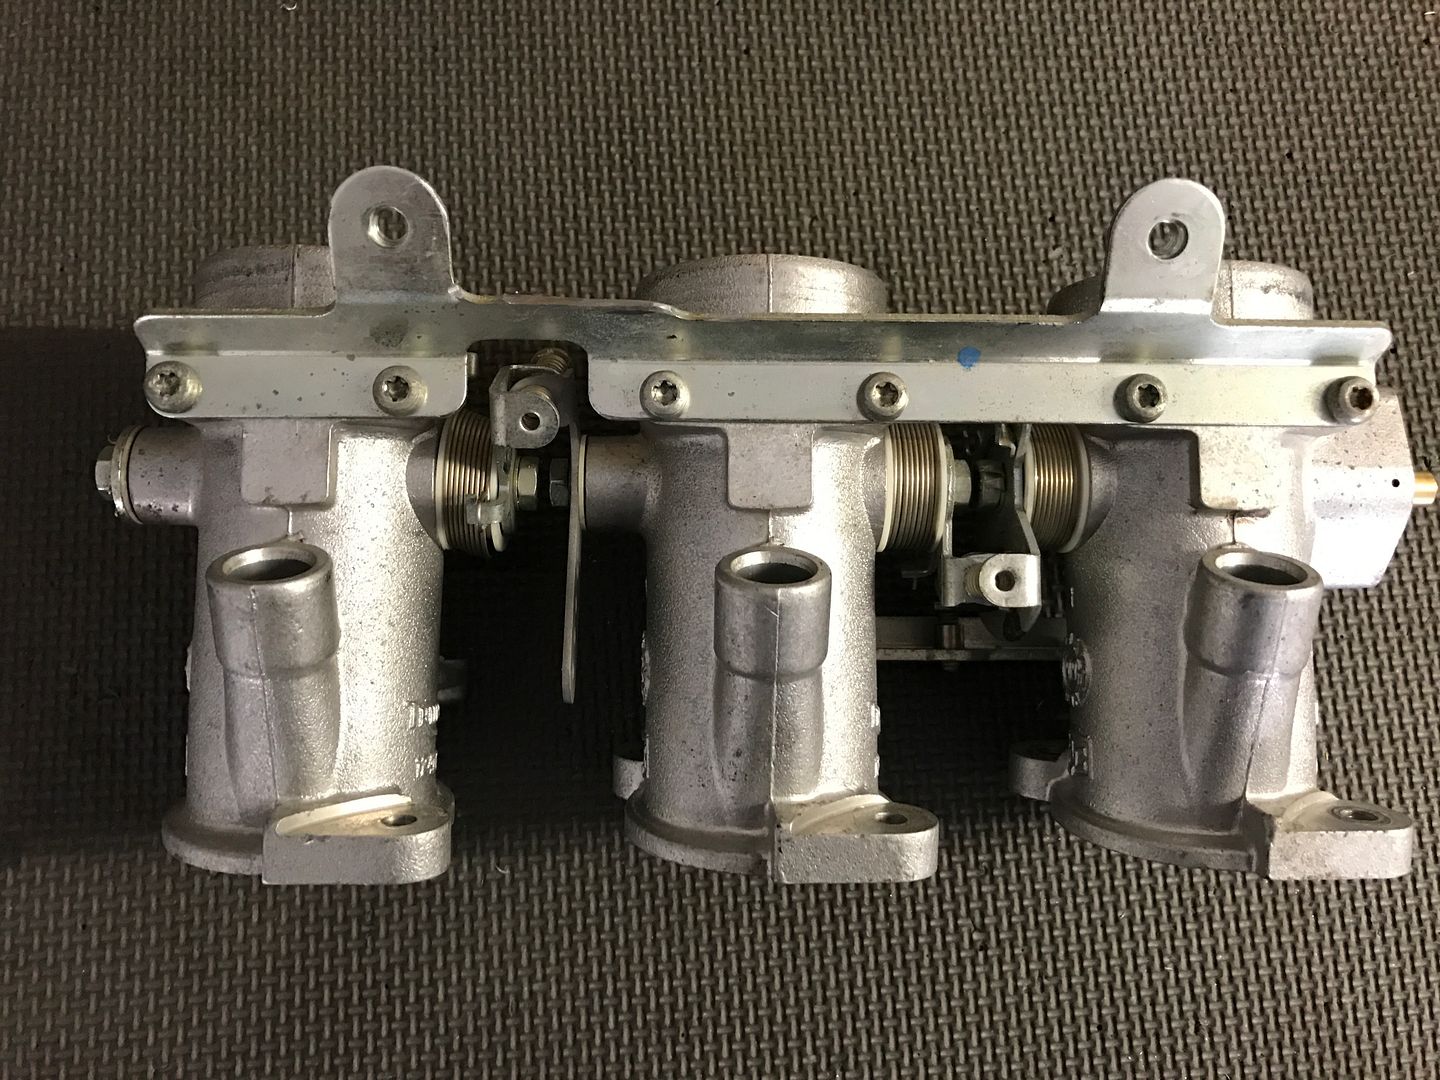
First up, was the linkage. The modified PMO/Weber crossbar setup worked well, but once i installed the rainhat airfilters, it limited the range of motion. So here's what I did: The fuel rail and idle stop bracket have accessory brackets on them that will no longer be used and interfere with the new linkage.  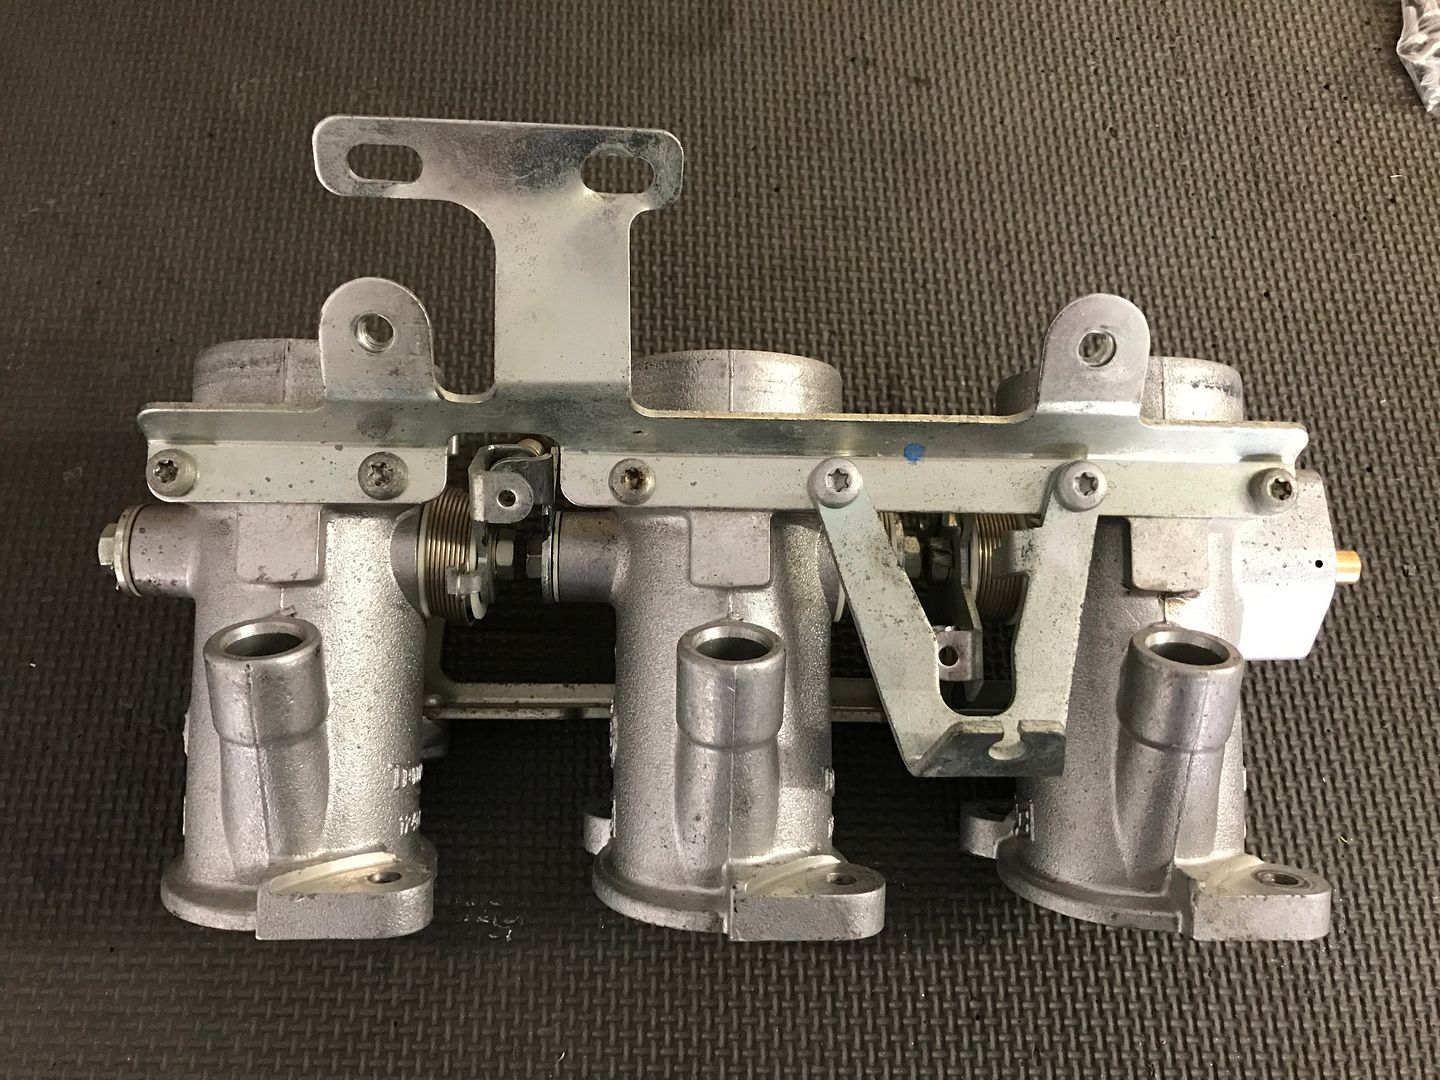 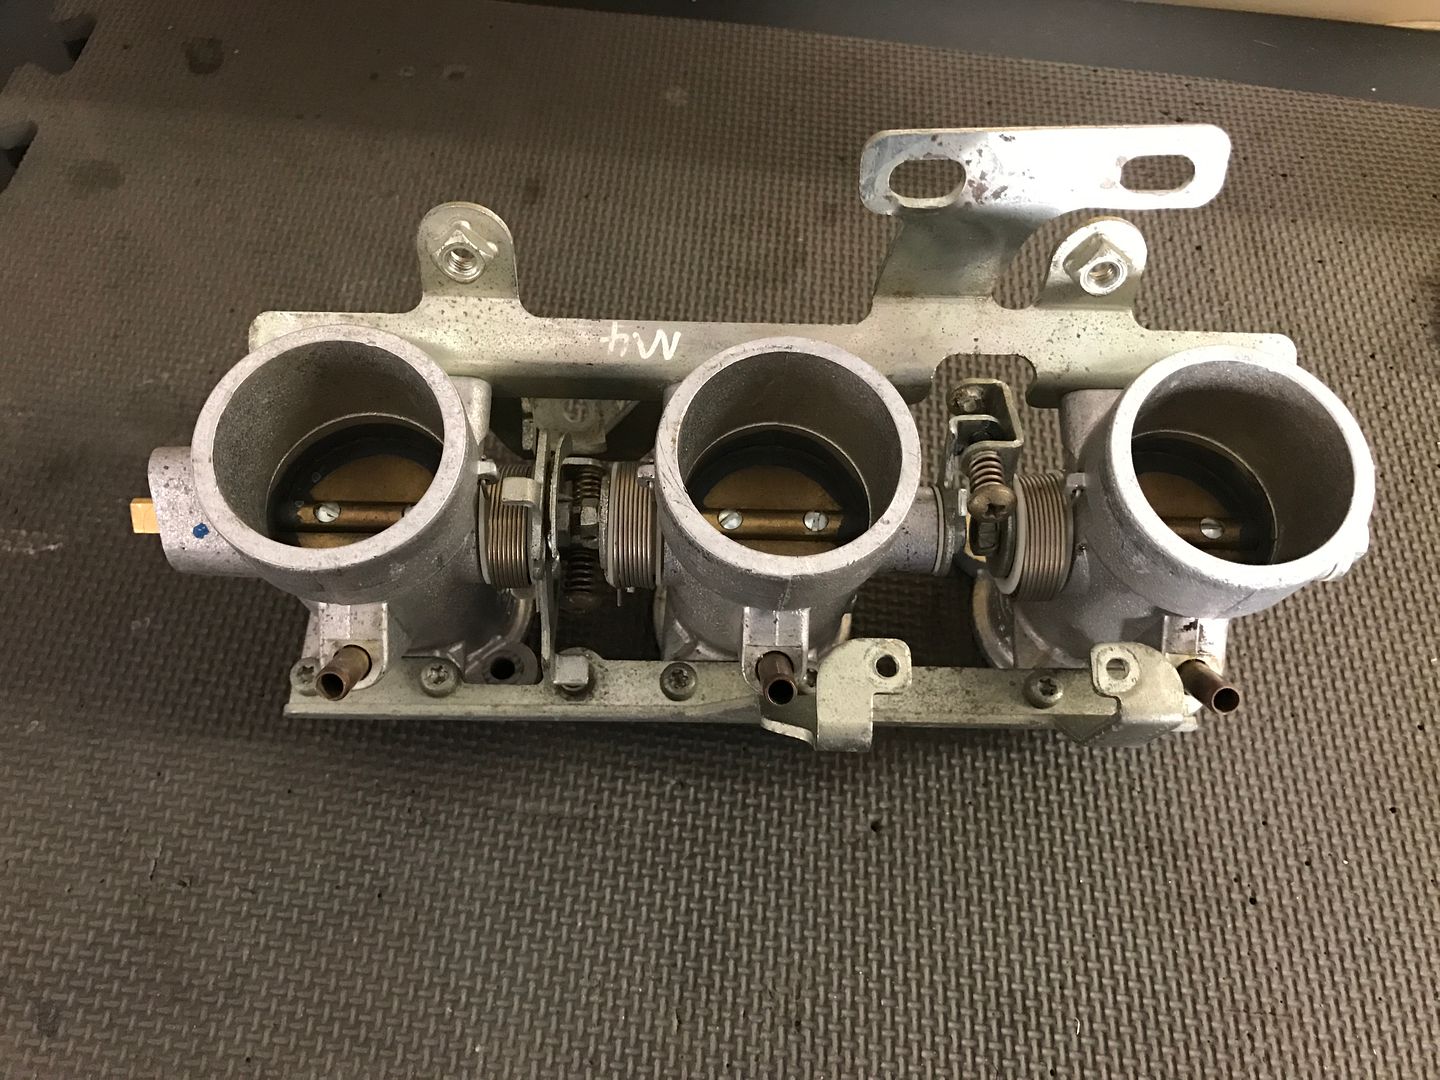 Remove the throttle body on the end without the throttle position sensor by removing the 4 torx screws 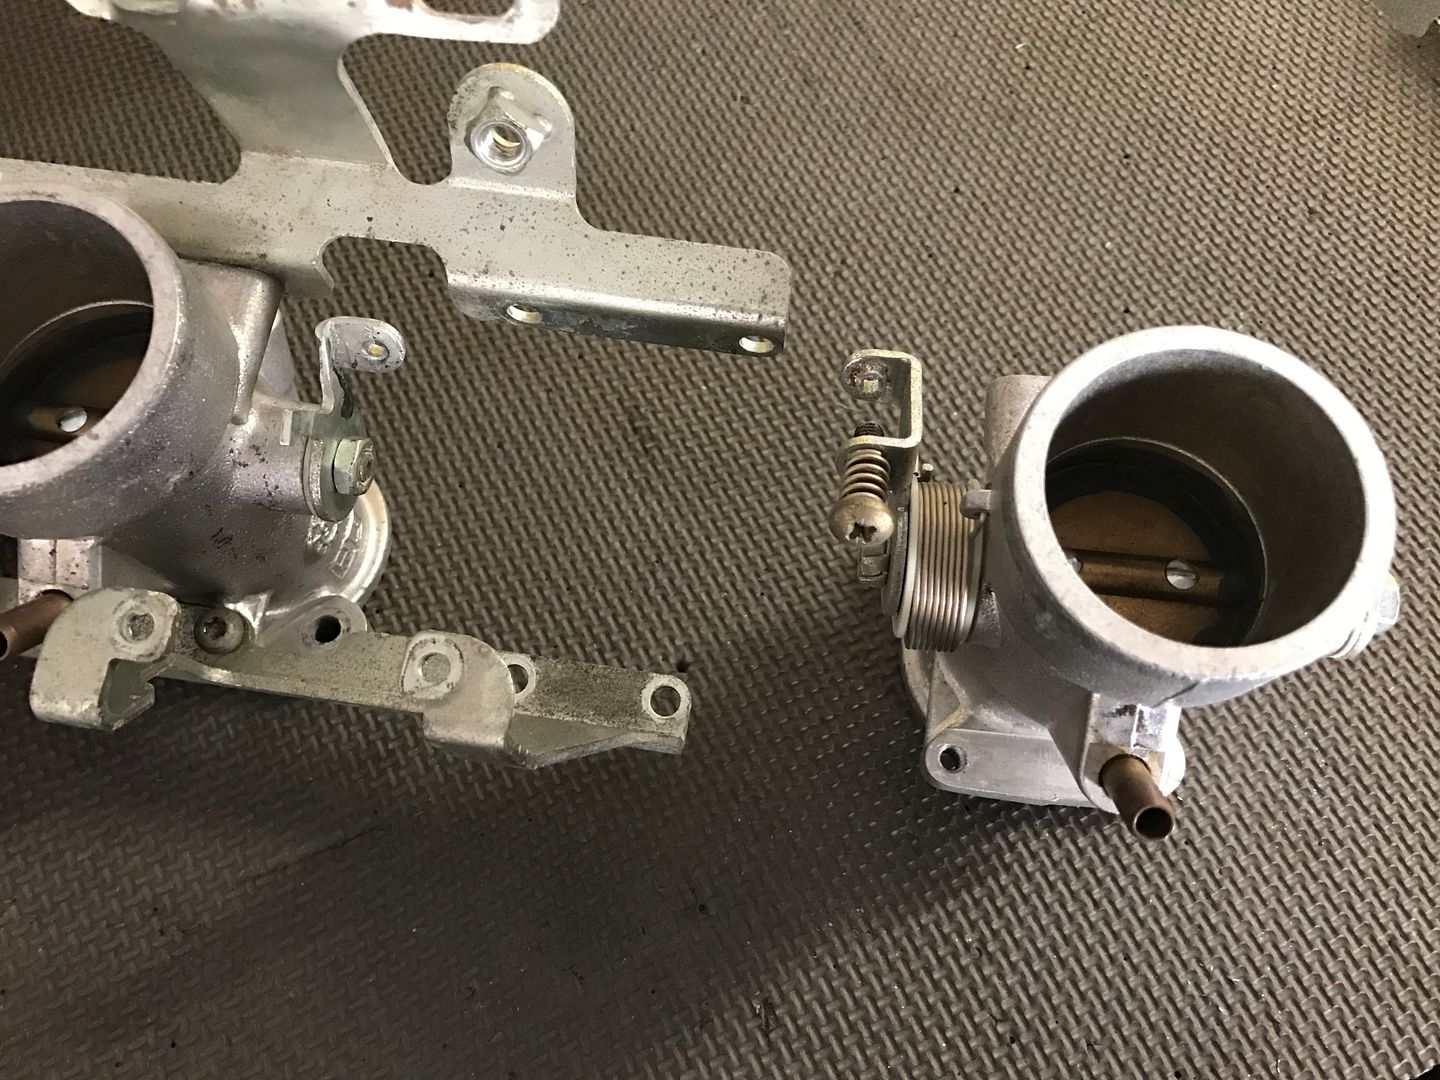 Note: There is a spring between the linkage that will fall out, save this. Cut the ITB bracket to remove the vacuum brackets and shorten it to only connect to the first two throttle bodies 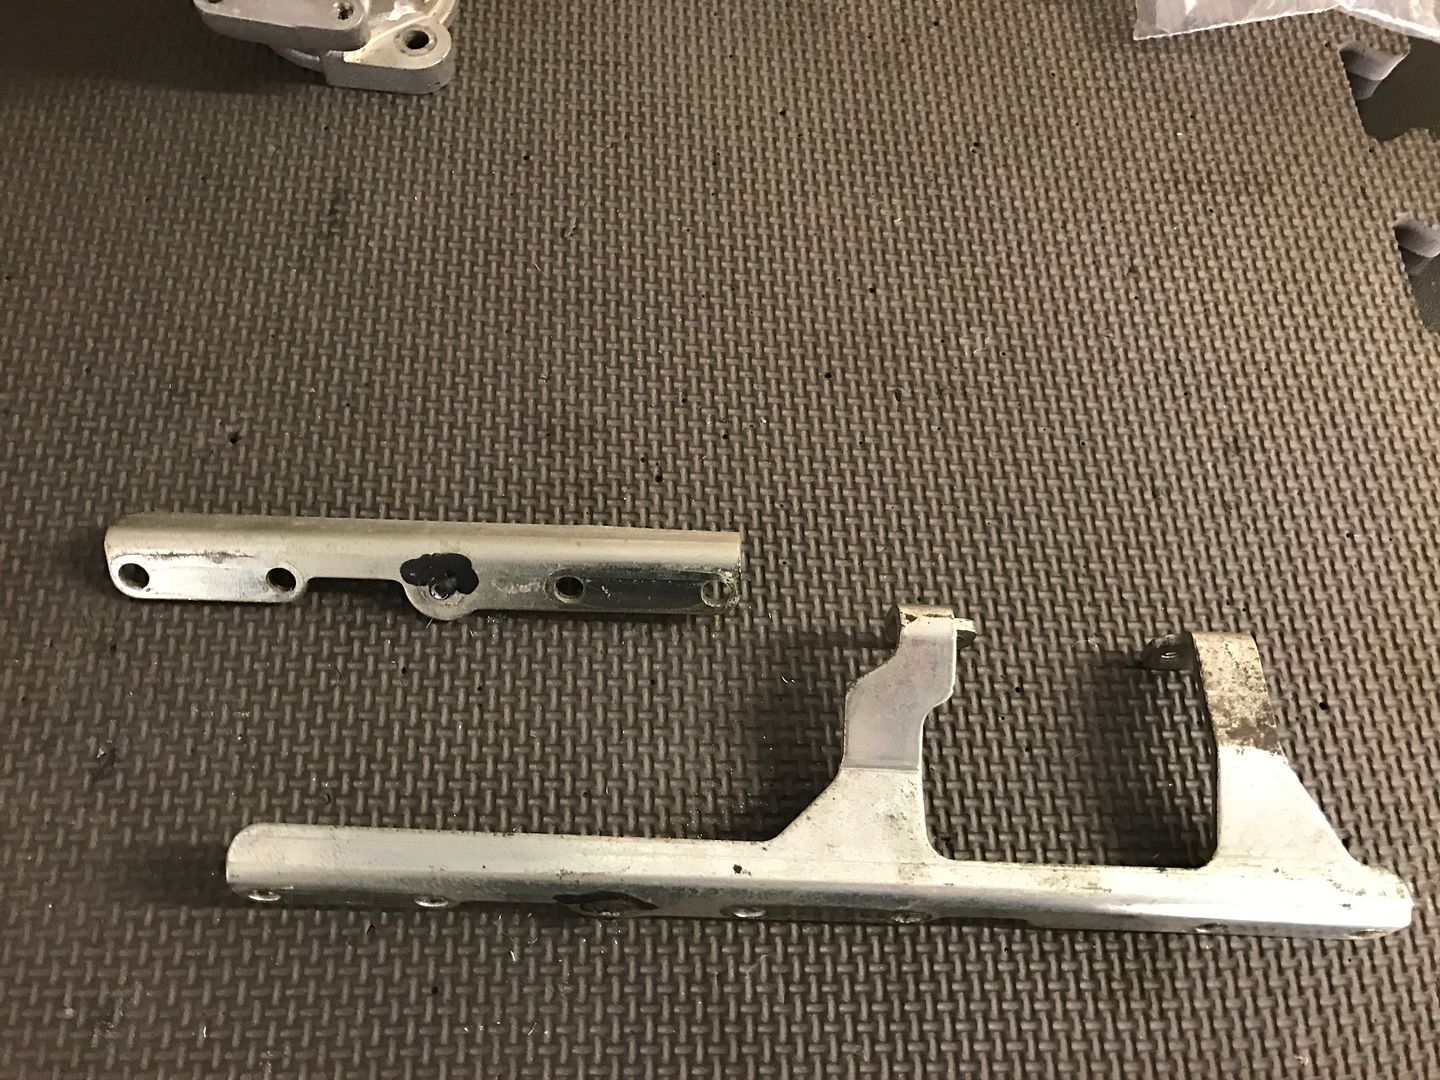 Cut the fuel rail bracket to remove the extra bracket. Reinstall without the cable linkage bracket. 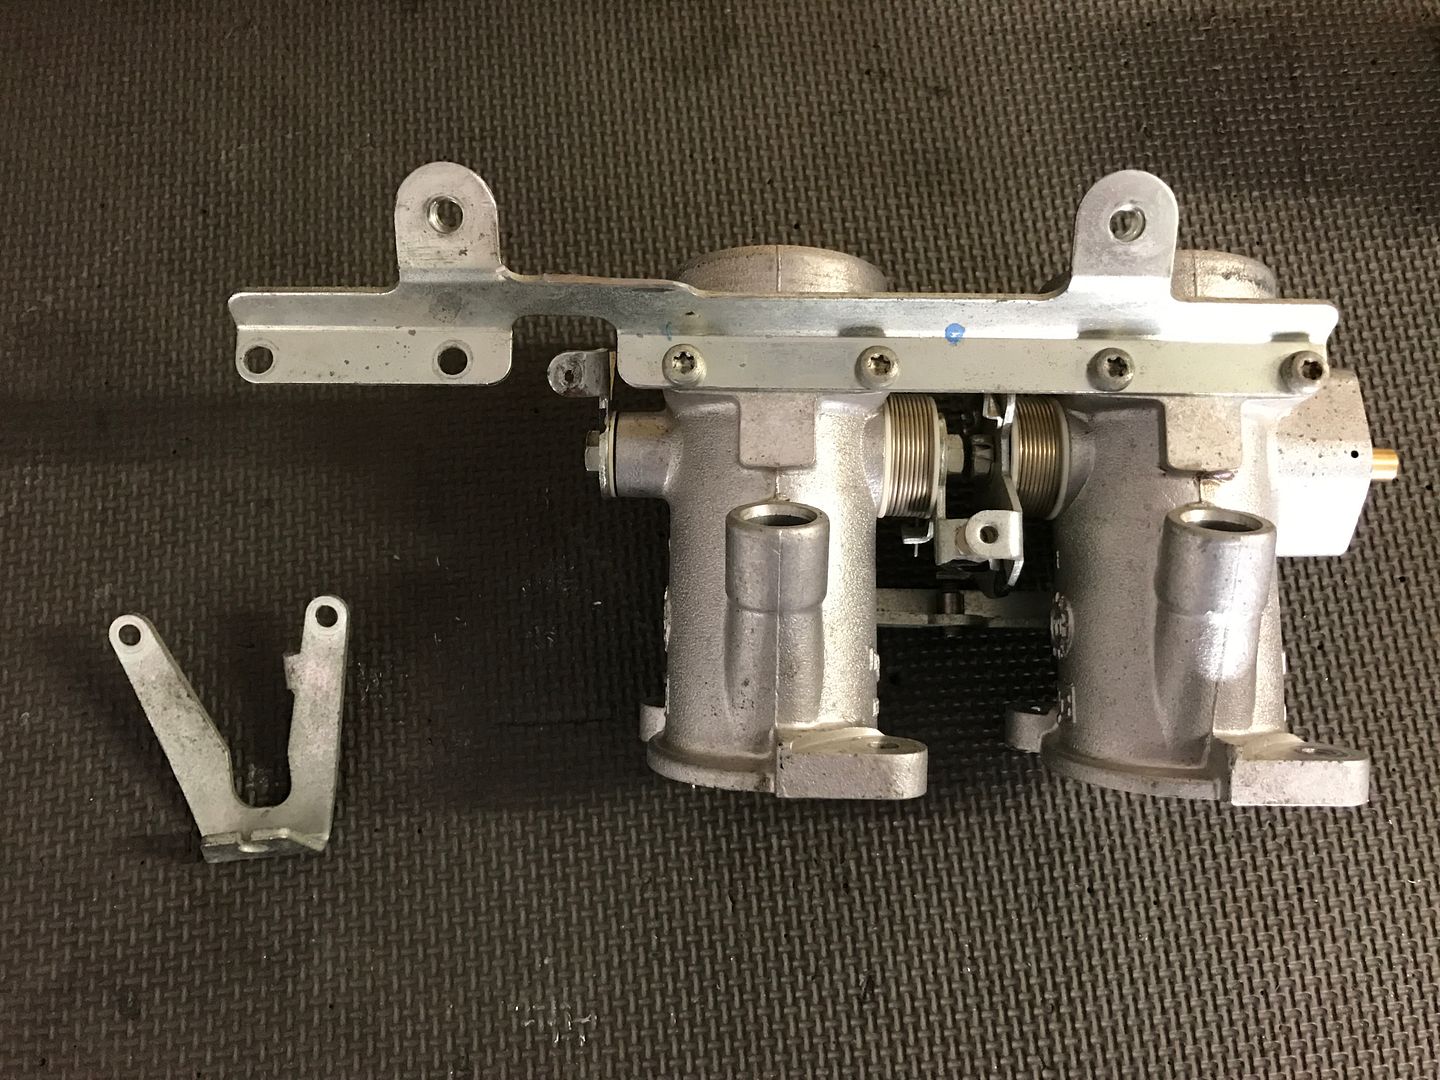 Once the end TB was out of the way, the middle linkage arm was replace with one I made 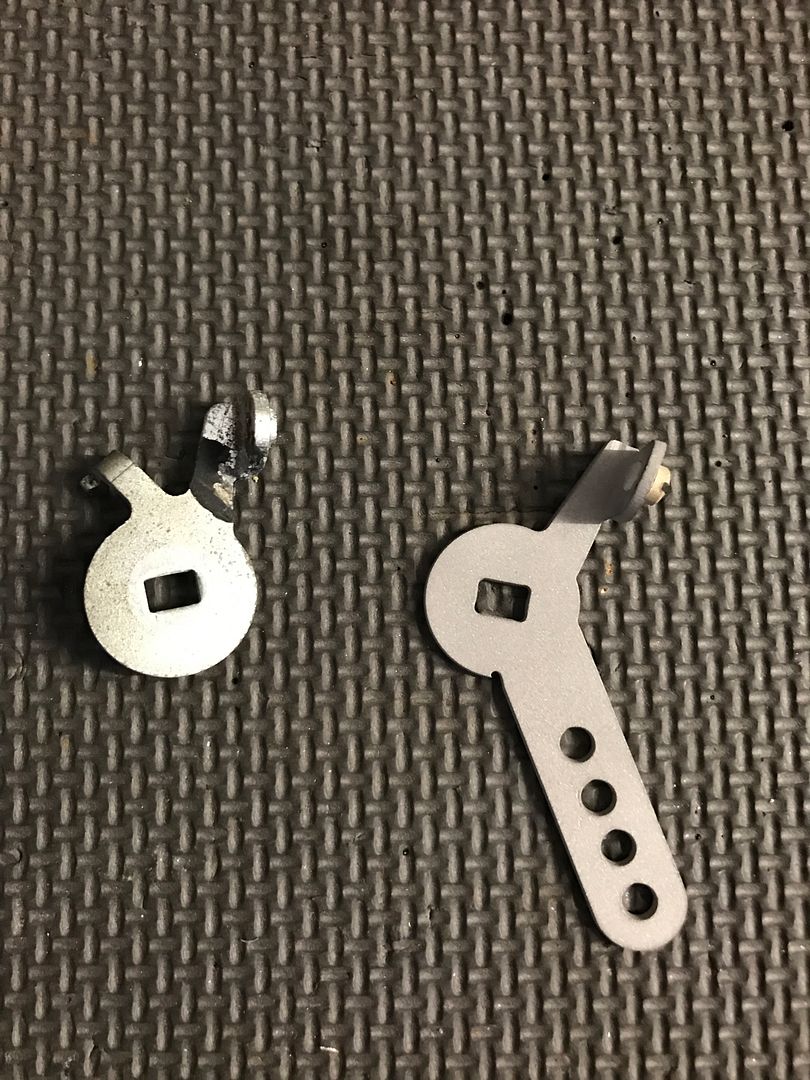 The Triumph linkage arm is held on with a 10mm nut. There is a lock washer with tabs that must be bent over prior to the nut removal. 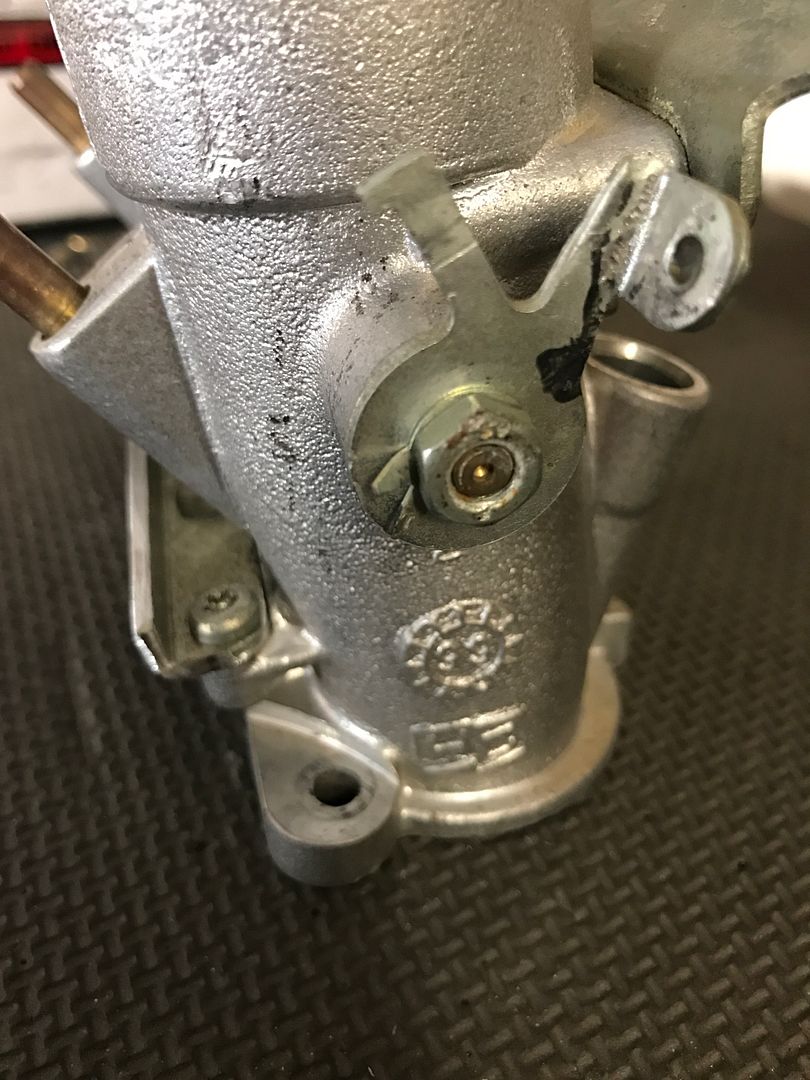 Leave the nylon washer in place. 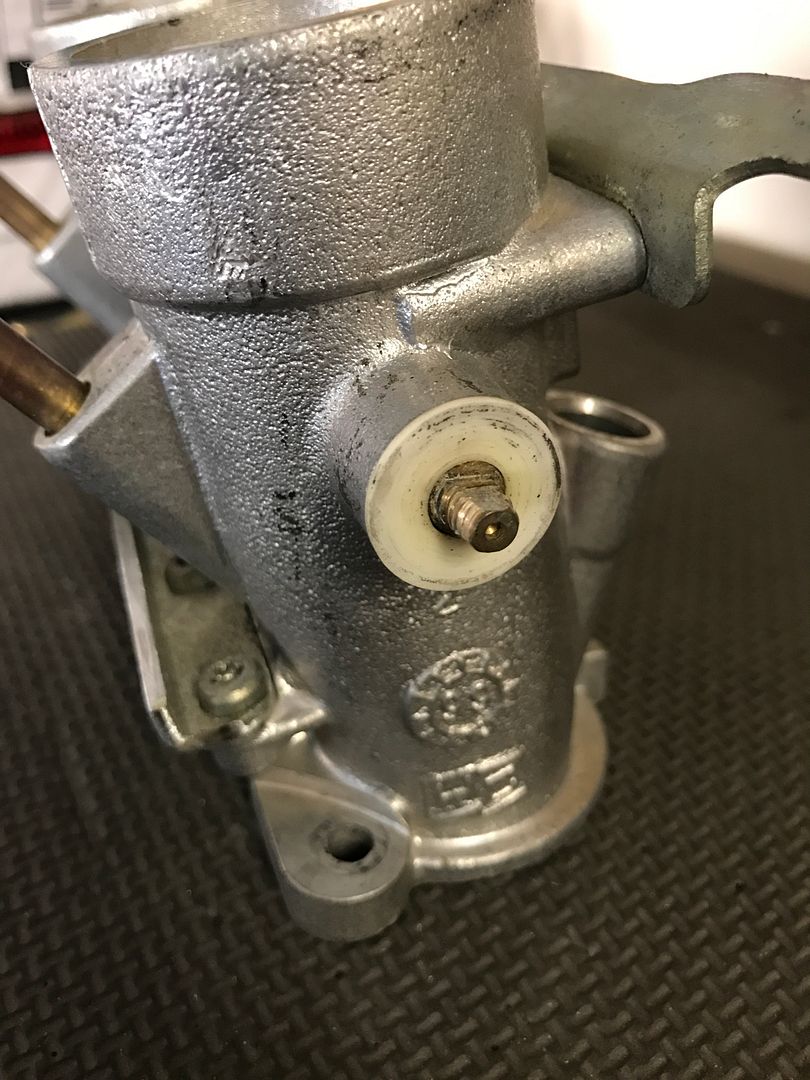 Install the new linkage arm. Reinstall lock washer and 10mm nut. Bend washer tabs up. 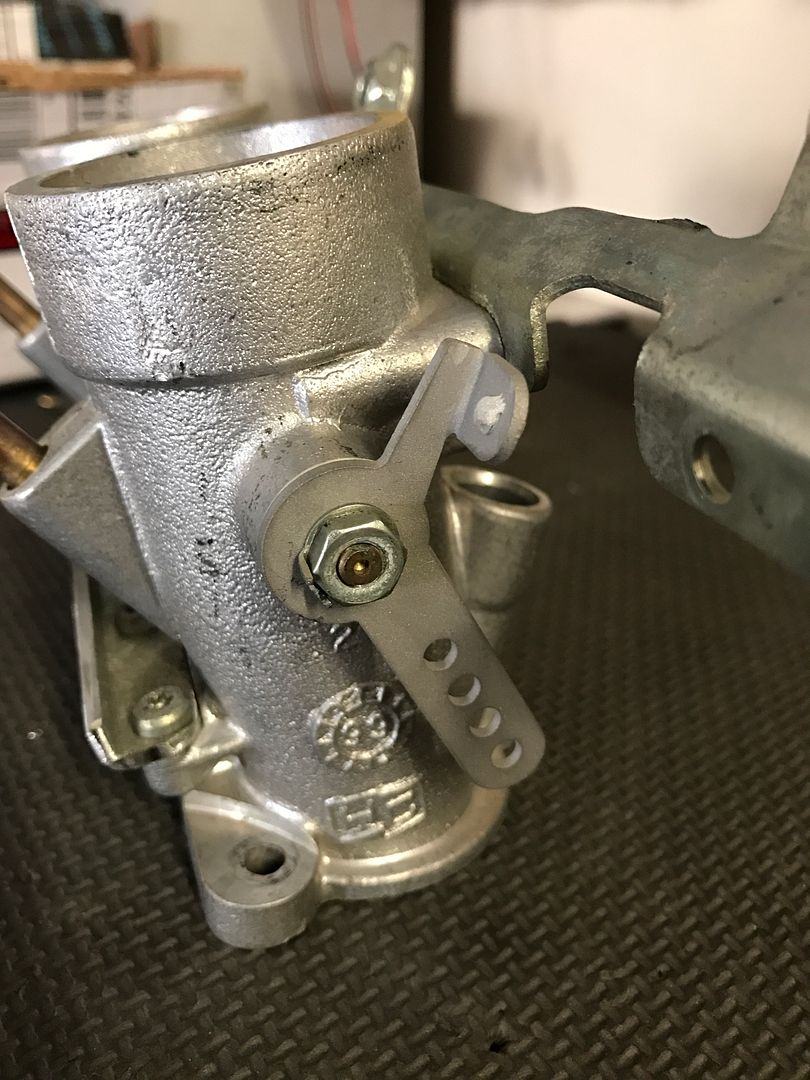
Last edited by Clay.0; 04-26-2017 at 05:52 AM.. |
||
|
04-26-2017, 05:48 AM
|
|
|
Registered
Join Date: Apr 2003
Location: Houston
Posts: 567
|
Then re-installed the fuel rail bracket with (6) torx screws.
 Reinstall the linkage spring between the new linkage arm and the old one. 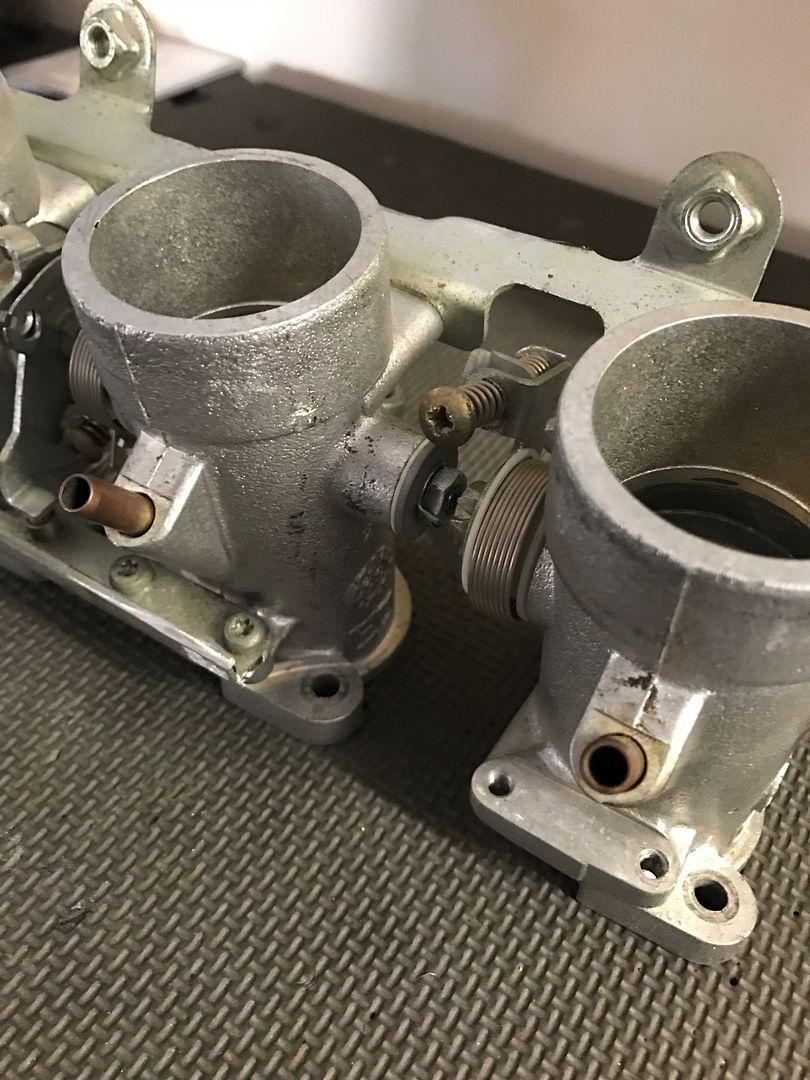 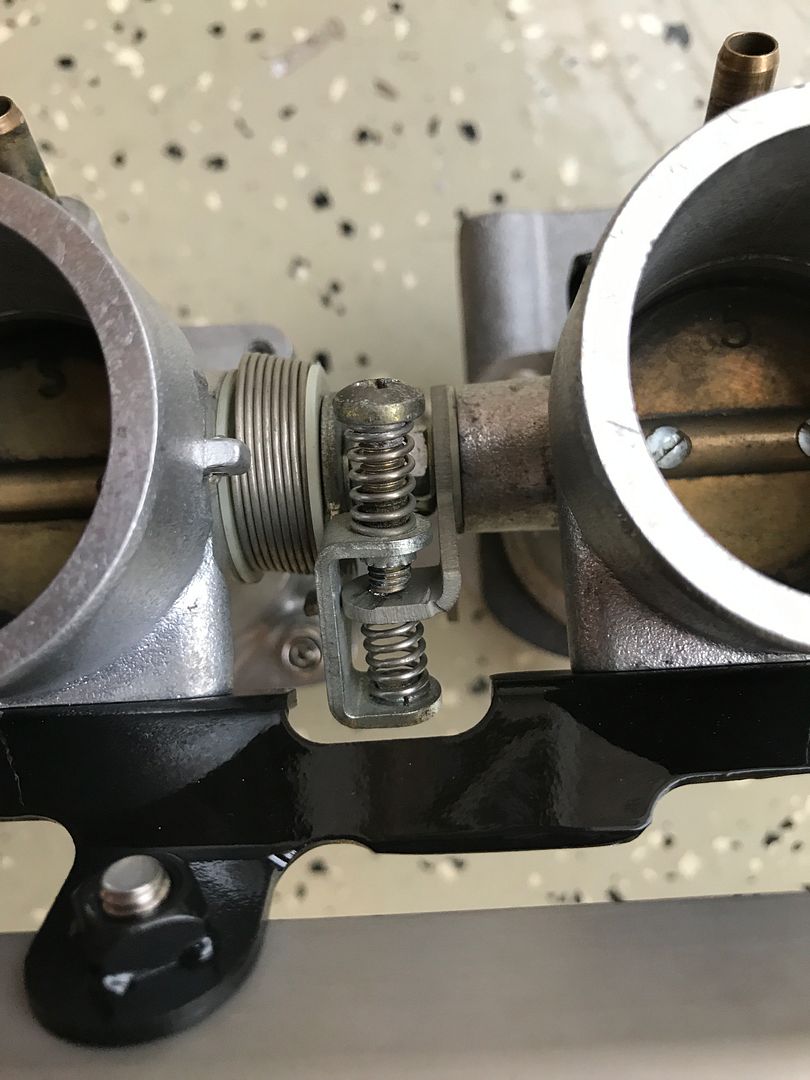 Reinstalled the modified idle stop bracket.  Then the linkage rods are attached to the new linkage arms 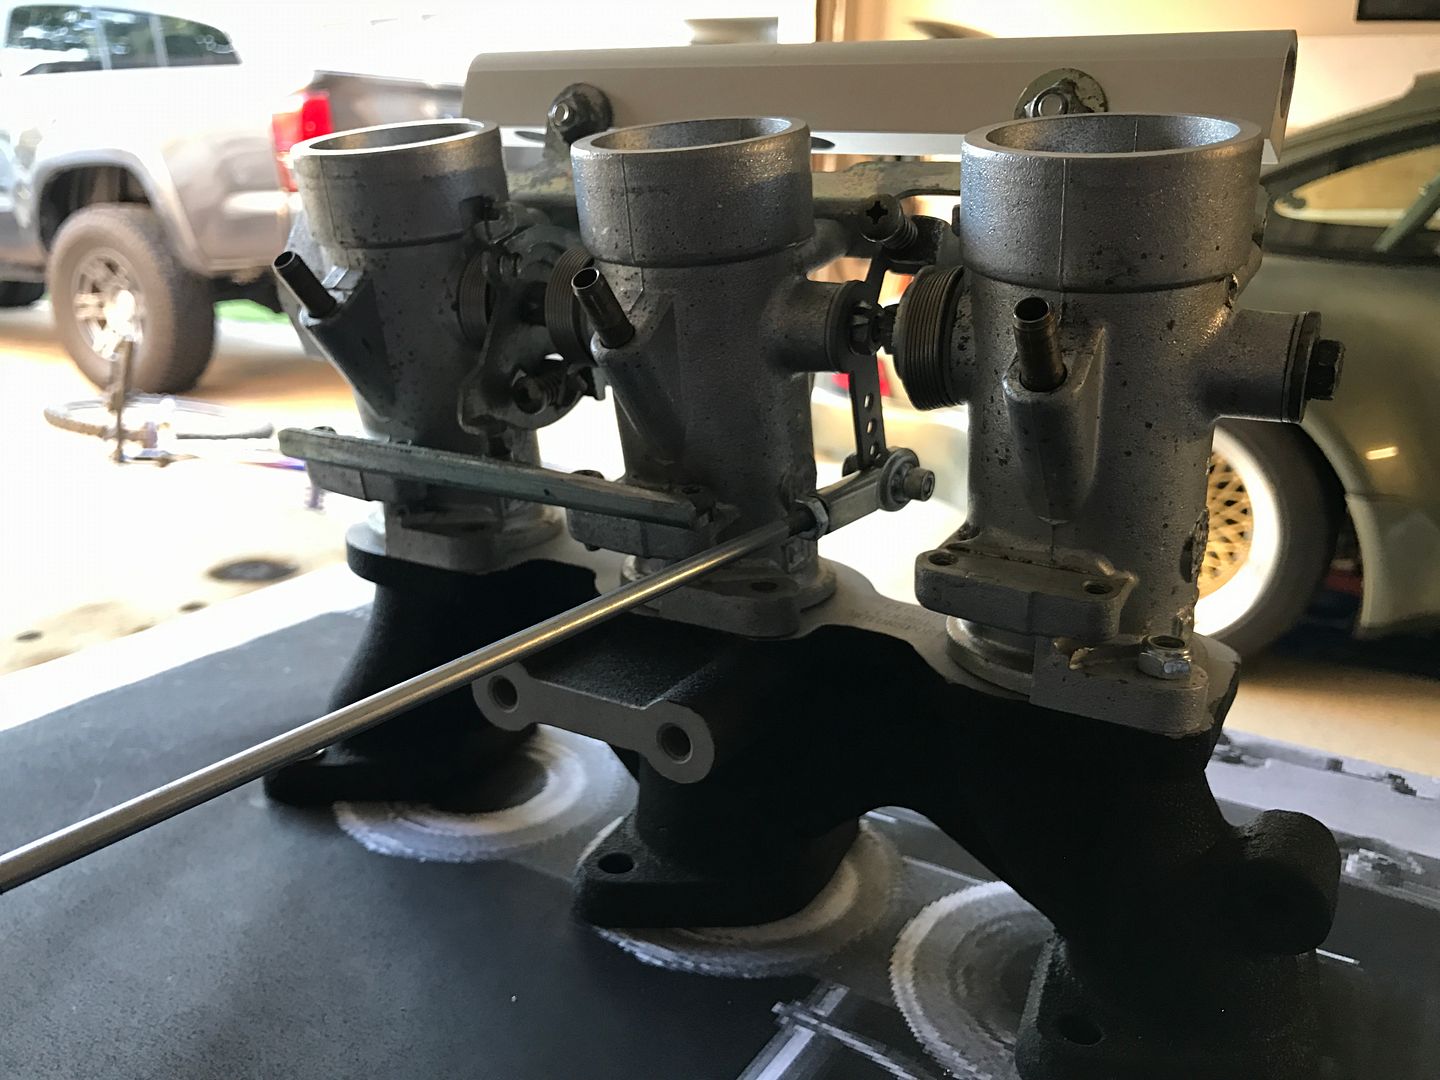 For the center pivot I waterjet cut a bracket that attaches to the oil breather and with some hardware and nylon washers provides a base for the linkage to tie into and pivot on. 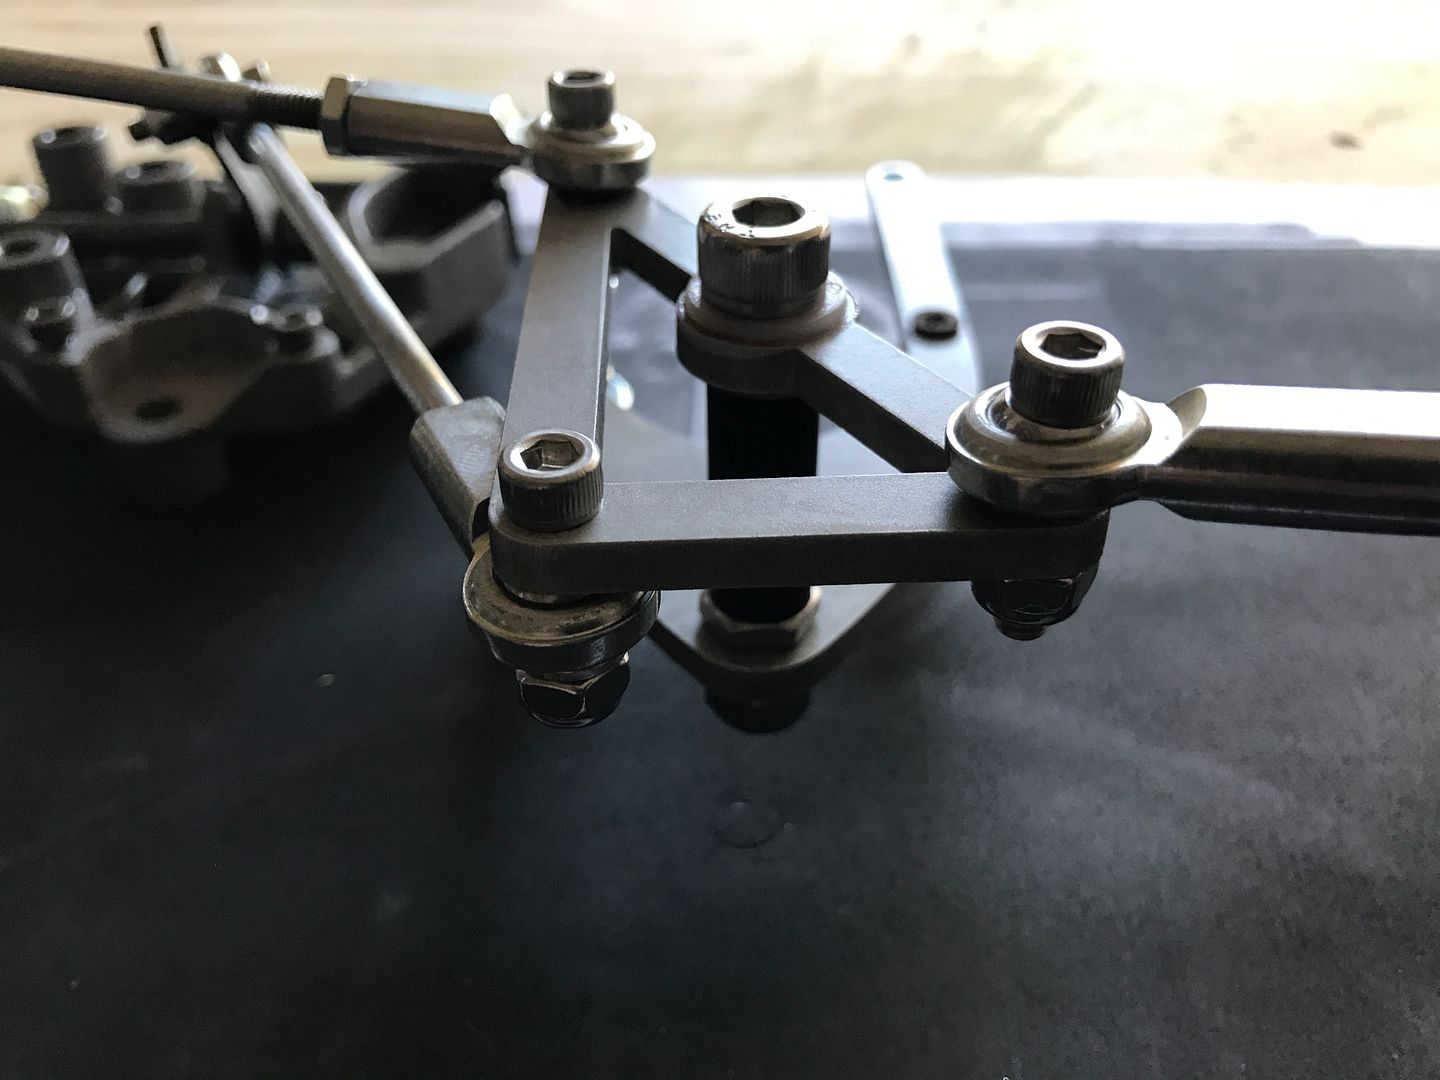 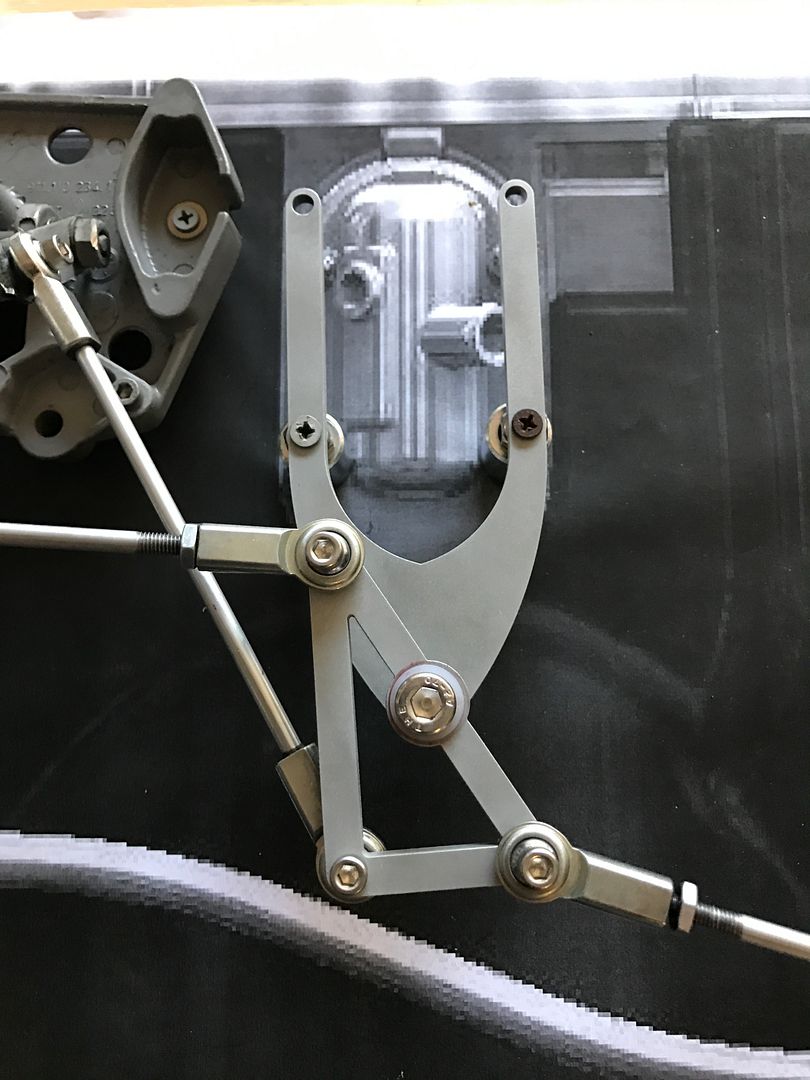 Then used linkage rods with swivel ends to connect it all. 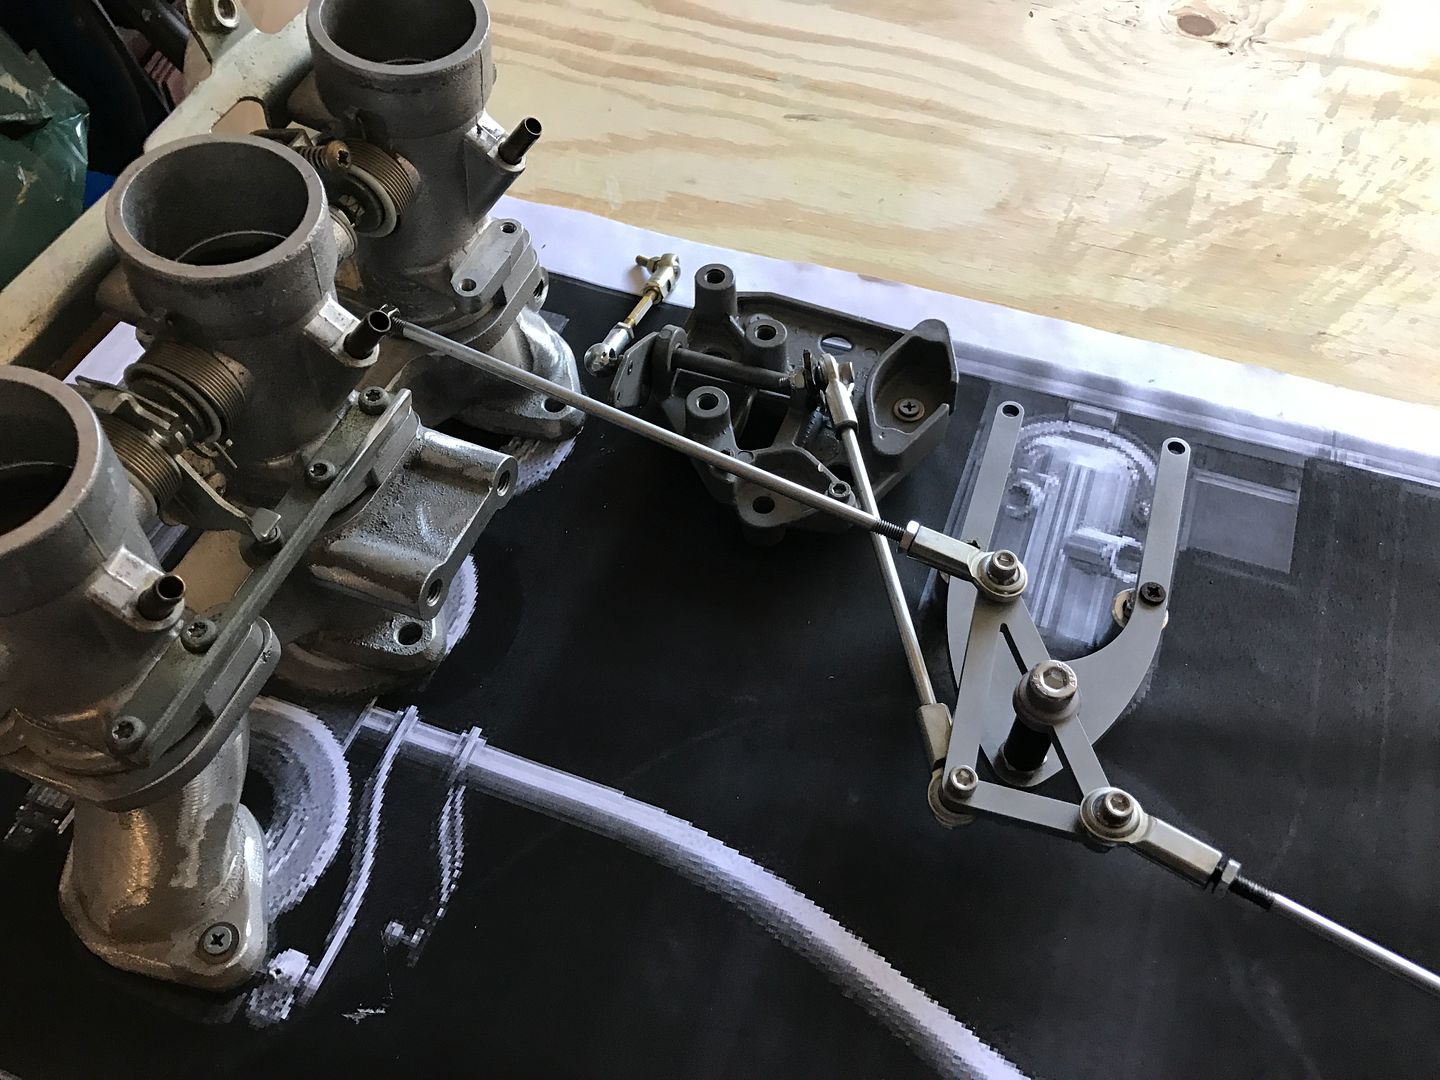 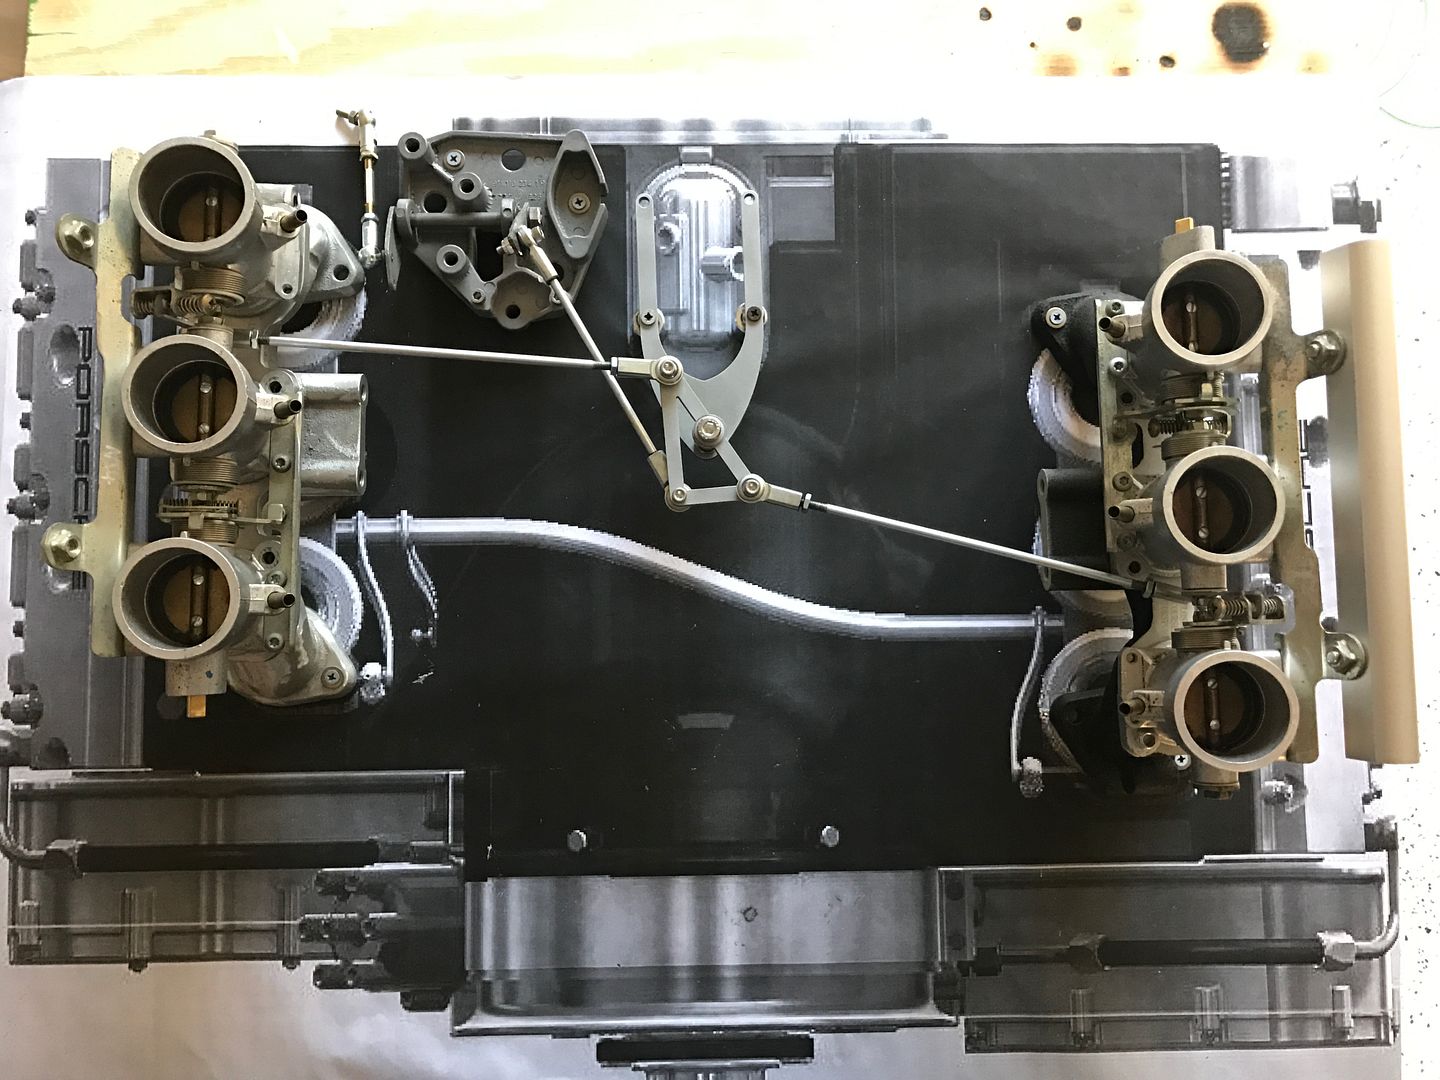
Last edited by Clay.0; 04-27-2017 at 11:51 AM.. |
||
|
04-26-2017, 05:55 AM
|
|
|
Chain fence eating turbo
Join Date: Dec 2008
Location: Austin, TX
Posts: 9,142
|
Very, very nice!
|
||
|
04-26-2017, 06:09 AM
|
|
|
Registered
Join Date: Apr 2003
Location: Houston
Posts: 567
|
Thanks!
I also had some fuel rails made with -6AN threads on the ends. The early Triumph motorcycles came with aluminum fuel rails, that I had, but the later ones came with plastic rails. The new rails replace the plastic ones, and are much cleaner than the stock triumph aluminum rails. 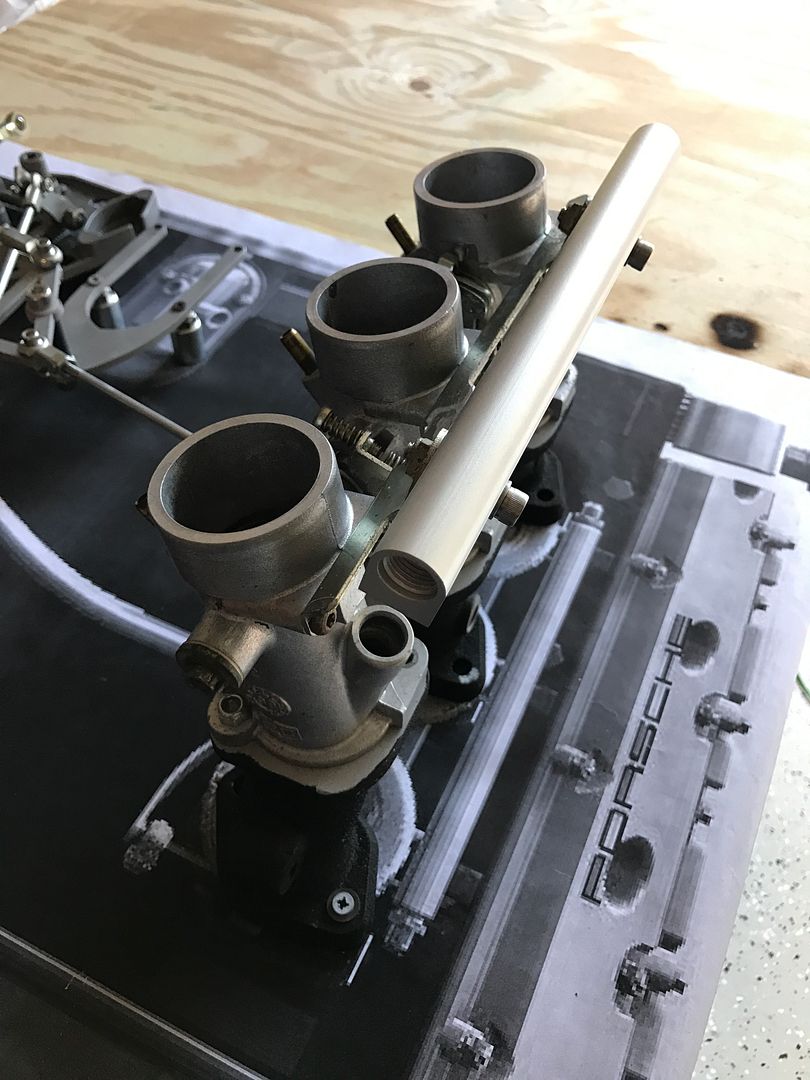 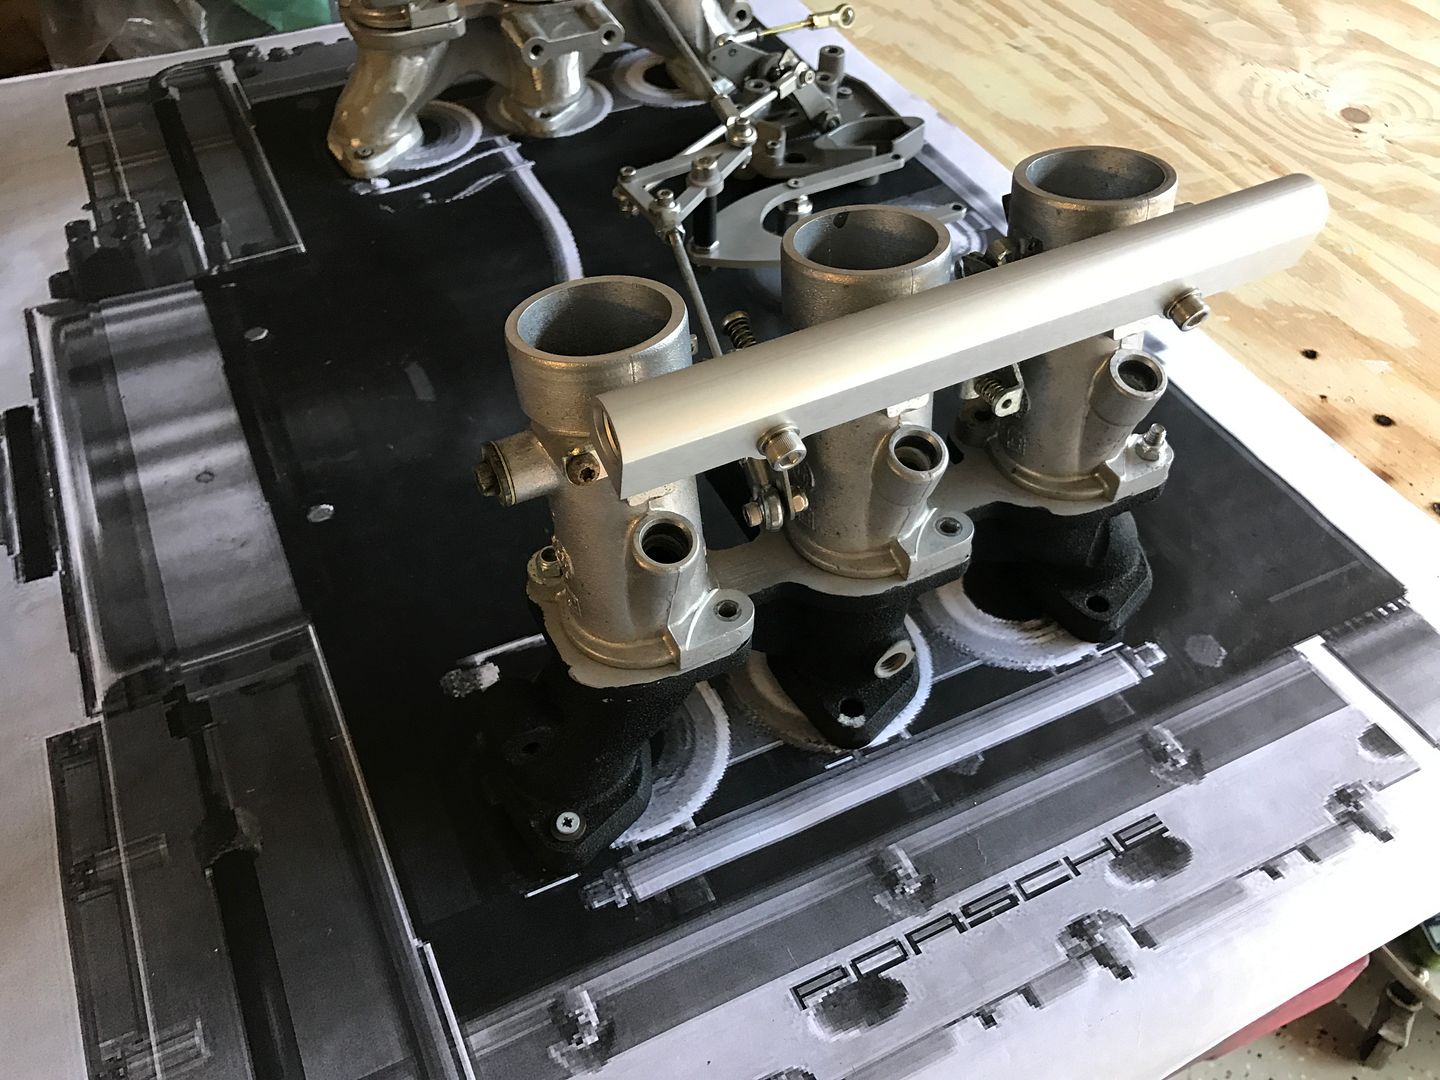
|
||
|
04-26-2017, 06:12 AM
|
|
|
I would rather be driving

Join Date: Apr 2000
Location: Austin, TX
Posts: 9,108
|
Love the mockup workspace table image.
__________________
Jamie - I can explain it to you. But I can not understand it for you. 71 911T SWT - Sun and Fun Mobile 72 911T project car. "Minne" - A tangy version of tangerine #projectminne classicautowerks.com - EFI conversion parts and suspension setups. IG Classicautowerks |
||
|
04-26-2017, 06:21 AM
|
|
|
Registered
Join Date: Jul 2005
Location: Atlanta
Posts: 1,241
|
Great stuff. Love it. Pm sent
__________________
No physical quantity completely explains its own existence |
||
|
04-26-2017, 06:29 AM
|
|
|
Registered
Join Date: Jul 2001
Location: mt. vernon Wa. USA
Posts: 8,730
|
looking good clay.
__________________
[B]Current projects: 69-911.5, Previous:73 911X (off to SanFrancisco/racing in Germany).77 911S (NY), 71E (France/Corsica), 66-912 ( France), 1970 914X (Wisconsin) 76 911S roller..off to Florida/Germany RGruppe #669 http://www.x-faktory.com/ |
||
|
04-26-2017, 06:31 AM
|
|
|
Registered
|
That's impressive.
|
||
|
04-26-2017, 10:32 AM
|
|
|
Registered
Join Date: Apr 2003
Location: Houston
Posts: 567
|
Thanks guys. I realize I didn't post the new setup installed
      And a video of the linkage in motion: |
||
|
04-27-2017, 11:52 AM
|
|

|
|
Registered
Join Date: May 2004
Posts: 763
|
What motor size will the ITBs work on ?
are they closer to a Weber 40mm or 46mm ? will it work on a 2.0 on the street?
__________________
looking for information about old VW Coach built based sports cars, or photos and stories from the past , At one time many of these got confused as "Porsche prototypes" including the one restored at Hill and Vaughn in Santa Monica |
||
|
04-27-2017, 02:40 PM
|
|
|
Registered User
Join Date: Oct 2012
Posts: 539
|
When are you going to build one for my 78 SC motor?
Seriously you could build this into a nice kit for people like me who have no motor mojo. Looks awesome. |
||
|
04-27-2017, 03:07 PM
|
|
|
911T '72
|
Hey Clay,
Any reason why you didn't put the new linkage arm between 4 and 5 on the left bank? Woudn't it be straighter? Nice work again!
__________________
Dennis Good drivers have dead flies on the side windows. (Walter Röhrl) |
||
|
04-27-2017, 10:46 PM
|
|
|
Registered
|
Super impressive Clay! The linkage is a thing of beauty... Very well executed sir!
David
__________________
2007 911 Turbo 6-speed, 1984 911 Carrera, 1974 911S, 75 914-6 conversion/project, 2007 Mercedes SL63 AMG, Coyote Powered FFR Cobra |
||
|
04-28-2017, 02:57 PM
|
|
|
Registered
|
Looks great!
|
||
|
04-30-2017, 02:05 PM
|
|
|
Registered
Join Date: Apr 2003
Location: Houston
Posts: 567
|
Quote:
Quote:
 Quote:
"The Triumph ITBs are 42/43mm. And they will support a lot of HP. The table below can be used to help estimate the correct size ITB 40mm 265cfm 61Hp 350-500 cc/cyl 42mm 304cfm 70Hp 450-600 cc/cyl 45mm 362cfm 83Hp 550-700 cc/cyl 48mm 408cfm 94Hp 650-800 cc/cyl This is a broad brushstroke, but a: 2.0 is (2000/6=333CC/cylinder) even 40mm is a bit too much. 2.7 is (2700/6=450CC/cylinder) high end of the 40mm, low end of 42mm 3.2 is (3200/6=533CC/cylinder) right in the center of 42 3.6 is (3600/6=600cc/cylinder) time to move up to 46's So...for the 2.0, i'd move to the smaller Triumph ITBs used on the 500-ish bikes. These also have an oval port and have approx 75% of the cross sectional area of a 40mm dia port." Quote:
 Quote:
|
||||||
|
04-30-2017, 02:22 PM
|
|

|
|
Registered
Join Date: Apr 2003
Location: Houston
Posts: 567
|
Here is how the linkage is adjusted to balance everything out.
A synchrometer, available from the host (Part #: PEL-PMO-STE-BK), is used to measure the kg/h at each cylinder.  First, the 3 linkage rods must be left loose at the center pivot  With the car running, likely roughly, start at cylinders #1 and #6. They are adjusted with the throttle stop adjustment screw. This is a 2.5mm allen head. Turn the screw in and out to get an kg/h reading of about 5-6 which should set the idle around 900-1000 rpm. 
Last edited by Clay.0; 04-30-2017 at 03:07 PM.. |
||
|
04-30-2017, 02:34 PM
|
|
|
Registered
Join Date: Apr 2003
Location: Houston
Posts: 567
|
Repeat on the right bank on cylinder #6
 Once both idle stops are adjusted evenly, the engine should be running much smoother. Next up is to balance each bank, starting at cylinder #2 Using a phillips screw driver, turn in and out the adjustment screw between the first and second throttle body until the kg/h reading is as close as possible to cylinder #1. Check the readings between #1 & #2 as adjustments are made.  Then move to cylinder #3, turn the adjustment screw between the second and third throttle body to match the readings of #1 & #2. This one will likely be the furthest off as removing and replacing the linkage arm and spring throws this off. Check the readings between #1, #2 & #3 as adjustments are made.  Once the drivers side bank is complete, everything on that side should be very close to being even. Then repeat the process on the passenger side starting with #5. The adjustment screw is located between #6 & #5.  Lastly, adjust the screw between #4 & #5 to set the kg/h on cylinder #4.  Once each bank is balanced both to each other (1-3 and 4-6) and to the opposing bank (drivers vs passenger) the idle set screws can be adjusted to set the idle. The banks should be balanced, so you should not have to adjust the phillips screws, just the 2.5mm allen for the idle stop. Last edited by Clay.0; 04-30-2017 at 03:08 PM.. |
||
|
04-30-2017, 03:00 PM
|
|


 911SC Targa
 1978 Porsche 911SC
 72 T
72 T 86 Carrera
 968CS
968CS Boxster S
 1984 Porsche 911 Carrera
 1974 Toyota Corona 2000 GT
 2003 Jeep Rubicon
 1970 Porsche 911t
 2013 Jeep Grand Cherokee
 1968 Ford Mustang
 2014 GMC Yukon
