|
|
|
|
|
| Author |
|
|
Registered
Join Date: Apr 2003
Location: Houston
Posts: 567
|
Triumph ITB - AEM Infinity Project
Hey guys,
I've been working on a Triumph motorcycle ITB (Individual Throttle Body) project with AEM Infinity EFI (Electronic Fuel Injection). I am far from the first to use motorcycle throttle bodies on a 911, but wanted to share my take on the project. The Triumph ITB's are from a Triumph Speed Triple 955i motorcycle. They came on years are 1997-2001, but the early ones 1997-1999 are a little better as they came with aluminum fuel rails. They later ones came with plastic fuel rails. The throttle bodies themselves are all the same, so if you have to mix and match it's okay, but i prefer the aluminum fuel rails. One can find the throttle bodies used on eBay or at motorcycle salvage yards. One setup with throttle bodies, fuel rail, injectors (27lb is stock), throttle position sensor, and vacuum lines can be found for around $100. In order to mount the ITB's to the 911, you need a manifold. Most use a Weber or PMO carb style manifold with adapter brackets to mount the ITBs on the manifold. There is nothing wrong with doing it this way, however the Weber/PMO spacing is different than the Triumph ITB's and using those manifolds requires splitting up the Triumph ITB assembly. This means custom fuel rails and custom linkage between each throttle body. I wanted to keep the Triumph assembly intact and utilize the aluminum Triumph fuel rails. This required casting a new manifold that both fit the 911 and Triumph assemblies. It all started with a few chicken scratch sketches 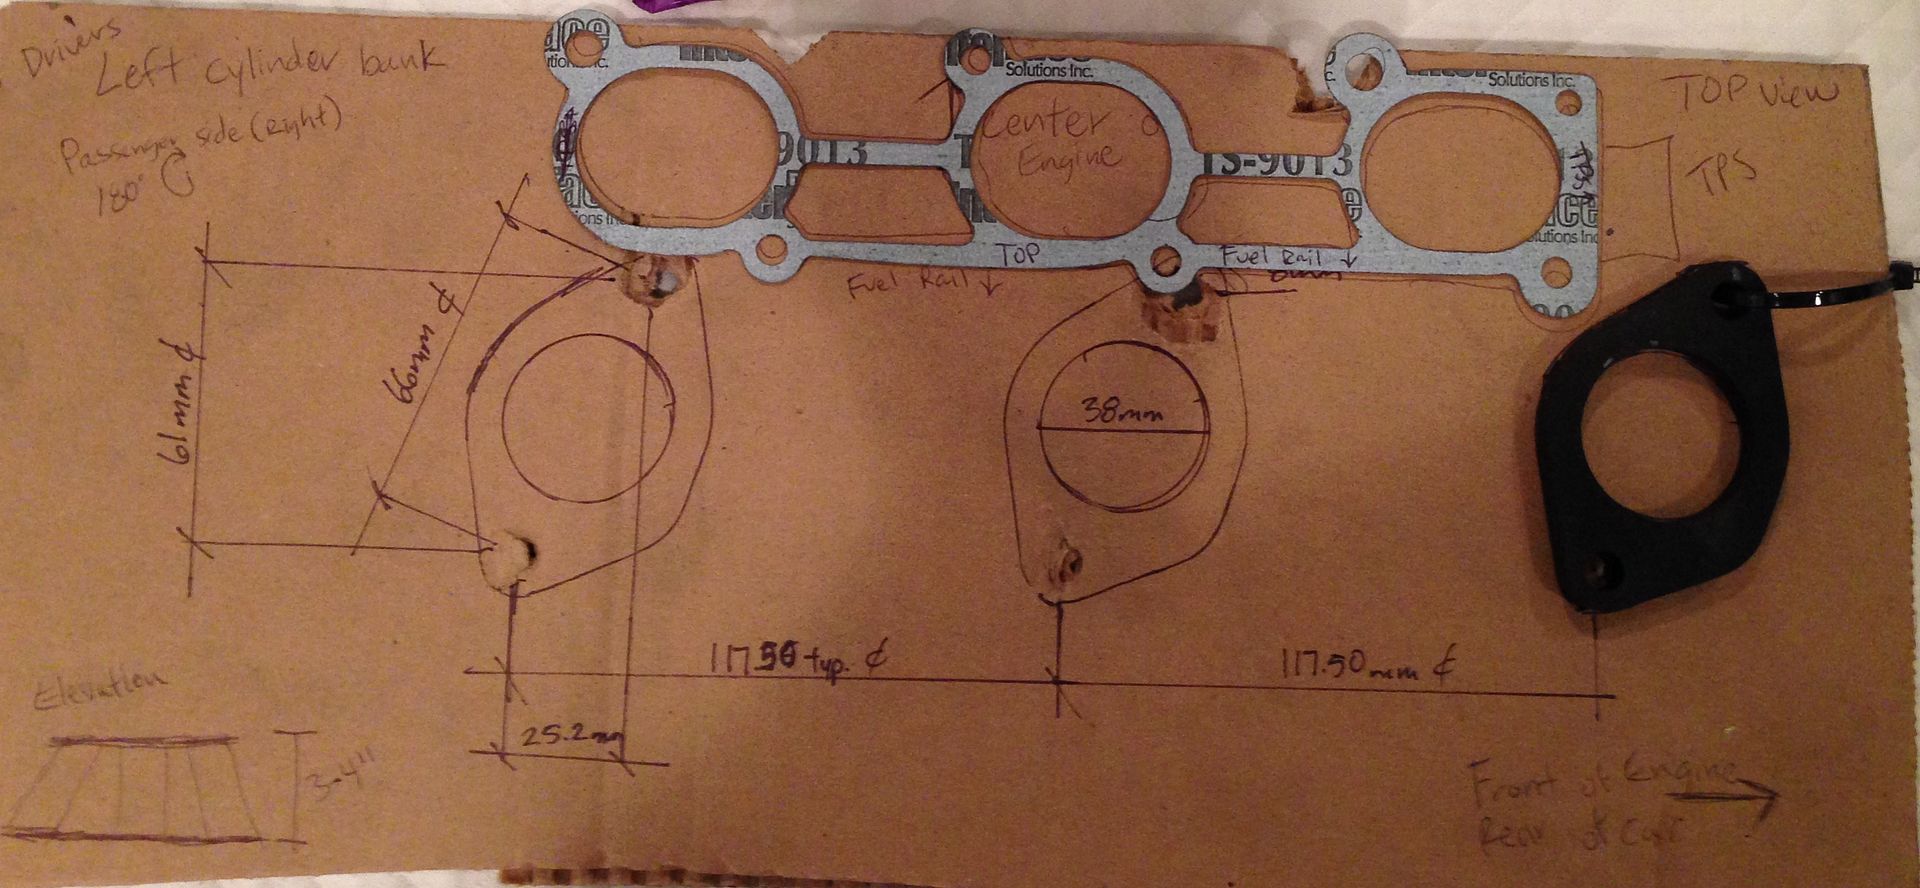 And a preliminary 3D model 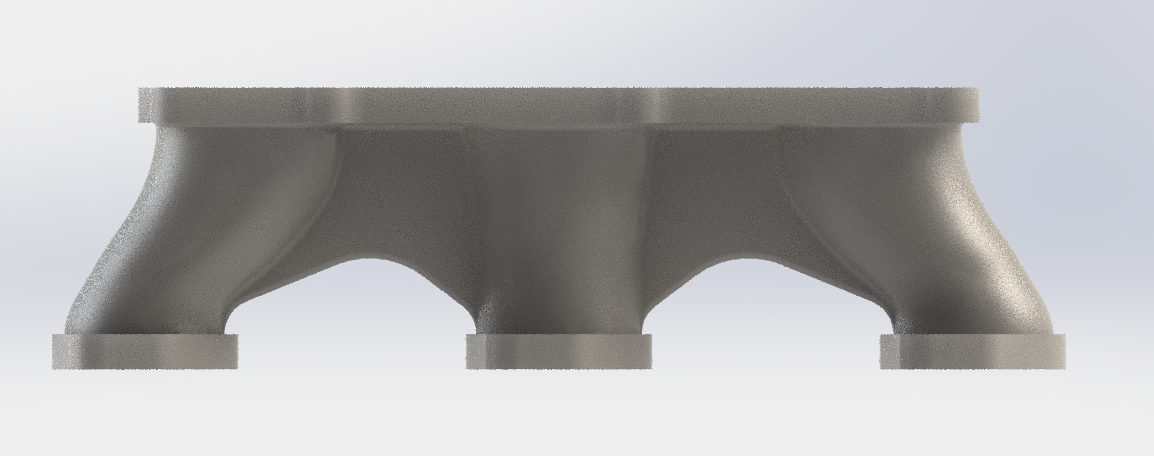 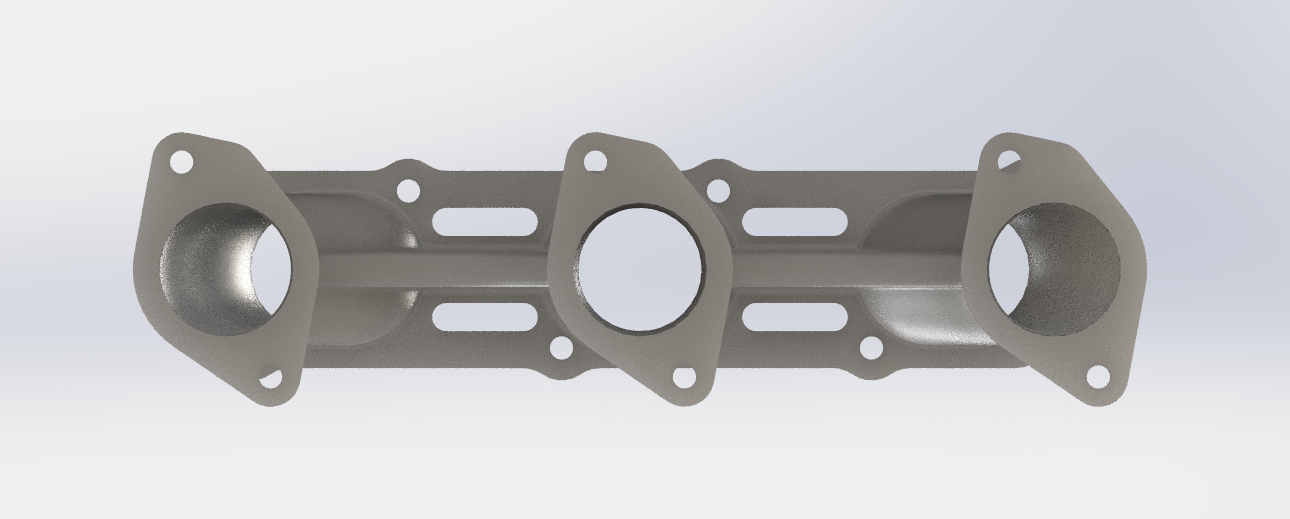  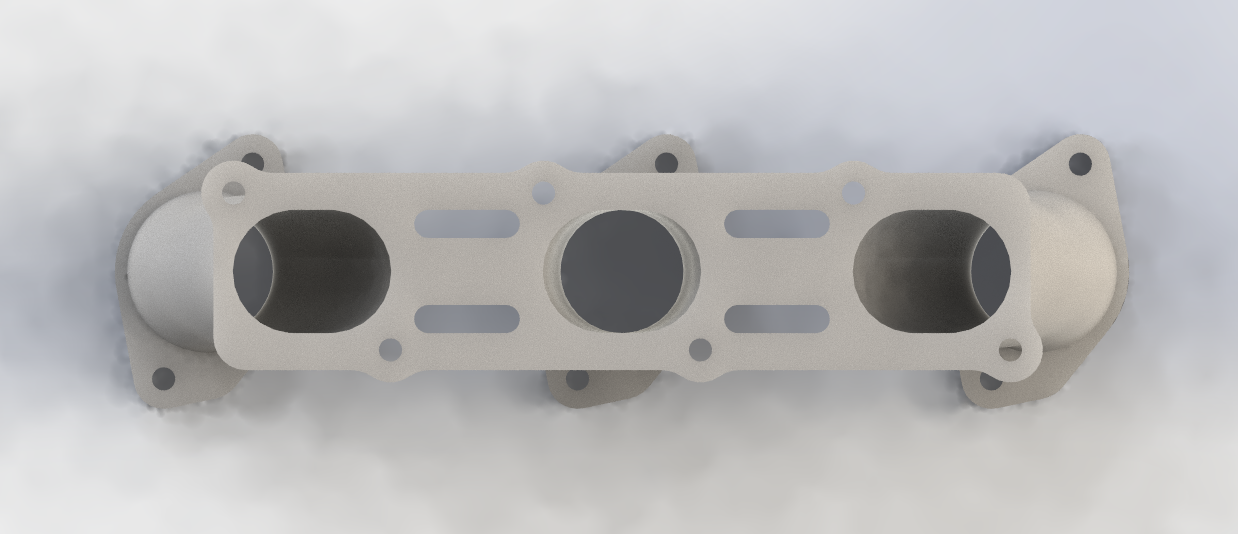 Once the model was made, we 3D printed a sample. My printer's print bed was too small for the full manifold so this test piece was done in two halves and epoxied together.  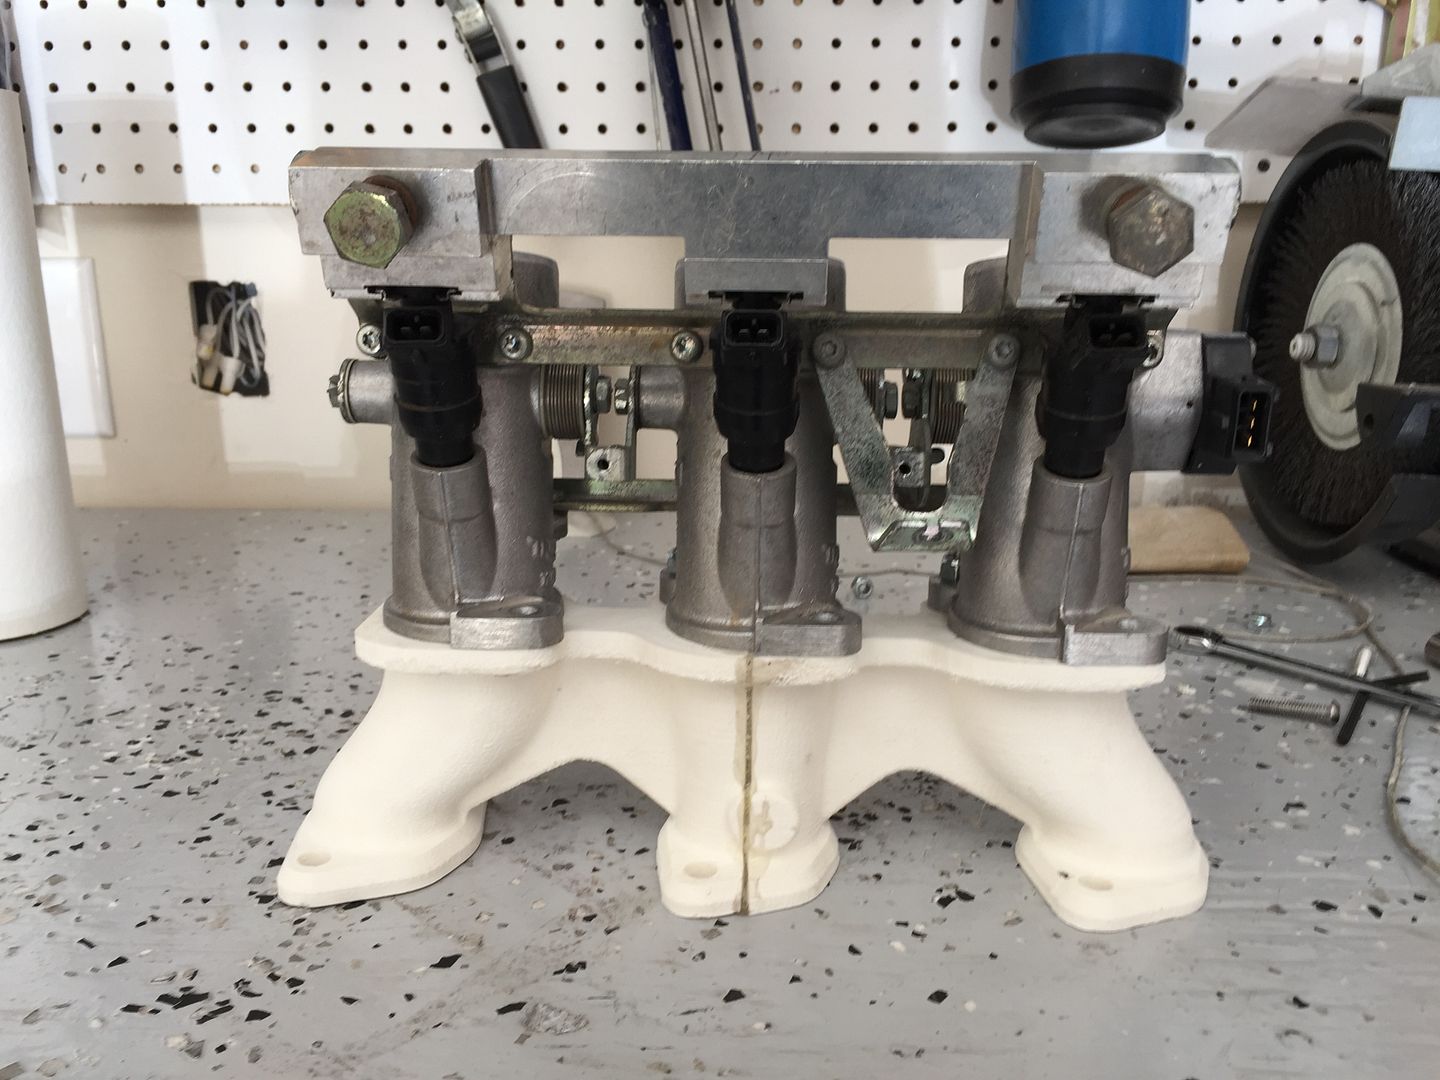 It wasn't too pretty, but it fit well. 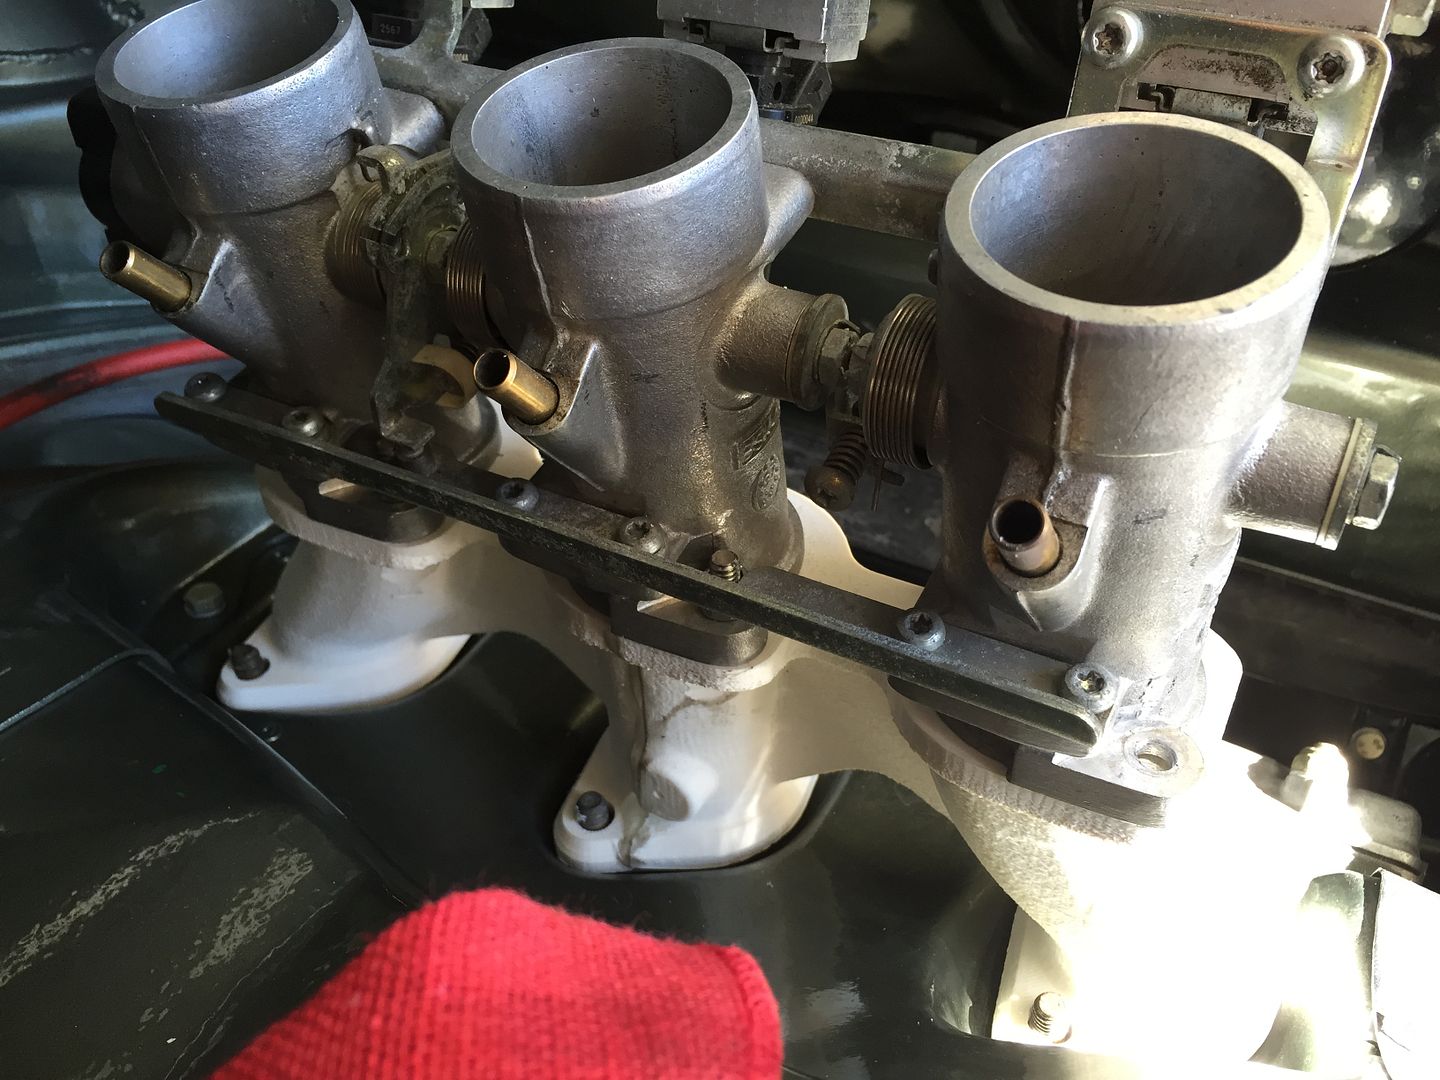 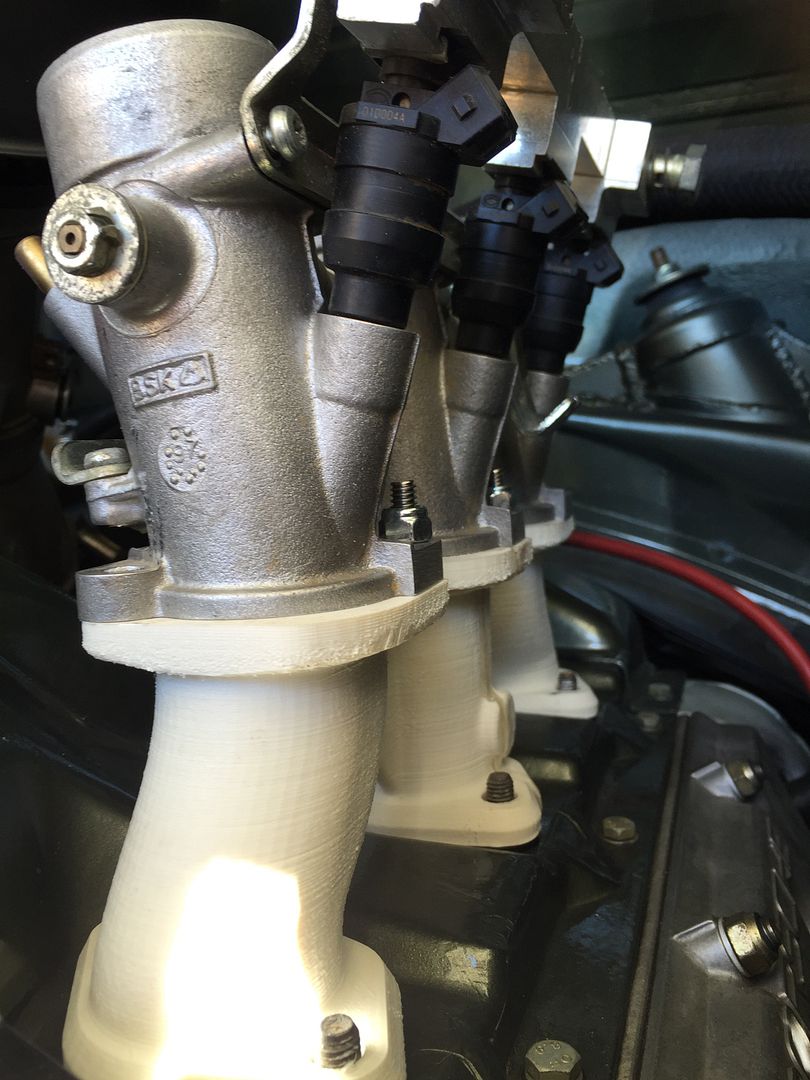 
|
||
 10-16-2016, 05:09 PM
|
|
|
Registered
Join Date: Apr 2003
Location: Houston
Posts: 567
|
While the printing was going on, I stripped two sets of ITBs, sand blasted and cleared them
 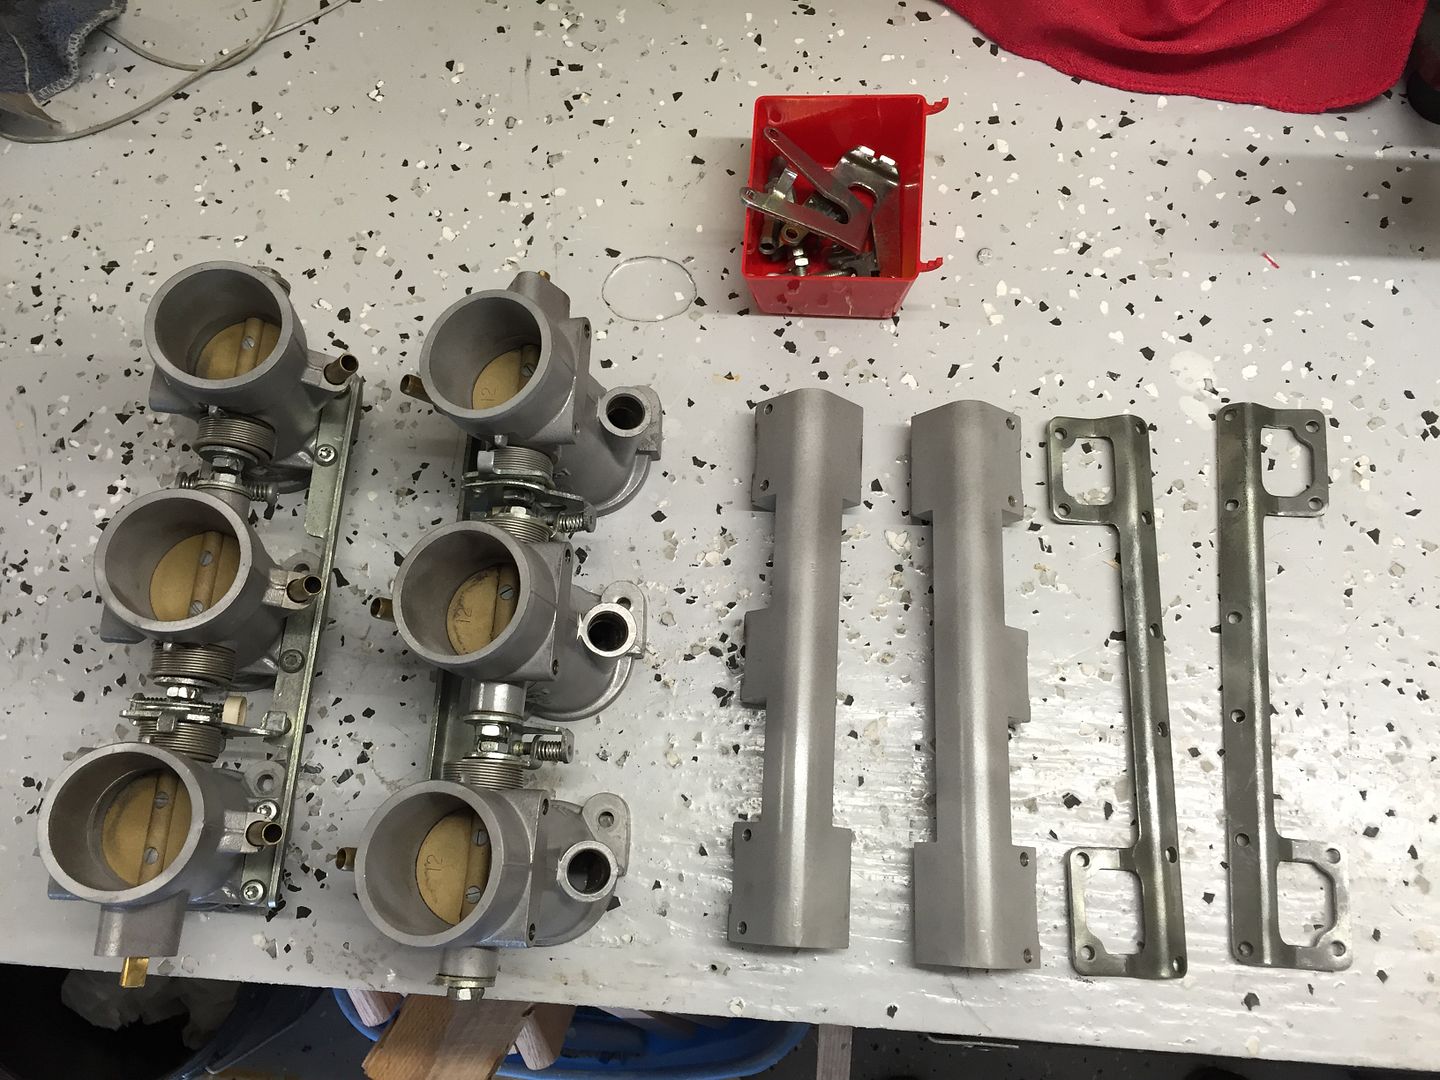 And started collecting other parts; donor distributor, AN6 fuel lines and fittings, full sized test 3D prints and other misc. parts 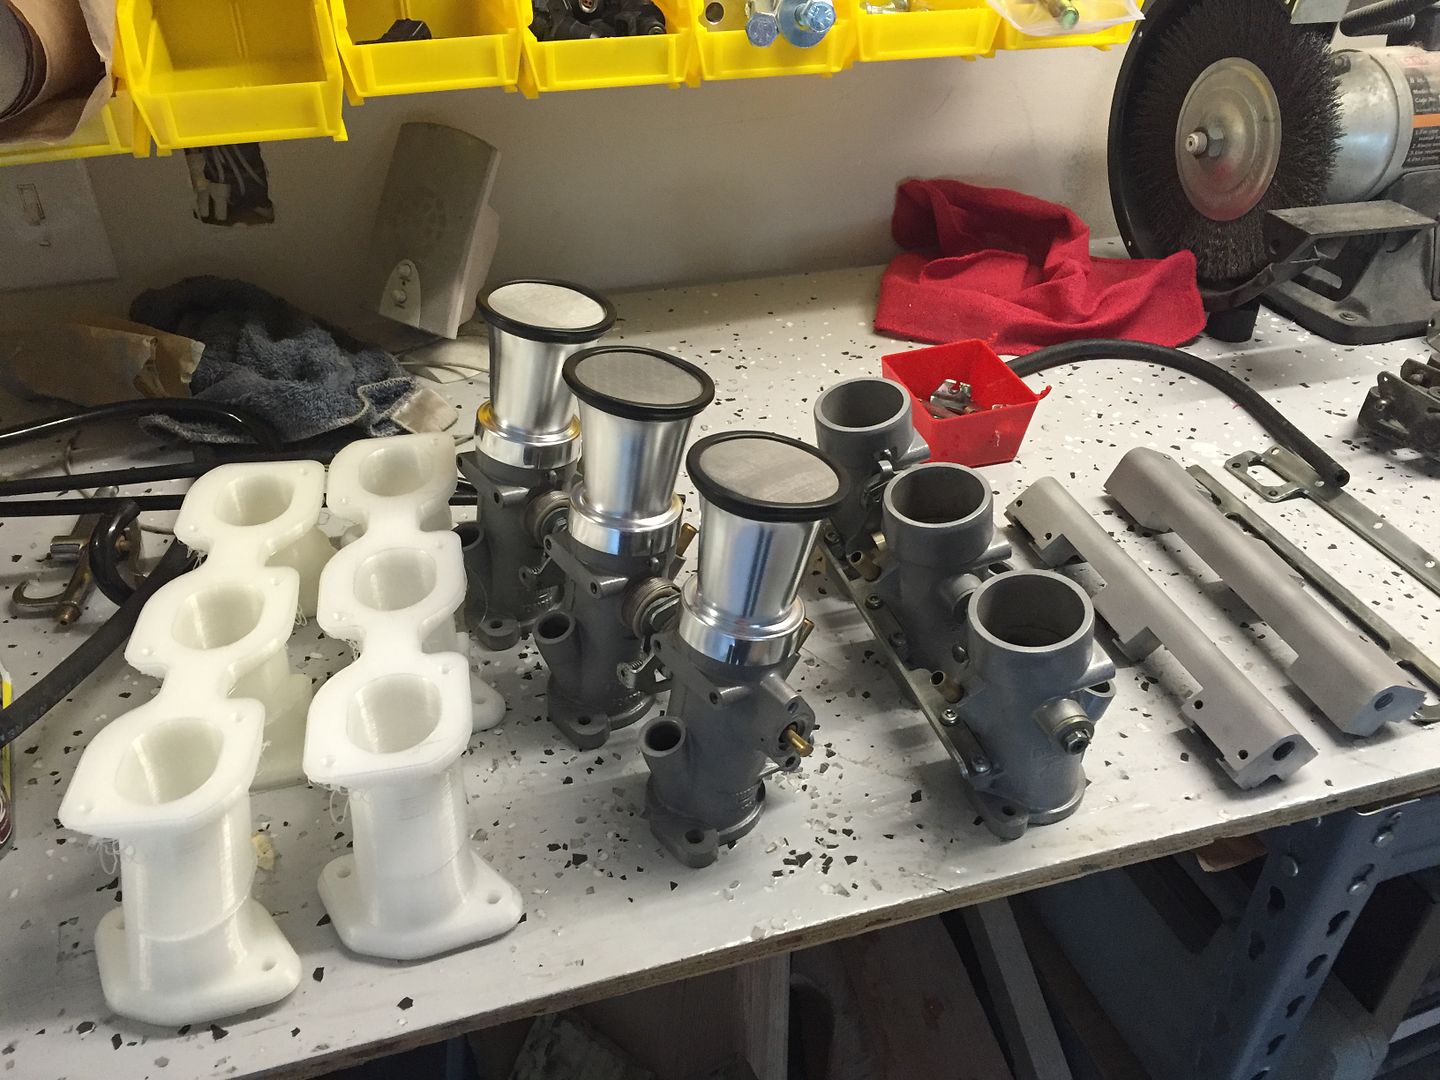 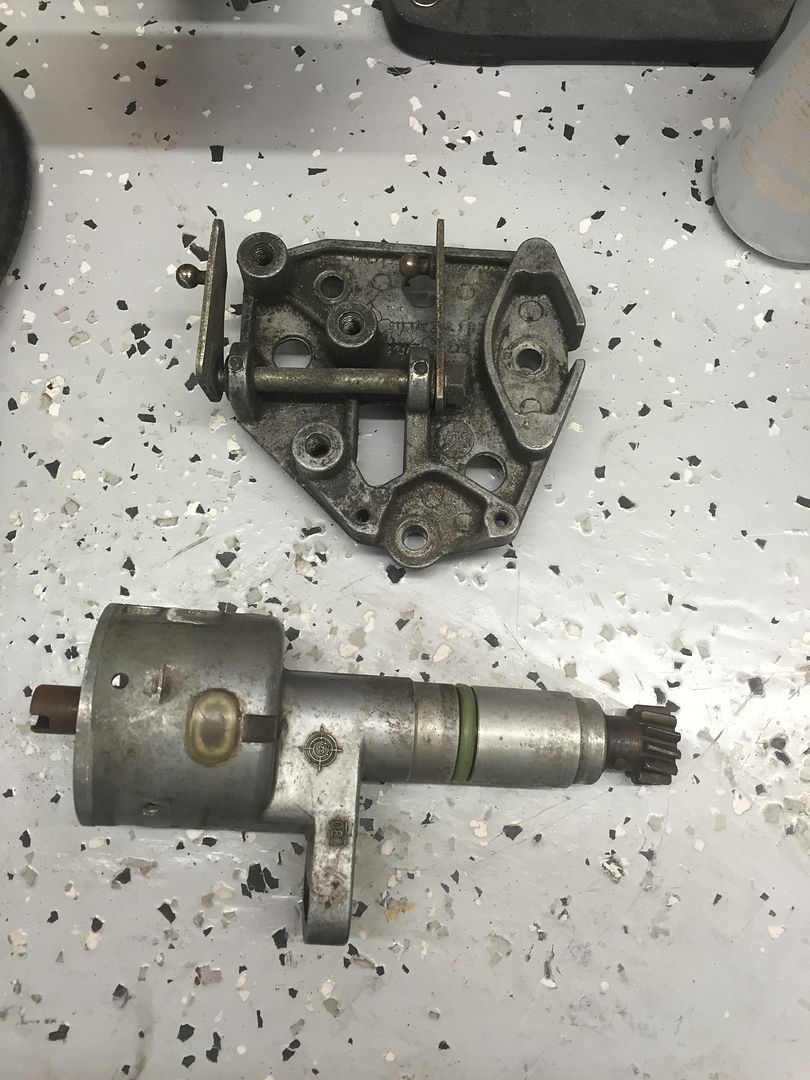 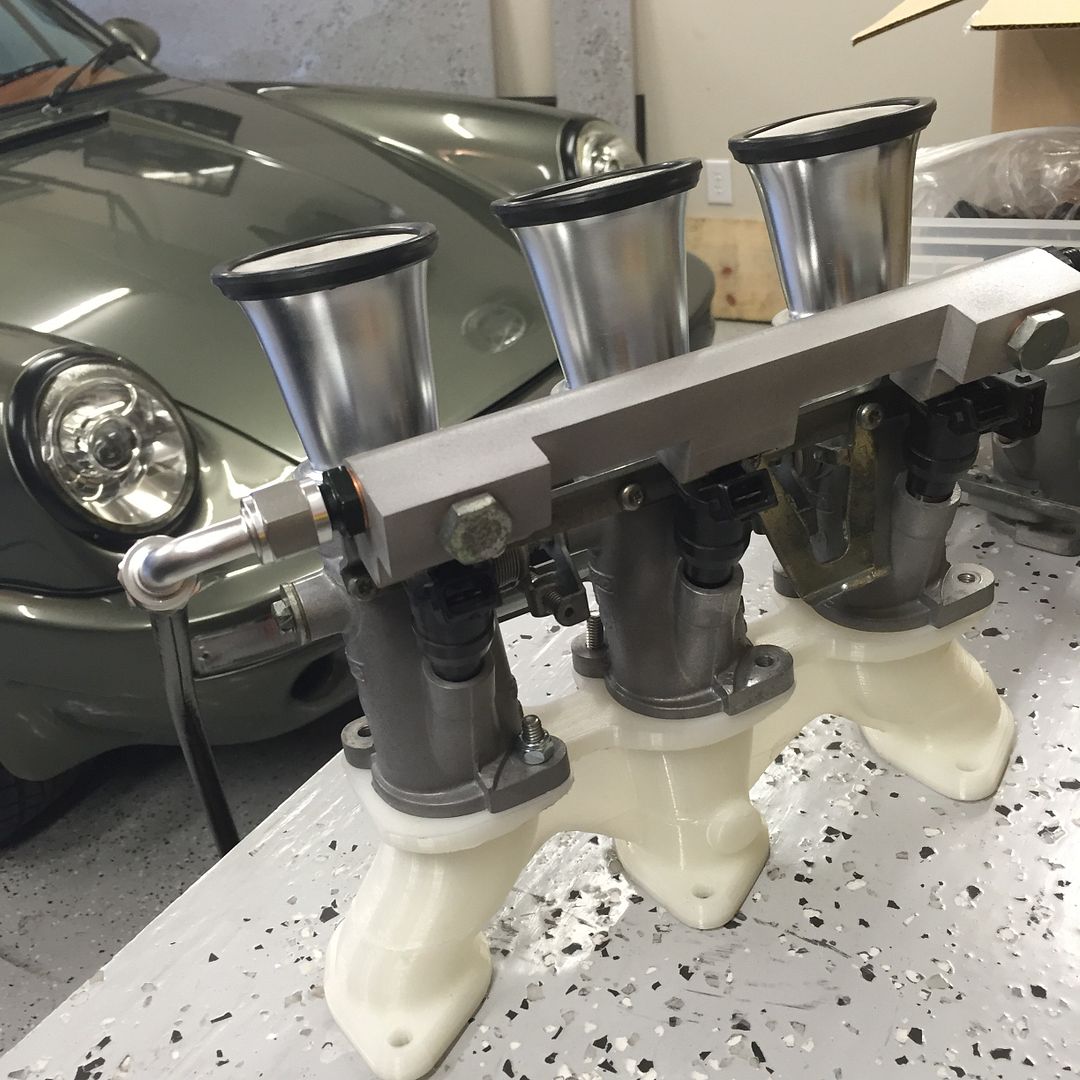 For the vacuum manifold, I used an Ebay manifold and fittings off supplyhouse.com This allows for the 6 ITB vacuum lines, 1/8" NPT for MAP sensor, and 1/4" barb for FPR http://i35.photobucket.com/albums/d151/c_hundley86/porsche/E21D52E2-45C8-4FEE-9B44-2B24AF05D01C_zpszytaf7yf.jpg And got the AEM Infinity parts in. 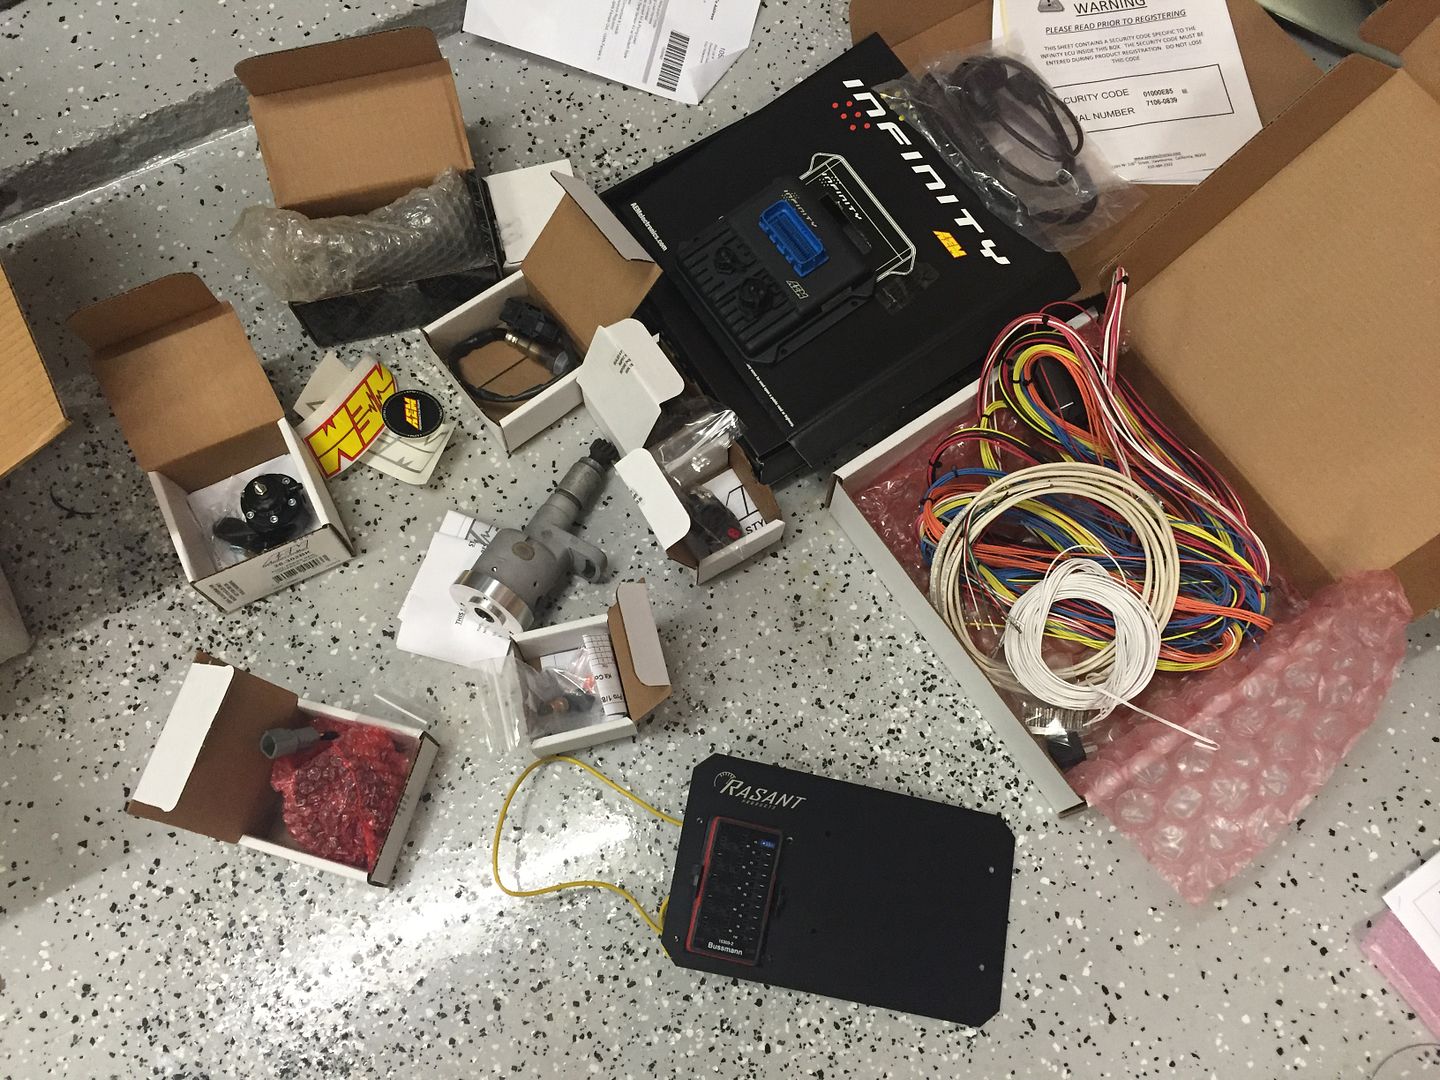 I purchased many of the AEM parts from Andrew and Rasant Products. I opted to buy a universal wiring harness and wire it myself - I don't recommend going this route if you're not familiar with wiring. Rasant sells a plug'n'play EFI setup that I highly recommend! For the fuse panel, I used a Bussman relay fuse center and a bracket to mount the AEM ECU and fuse center. Rasant's kit includes this ready to go. THIS IS A GREAT DIY FOR WIRING THE RELAY PANEL AND GENERAL WIRING TECHNIQUES: DIY Bussmann RTMR Fuse Block, Part 4 – Wiring and Schematics | Bodenzord Again, if you get the Rasant Kit there is little wiring to do, but I wanted to wire mine myself |
||
|
10-16-2016, 05:17 PM
|
|
|
Registered
Join Date: Apr 2003
Location: Houston
Posts: 567
|
One of the greatest things about the AEM setup is that it uses an Engine Position Module off the distributor for the engine crankshaft position and camshaft positions rather than using a trigger wheel or other magnetic based reference sensor.
 Installing the EPM on the distributor is a simple task with Rasant's distributor adapter kit. I started out with a donor distributor that I bought off the classifieds section. It was just a core and was picked up cheaply. I started by sand blasting it to clean it up, then punched out the drive pin. 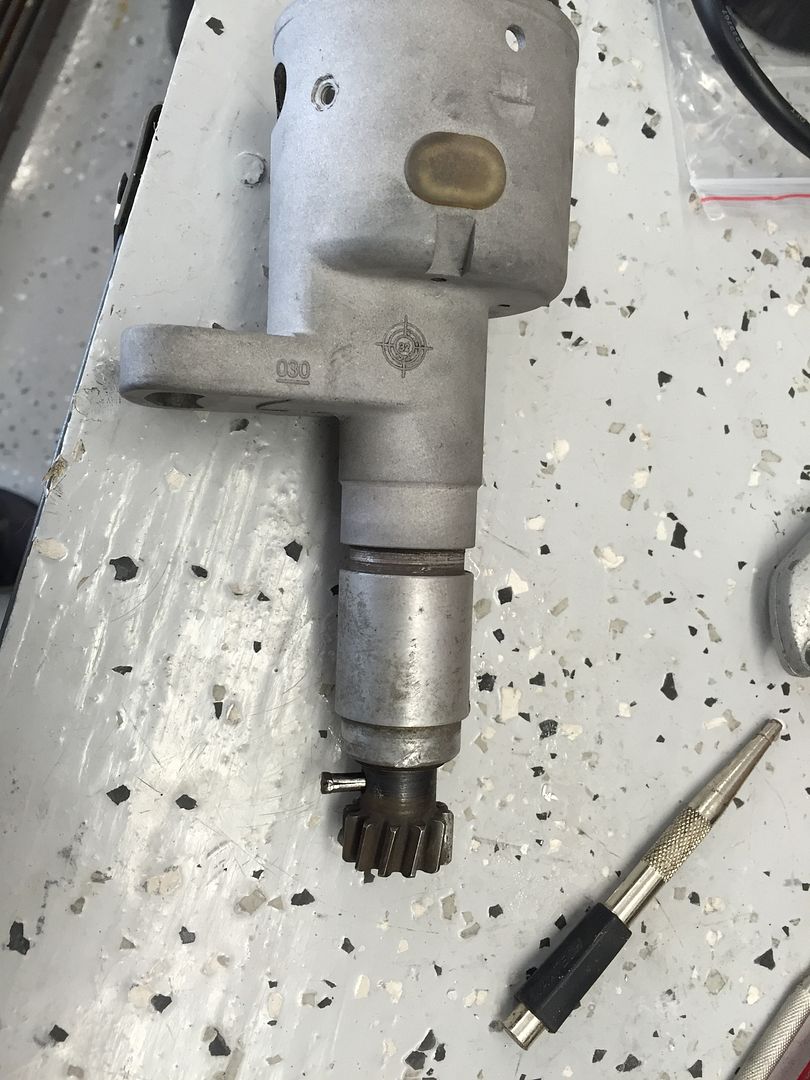 Then pulled off the drive gear and center shaft 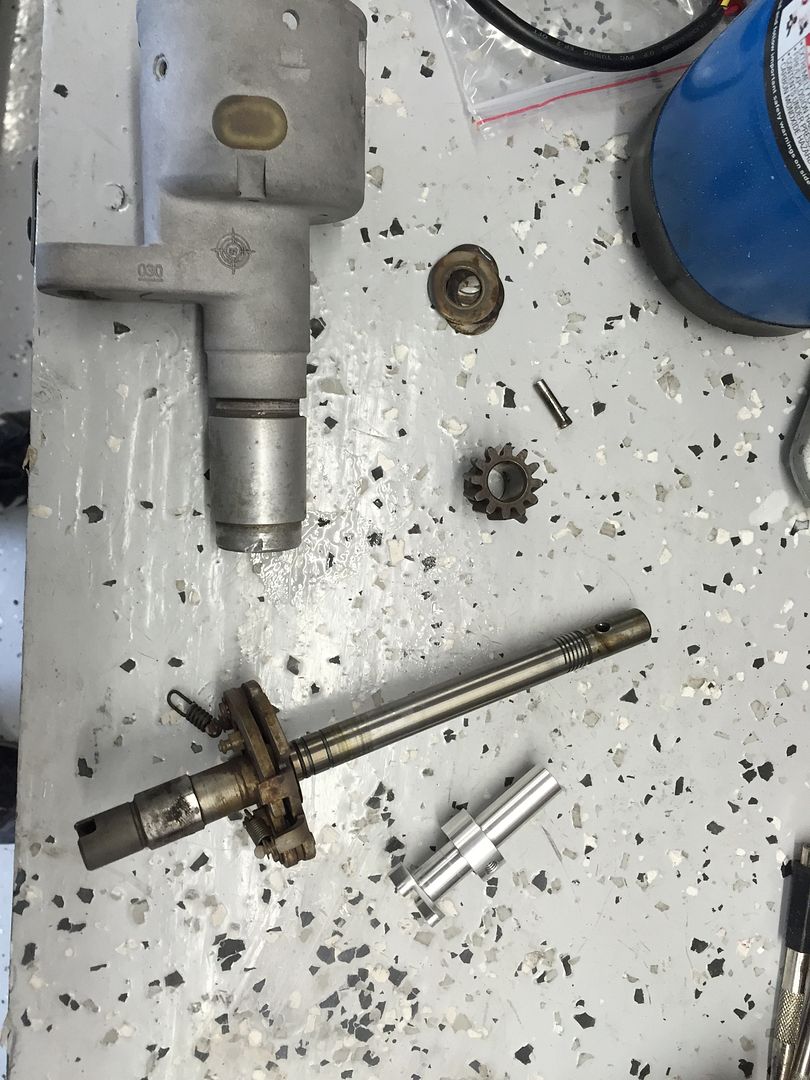 Removed the mechanical advance parts to install a fixed drive for the AEM Engine Position Module (EPM). The aluminum fixed drive is part of the Rasant EPM adapter. 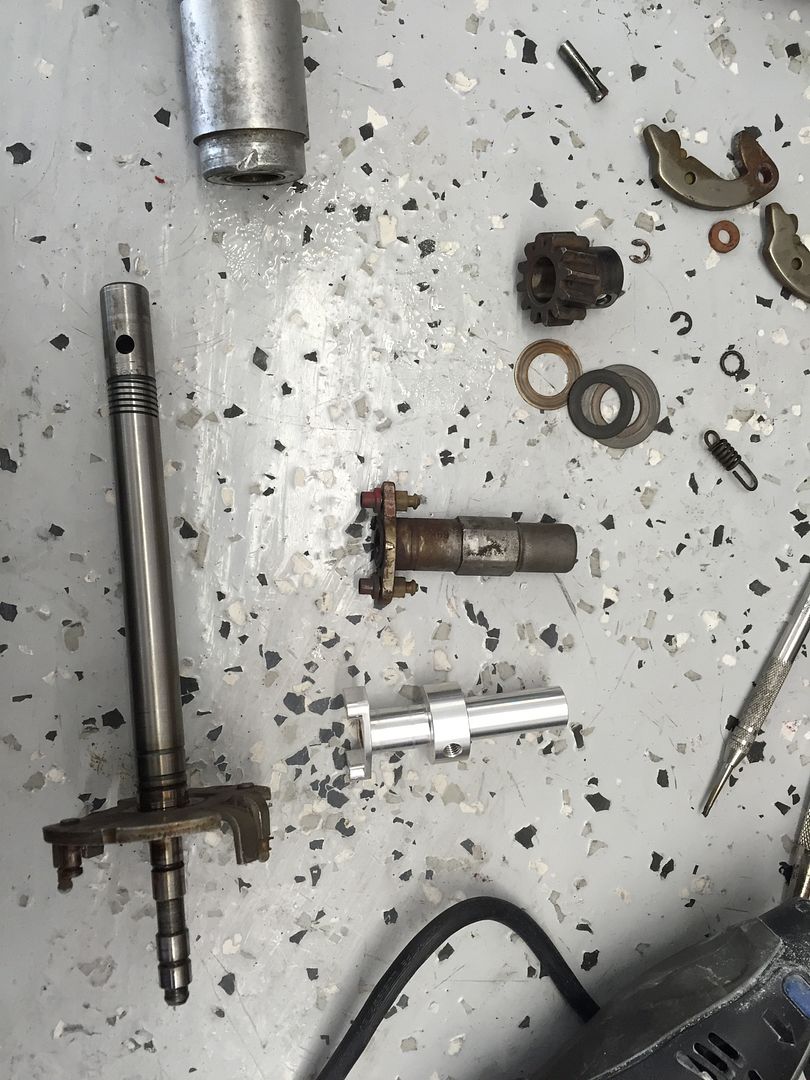 Drive installed with set screw 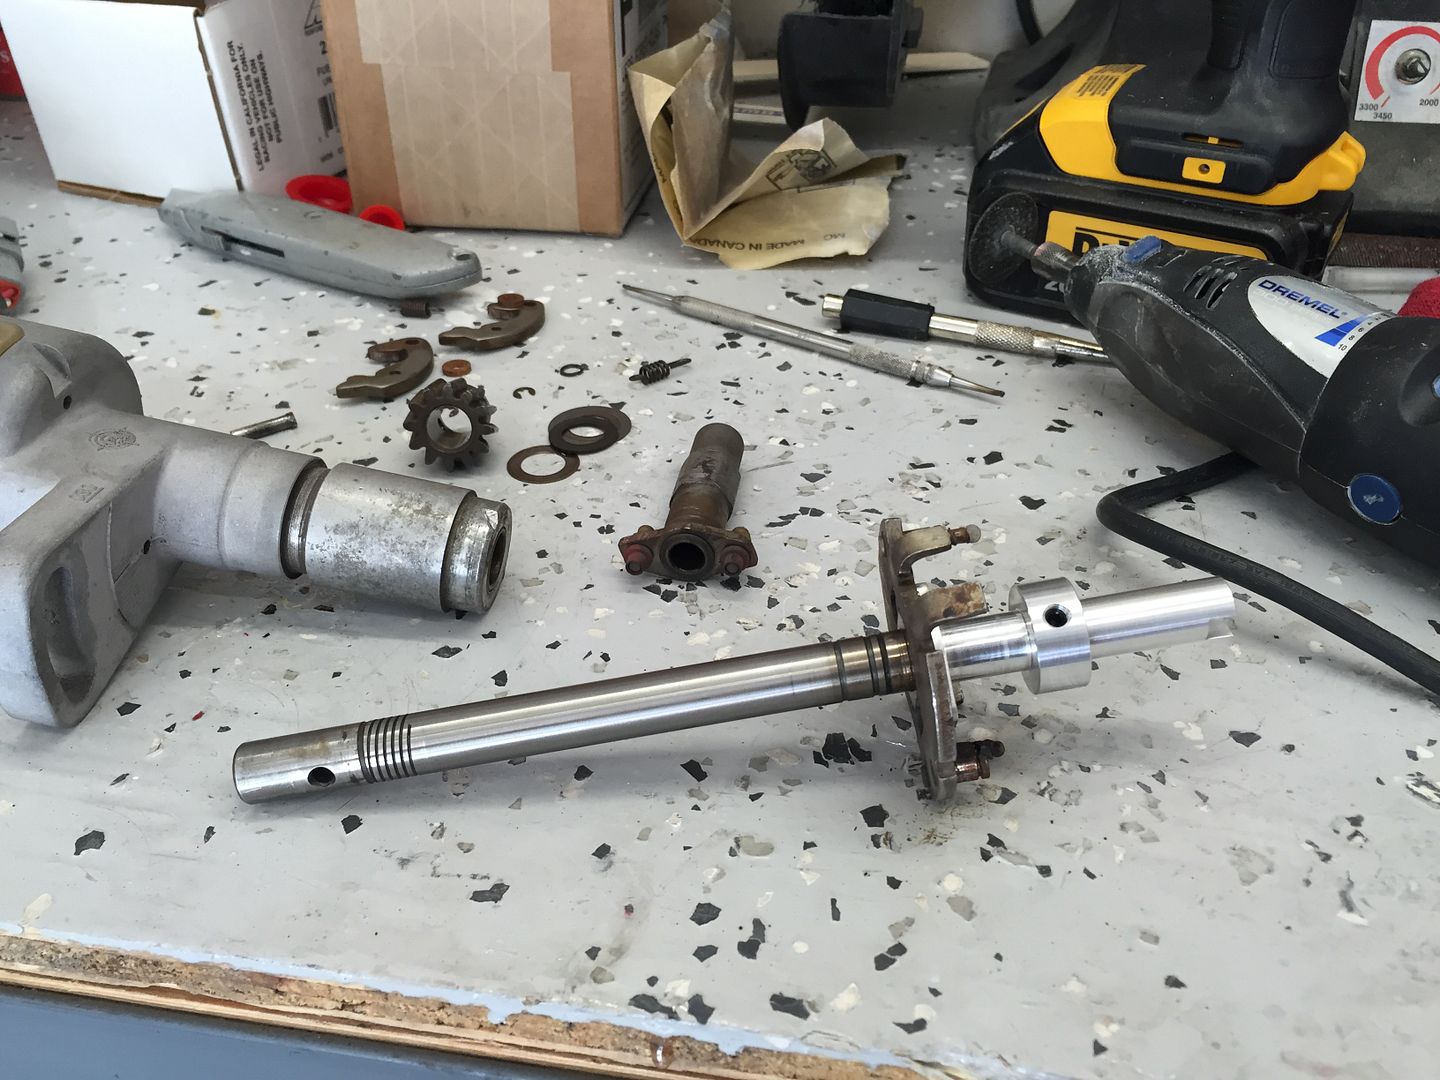 And reassembled with gear drive 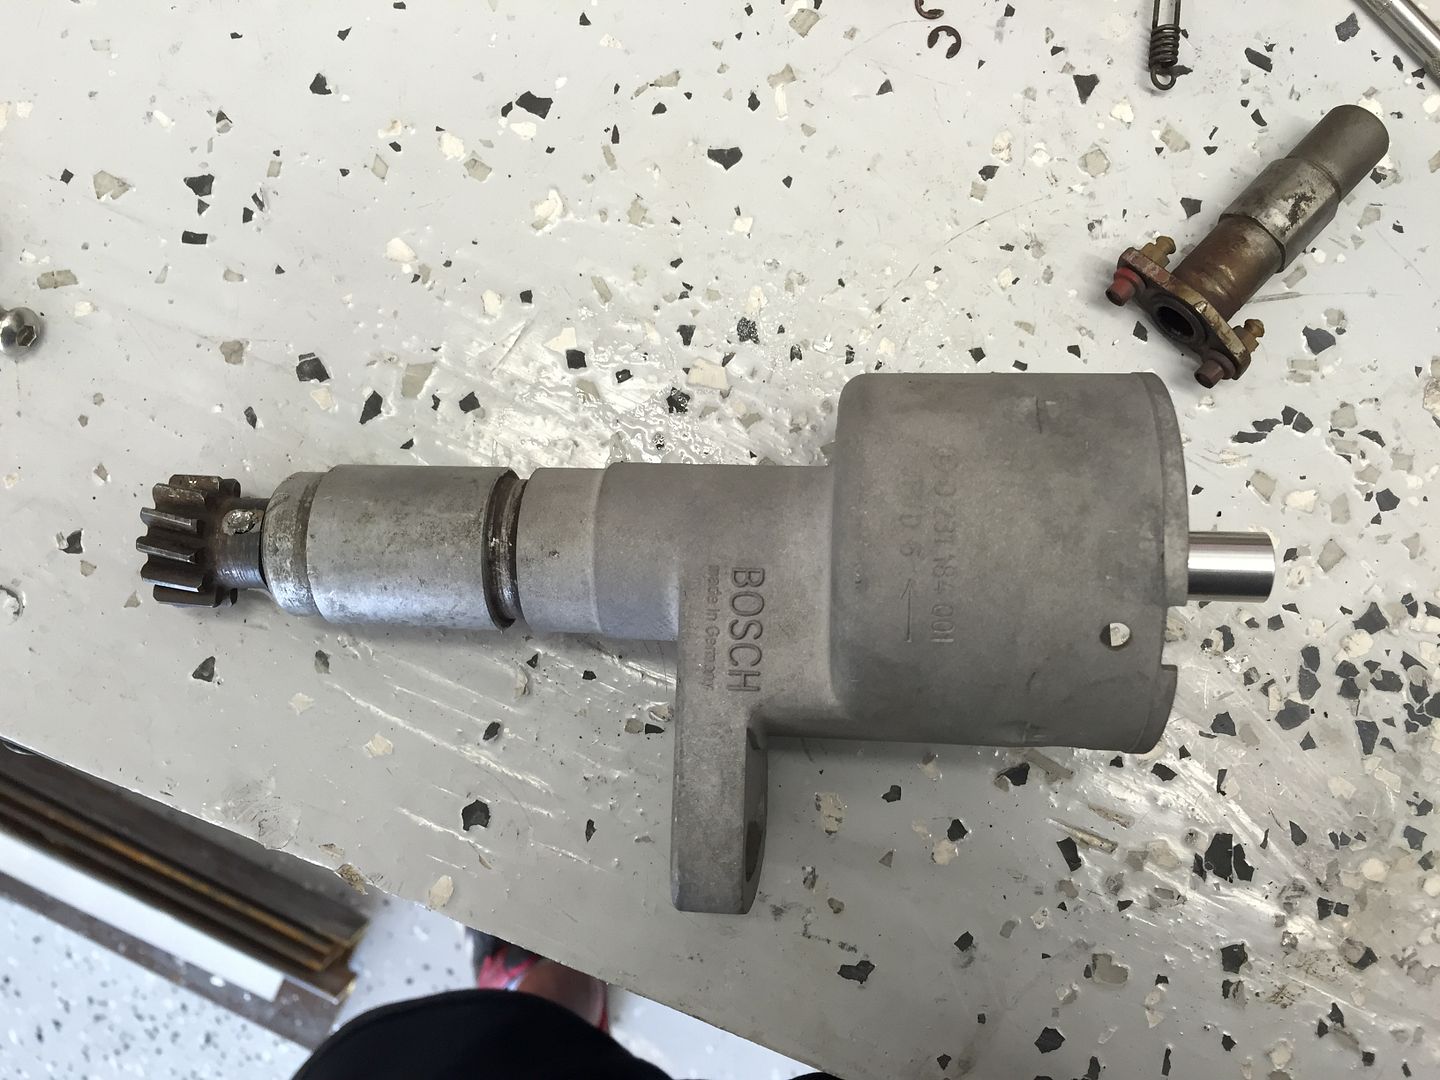 Then installed the Rasant EPM adapter to the AEM EPM which was a slow process. Only got 1/8" turn with box wrench on the nuts. 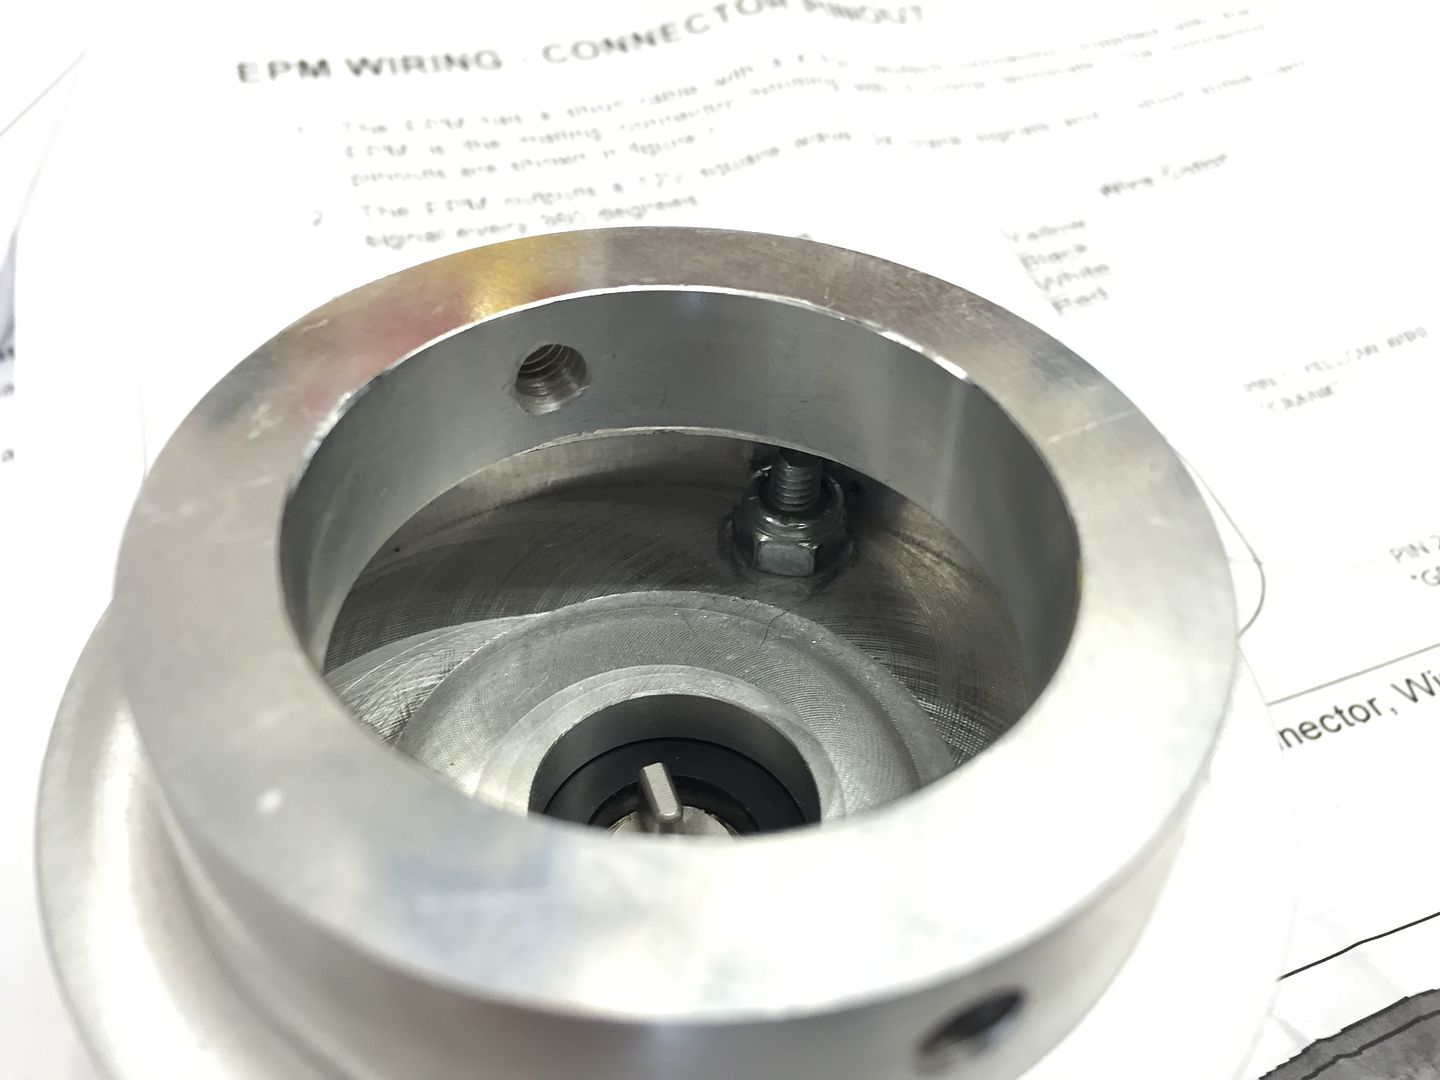 The keyway on the drive lines up with the pin on the EPM for signal. The EPM is an optical hall sensor which gives the AEM ECU cam and crank position. 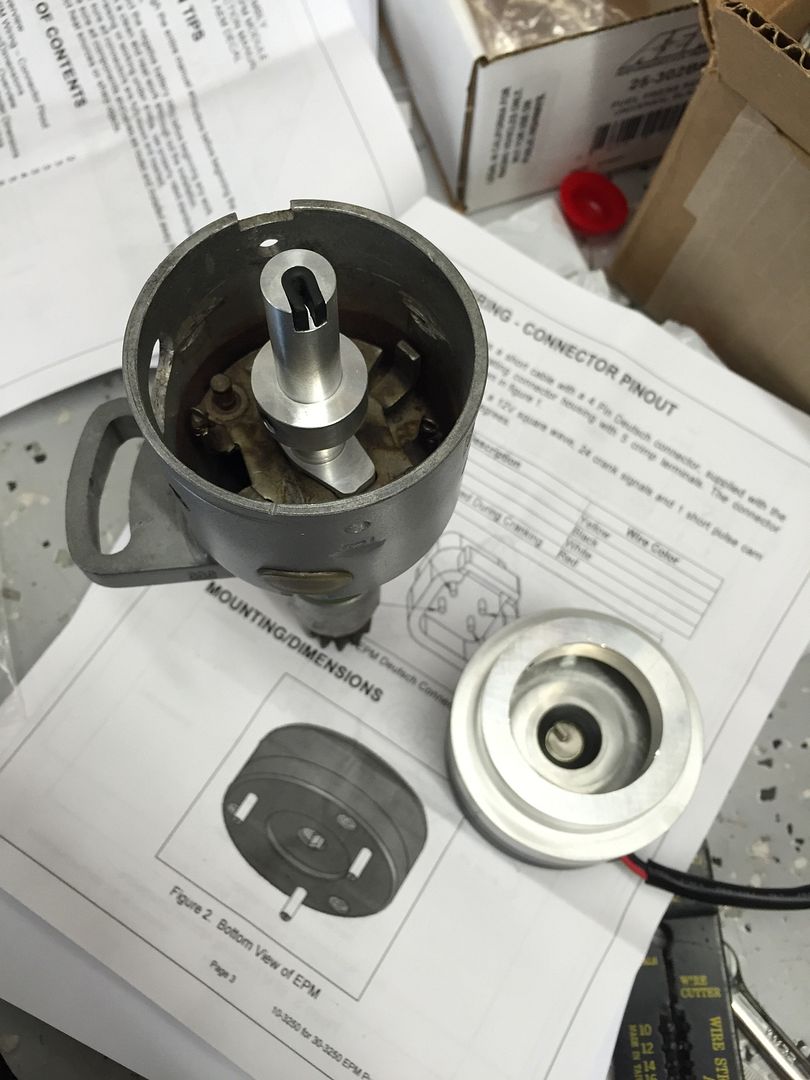 All together. 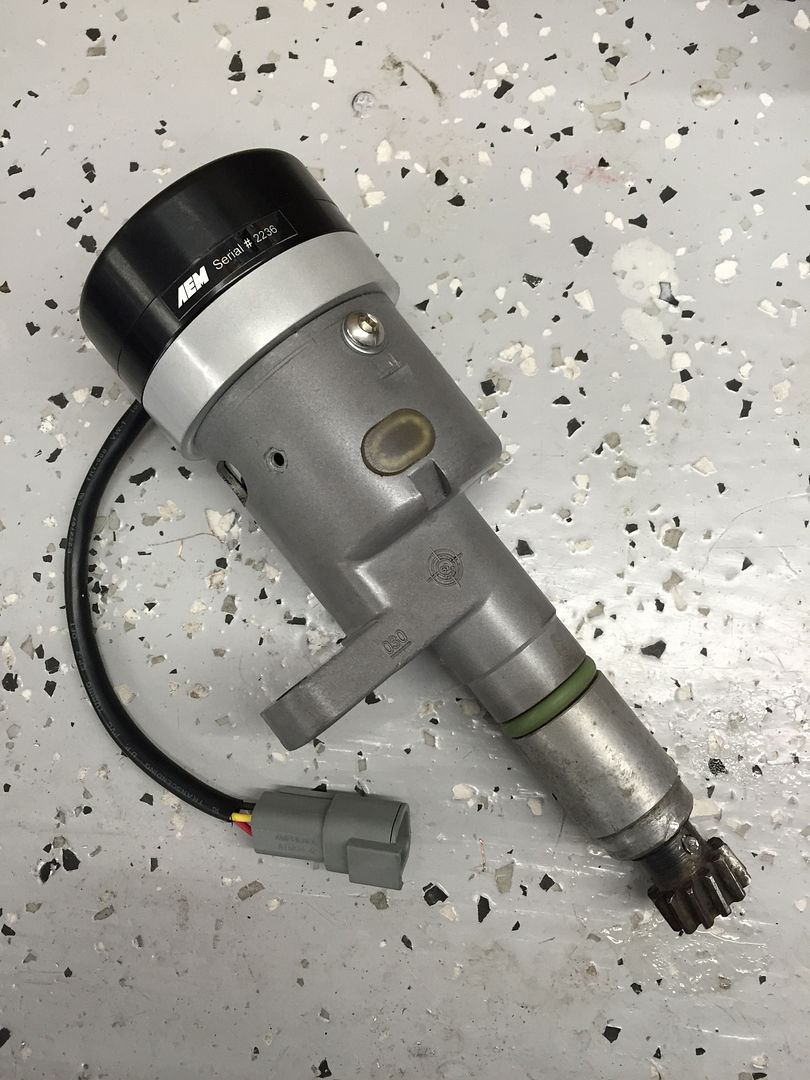
|
||
|
10-16-2016, 05:29 PM
|
|
|
Registered
Join Date: Apr 2003
Location: Houston
Posts: 567
|
The start of the wiring came next
I started with an universal flying lead harness from AEM, this harness is a good start but needs some modifications. It comes wired for 8 cylinders with 8 coil and injector leads, and fan relay output, all of which I don't need. Pulled those wires out and added fuel pressure, oil temp, oil pressure, analog input from existing AEM AFR gauge, knock sensor and probably a few others i'm forgetting. 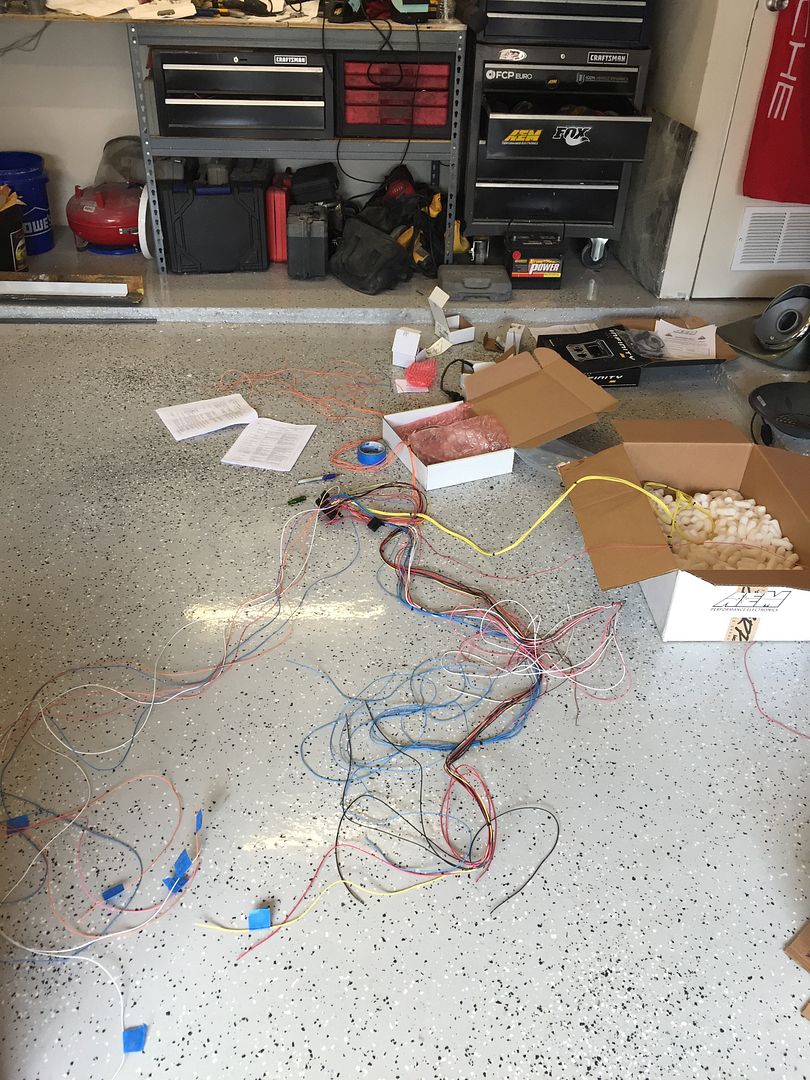 Bussman fuse/relay center with Infinity ECU mounted to the Rasant bracket. This will be installed somewhere behind the passenger seat. 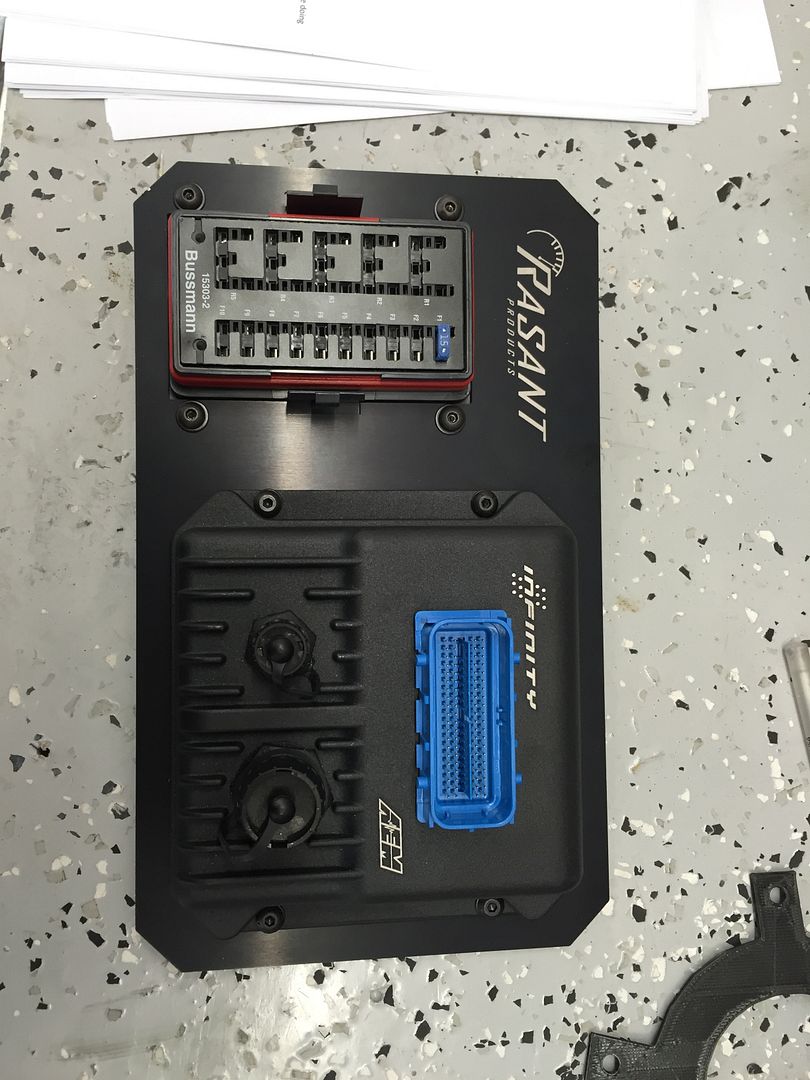 More wiring... 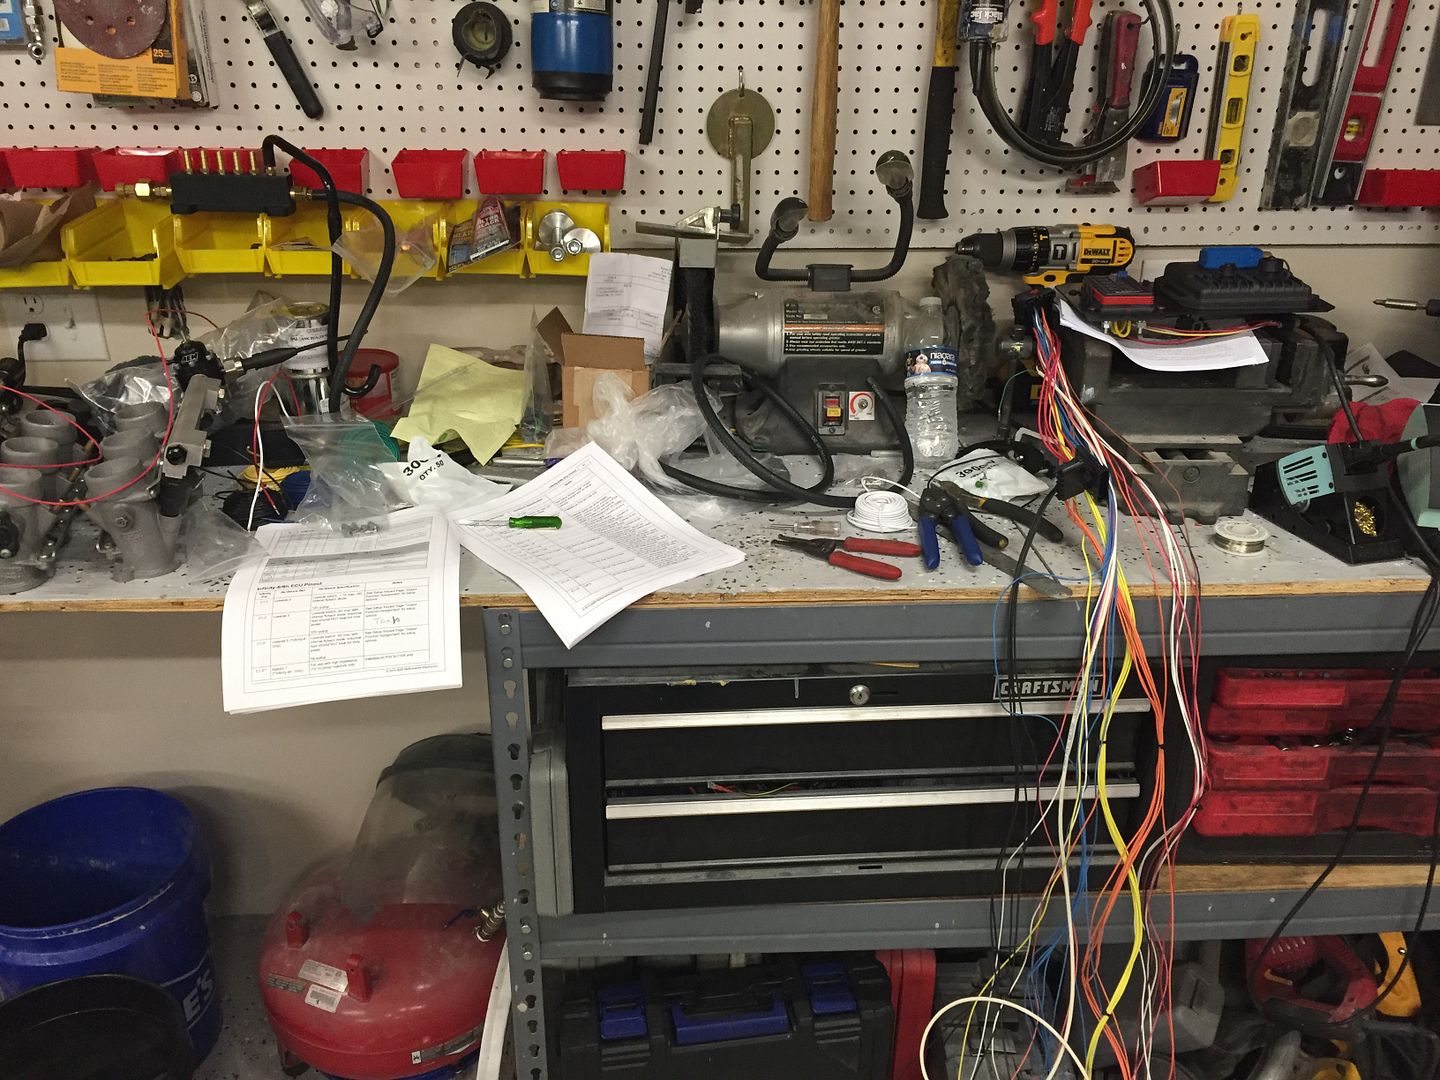 Relay panel wiring... Installed circuits for the ECU main power, fuel pump, injectors, coils and O2 heater. 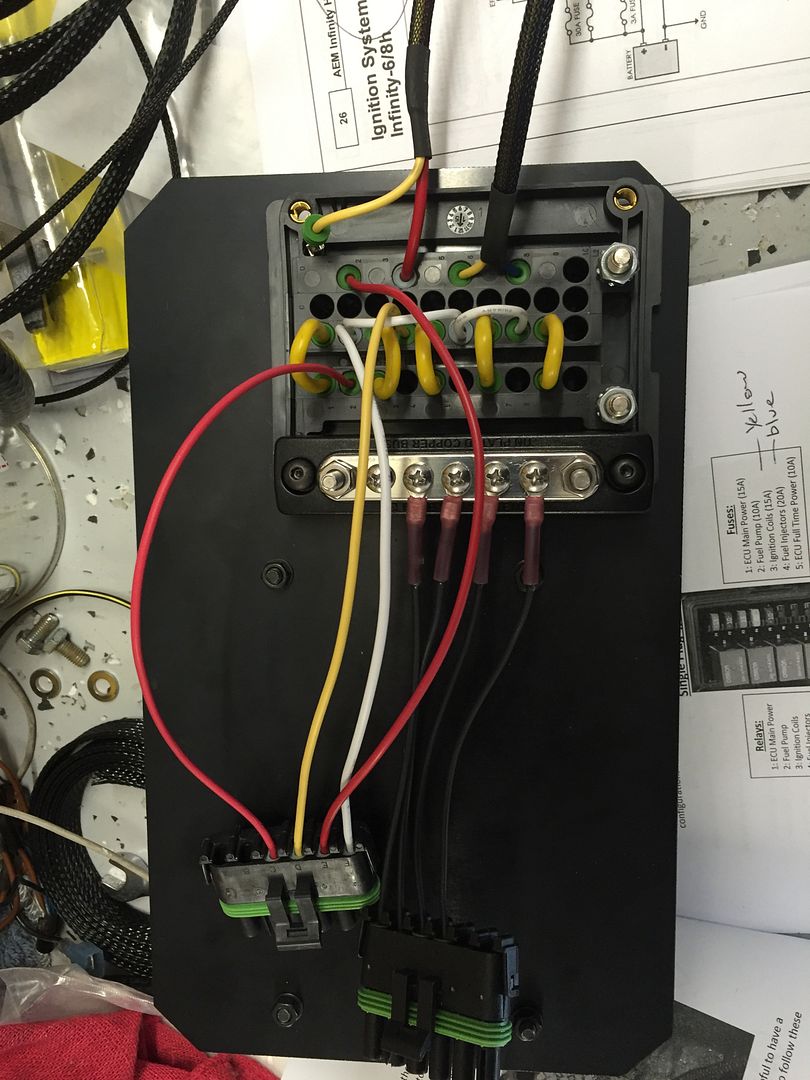 Then started the braided sleeving 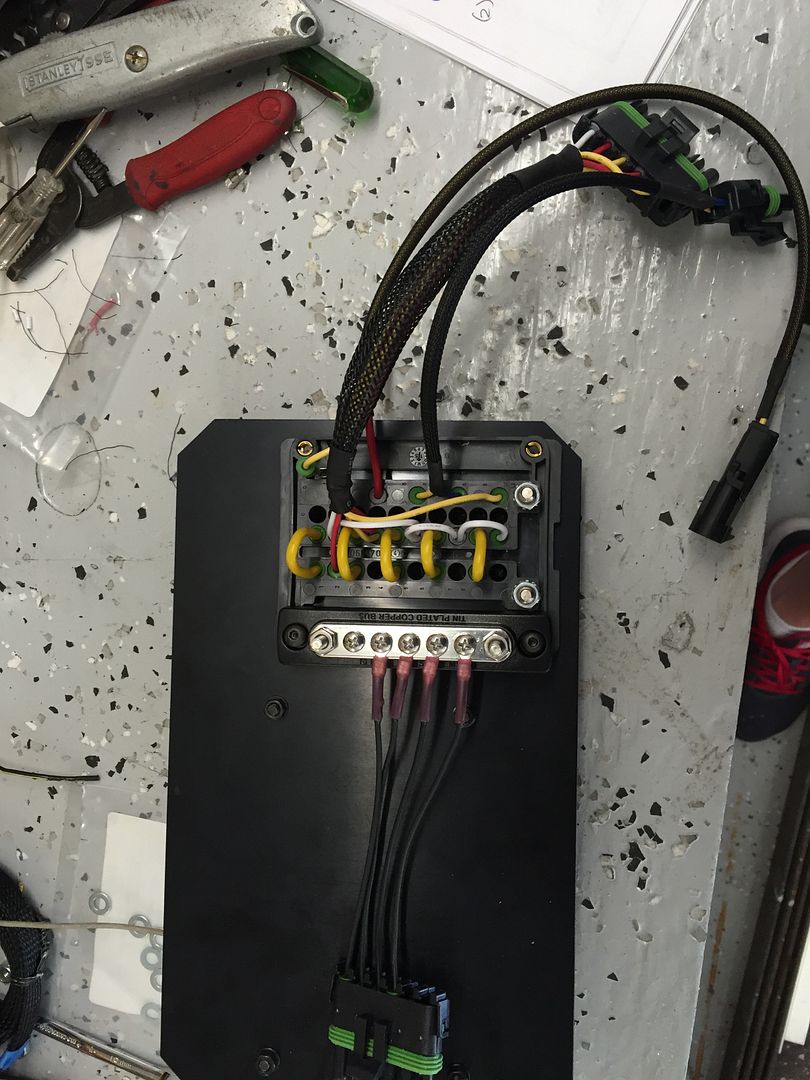 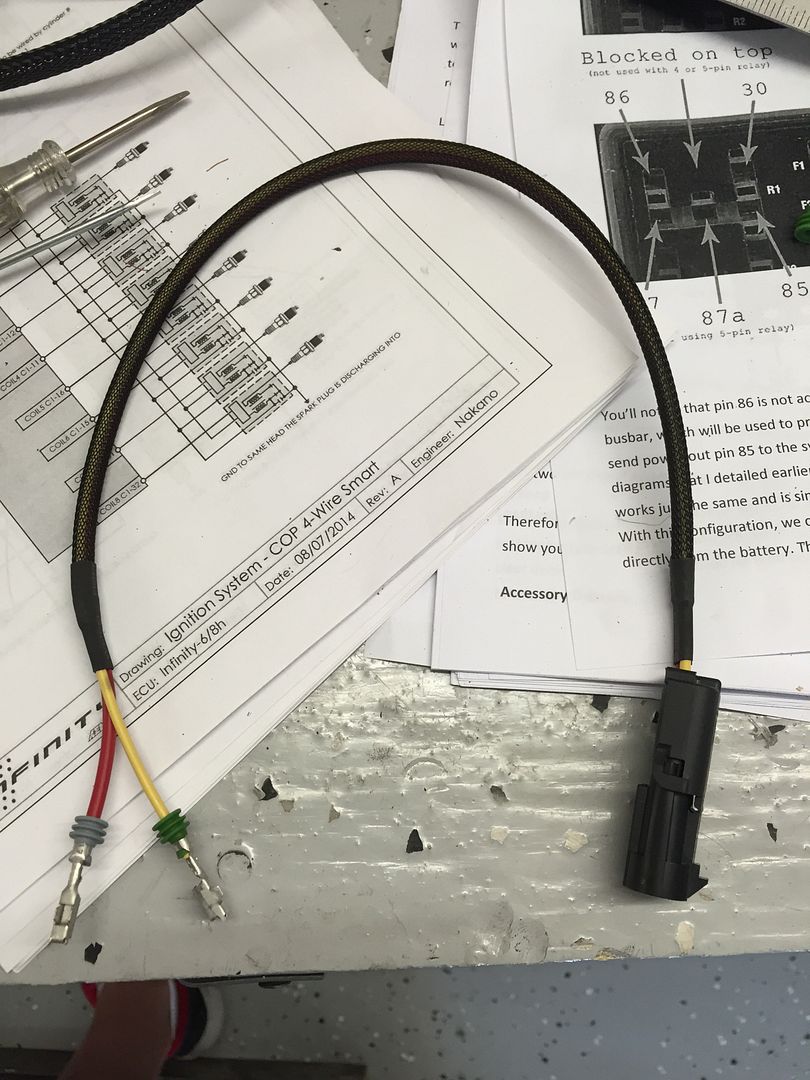 These plugs are for the ECU main power, fuel pump, injectors, coilpacks, grounds, and O2 sensor heater wire. 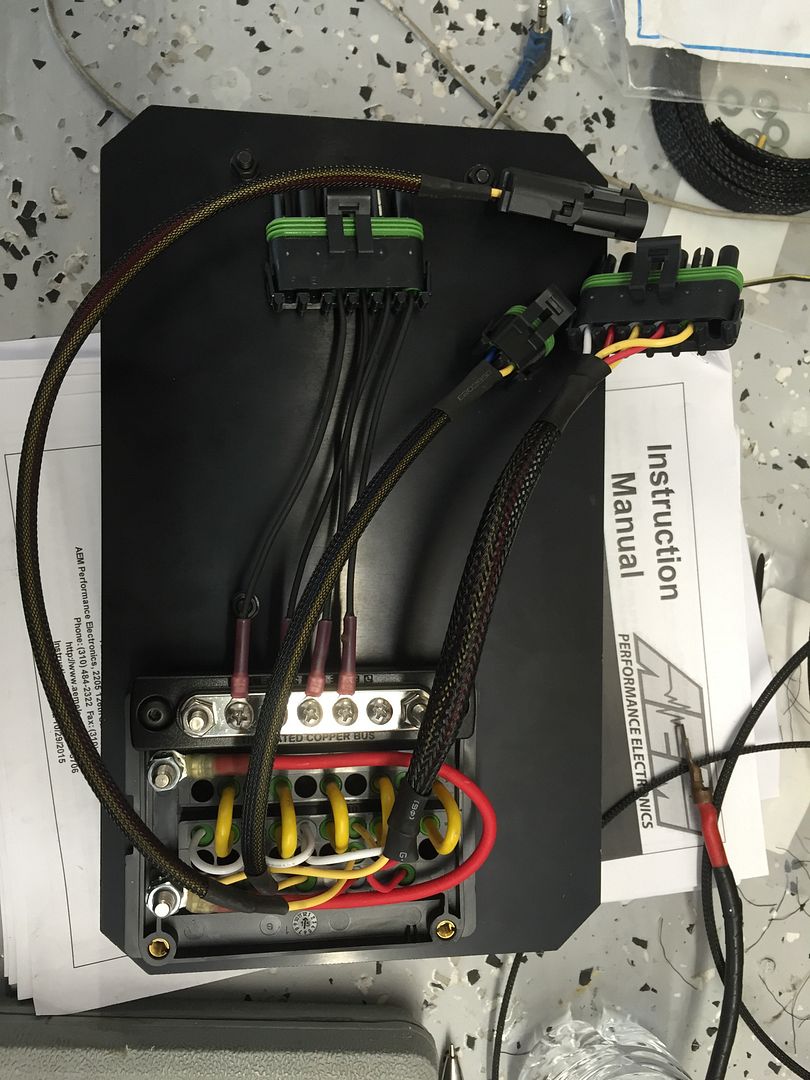 One of the front of the fuse panel 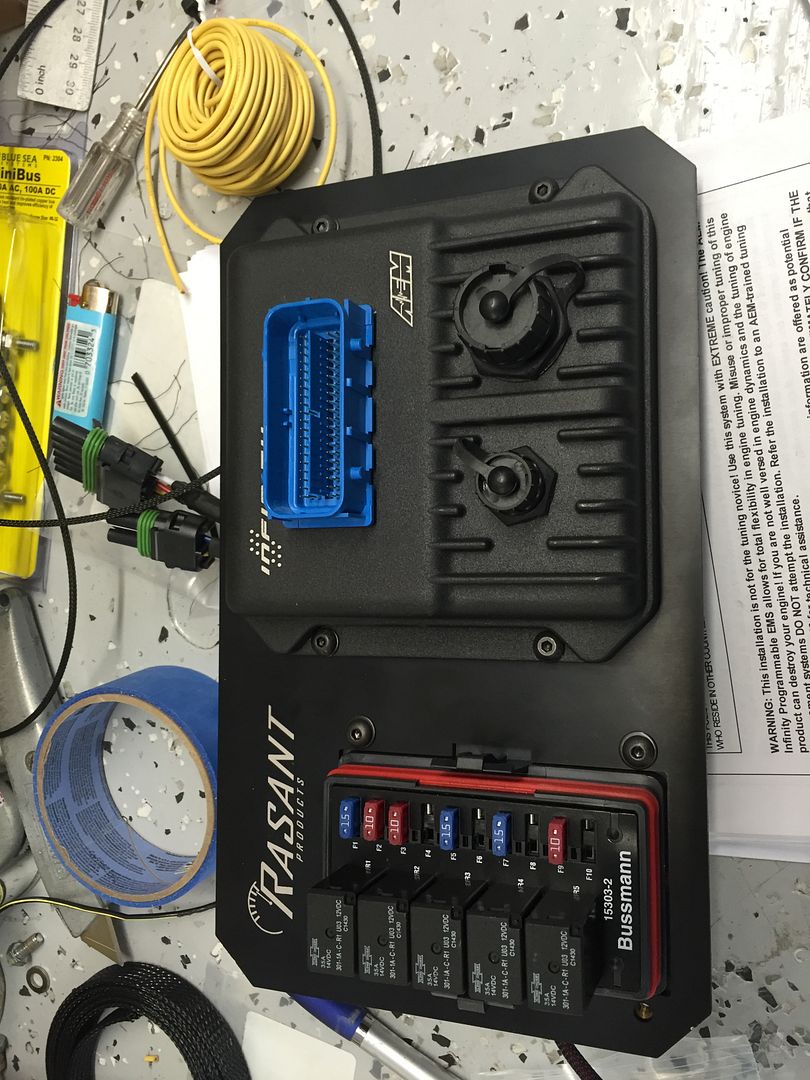 I installed the bracket and ECU in the passenger rear seat, there was not any room on the floor because I have a roll bar. The ground is attached to the old seat belt hole. 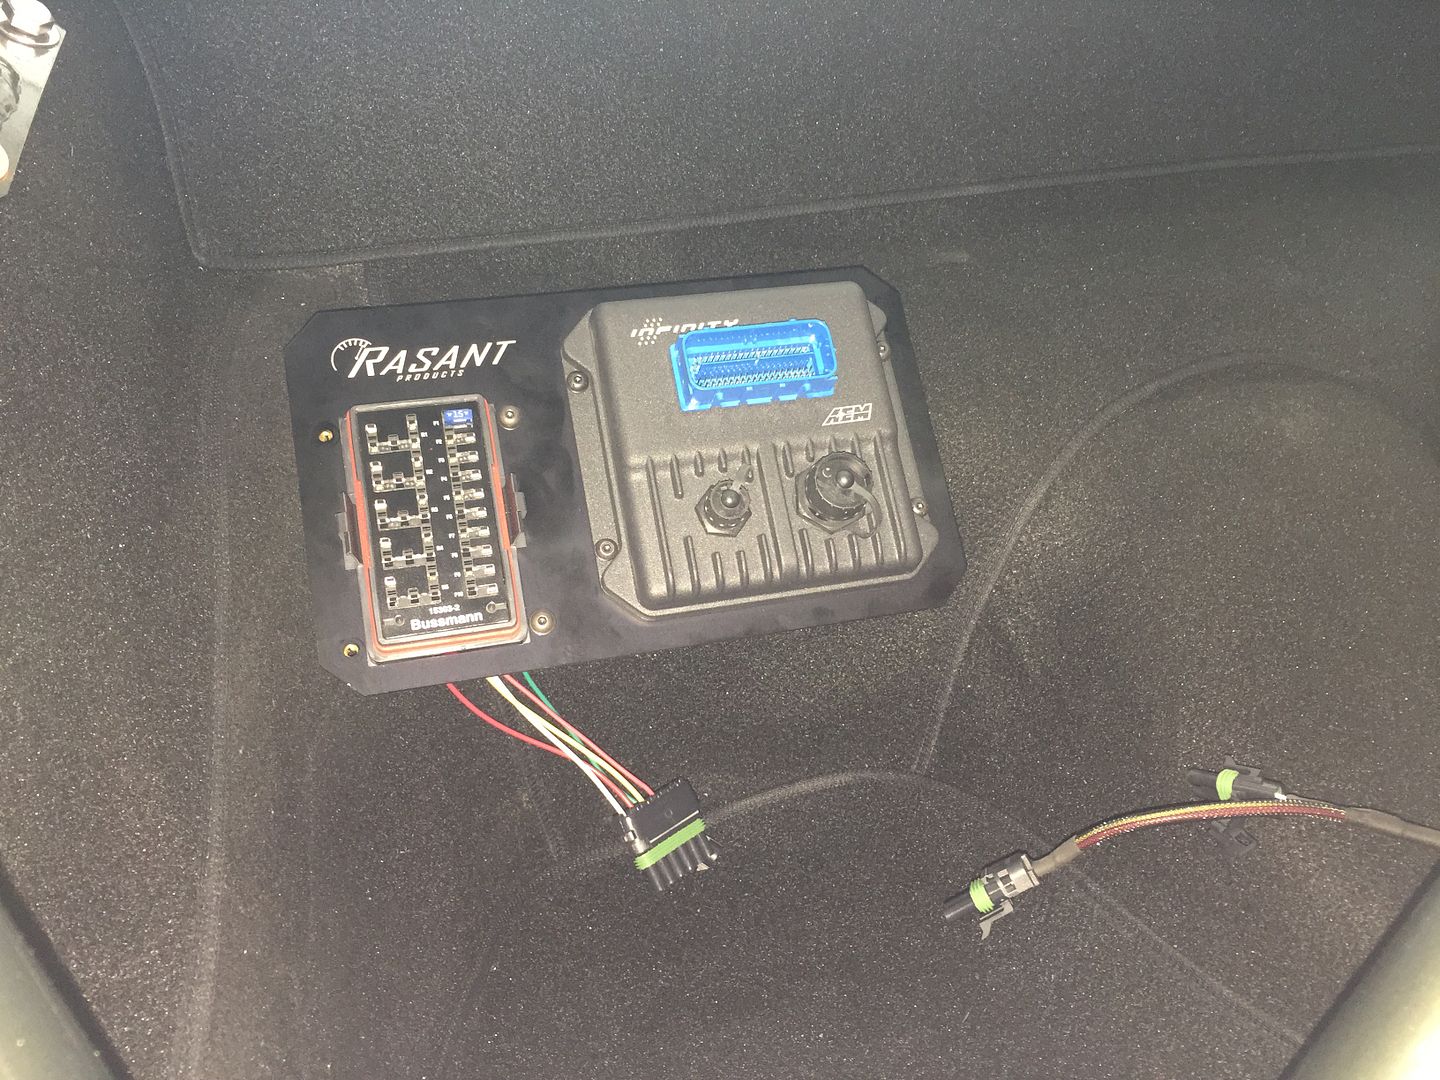 I ran new wires for the fuel pump, ignition switch and lead from the existing AEM AFR gauge through the tunnel to the ECU. 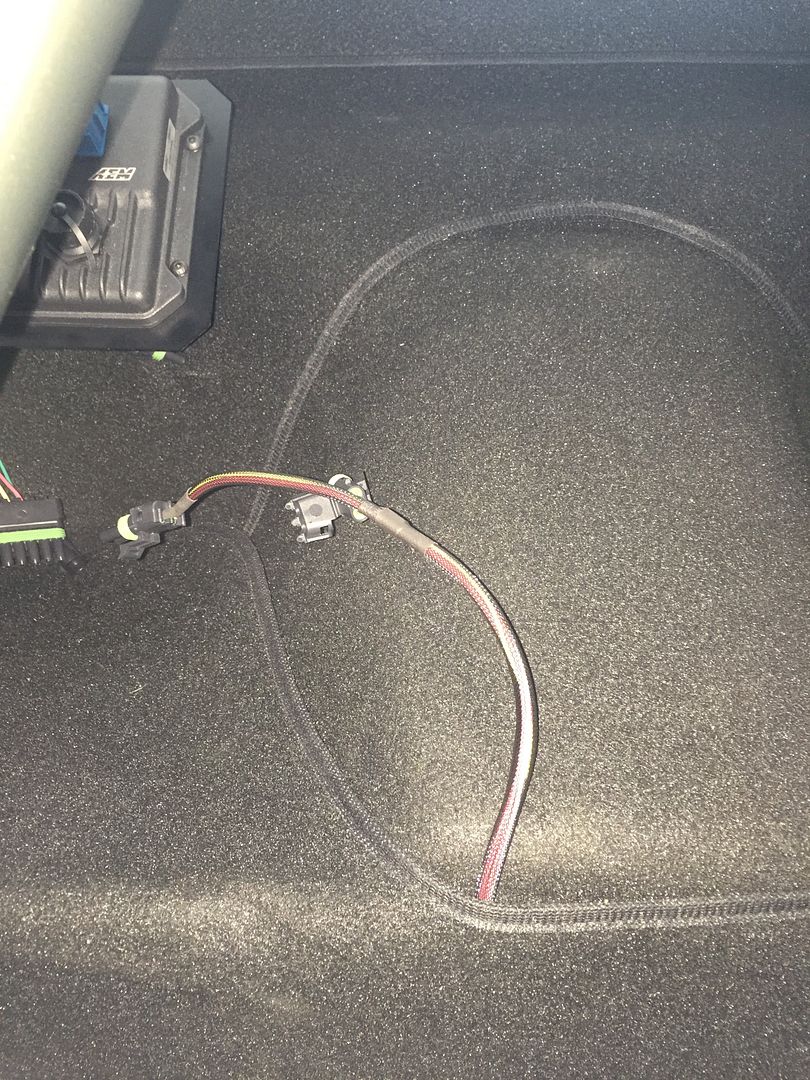
|
||
|
10-16-2016, 05:38 PM
|
|
|
Registered
Join Date: Apr 2003
Location: Houston
Posts: 567
|
Originally I had planned on using Triumph motorcycle cable linkage.
I've decided to use modified Weber crossbar based linkage instead, but wanted to show want I had come up with using cable linkage. Using the CIS throttle bracket I posted earlier, I made a bracket to hold two triumph linkage cables and welded a steel angle to the CIS linkage to attach the cables to. This would likely need a spring to help the return, but there are springs on the up stream throttle linkage and spring on each of the ITBs. There will only be able 1" of travel, so i'll have to get all that dialed in once it's all installed. 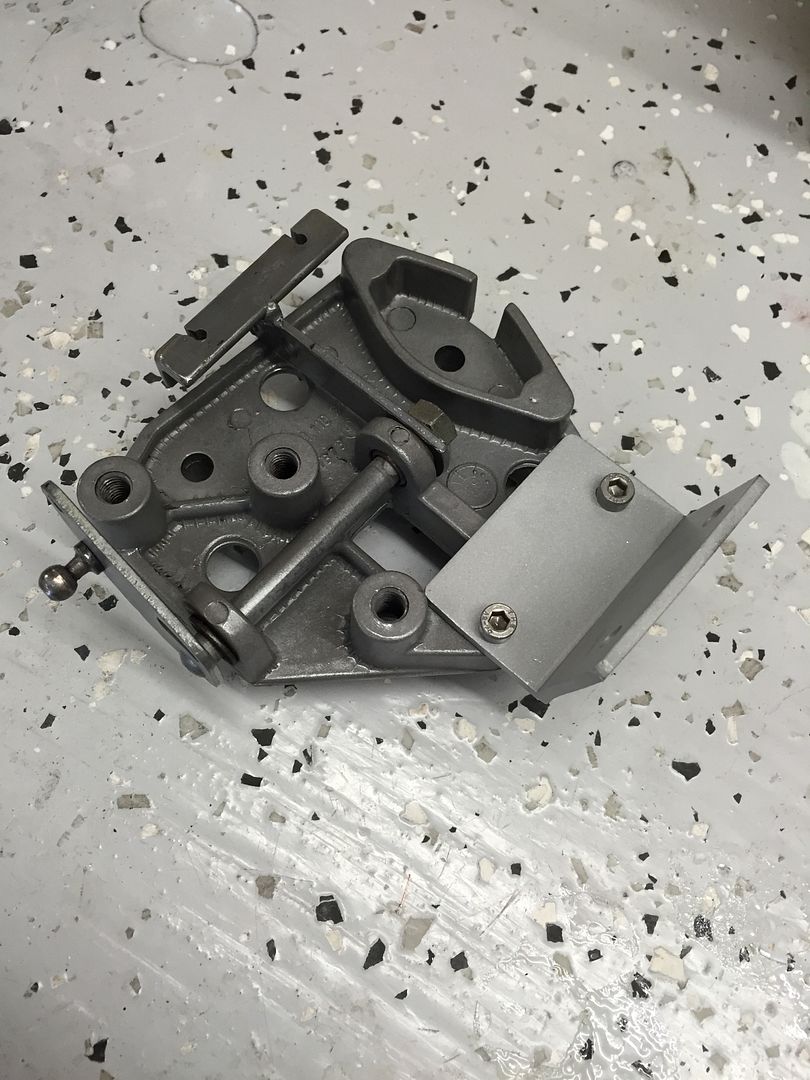 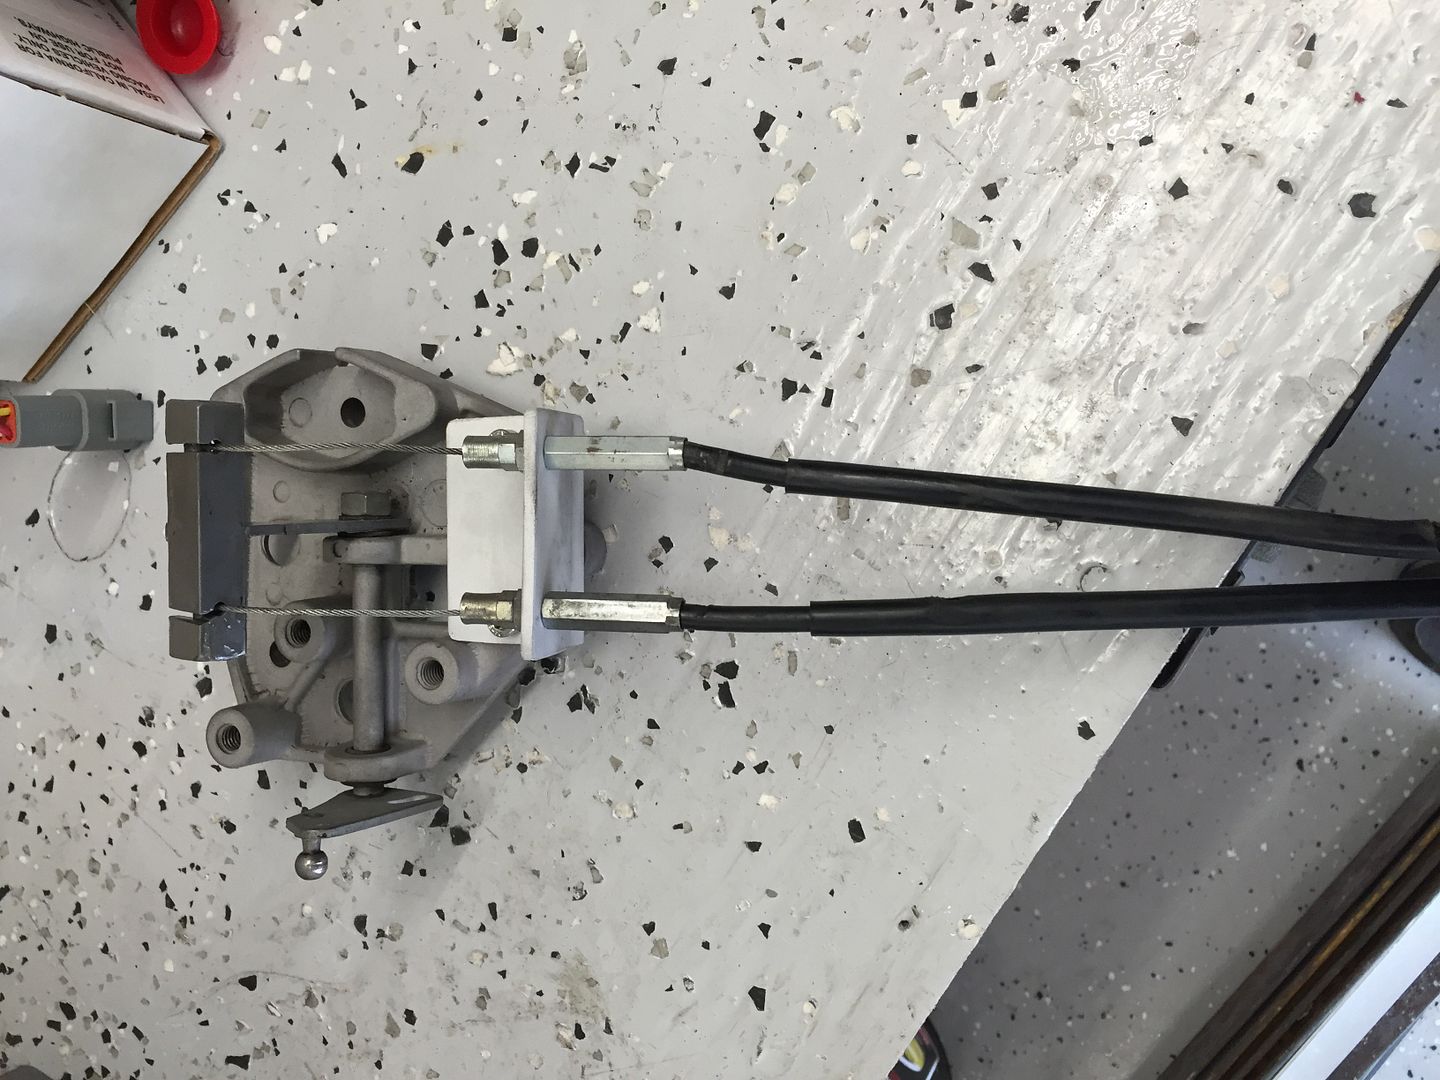 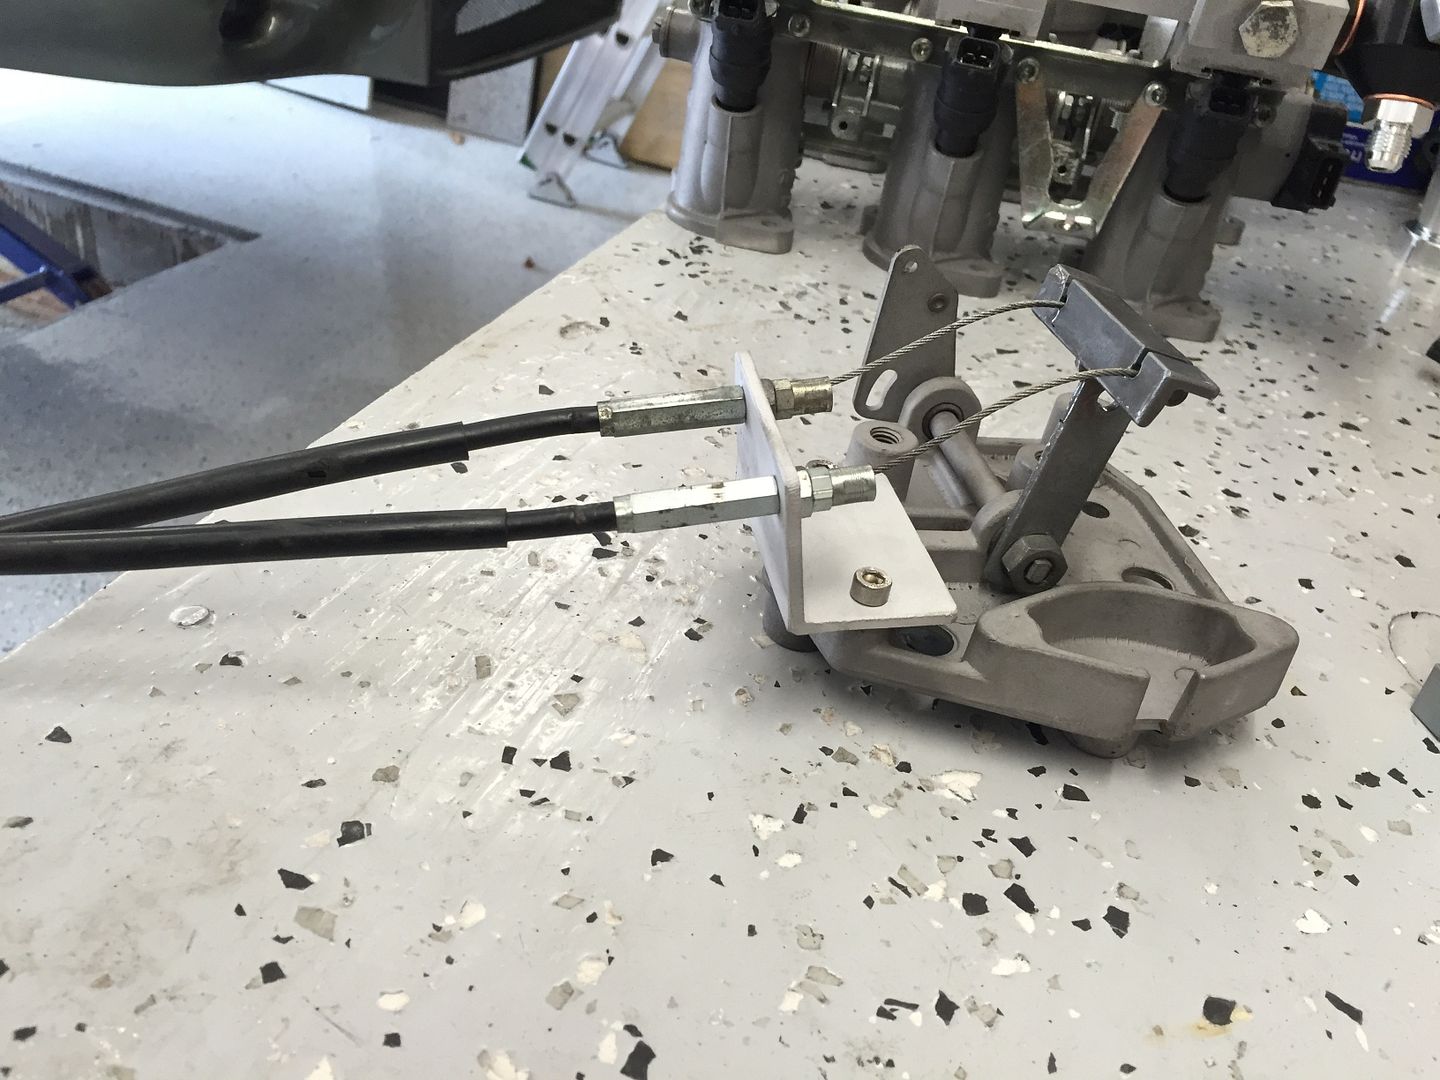 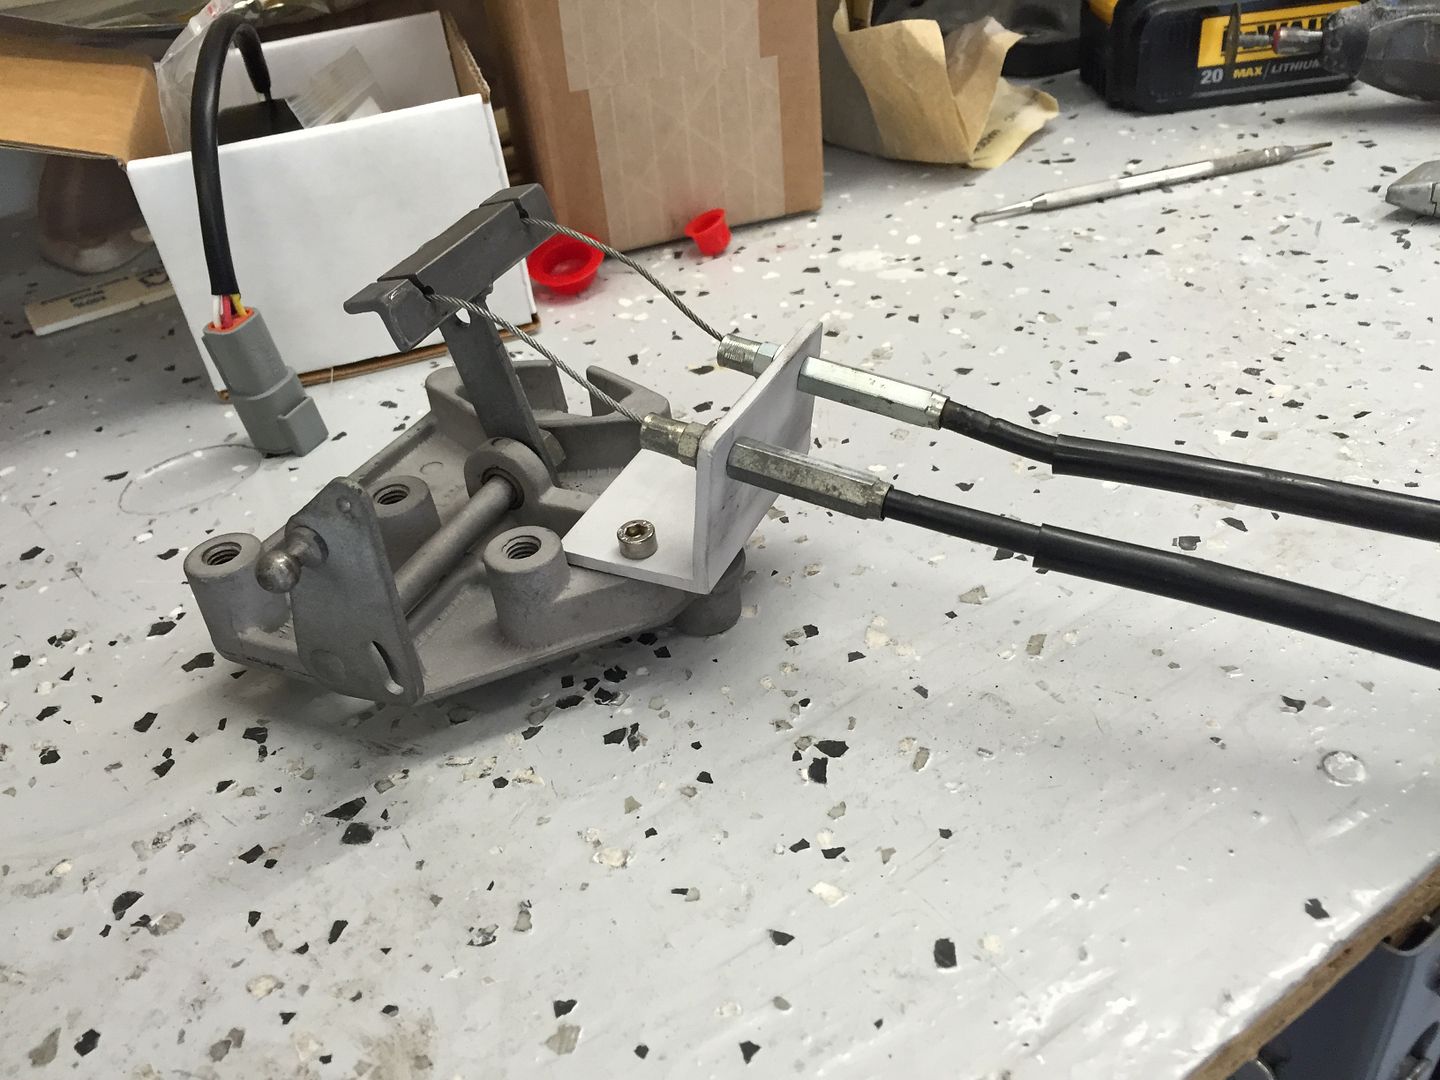
|
||
|
10-16-2016, 05:54 PM
|
|
|
El Duderino

|
Can't wait to see how this turns out. Keep up the good work!
__________________
There are those who call me... Tim '83 911 SC 3.0 coupe (NA) You can't buy happiness, but you can buy car parts which is kind of the same thing. |
||
|
10-16-2016, 06:18 PM
|
|

|
|
Registered
|
Are you having intake manifolds casted somewhere? Or are you using 3D printed manifolds? If using printed manifolds, what material?
|
||
|
10-16-2016, 06:19 PM
|
|
|
Registered
Join Date: Jul 2001
Location: mt. vernon Wa. USA
Posts: 8,759
|
Efi
clay,
nice work on the manifolds. As you know, i have been down this path for a while. And while I eventually elected to adapt the ITBs to use standard PMO manifolds and linkage....like you, I started with adapting the bellcrank to use cables to actuate the ITBs. I thought you might like to see this pic of my proto bellcrank mod. I love the DIY approach and the ingenuity....again...nice work and good luck with the project.  regards, al
__________________
[B]Current projects: 69-911.5, Previous:73 911X (off to SanFrancisco/racing in Germany).77 911S (NY), 71E (France/Corsica), 66-912 ( France), 1970 914X (Wisconsin) 76 911S roller..off to Florida/Germany RGruppe #669 http://www.x-faktory.com/ |
||
|
10-17-2016, 08:57 AM
|
|
|
I would rather be driving

Join Date: Apr 2000
Location: Austin, TX
Posts: 9,108
|
Nice project. Love the use of the 3D printer. Just a careful note about the manifold. The printing process works great for mocking up. I have researched these materials for printing quite a bit for automotive applications. Most of them are not suitable for actual usage beyond a test. Keep in mind that ABS is not solvent compatible. It will dissolve itself from the inside out with the fuel mixture. There are some PET and PET/Nylon blends that would work but have softening issues. I fully support this process but don't want to see a meltdown on the new system.
Keep going on a great project.
__________________
Jamie - I can explain it to you. But I can not understand it for you. 71 911T SWT - Sun and Fun Mobile 72 911T project car. "Minne" - A tangy version of tangerine #projectminne classicautowerks.com - EFI conversion parts and suspension setups. IG Classicautowerks |
||
|
10-17-2016, 09:15 AM
|
|
|
Registered
Join Date: Apr 2003
Location: Houston
Posts: 567
|
Quote:
Quote:
Quote:
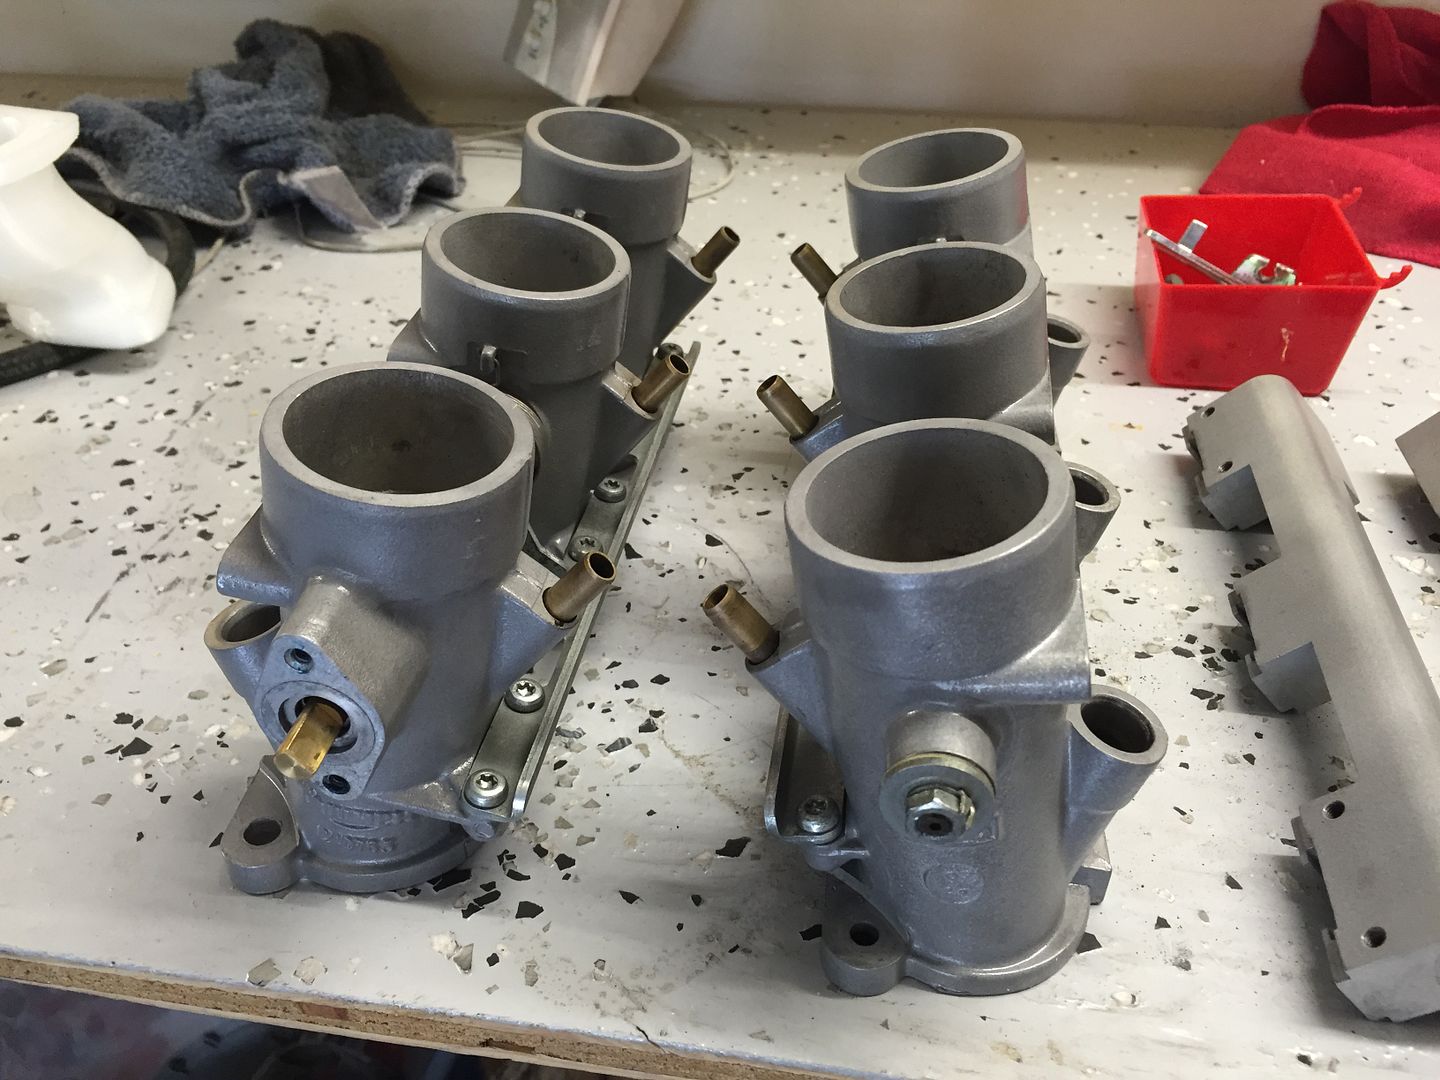
The original idea was to install a 3D printed manifold. The first 2-piece printed sample was ABS and very hard and machinable. It printed well and was relatively accurate. We then printed some in Nylon. These ended up being much softer and more difficult to print. The two below that are a single piece are Nylon. The tolerances were much further off with these and during the printing process they started to sag, you can kind of see a line mid-runner where they shifted. I tried to clean them up and even coated them in a fuel tank epoxy, but in the end, I didn't want to risk them leaking fuel or not creating a good seal. 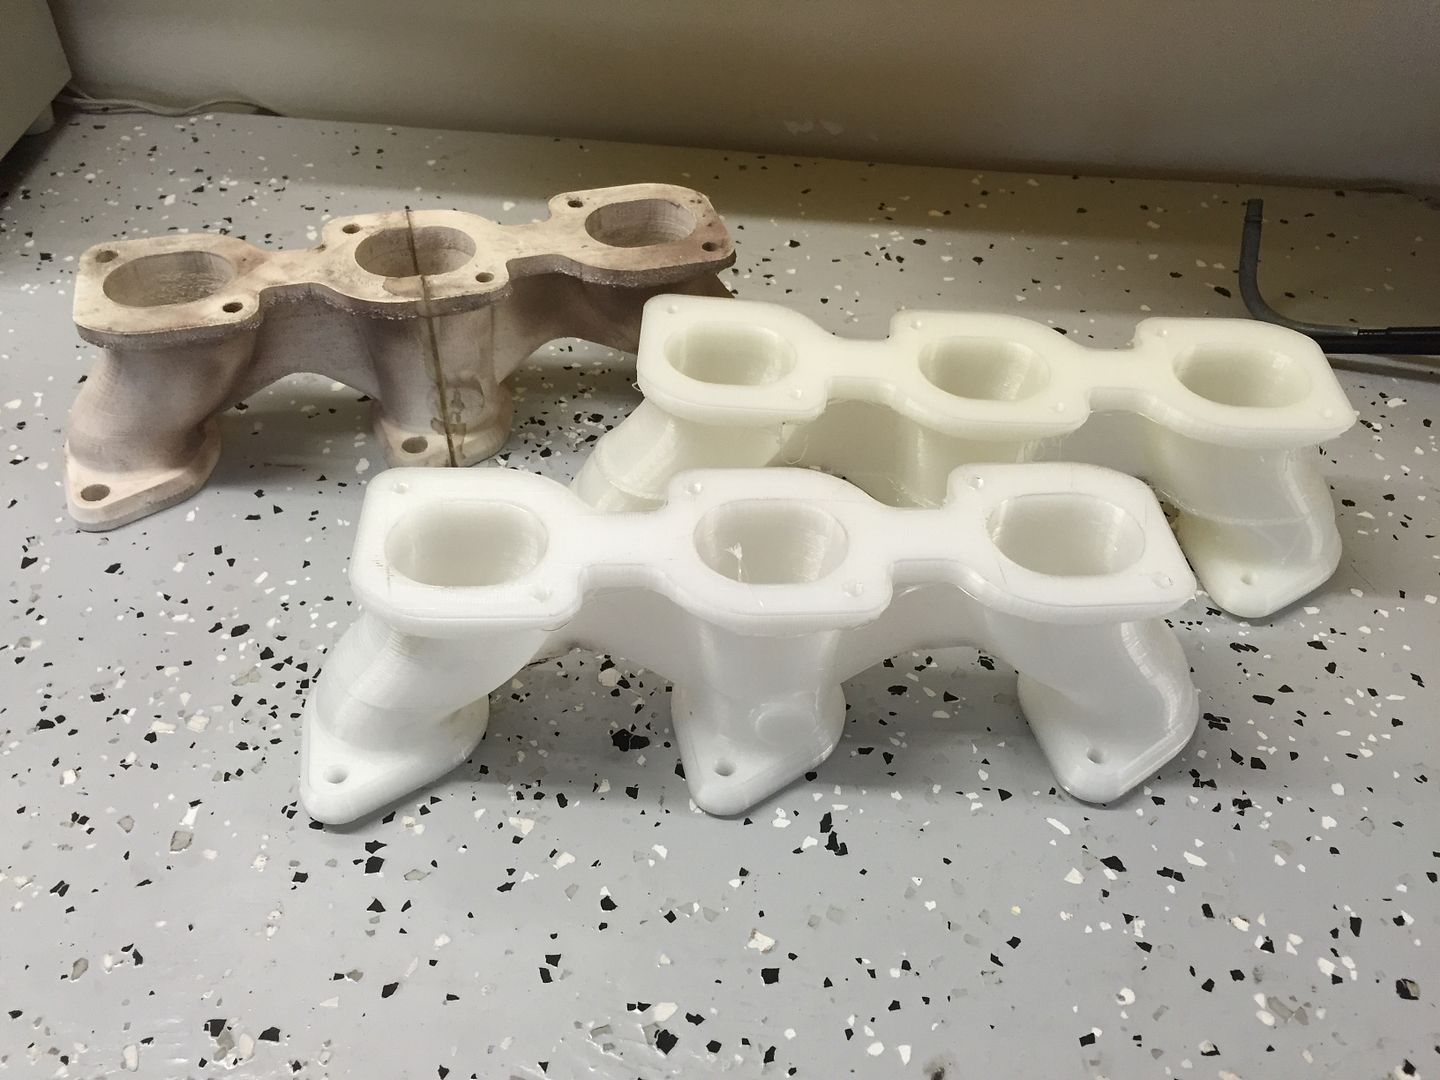 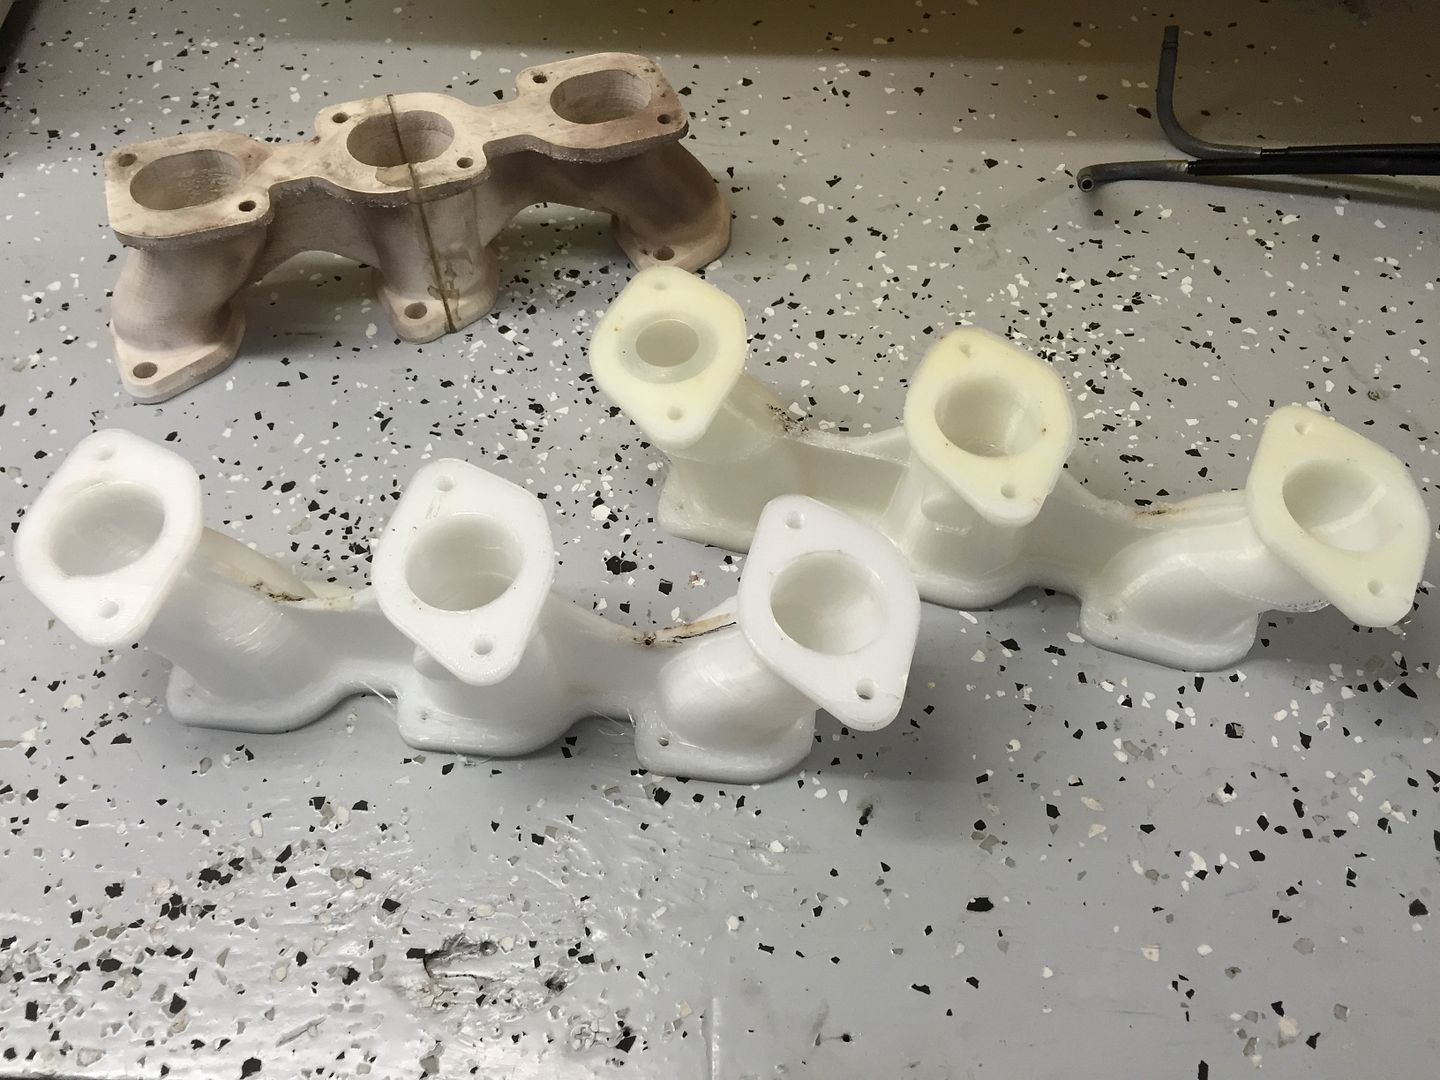 http://i35.photobucket.com/albums/d151/c_hundley86/porsche/AFDB39B5-D6AC-4B17-826F-7E97C816C8C6_zpsn4hd1ijz.jpg After messing with 3D printing for a few months, I finally bite the bullet and had a pair casted in aluminum. On these I included bosses' for Weber/PMO crossbar linkage and a pivot rod for the Weber/PMO bellcrank.    At that point I ditched the idea of using cable linkage and picked up some modified PMO linkage from Al @ x-faktory.com .    And one of the hardware mocked up with the distributor and plug wires still installed. 
|
|||
|
10-17-2016, 05:02 PM
|
|
|
Registered
Join Date: Jul 2001
Location: mt. vernon Wa. USA
Posts: 8,759
|
Clay provided me with a pair of his manifolds to review. I think they are well done and and I bought them and will likely use them on my current hotrod 3.0 build.
regards, al
__________________
[B]Current projects: 69-911.5, Previous:73 911X (off to SanFrancisco/racing in Germany).77 911S (NY), 71E (France/Corsica), 66-912 ( France), 1970 914X (Wisconsin) 76 911S roller..off to Florida/Germany RGruppe #669 http://www.x-faktory.com/ |
||
|
10-17-2016, 05:10 PM
|
|
|
Registered

|
Nice!
__________________
Billy, MoosgrunMetallic - 81 911 SC - (Carbon fiber Wrap) Drank the Koolaid in 82 |
||
|
10-17-2016, 05:27 PM
|
|
|
Registered
|
I see a run in Triumph ITB's in the future.
__________________
Billy, MoosgrunMetallic - 81 911 SC - (Carbon fiber Wrap) Drank the Koolaid in 82 |
||
|
10-17-2016, 05:33 PM
|
|
|
Registered
Join Date: Apr 2007
Location: Seattle
Posts: 3,032
|
That's super cool. Really nice to see some of the new tech incorperated into our old sleds.
I know next to nothing about 3-D printing but it sure is neat technology. A little o.t. but, I always thought it would work great to replicate the unobtanium 4sp shift knobs for the turbos. Or any other hard to find bakelite or plastic parts. I wonder if there will be a fuel stable material available soon.To bad ABS won't work. It's incredibly strong. Have fun with the snappy throttle.
__________________
81 Pacific Blue 930 Euro coupe slicktop on a strict diet, Rarlyl8 headers, Blowzilla turbo, Tial waste gate, Full bay I/C, Home made center out exhaust, Leask WUR, MSD 6AL, PLX wideband Wevo shifter, LSD. Next up, Cams, Heads and port work |
||
|
10-17-2016, 05:42 PM
|
|
|
I would rather be driving
Join Date: Apr 2000
Location: Austin, TX
Posts: 9,108
|
Cool. Did you use the 3D printed models for the molds for the casting? Lots of options there.
I assume the modified linkage is to match the arc travel of the entire system.
__________________
Jamie - I can explain it to you. But I can not understand it for you. 71 911T SWT - Sun and Fun Mobile 72 911T project car. "Minne" - A tangy version of tangerine #projectminne classicautowerks.com - EFI conversion parts and suspension setups. IG Classicautowerks |
||
|
10-17-2016, 08:00 PM
|
|
|
Registered User
Join Date: Dec 2014
Posts: 989
|
wantwantwant
|
||
|
10-17-2016, 08:50 PM
|
|
|
Registered
Join Date: Apr 2003
Location: Houston
Posts: 567
|
Quote:
Quote:
Speaking of, the hardware is installed. I pulled off the Weber's I had on there before and was left with a relatively blank slate. I reused the phelonic spacers that I used with the carbs.  Installed the linkage on the ITB's. I'm using a Russell 650133 inline fuel filter and AEM fuel pressure regulator The black fittings on the triumph fuel rail are M12x1.5 to 6AN adapters to run 6AN fuel line and fittings  And onto the engine for good and removed the rest of the carb fuel setup.  I tried to keep the linkage parallel to the ITB's to start which worked out well   Then removed the stock distributor, MSD and plug wires. Installed a fuel line between the two ITBs like a 3.2 setup. and pulled the AEM harness into the engine bay to start the engine wiring 
Last edited by Clay.0; 10-25-2016 at 06:06 PM.. |
||
|
10-25-2016, 06:01 PM
|
|
|
Chain fence eating turbo
Join Date: Dec 2008
Location: Austin, TX
Posts: 9,209
|
Whoa! Nice project! I too went down this path but stopped for various reasons.
I also had that exact Triumph. Bike was a turd, so you're finally using the ITB's for a good purpose! HAHA  One caution, I'd ditch that AEM dizzy adapter, it is not accurate enough in my opinion for what you're doing. If it were fuel only, I'd say it'd be ok, but if full ignition control, I'd be hesitant using that. Think gear lash and what that equates to in degrees!!! Go with a crank trigger from GoingSuperFast. |
||
|
10-25-2016, 06:56 PM
|
|

|
|
Registered

|
Amazing work - thanks for sharing! Having your manifold design cast is baller! I think I will go with that Bussmann unit for my Microsquirt project - the tutorial you linked to looks excellent.
Can you elaborate on why you switched from cable to a solid linkage, please? |
||
|
10-26-2016, 10:16 AM
|
|
|
Registered
Join Date: Jul 2012
Location: Simi Valley, Ca.
Posts: 265
|
Quite a project. Just wondering why you didn't rotate the throttle bodies 180 and put the fuel bars in the middle. That would have given a straighter line into the intake port if the manifolds were cast with a slight offset to the valve cover sides.
Bob B |
||
|
10-26-2016, 11:55 AM
|
|


 1983 Porsche 911SC Coupe
 2011 Mercedes-Benz E350 Cabriolet

 Tie Fighter
