|
|
|
|
|
| Author |
|
|
Registered

Join Date: Apr 2006
Posts: 5,179
|
My clutch job, in pictures:
Here's brief photographic documentation on my clutch job. As of this posting, I have gotten the old rubber center clutch out and am awaiting new parts before reassembly.
We'll start with getting the car in... here she is, backed into the workshop, fresh after my 'last' drive..   Time to get it up on stands. I put them under the metal pucks at the front and the torsion tube carriers in the rear.  First step after disconnecting the battery is to drop the exhaust. This necessitates removing six bolts at the triangle shaped flanges at the primary header. Those flanges are just out of view of this pic. The bolts will most likely be rusted tight. I broke 3 free with an impact, and ground 3 off with a cutoff wheel pnuematic tool. Be prepared to spend a lot of time and get very frustrated here. It took me about an hour to grind the bolts off. 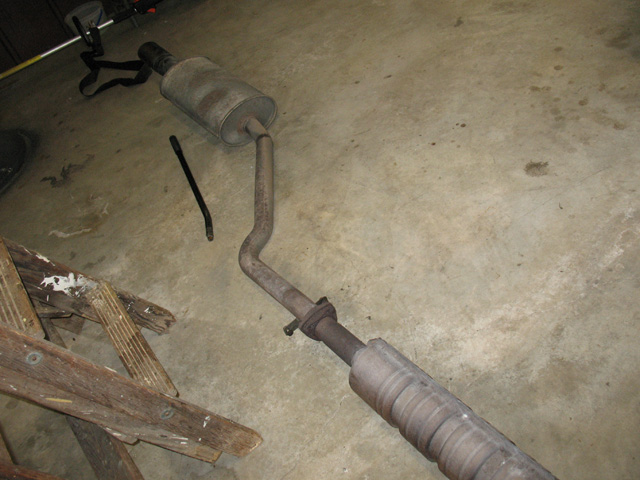 Then its to the rear of the car. The halfshafts need to be dropped. This required an 8mm 'cheesehead' tool, or 12 point internal socket. Remember to 'wake up' the bolts before busting them loose. Mine all came out easily. I reccomend putting the parking brake on, taking three inner and three outer bolts loose, then taking the brake off, rotating the wheel 190 degrees, setting the brake, and continue with the rest. Note my halfshafts have the paint chipping off them. They will be getting replaced with a newer set that I have and this set will get rebuilt later.  Now that those are out, it's time to start getting the transaxle down. Taking off the rubber cover on the bottom side of the trans, you will see the coupler inside. There are two allen head bolts that must be completely removed (not just loose) for the coupler to slide back. You will need someone to push in the clutch pedal while you rotate the shaft around to where you can access the bolt heads. After you get them out, slide the couple back towards the tranny. It should slide easily. Be sure to do this step before loosening any of the trans mount bolts.  Now you will also want to disconnect the reverse sensor wires. The shifter is next. In the car carefully remove the shift boot. There is just a small clip that holds the shifter on. After it's off, on the linkage there is a C-clip that holds the shift linkage to the shift lever. Remove this and slide the tube over. Remove the nasty insulation under the shifter. Then, back at the trans, take the single bolt out that holds the shift linkage tube to the transaxle. It needs to come all the way out. Then in the car, slide the shift linkage tube down and into the tunnel forwards as far as you can.  Now it's time to loosen the transaxle from the rear bellhousing. There are 4 bolts on this interface. Two regular bolts (17mm I believe) and two large socket head cap screws.   
__________________
M |
||
 07-13-2009, 01:04 AM
|
|
|
Registered
Join Date: Apr 2006
Posts: 5,179
|
After those are out, the only thing holding the trans in is the top two bolts on the rubber mounts. Put a jack under the trans and take these out. The slowly lower the trans back and down and out. As you can see mine was covered in grime. It may have been overfilled at one time. I'm going to clean it up and check for leaks.
 But, if you're like me.. you'll have a nice clean backup on standby just in case..  Now in the rear you will just have this: 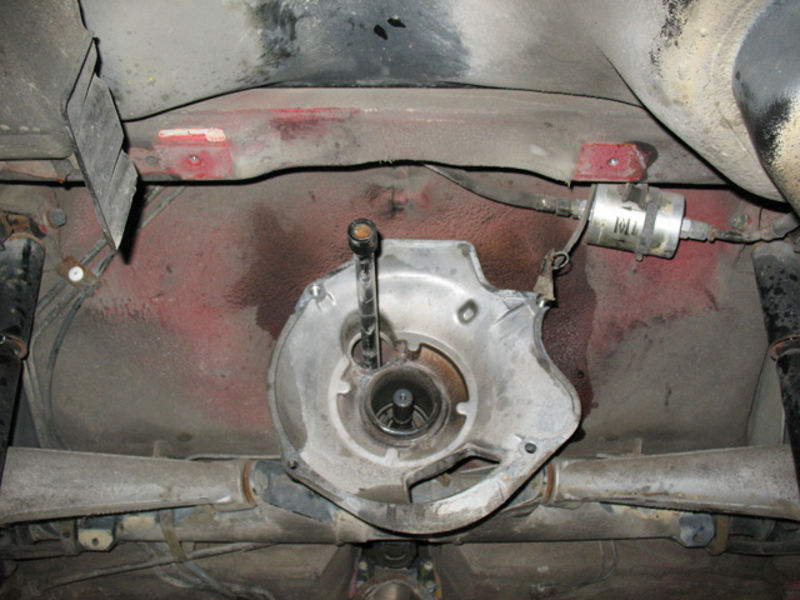 Now it's time for the starter. This was difficult. After you remove the wires to the starter, there are two bolts holding it on the bellhousing. One faces forward, one faced back. The one that had the head on the forwards size will be stuck, I bet on it. It also cannot be accessed with a large socket wrench or impact. It must be turned with either a slim 19mm spanner wrench or a 19mm short socket on a small breaker wrench or small ratchet. 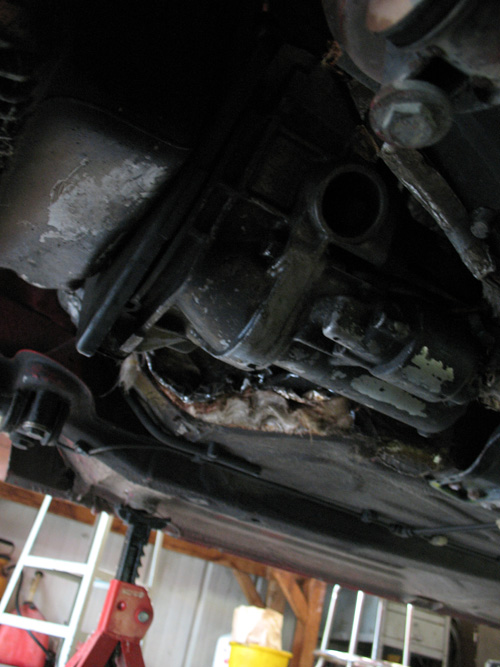 After the started is out you can get to the 4 torque tube bolts. Undo these (17mm). Then you can slide the TT back. Get some help here. After the exhaust hangars are all off, push the tube up and rotate it 180 degrees. Then slide it back, clearing the tabs over the torsion bar housing.  You will then be able to see the driveshaft splines. Note how much room I have here.   Now it's time for the difficult part. It's time to remove the sensors from the top of the bellhousing. There are 3. They are in the vary back of the motor, on the top of the bellhousing, facing the driver's side. To get to them effectively, I pulled the starter wires up to the top of the motor and set them aiside. I then undid the hose clamp holding the heater core line and valve and pushed it away. Then I pushed the ECU harness out of the way. They are way back there. My sensors were held in with 10mm bolts. The top most forwards sensor can be got at with a long extension directly. I linked together three 1/4 drive extensions on a ratchet which had enough tolerance in them to 'bend' and make a flex shaft, fitting the socket on the sensors easier.  Lots of PB blaster here. You don't want to have to force the sensors out. To get the back sensor bolt off I put a floor jack under the back of the motor and used it to push up, tilting the motor forwards (remember, the TT is disconnected at this point). This brought the rear sensor bolt into view. You will hate this part, but it is satisfying when they come out. When getting them out, twist them back and forth repeatedly as you pull up.  I do not have a lot of pictures explaining the rest. I deviate from the standard method a bit here. Instead of pulling the clutch fork pin, which I have tried and failed to do before on another car.. I opted to take the pressure plate bolts out through the started hole. This is time consuming, as I was by myself and had to go rotate the motor with a big wrench at the front of the car, then get under the car and look for the bolts in the starter hole. After they were out the PP is free in the bellhousing. Then there are only 4 bellhousing to engine bolts and a big ground cable holding the bellhousing on. Two of these are easy, two are difficult to reach. I had to use a 'breaker bar' style socket wrench (one that doesn't ratchet, just a u-joint) that could bend in a weird angle, to reach them. Here also I had to tilt the motor forwards to get at one near the top of the firewall and then pulled the motor aft to gain clearance to one under the brake booster. There is a big ground cable at the top that is held by a 13mm bolt. Then it comes off! The bellhousing and PP come together, held by the clutch fork. 
__________________
M |
||
|
07-13-2009, 01:05 AM
|
|
|
Registered
Join Date: Apr 2006
Posts: 5,179
|
Here is the flywheel...
 And the rubber clutch all busted up. A large chunk of rubber was missing and the metal splines and plate were not attached to the rubber at the base anymore, allowing the splines to rotate about 100 degrees before the limp tabs engaged and held it together.  A shot of the limp tabs. They had nearly started to start to shear across themselves.  So.... from here it's to each his own. I'll be replacing some bits and reassembling the whole kit next weekend. It took me a little over 9 hours to do everything you see above, spread over two days. I could have done it in roughly 7 without the nuisance of some stuck bolts along the way. Thanks for everyone's help and suggestions leading up to this point! I was able to do everything you see above without needing to reference clark's or a book or manual. It is time consuming but this is nothing that cannot be done (by one person here even!) in you home garage provided you are patient and have an assortment of ratchets and spanners that will be able to get into tight spots (behind the engine). I can't wait for next weekend when she gets new life!
__________________
M |
||
|
07-13-2009, 01:05 AM
|
|
|
Eric
|
Good job.
I've just removed the trans myself to rebuild my tt. I slid the shifter much further forward before removing the trans - so the end of the shift rod was in line with the end of the tt housing. I also unbolted the shifter from the tt but didn't remove the shifter - I just hung it across the centre console in position. What did you use to get that spare trans so clean??!! You might want to check out the tt bearings while your there. Mine failed on my S2 at 135,000 km. Hence the rebuild. |
||
|
07-13-2009, 01:55 AM
|
|
|
Registered
Join Date: Apr 2006
Posts: 5,179
|
The spare trans was stripped with some heavy duty industrial degreaser and then painted...
Is there a procedure for checking the TT bearings? I guess I will go check clark's...
__________________
M |
||
|
07-13-2009, 08:17 AM
|
|
|
Registered
Join Date: Jul 2009
Location: Seattle(ish)
Posts: 17
|
Great pictures, thanks for putting it together.
I just became a proud 944 owner this past weekend, and I'm likely looking at a clutch replacement over the winter, so I've been reading anything I can find. I've read that some people prefer to remove the intake manifold in order to reach those sensors on the back of the engine, but I can understand why you didn't go that route if you didn't have to. What I'm wondering is if it's possible to loosen the motor mounts in order to gain additional clearance to those sensors? I have large hands, so I need all the clearance I can get.
__________________
Tim 1988 Guards Red 944 NA (First Porsche... HOORAY!!!) |
||
|
07-13-2009, 09:28 AM
|
|

|
|
Registered
Join Date: Apr 2006
Posts: 5,179
|
I took off the distributor coil wire and the J-boot and put a jack under the bellhousing and jacked the engine up, which tilted it forwards, allowing me to get a 10mm socket on a set of extensions onto the sensors no problem. I have big hands too and it was not difficult once I got at them. The distributor coil wire came off as it gets close to the headlight bar when I jacked the motor up and the J boot came off because it starts to bend when you move the motor that much, and I didn't want it to crack.
I do not think it would be worth taking the intake off as you would have to disconnect the fuel lines, vac lines on the bottom (a pain) and then get new intake gaskets to reassemble. I spent about a half hour staring at the sensor area just planning my method of attack, moving things around, etc.
__________________
M |
||
|
07-13-2009, 09:43 AM
|
|
|
Registered
Join Date: Mar 2008
Location: Chicagoland
Posts: 2,695
|
nice pics.
seriously after looking at that, i'm glad i swapped on a clutch when i dropped my engine. i don't wanna drop the trans! hehe |
||
|
07-13-2009, 09:45 AM
|
|
|
1985 +1985 Porsche 944
Join Date: Dec 2008
Location: northern VA
Posts: 58
|
Good job with the documentation. I just did the clutch job and some or it was a PITA. Exhaust bolts are dificult to do. Along with the sensors on the top of the engine.
|
||
|
07-13-2009, 09:45 AM
|
|
|
Registered
Join Date: Mar 2008
Location: Chicagoland
Posts: 2,695
|
nice pics.
seriously after looking at that, i'm glad i swapped on a clutch when i dropped my engine. i don't wanna drop the trans! hehe |
||
|
07-13-2009, 09:48 AM
|
|
|
Registered
Join Date: Jan 2003
Location: Atlanta, GA
Posts: 2,688
|
Great pics!
__________________
89 944 - Alpine white/blue, Focus 9 DME and MAF, MSDS headers |
||
|
07-14-2009, 11:25 AM
|
|
|
Registered
|
i've got this to look forward to this weekend

__________________
https://www.instagram.com/kiwi944s3/ '86 944S3 conversion - '94 968 3.0 engine - 6 spd/LSD - 17x8,17x9 Oz Racing Crono wheels |
||
|
07-14-2009, 07:06 PM
|
|

|
|
Writer/Teacher
|
Thank you for this detailed post. I will be doing a tranny swap this weekend (or starting one, at least), so the pictures are useful.
If you ever need to do a head gasket job on a 951, I have a pretty detailed write-up on this site.
__________________
Current Stable: Black 07 Porsche 987 Cayman S: Long-Tube Headers; FabSpeed Exhaust; VividRacing ECU Tune; IPD Plenum; 997GT3 Throttle Body. Blue 1983 Porsche 928S. 1985.5 Porsche 944 Rat Rod. 2011 Acura MDX. 2008 Mazda 3. Gone But Not Forgotten:Garnet Red 86 Porsche 951("The Purple Pig"). Alpine White 83 Porsche 944 ("Alpine Wolf"). Guards Red 84 Porsche 944. |
||
|
07-14-2009, 09:42 PM
|
|
|
Registered
Join Date: Apr 2006
Posts: 5,179
|
Already checked off a head gasket job on my list...
I've done every job associated with these cars now except a torque tube rebuild, bottom end rebuild, and oil pump. It's amazing how simple the car has become in my mind from what it was when I first bought it. That means it's time to move on to a turbo...
__________________
M |
||
|
07-15-2009, 02:49 AM
|
|
|
Proprietoristicly Refined
Join Date: Jul 2001
Location: ~Carefree Highway~
Posts: 5,833
|
Quote:
You might enjoy doing a rebuild. http://www.rennbay.com/torque.html http://forums.rennlist.com/rennforums/924-931-944-951-968-forum/465869-mechanic-says-my-new-torque-tube-will-be-noisy.html GL John_AZ |
||
|
07-15-2009, 05:25 AM
|
|
|
Greasy Member

Join Date: Mar 2006
Location: Indiana
Posts: 1,457
|
Nice write up!
P.S. I like the spotless tranny  -Nick
__________________
Owner: Bennington Motorsports www.benms.com Sponsor for Midwest Region 944-SPEC racing series -When was your timing belt changed or tensioned?? -Yes, I'm the crazy man that will loan out my 9201. Just PM me, I will add you to the list and get it out ASAP. |
||
|
07-15-2009, 06:03 AM
|
|
|
Registered

Join Date: Nov 2003
Location: Calgary, AB
Posts: 1,883

|
I just drop the entire drive-train on the ground, transmission bracket, rear suspension, torque tube braces, front struts, everything. Makes life so much easier. It sounds harder until you do it, the only catch is you need an engine hoist and you have to remove a bit more wiring. I think its worth it since you will then have a clear shot at any bolts or nuts you need to reach.
__________________
2010 Hyundai Elantra Touring, GLS 5 speed, Indigo Blue Metallic. 2.0L of Korean fury! Buy my parts! |
||
|
07-15-2009, 08:52 AM
|
|
|
Registered
|
Nicely detailed Schumi, goes a long way in showing what to expect when you think " Its just a clutch job"! how hard can that be?.
__________________
87 944s gone 88 951 gone |
||
|
07-15-2009, 11:16 AM
|
|
|
Registered
Join Date: Sep 2001
Location: berkshire uk
Posts: 1,697
|
damn fine job !
__________________
----------------------------------------------------------- The fear of God is the begining of wisdom <>< NotJustPorsche Subscribe: notjustporsche-subscribe@yahoogroups.com |
||
|
07-16-2009, 05:01 AM
|
|
|
Registered
Join Date: Apr 2004
Location: Chicago
Posts: 729
|
Buying a trubo eh...perhaps I'd entertain an offer...Ive been thinking about selling her...and oh yeah me and my buddy Borys just finished the clutch job and a brake booster a couple weeks ago
__________________
88 928 S4 Black, Black and Grey Interior Alpine head unit & amp, Bazooka Tube, Viper 5704 Smart Start GPS tracking, Devek Headers, Flowmaster 40 3" with Resonator, Auto Authority chips. Custom Luggage Cover. Traded - 86 944 Turbo Guards Red. RIP - 85.5 944 Guards Red |
||
|
07-16-2009, 12:54 PM
|
|


 J1nx3d
 J1nx3d2
 2007 Porsche Cayman S
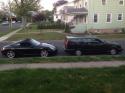 The Viridian Falcon
 SOLD! -- The Purple Pig
 SOLD! -- Mighty Mouse
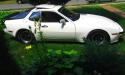 SOLD!! -- Alpine Wolf


