|
|
|
|
|
| Author |
|
|
Registered User
Join Date: Apr 2012
Posts: 25
|
Quote:
Thanks fella! Hope you're enjoying the course. Sent from my iPhone using Tapatalk
__________________
FRANK - 964 Shaped blood cells run through my veins BLACK BETTY - Molested WORLD 964 OWNERS - www.world964owners.com |
||
 04-30-2015, 11:12 PM
|
|
|
Registered
|
Your engine turns magnificently well, I am great satisfied for you Spencer, your efforts are rewarded!

|
||
|
05-01-2015, 06:37 AM
|
|
|
Kartoffelkopf

|
Thanks as always Pat! I'm back from my trip over to Boston now, so it's going to be time to carry on with the project.
|
||
|
05-02-2015, 09:05 AM
|
|
|
Kartoffelkopf
|
While I was away, my new fuel regulator arrived from Think Automotive; a lovely FueLabs 51502, in "discrete black", of course....
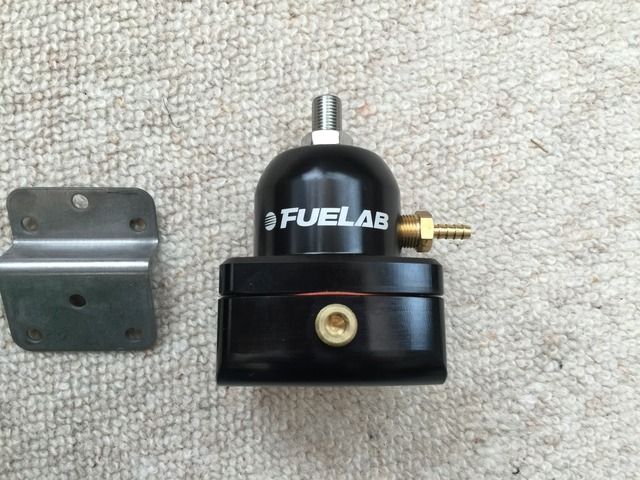 This model is for EFI applications, -6AN connections with a bottom return outlet.... 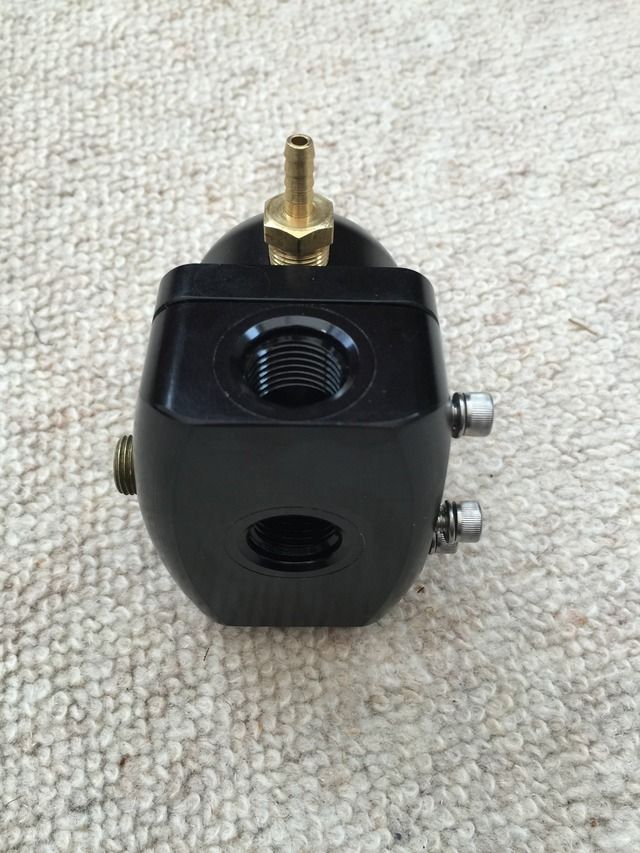 And the required -6AN > M16 adapters + sealing O-rings... 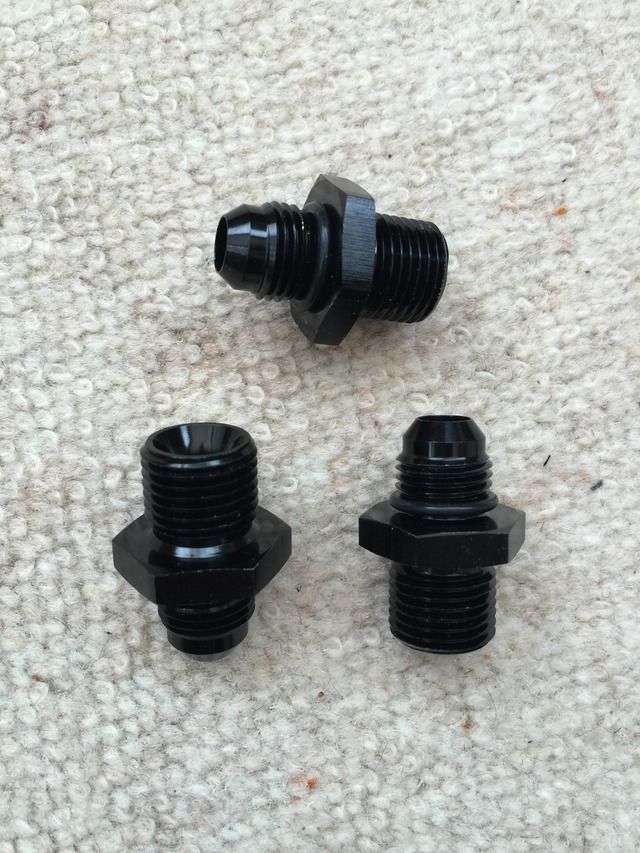 Having just gone out to the workshop and offered-up the regulator to the fuel rails, I reckon that by removing the stock regulator mounting bracket, there *may* just be enough room to install it in the original location, then use the 3x M4 tapped mounting holes to fabricate a bracket to mount it to the inlet manifold. Certainly don't want the mass of the regulator being carried by the M16 junction at the end of the 1-2-3 rail. Back later with pics to show what I'm referring to. So long as the jet lag doesn't kick in. Last edited by Spenny_b; 05-05-2015 at 05:39 AM.. |
||
|
05-02-2015, 09:29 AM
|
|
|
Kartoffelkopf
|
Well, predictably, jet-lag did hamper things this evening and I'm now wide-awake.
So, whilst watching the Laguna qualifying for TUSC, I've been compiling the list of jobs to get done to finish the car. Behold, my homework list....not too much, then. *************** Work Complete Work In Progress *************** QUICK JOBS
PLATING
Last edited by Spenny_b; 10-28-2015 at 03:40 PM.. Reason: Constant updating of progress list.... |
||
|
05-02-2015, 05:27 PM
|
|
|
Kartoffelkopf
|
Some progress over the weekend.....
Started shuffling around the electrical items mounted on the relay/fuse board on the LH inner wing. Hoping I can get away without making a whole new assembly, as I'm pretty sure that it's just the externally mounted blade fuse holders (4) and the bulge in the stock plastic cover, that foul the inlet tract. So, I re-drilled the fuse holder mounts under the location where normally the far left relay mounts. Relocated the relays one-hole-to-the-right to make space... 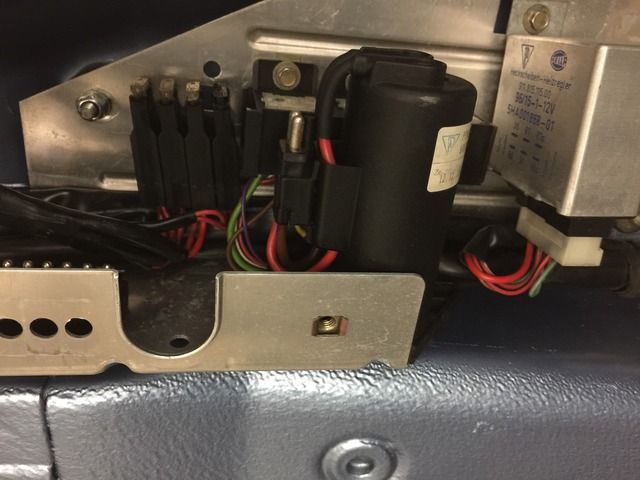 Then started to make a new ally cover. Some strange compound angles going on, and not convinced I've got this to my satisfaction (or close enough in terms of fitting)....but got a little frustrated with it so moved onto other things: 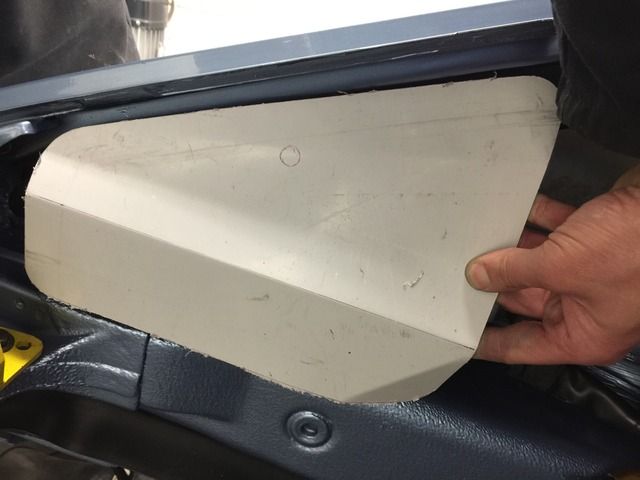 Per the previous post concerning the FPR, here's how it's going to mount after spending a few hours in the garage this evening: 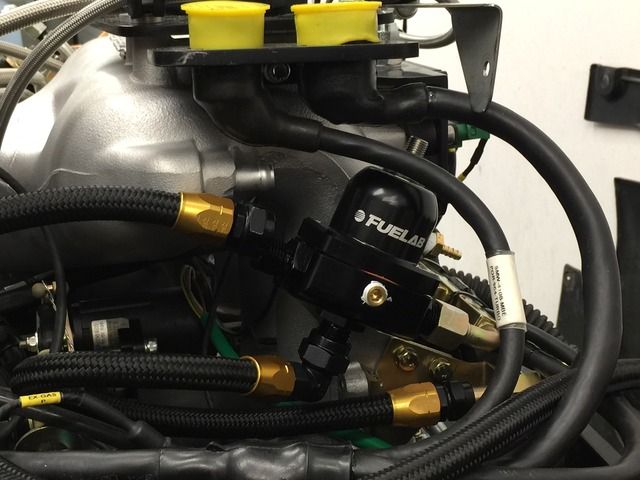 The inlet manifold needs a little fettling under the breather connection, to clear the 4-5-6 fuel rail return into the FPR (or I buy a 45º fitting)....it does all clear (by less than 1mm) if the connection is fitted to the FPR before the FPR is mounted to the engine, but again, not great for future serviceability. 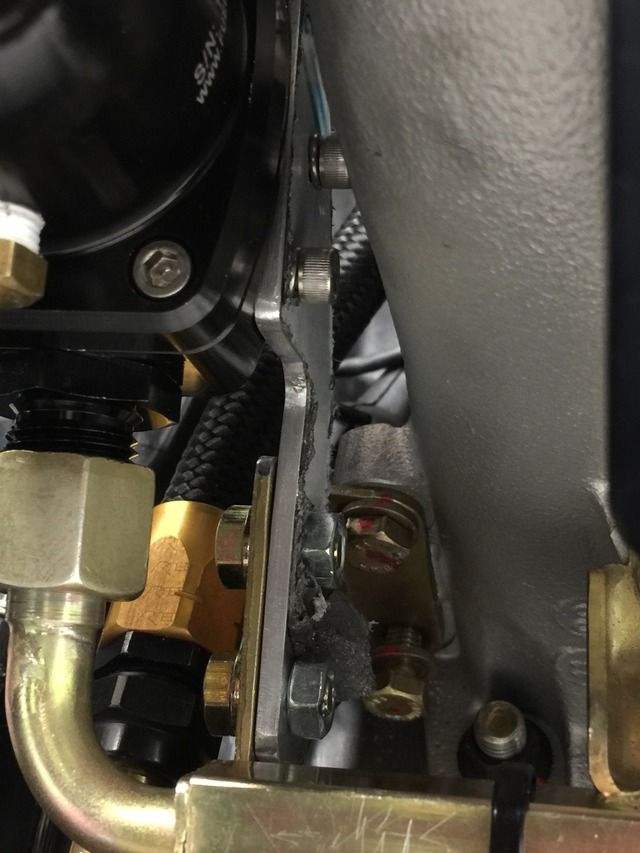 Some 3mm ally plate was used to make the hockey stick shaped bracket that now mounts onto the OE steel item. Pleased how this has turned out - discrete and will prevent any vibration fractures to the injection rail itself. The unit is mounted at an angle such that the pressure adjustment clears the management wiring harness, directly above. Of course, it'll get black anodised, as/when the next batch is taken over to the plating shop. The steel bracket will have 2x M6 plain nuts welded to the reverse side, then the unit will use 2x M6 bolts from the other direction. 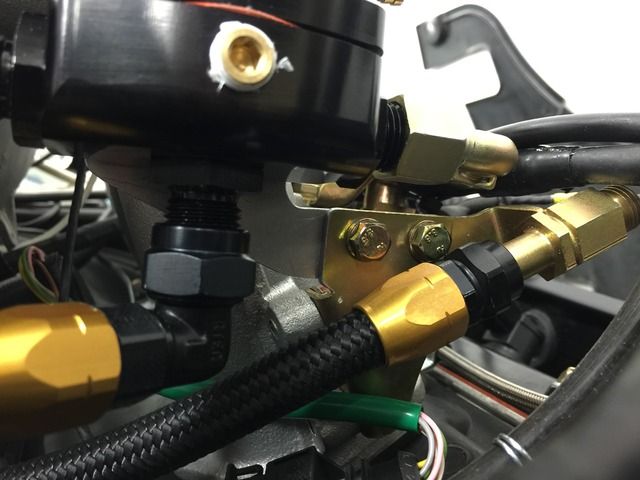 As you can see, I've chopped the stock bracket; this normally mounts the OE pressure regulator plus the injection return line, making it a lot more accessible for connection/disconnection when servicing or removing the engine. It would've been a lot easier to bin the whole bracket, however, being able to contort oneself with the engine in the car, to be able to brace the FPR whilst tightening it, wasn't something I wanted to risk....either that, or it's a case of installing a "floating" male-male connection in the line, which isn't ideal either. Some other minor jobs from the list were also completed
Last edited by Spenny_b; 05-04-2015 at 06:15 PM.. |
||
|
05-04-2015, 06:07 PM
|
|

|
|
Registered
|
Hello Spencer, I am filled with admiration for your accomplished work, it is impressive, bravo!
|
||
|
05-05-2015, 03:26 AM
|
|
|
Kartoffelkopf
|
Cheers mate....I can't remember, did you say you were going to Le Mans in a few weeks?
|
||
|
05-05-2015, 04:03 AM
|
|
|
Kartoffelkopf
|
Ponderingment time....
Not 100% convinced that making a new fuse/relay cover in aluminium is going to look how I want. However, I don't want a butchered OE cover, so I was thinking overnight that I may give fibreglassing a go and make a mould of the original item. Clearly I'm going to have to butcher the original to remove the bulge that covers the blade fuse holders, but then I'll end up with a cover that's exactly the correct shape, size, looks stock and has the recessed platforms that are used to attach it to the ally channel. I could even take it a step further and use the mould to then make a carbon fibre cover  ") Rob - if you're reading this, I may well ask a favour in terms of guidance - seeing as you're Rennlists favourite 964 CF fabricator at the moment!! I've worked with fibreglass for many years on the Westfield (and latterly the Lotus) but only once it's been made, I've never made anything of any significance, but I do have a spare unopened pot of black gelcoat dye. Thoughts for a newbie, anyone? Last edited by Spenny_b; 05-05-2015 at 07:32 AM.. |
||
|
05-05-2015, 05:48 AM
|
|
|
Kartoffelkopf
|
Steady progress being made
.time for a quick update.
On the way home from a business meeting I popped into my most local Pirtek branch (a UK chain who specialise in making custom hoses, mainly hydraulic for plant machinery). The aim was to take the AC lines along and at least get the conversation started with regards to making a custom pair. These will run the full width of the rear bulkhead, then 90º bend to bring them up behind the AC pump. In turn, I'd then need to buy one of Charlies (Pelicanite "Keuhl") manifold covers for the Denso pump, with the ports facing towards the rear of the engine bay, not on top of the pump. However, Pirtek were very open in saying that they wouldn't be doing the job on-site, it would get sub'd out to an outfit in the north of England. On the basis that they thought what I was describing sounded complex, his advice was for me to deal directly with them. Good of him to be that honest and not just add unnecessary margin/time. The rear inlet tract mounting bracket is now re-made; I initially made one from a sheet of mild steel which happened to be lying around, and it performed ok on the dyno, but IMO it's too flexible for use in the wild. Time to make a new one from 3mm plate ally, which I dropped over to Pete for welding the other day. 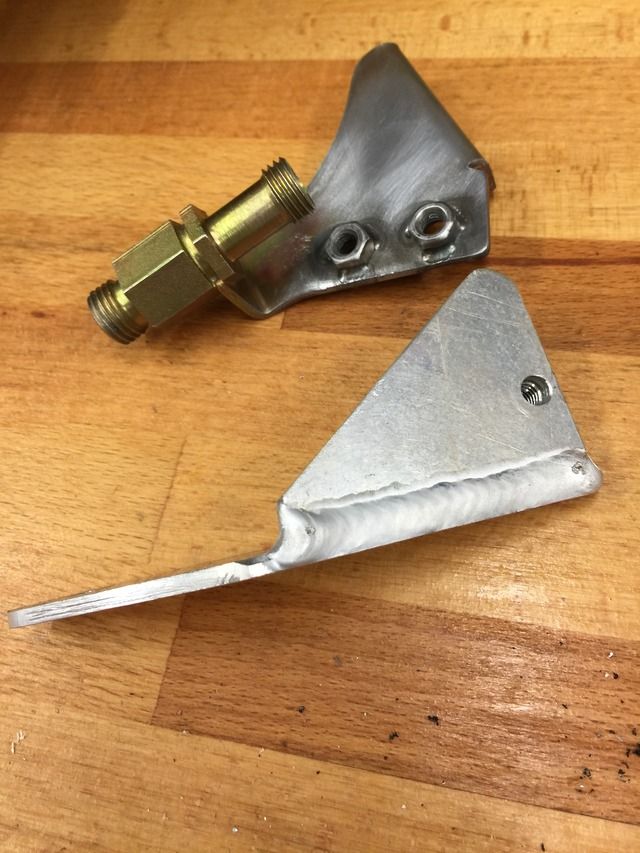 Some filing and fettling and it looks great; in-keeping with the rest of the bracketry in that area, and the welded cylindrical nut on the back ensures there's plenty of thread engagement to prevent any stripping. 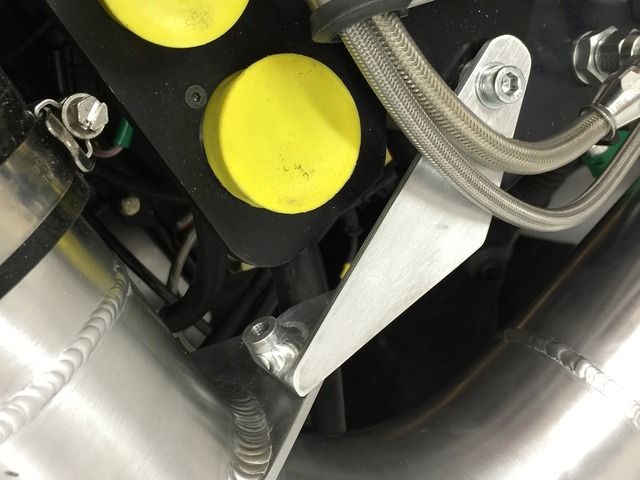 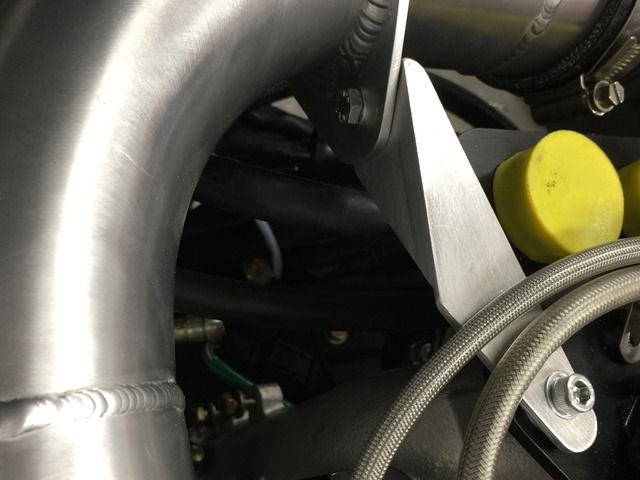 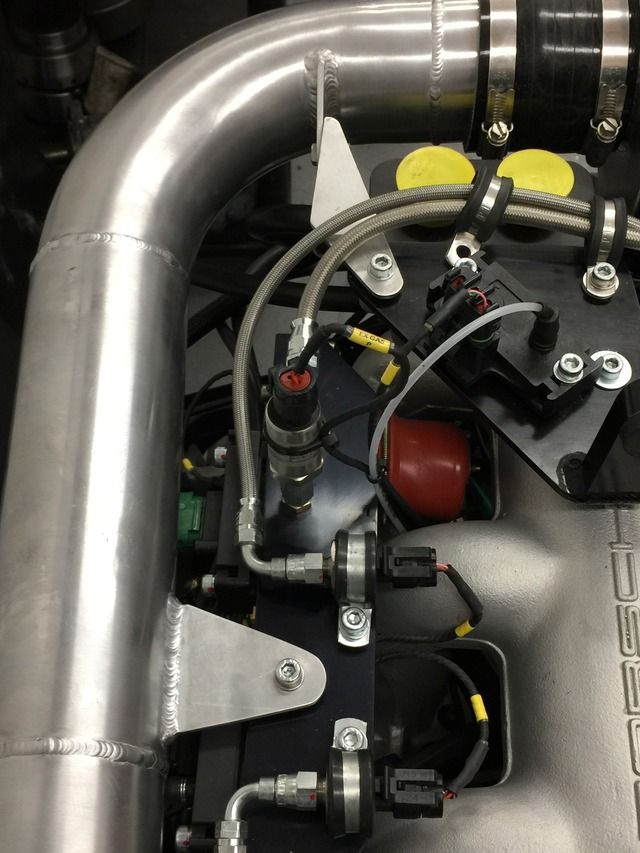 I also asked Pete to quickly buzz on a couple of captive nuts onto the modified fuel pressure regulator bracket, which will now be re-plated. Collected both parts on the way home this evening. It all assembles up very nicely... 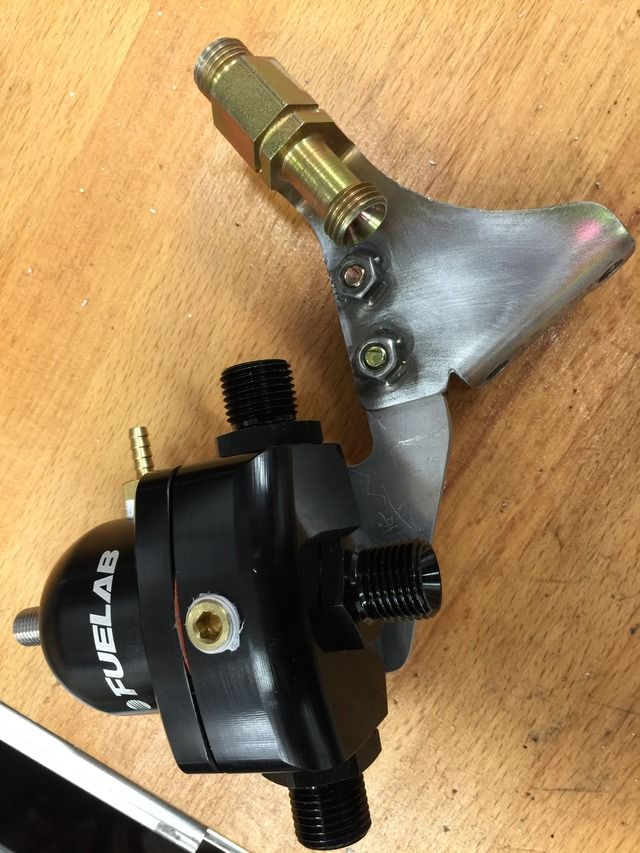  I now have a large collection of parts that can go over to the plating shop and the powder coating guys - think I can get everything done that was on the previous checklist (plus a few extra items), apart from the front wheel speed sensor units. So, not much happening really, just working to get more odds-and-sods jobs off of the above list....slowly but surely. With regards to the previous post on Tuesday, a quick shout out to these guys ---> Easy Composites ....not dealt with them yet, but stumbled upon their site the other day whilst researching how to best make a mould for fibreglass or CF parts....some great instructional videos on there, well worth a look. Bravo to them for taking the time to make them, commendable (sensible). |
||
|
05-07-2015, 04:45 PM
|
|
|
Registered
Join Date: Dec 2003
Posts: 53
|
Paul had some custom AC hoses made up to re-route around his ITB set up might be worth dropping him a note to see where he got them, not sure if it was the guys at Redtek that sorted them.
911uk.com - Porsche Forum, Specialist, Insurance, Car For Sale, Finance, Parts & Service : View topic - 964 Project - Plan B |
||
|
05-08-2015, 01:43 AM
|
|
|
Kartoffelkopf
|
Gaaz, great info, thanks mate. I've quickly clicked the link but will read more thoroughly later this evening.
Cheers S |
||
|
05-08-2015, 05:10 AM
|
|
|
Registered
|
Quote:
__________________
Steve Sapere aude 1983 3.4L 911SC turbo. Sold |
||
|
05-08-2015, 06:30 AM
|
|
|
Kartoffelkopf
|
Steve, could you post up some pics of your setup pls? All helps with explaining to the company that'll make them.
Not against making them myself except that what I really want making are hoses that are aluminium right the way across to the RHS of the engine bay, then only rubber down to the pump. This is because I know that the air filter will run tight within the confines between the back of the IC and the rear bulkhead; keeping the pipe work rigid reduces the OD a little - should be easier to accommodate. Plus, there don't seem to be many places in the UK to buy the hose and fittings from, my usual supplier certainly don't stock them. The crimping tool is also pretty pricey for a one-use item....but you never know, may resort to this. Would be a lot easier doing it in-situ! Presumably you also got rid of the 100deg bend on the stock lines? How did you re-form the flare onto which the swage crimps? |
||
|
05-08-2015, 07:08 AM
|
|
|
Kartoffelkopf
|
This weeks update....
Not too much going on this last week-or-so; some steady "greying-out" of the To Do list above.
The clutch is now re-ftted - I left the original cap-head bolts up at the dyno, so a quick order placed for a new set and it's now on and ready 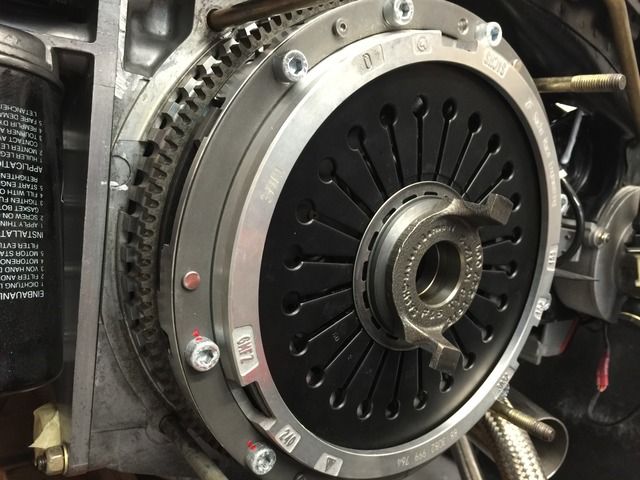 A rather large bag of assorted items went over to my plating shop late last week...plus another visit over the weekend to drop in a forgotten item.....and a 3rd trip on Sunday for 2 more items that escaped my attention! It's all back now, collected this lunchtime and looks great. A whole load of gold passivate plating..... 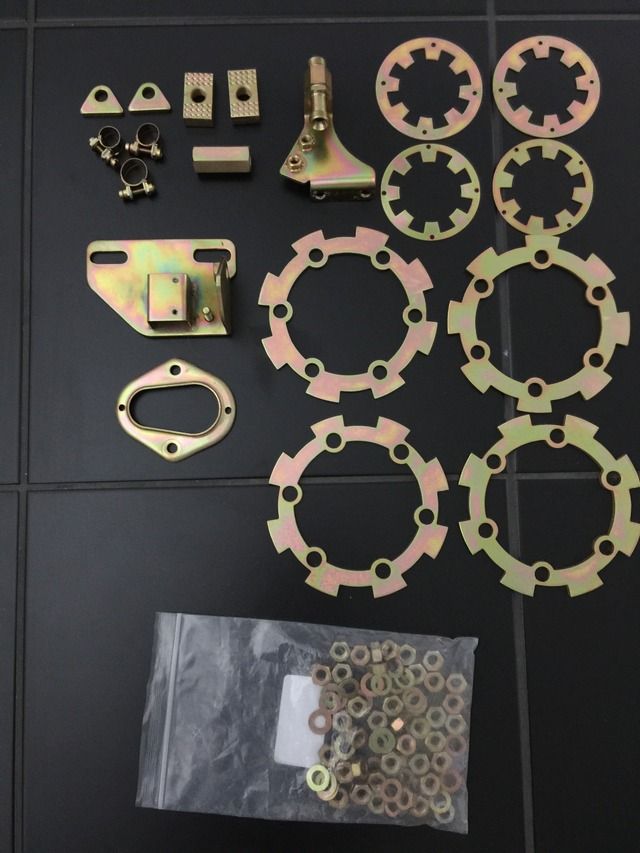 And some black anodised items; the inlet tract bracket, the fuel pressure mount and some assorted spacers that are used on the sensor bracket....black, black, black.... 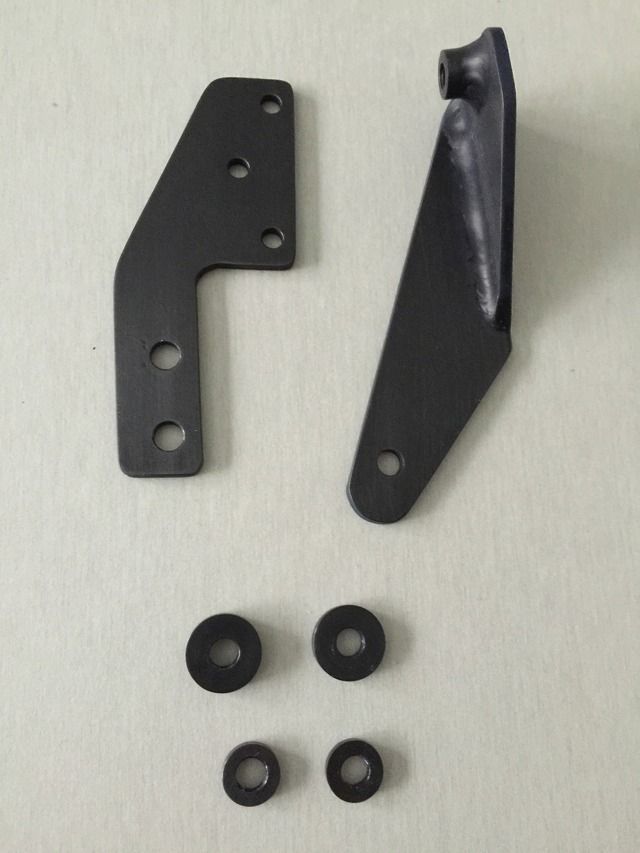 The shortest shopping list for a long time is now with OPC Tonbridge; just a new clutch line that runs up to the flexi hose to the slave cylinder, plus a new power steering pump reservoir > pump hose. I'm sure the original's fine but knowing how flammable PS fluid is, and the fact it's now over 20yrs old...and that I've replaced all other hoses....OCD time... New hot air ducting hoses are on the way, as is another length of vacuum hosing to replace some of the vacuum lines that are just a little too tight for my liking. This weekend I should have chance to really crack on with some of the items on the list. Question to those who have done this before....the front stub-axle nuts, M22x1.5....they're not a nyloc nut, rather a deformed thread. I need to remove the front hub assembly in order to fit the traction control timing wheels. Can these M22 nuts be safely reused another time? They're £19 each, not a problem if they were going to remain on there for years to come, but Phase 2 of this project will be to do a complete rebuild and refresh of the suspension, so they'll need to come off again in the near future. Just seems a waste to go over-the-top and buy new ones if nobody else does. (Of course, if they are strictly a one-use item, then they'll get replaced each time....) |
||
|
05-14-2015, 08:10 AM
|
|
|
Registered

Join Date: Mar 2005
Location: Phoenix, AZ
Posts: 2,862
|
One time use in our experience.
Wouldn't want to trust used ones, and wouldn't want to try to make them "safe" with threadlocker (even more of a nightmare to remove later!)
__________________
Chris Carroll TurboKraft, Inc. Tel. 480.969.0911 email: info@turbokraft.com http://www.facebook.com/TurboKraft - http://www.instagram.com/TurboKraft |
||
|
05-14-2015, 02:55 PM
|
|
|
Kartoffelkopf
|
Ok, cool, thanks Chris....no half measures....

|
||
|
05-14-2015, 03:13 PM
|
|
|
Kartoffelkopf
|
Spoke with the guy at Burgaflex, the company looking to make my custom AC lines - very helpful, and it looks like my brainwave idea may indeed be the easiest and most cost effective way to achieving the re-routing project.
In short, my plan was to use both sections of hard line on both hoses, but remove the 100º bend on each, then join each section with a short length of barrier hose. A quick mock-up to show what I'm on about.... 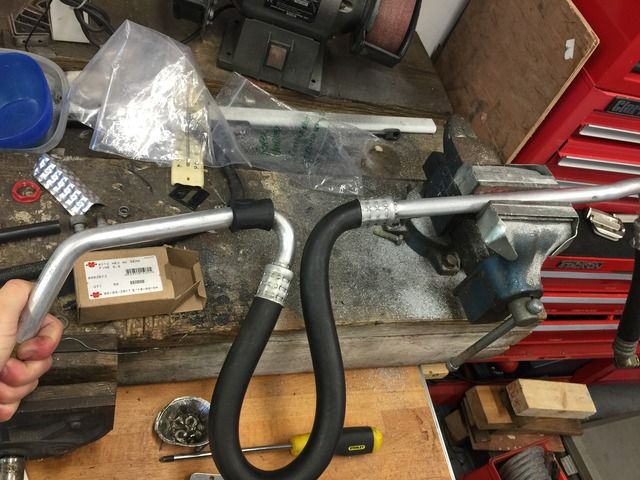 So this evening I set about chopping off the middle section of rubber hose, leaving the bare ends of each. Somehow I thought the swage "collar" would be more pronounced than this, although I guess the pressures aren't massively high, so perhaps no need... 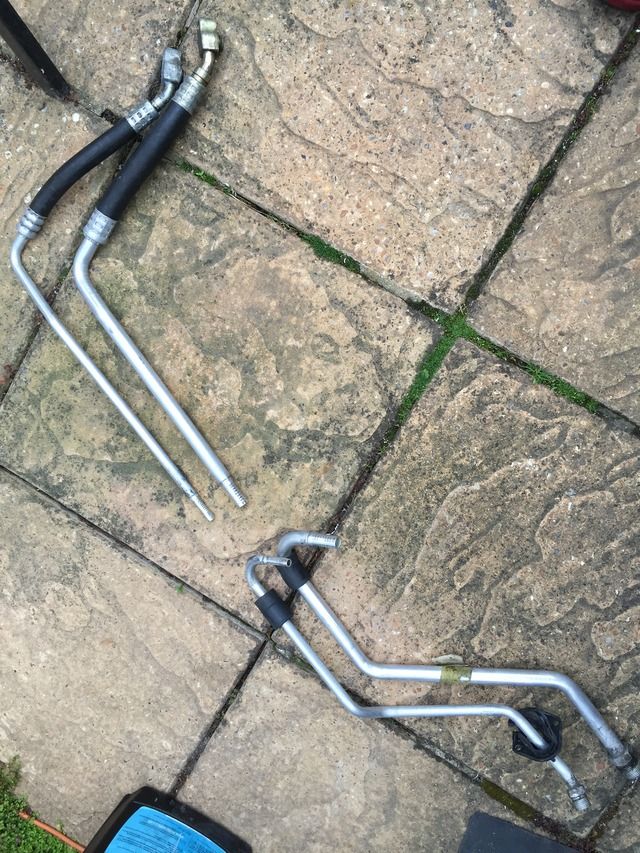 Ill take another pic tomorrow once Ive got it in-situ for measuring. The only part then left to think about are the terminations for mounting it to the Denso pump. Apparently we'll most likely be able to re-use them, but they make need chopping and brazing. If this doesn't work, then time to order the new manifold which will present the connections at the back of the pump instead of on top. Last night I also bolted back together a lot of the parts that came back from plating; the fuel pressure regulator is now back in place, looking pretty factory-like with its black and gold passivate hardware....  The front IC mounting bracket also now back in place, hose clamps on and ready for engine installation. |
||
|
05-15-2015, 02:21 PM
|
|
|
Kartoffelkopf
|
Gearbox oil drained - this was freshly filled using Millers 75w90 before I took the car off the road 4yrs ago, however, the shift quality was noticeably worse than whatever oil was previously in there. The trouble was, I didnt know what the previous owner had used (I changed all fluids when I bought the car). It's been at the back of my mind to change it, so its the perfect opportunity before reinstalling everything.
After posting a few threads and doing some research, the final decision with which oil to use was made when a recommendation of a secret formula was made by a mate The gearbox lifted up on axle stands so I could drain it..... 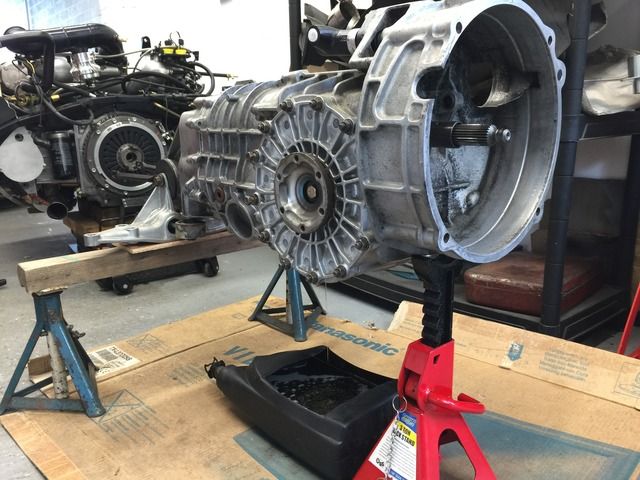 Then an additional hand courtesy of some old washing line; a bit Heath-Robinson, but it did the trick...stank like hell, the usual God-awful stench of transmission fluid (which my daughter loves .which is weird) but with a hint of coconut. 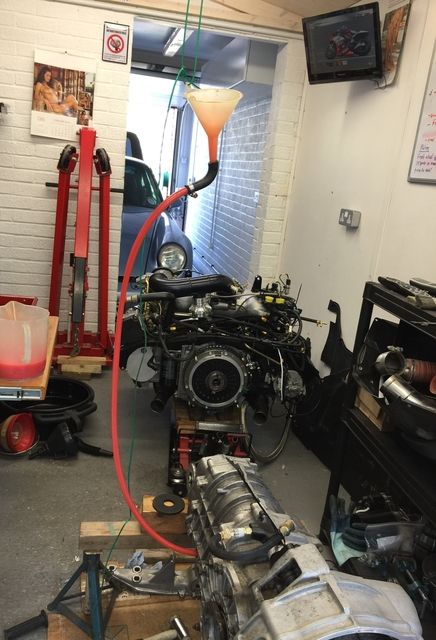 I had a load of spare M8 nuts and washers re-plated with last weeks batch, with the intention of replacing all of the gearbox nuts and smartening it up a little. Rather than half-do it, I decided to remove the stabiliser rod/damper along with the associated fixings, and I'll get them re-plated next week. Hoping they can do this without having to remove the rubber innards. I had a cunning plan this afternoon; I have a load of Goldline rosejoints in my parts bin, really nice high quality ones from a previous project; it occurred to me that with the upgraded power unit mounts (gearbox tail mount using the TurboKraft item, the 964RS engine mounts and the Goldenrod shift linkage), whether it may be worth using a rosejoint to replace the stock stabiliser bar? Its a lot heavier duty than the diameter of the stock unit (they were previously used on unequal length wishbone mounts). Stock stabiliser bar ---> 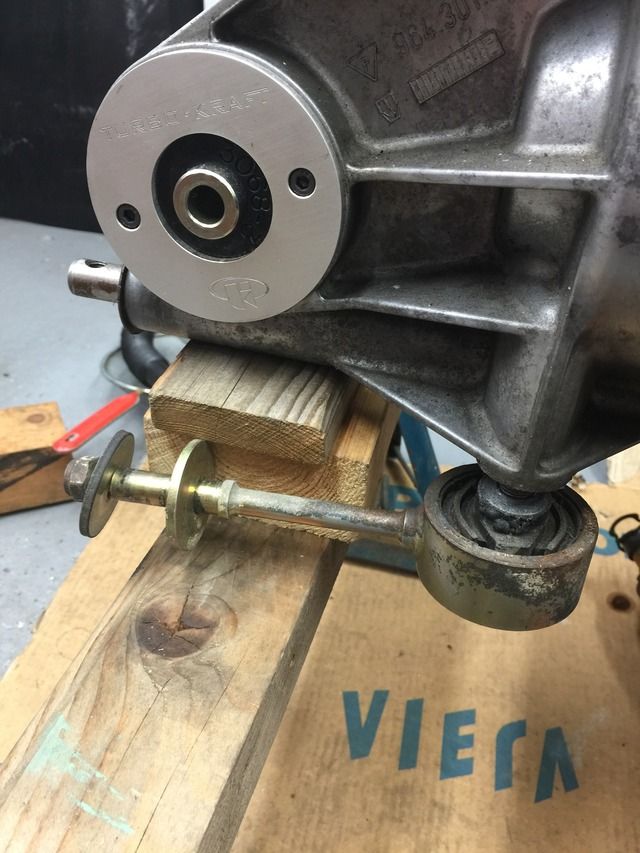 Use of a rosejoint instead (plus a spacer to obtain the correct distance from the housing) ---> 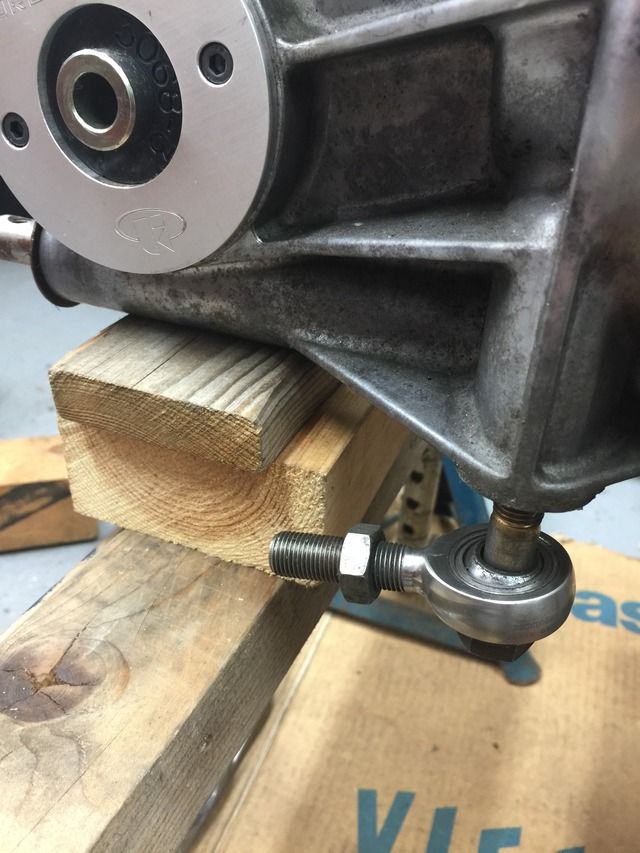 Ill probably look to retain the rubber mounts where it installs into the cross member, otherwise it becomes a solid mount and likely to really increase the NVH. Has anyone got any experience of doing this kind of thing? Am I doing a really stupid thing in terms of stressing the gearbox case? |
||
|
05-16-2015, 04:03 PM
|
|
|
Kartoffelkopf
|
Sunny weather = BBQ plus 2 live feeds of the Nurburgring 24hrs + beers
So, the last job of the evening was to remove the rear bumper beam supports.
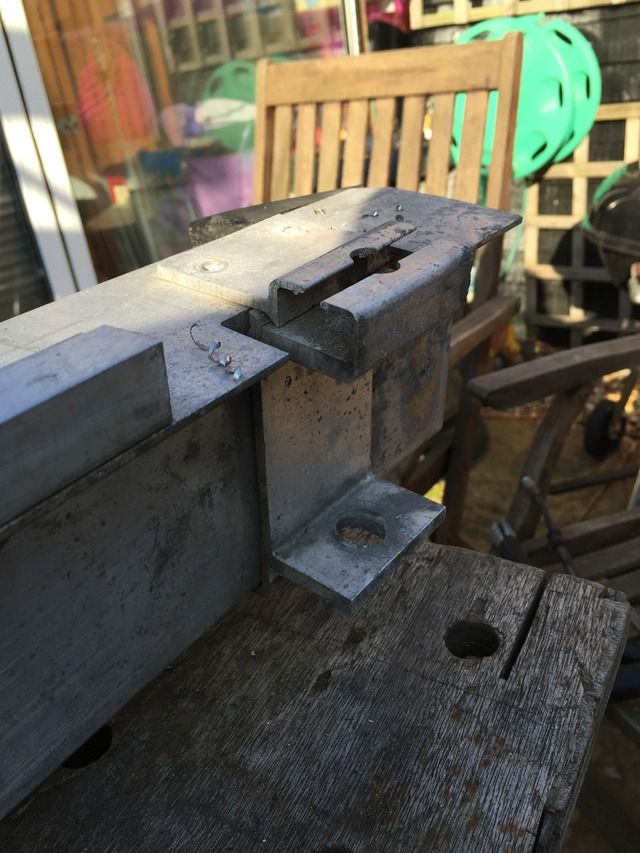 The rivets holding each mount onto the beam are big, so I was anticipating an absolute pig of a job to remove them as the centre stems were flush with the rivet head. So in order to get them out, some accurate centre punching and careful drilling .however ..after doing exactly this for the first one, which went well, I then discovered that using a parallel punch of exactly the right diameter, a swift thump knocked the steel centres right out, just leaving the heads to drill off. Once the heads were off, another carefully selected punch from the arsenal was used to drive out the core. Easy! Within 20mins, I had all eight removed. 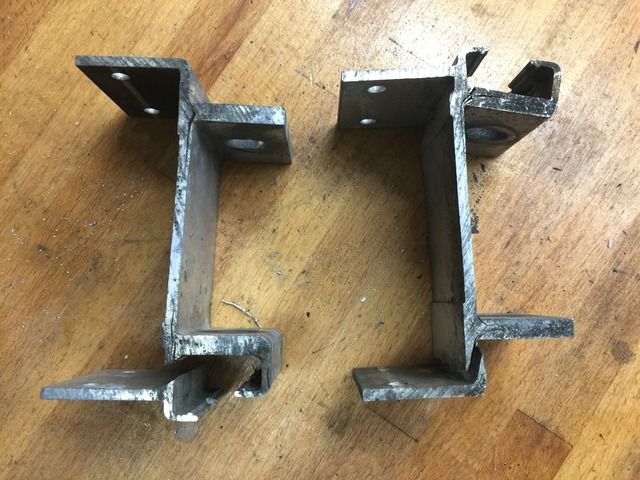 The brackets were so heavily corroded that they fell off, each one breaking into two pieces. No idea how the bumper assembly even held in place when it was on the car; bit scary actually, the whole unit could easily have parted company on the road. Im undecided how to now make-good the beam; I can do a similar procedure to remove the black plastic buffers, then either vapour blast and anodise it. Another option (with the buffers removed) would be to powder coat it; no need to vapour blast it, the powder coating shop always media blast items in-house before coating. Powder coating is preferable, but would just need some handling care when the new mounts are fabricated....will think about it overnight, no rush. |
||
|
05-16-2015, 04:07 PM
|
|
 |
|
|
| Tags |
| 964 c4/c2/turbo , efi conversion , life racing , syvecs , turbokraft |


 930
930 1993 Porsche 911 (964) Turbo 3.3
 2006 Lotus Exige Cup 240 (#45 of 50)
 BMW M2 Competition
 BMW R1250 GS Rallye HP
 Ducati 748R
 1983 Porsche 911SC
