|
|
|
|
|
| Author |
|
|
Registered
|
Quote:
 My exhaust ended 
|
||
 10-05-2014, 04:02 AM
|
|
|
Kartoffelkopf

|
Bit of a relaxing days work today...some steady progress and because it's been great weather here today I was able to get the car rolled out of the garage and get another paint job done.
The aim today was to get the front end sorted so that I can then get the bumper back on. The A/C condensor needed bolting in properly, along with cross braces. The wiring harness was fixed back in place (had to rob a round connector clip from the engine bay, must remember to buy a new one to replace it with), rubber bobbin cleaned up, fasteners loctited and all Waxoyled. Now that the oil lines are back in, the drivers side sill (rocker) trim has been refitted. Easy job, but a big and easily damaged part out of my home office. I noticed that the underside of the return lips on the front wings, which have spire clips in place to attach the bumper, were both quite rusty. Obviously some water had got between the metalwork and the rubber seal that sits between the metal and the bumper. The drivers side, strangely, had also been buckled slightly, but seeing as I was removing the rusty clips and rubbing it back for a respray, it was easily bent back out. Some zinc primer, 2x coats of colour and 2x lacquer and it's all good again. 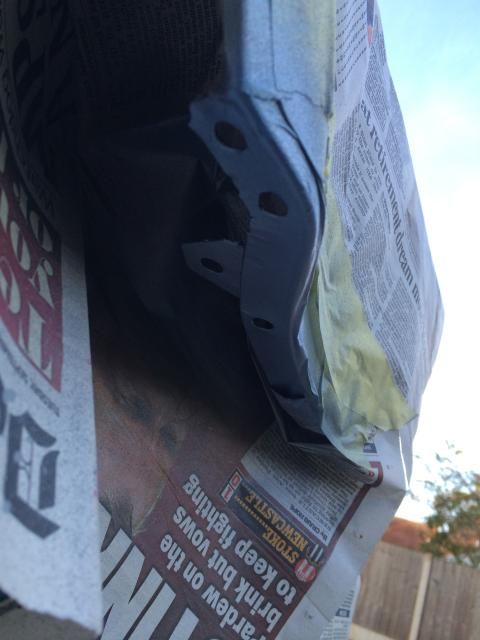 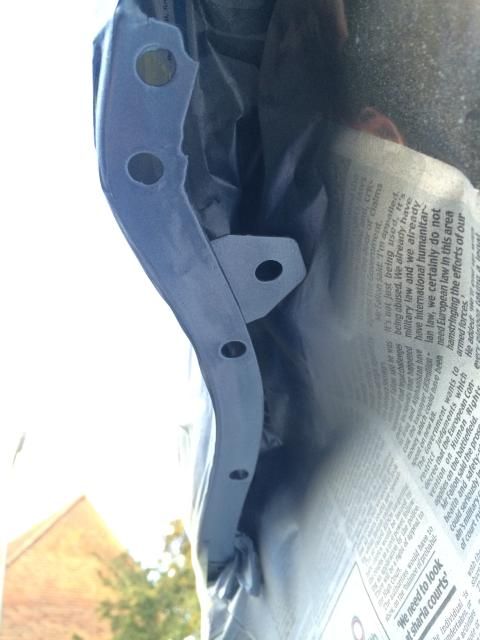 Just about got this done before losing the light, but I think I'm now in good shape to finally get the bumper reinstalled....subject to maybe opening out the dummy RS-a-like air ducts. A quick job with a die grinder if I decide to do it. Got the passenger seat removed and stashed in the house, so I can start removing all the unnecessary electronics from under the mounts. Got some of it out but scratching my head with regards to the Porsche immobiliser....it has a Porsche part number, but has been installed at the dealer, as the harness is wrapped in insulating tape, not the factory cotton tape. I think it wires into the Jetronic management system, which clearly I don't need any more, but whether it can be extracated as a whole, or whether I need to start splitting the harness(es) I have no idea yet. Looks like my new stuck down carpets may lift up ok, with some gentle persuasion. Started working the sections around the front seat and tunnel, and it's coming up ok without any stretching or tearing. Once that's done, the second half of the harness can be put in place. At the end of next week the rear blower fan housings should be finished at the powder coaters; that'll be an easy job to rebuild and refit with the freshly replated bracketry. Sorry, not a hugely interesting update, but quite a rewarding one from my perspective, always nice to know that the time spent doing the preventive maint with rust is always time well spent. Unfortunately, am away again for 3 days next week in Prague, so not going to be any progress until next weekend probably; stay tuned! |
||
|
10-05-2014, 12:31 PM
|
|
|
Kartoffelkopf
|
Rear Blower Fans - Refurb Pt1
Evening all,
Time for a quick check-in. Per previous post, been a hella 3 weeks so not a lot of progress. However, the odd few minutes I have managed to grab in the garage over the weekend and this evening, have meant I've been able to finish off the rear blower fans refurbishment. This is what they looked like when I removed them ---> 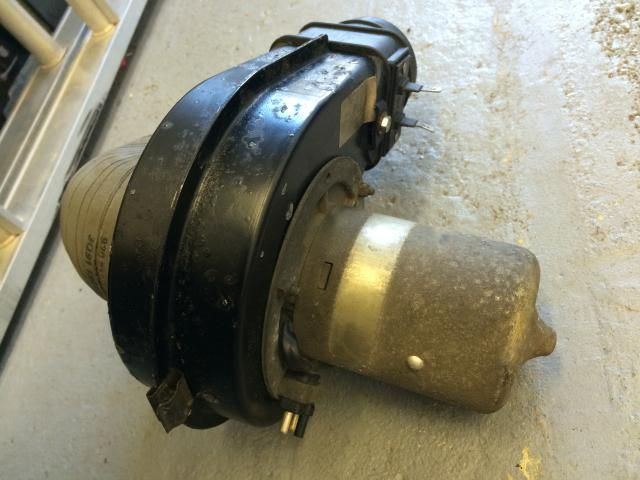    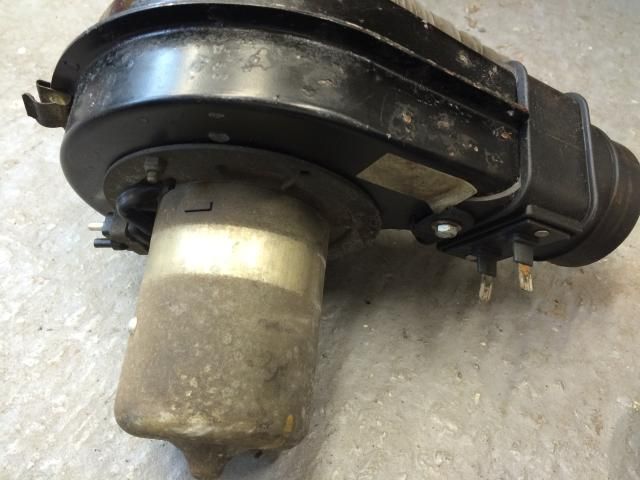 So, some stripping down was easily done once I sussed that the impeller needs to be removed to reveal the screws that hold the motor casing on. Wire brush the motor housings with the angle grinder, ready for painting. The fan housings were just sent straight out to my powder coating shop for incineration, bead blasting and coating....... |
||
|
10-13-2014, 03:39 PM
|
|
|
Kartoffelkopf
|
Rear Blower Fans - Refurb Pt2
I collected the powder coated housings the other day....another exemplary job from Windridge Coatings --->
 ....like new again. Armature and housing degreased (although the staining in the aluminium makes it look dirty still...rest assured it isn't) 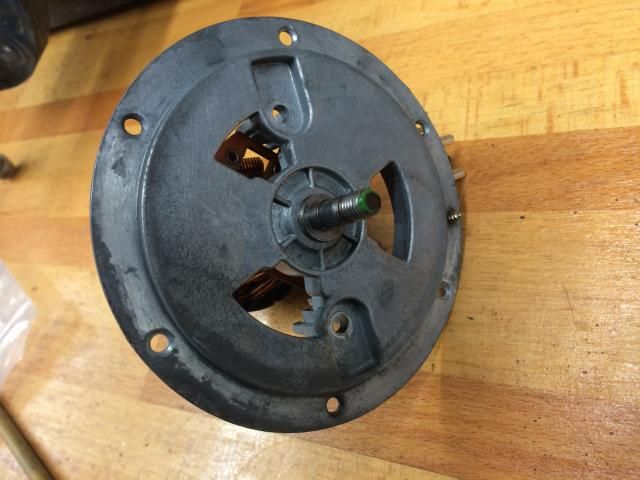 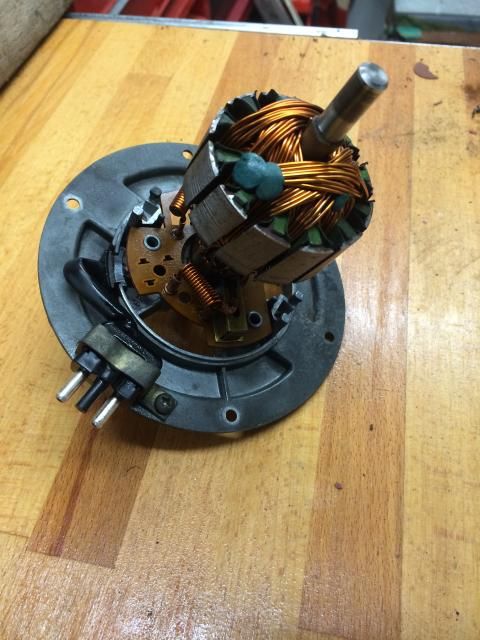 The motor casings have got the magnets fixed to the inside using spring plates and rivets with lock washers; didn't fancy removing them and risk something breaking so I decided to clean out the dust and muck from inside, wire brush the outer plated surface, etch-primer, paint and 2x lacquer coats for hopefully a durable finish --->  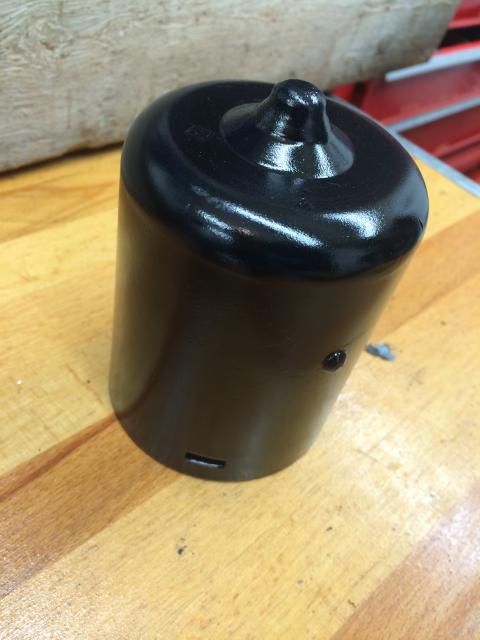 Plastic end caps that house the thermistor were thoroughly cleaned, the impeller refitted to the armature, then all reassembled with new nylocs. The stainless elbow on the plastic section is a new part from Porsche; for some reason I had one stainless item on the other fan, and a mild steel one on this fan. The steel one was rotten as hell, but thankfully was the cheaper of the two! (A lot cheaper).  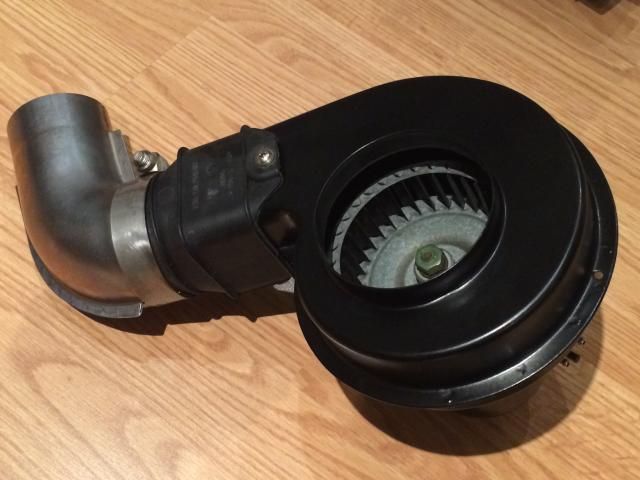 The passenger side (LHS) fan has the 90deg rubber elbow, which cleaned up great --->    The drivers side (RHS) joins onto the black 90deg rubber elbow that is fixed to the rear RHS corner of the engine bay...I think....been a long time. All the fan fittings were re-plated a few years ago, so time to dig them back out again and get the fans bolted back onto the car (maybe tomorrow evening). Another job off the list. |
||
|
10-13-2014, 03:41 PM
|
|
|
Kartoffelkopf
|
Rear Blower Fans - Pt3
Time to refit everything....eventually found that long-lost stash of fixings, clips and brackets:
 The RH side fan; for anyone doing this in the future, don't try bolting the two halves of the mounting bracket onto the chassis first, then mounting the fan onto the bracket...not enough room to manoeuvre it into place. Blower needs to be mounted on the outer bracket first, then the bracket bolted to its counterpart that's on the chassis. Still a wrestle to get it in without damaging the paint on the motor and get it into the 90deg rubber hose that goes through the inner wing, but it's do-able. 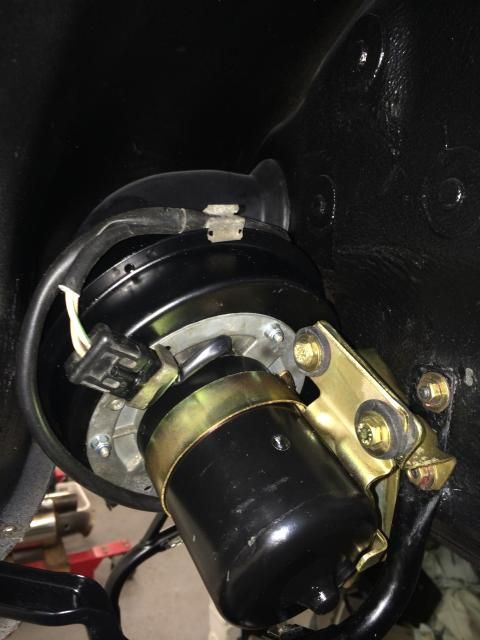 The LHS blower, by contrast, almost bolted itself into place. Just loosely bolted into place for the time being, until I can get the engine back in with the hoses hooked up. Until then, the positioning is just guesswork. 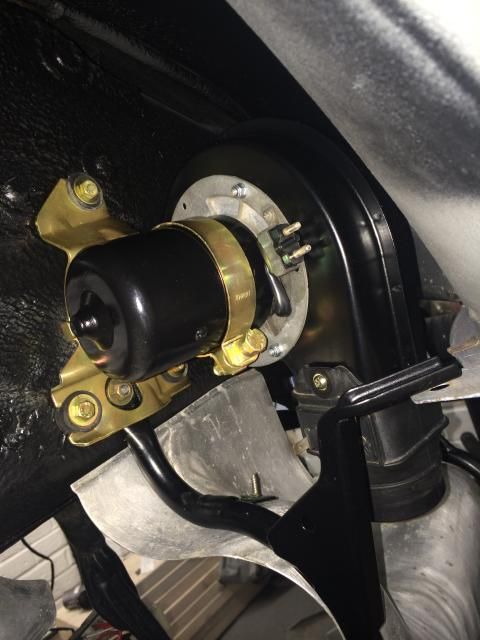
Last edited by Spenny_b; 10-20-2014 at 03:00 AM.. |
||
|
10-20-2014, 02:43 AM
|
|
|
Kartoffelkopf
|
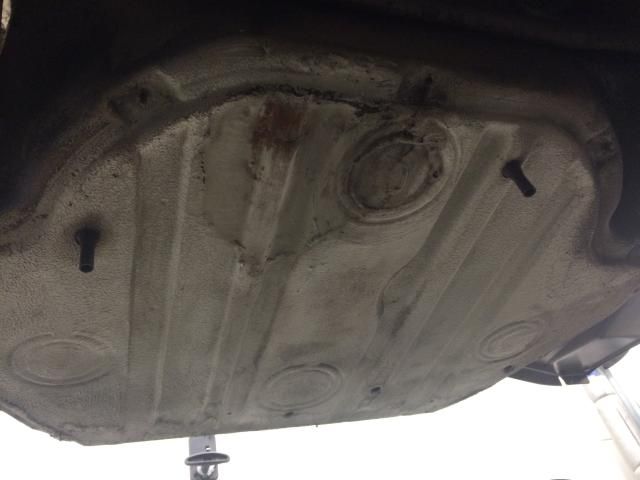
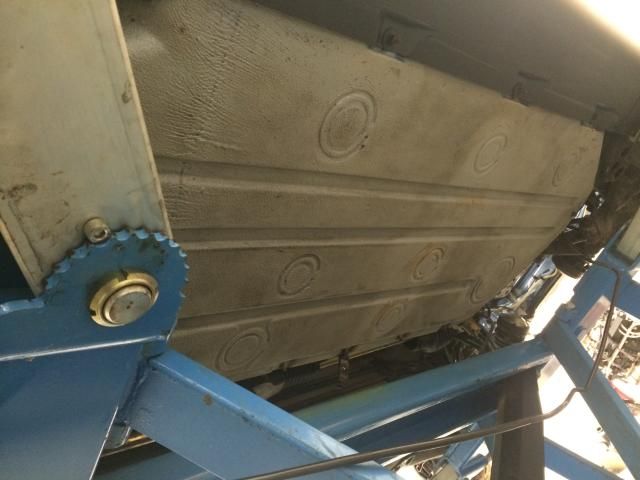
A job I've been meaning to do for a while is finish off the cleaning of the underside...filthy job, upside down and getting neat Gunk dripped on you, ain't my idea of fun, but hey, it needed doing and now looks pretty good for a "first-pass"....socially clean...great to see that there's no tin-rot, just one very small spot on the underside of the frunk that needs some light attention with a wire brush.
   What spurred me on to finally get this done, is to get the front fuel pump area cleaned and ready for installing the new Bosch 044 pump and related plumbing. White spirit is a pretty good solvent for removing the horrid brown Dinitrol that the factory seem to daub everywhere/anywhere. Pump recess area is again immaculate and box-fresh ---> 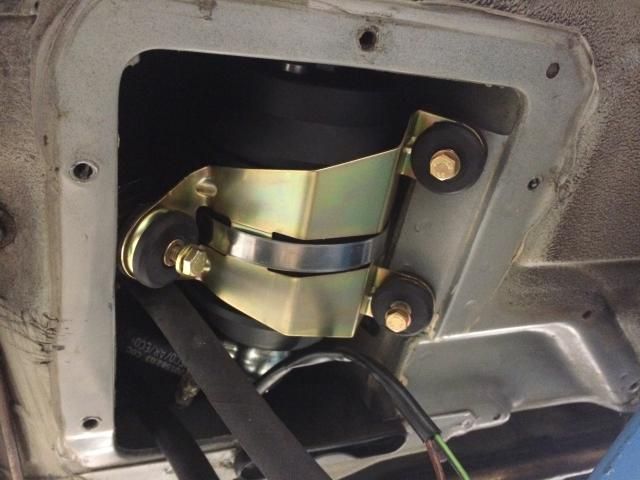 The new pump is now in it's cleaned up rubber damping sleeve and attached to the freshly replated mounting bracket ---> 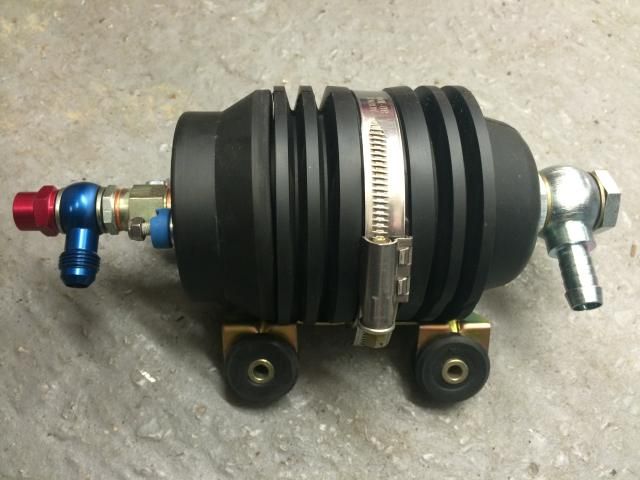  Initial placement of the pump into the chassis to see how the feed into the pump will work; the new feed hose from the tank outlet filter was not going to work as-is...too much of an "S" bend to mate onto the pumps inlet banjo without kinking the hose when the pump was bolted into place - clearly not going to work. A quick chop of the hose to make is more "L" shaped and I reckon it'll be fine (you can just about see it in the bottom right corner of the recess, with printed p/n) ---> 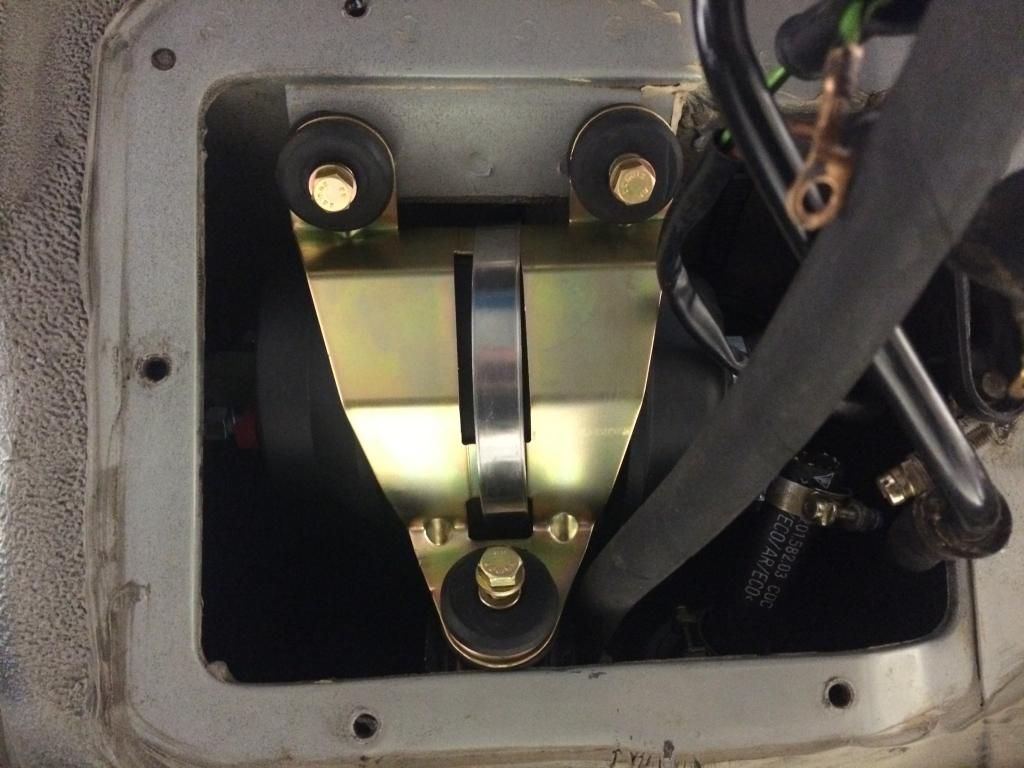 The other end of the pump is pretty tight up against the wall of the chassis; the red anodized cap at the end of the non-return valve having just a few mm clearance. Maybe a quick realignment of the pump on the carrier bracket will sort this out (not the best photo but you can just about see) ---> 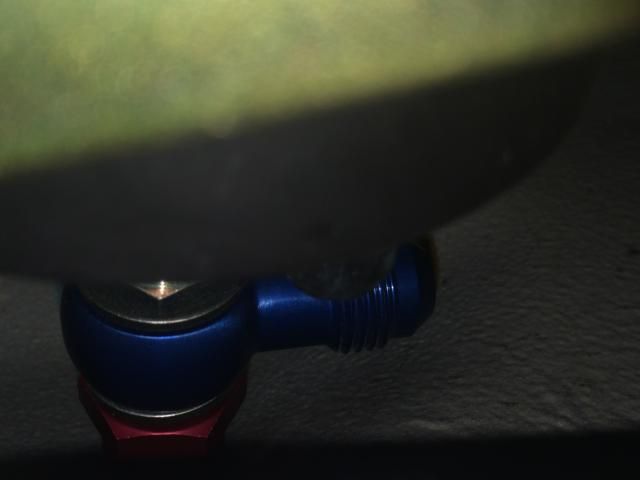 Just waiting for a delivery of a load of stainless steel P-clips (hopefully today), then I can run the feed and return lines to the engine bay. The rear pump and filter are (again) loosely in place for positioning purposes so I can make the link hose between the two, once the long runs have been cut out of the length of -6AN hose I have.  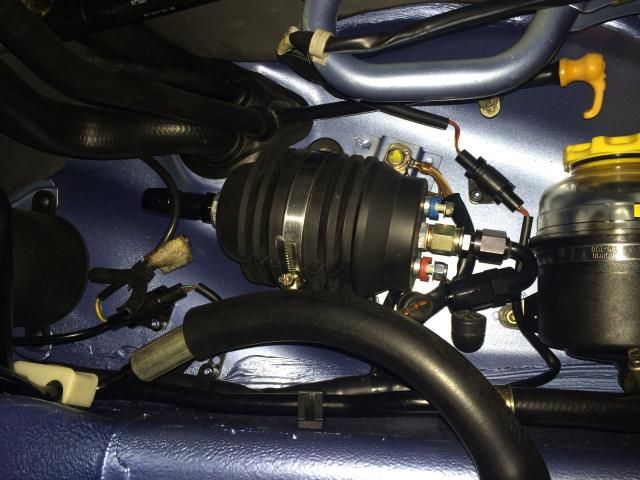 Next job is to to fit new electrical terminals onto the harness for both pumps; the 044's have larger diameter binding posts. Only a quick job to cut and crimp on some new ones...will probably take me longer to drop the car off the lift so I can get in the loft and retrieve my box of electrical fittings. Last edited by Spenny_b; 10-20-2014 at 09:09 AM.. |
||
|
10-20-2014, 02:45 AM
|
|

|
|
Registered
|
Hello Spencer, continue like that!
|
||
|
10-20-2014, 07:53 AM
|
|
|
Registered

Join Date: Mar 2005
Location: Phoenix, AZ
Posts: 2,862
|
Spencer,
Looking amazing, friend! You can shorten both fuel pumps by removing the spacers on the pumps' outlet side. Buys you a fair amount of clearance in the front trunk compartment, and more room on the rear pump so the AN fitting doesn't hit the PS fluid reservoir. On the front pump, you can use a 12mm barbed inlet fitting (ex: on TK website) and then stock tank-to-pump hose can be reused. Probably higher flowing than a banjo on a low (no) pressure fuel feed circuit.
__________________
Chris Carroll TurboKraft, Inc. Tel. 480.969.0911 email: info@turbokraft.com http://www.facebook.com/TurboKraft - http://www.instagram.com/TurboKraft |
||
|
10-20-2014, 10:55 AM
|
|
|
Kartoffelkopf
|
Quote:

|
||
|
10-21-2014, 02:11 PM
|
|
|
Kartoffelkopf
|
Boom!
I went across to my harness guy this evening after work; two reasons, firstly to sell him my old MacBook Pro (!), secondly to do some more testing on the loom. Stupidly, I forgot to take the 4 x Ignition Amplifiers over with me the last time we tested it, so although we could test the sensors, we couldn't test the sparks.
So, with everything hooked back up again we set about modifying an old plug (removed the GND electrode) and using an earth that we could move away from the plug to see how far we could get....we got to about 11.5-12.0mm! We then put 2 x amplifiers in the circuit with 2 x plugs, simulating what one cylinder would see. Each plug is fired from a different amplifier, for availability and duty cycling. If one amplifier blows, the cylinder still has one plug to fire the mix. By grouping them with some thought, we can also ensure the duty cycle of any one amplifier is minimised. So this is what we found...you wouldn't want to be on the receiving end! After that, we then removed the earthing bar and replaced the test plugs with the correct Denso iridium items....nice big purply sparks.... All-in-all, very encouraging as this was a slight "unknown" (well, not really for Steve @ SBD or Simon @ Sileck) but for me it was very similar to the setup I had on the Westfield, albeit using different CoP's and triple not double amplifiers. Hopefully it's beneficial to everyone as another way of tackling ignition. Last edited by Spenny_b; 10-21-2014 at 05:53 PM.. |
||
|
10-21-2014, 02:42 PM
|
|
|
Kartoffelkopf
|
By the way, if anyone wants to know the combination of parts I'm using for the above ^^, it's:
12 x Denso Coil-on-Plug units - speak to Chris @ TurboKraft 4 x Bosch Ignition Amplifiers - 3-channel per unit (part number on the unit in pic) 12 x Denso Iridium IW24 spark plugs 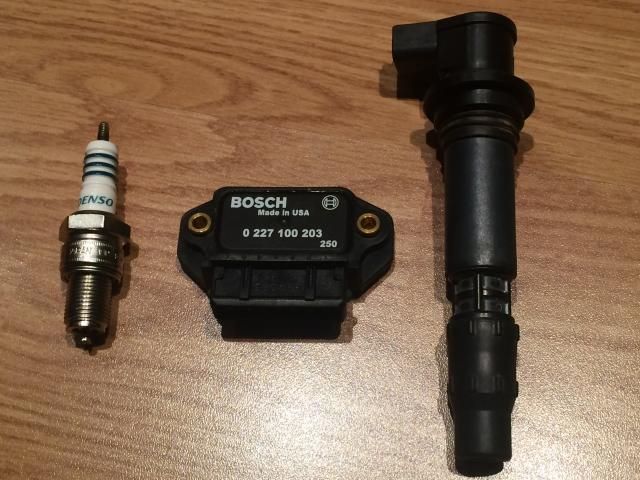 The MBE 9A9 management unit is, by default, shipped to be able to drive the CoP's directly, but not 12 of them! (think they're limited to 8 or maybe 10 ignition outputs). So, MBE made me a "special" unit with different drive outputs, that allow connection to external amplifiers like the Bosch units above. |
||
|
10-21-2014, 05:50 PM
|
|
|
Registered
|
It is nice Spencer that you make the effort to give details and references of your project for those who ask themselves questions, I am sure that you help or motivate many people who would like to cross(spend) in the EFI for them 930/965. As me moreover!
|
||
|
10-22-2014, 01:41 PM
|
|

|
|
Kartoffelkopf
|
Haha, yeah that's what it's all about though, isn't it? I work for an open source software company where the unofficial motto is along the lines of "sharing makes us stronger"...I'm no developer, but I guess this is my little bit of open sourcing
|
||
|
10-22-2014, 02:22 PM
|
|
|
Registered
|
"sharing makes us stronger" Very beautiful quotation! In France on the forums porsche there is in no way the same atmosphere as here, moreover it is for it that I came here. I like this spirit of mutual aid.
|
||
|
10-23-2014, 01:12 PM
|
|
|
Moderator

Join Date: Dec 2001
Posts: 9,569
|
Good show!
Now build a pressurized test chamber with a quartz window so you can observe the spark under approximate cylinder pressure!
__________________
'66 911 #304065 Irischgruen 96 993 Carrera 2 Polarsilber '81 R65 Ex-'71 911 PCA C-Stock Club Racer #806 (Sold 5/15/13) Ex-'88 Carrera (Sold 3/29/02) Ex-'91 Carrera 2 Cabriolet (Sold 8/20/04) Ex-'89 944 Turbo S (Sold 8/21/20) |
||
|
10-23-2014, 01:45 PM
|
|
|
Kartoffelkopf
|
Quote:
 (ok John, I give in....what does it look like under cylinder pressures?) Last edited by Spenny_b; 10-23-2014 at 01:55 PM.. |
||
|
10-23-2014, 01:48 PM
|
|
|
Kartoffelkopf
|
Ahhhh...yes, I see....
This guy has a few vids on the Tube --> |
||
|
10-23-2014, 01:54 PM
|
|
|
Registered
Join Date: Jul 2001
Location: Suntree, Florida, USA
Posts: 2,261
|
Was he literally blowing out that spark with air? Hmm...
I have a question for you (or the group). If there is no idiot light on the dashboard to show that one of the two plugs isn't firing, would it be safer to fire both plugs off the same signal so you know that a cylinder is down rather than allow only one plug to fire and perhaps have a mishap in that cylinder requiring some type of repair? I struggle with the question on twin plugging but have never really gotten feedback from the PP brain trust. |
||
|
10-23-2014, 02:53 PM
|
|
|
Kartoffelkopf
|
Quote:
With the amplifier units we're using, we have the ability to fire 3x CoP's per amp. Bosch do make a dual channel version (I used to use 2 of them on my 4-pot Westfield to fire 1+4, 2+3), but of course, it's going to look messy, add complexity to the loom, cost more, etc, to have 6 x dual channel units for this engine. Simon has grouped the 3 channel units so that we're using 2 of the 4 amps at any one time, to fire a single cylinder; if we lost an amplifier, we'd lose 1 plug from all 3 cylinders on 1 bank....which I *hope* would be noticeable, but again, this is new territory for me. |
||
|
10-23-2014, 06:23 PM
|
|
|
Registered
Join Date: Mar 2005
Location: Phoenix, AZ
Posts: 2,862
|
It is noticeable if you lose 3 or 6 plugs from the upper or lower bank.
__________________
Chris Carroll TurboKraft, Inc. Tel. 480.969.0911 email: info@turbokraft.com http://www.facebook.com/TurboKraft - http://www.instagram.com/TurboKraft |
||
|
10-23-2014, 06:52 PM
|
|
 |
|
|
| Tags |
| 964 c4/c2/turbo , efi conversion , life racing , syvecs , turbokraft |


 930
930

 1993 Porsche 911 (964) Turbo 3.3
 2006 Lotus Exige Cup 240 (#45 of 50)
 BMW M2 Competition
 BMW R1250 GS Rallye HP
 Ducati 748R
