|
|
|
|
|
| Author |
|
|
Kartoffelkopf

|
A quick end-of-weekend update....
Lots of odd jobs done today, nothing which makes for interesting photos really, but good steady progress nonetheless....the above To Do list gets shorter, but then I remember a few jobs that aren't even on the list. So, being the CMO (Chief Motivation Officer) on this project, I'm adding the unlisted jobs and instantly greying them out! Good for morale.... The inside of the bell housing is something that's irritated me for almost 4yrs. When I cleaned the gearbox back in 2011, the outer casing came up pretty well, but by the time I got to cleaning the inside of the bell housing with the seemingly baked-on clutch plate remnants, I started to lose-the-will; I gave it as much of a clean as I could be bothered with and left it for another day. Maybe. So today, in an effort to clear some of the boxes and bags of parts I've got stashed around the house, I assembled the clutch release arm assembly and fitted new guide sleeve screws; the old ones got a bit chewed when I removed the old guide tube. Whilst I was at it, I dug out some aluminium cleaner that I bought years ago, but dismissed as being too much effort (i.e., it didn't work instantly!). A few hours of constant re-appliction and scrubbing, and it's come up very well.... 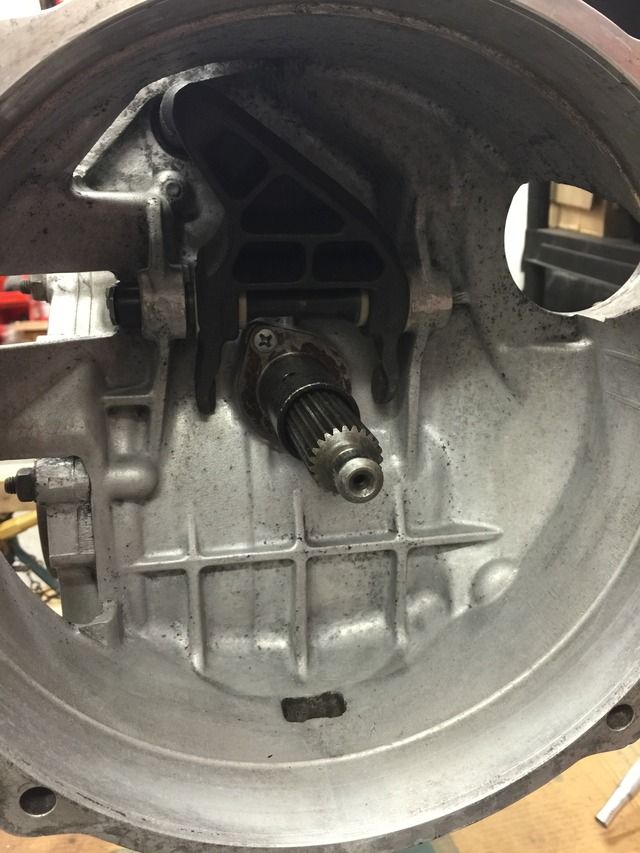 I've just installed the release arm temporarily just to make sure it all fits and get it out of the way; I'm aware that the shaft needs to come out when mating the gearbox to the engine  The re-plated clutch line fitting (M14 female>female) is also now back on the car. Another job I've been meaning to do since last summer, when I last had the rattle cans out, was to repair some corrosion on the underside of the rear arch on the LH side. The return lip where the bumper bolts onto had obviously trapped some water and taken its toll, so time to wire brush it back to bare metal and repaint. Not a huge job, just one that will prevent me from fitting the rear bumper and associated arch liners. All done now, good as new. I've ordered some Raceglaze "AluBright" as well; this gets some really good press in the detailing forums, specifically for ridding fixings of rust when left in a tub overnight, and for bringing up aluminium components to an almost new look. My first use will be on the gearbox case, see if I can get it just a little bit better than it is at the moment, before giving it a coat of clear Dinitrol to give it the long term protection. The AluBright should also prove useful for the future suspension refurb project. Oh, and I gave the garage and workshop a damn good tidy up...been far too long, tripping over the clutter eventually wore thin. So a busy day, just not too much to really show for it! |
||
 05-17-2015, 02:51 PM
|
|
|
Kartoffelkopf
|
Some good progress this evening!
Vacuum hose and the hot air ducting hose arrived this morning.... 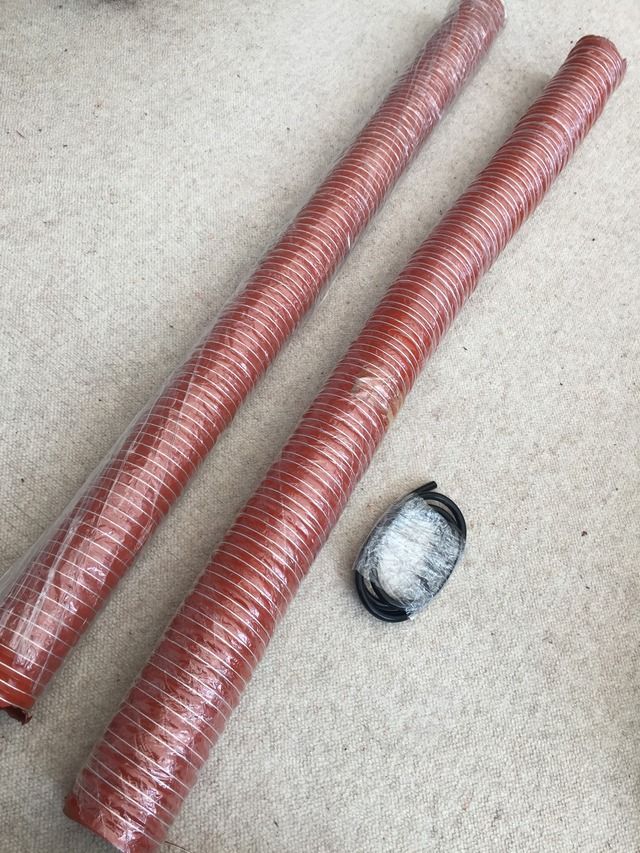 So, quick switch of some of the tighter vacuum lines between the intake and the fuel dampener and FPR. Easy job, another greyed out item. Next job was to strip the bumper crash structure. All going ok until 4 of the jumbo rivets started spinning, but got there in the end without damaging the plastic buffer things. 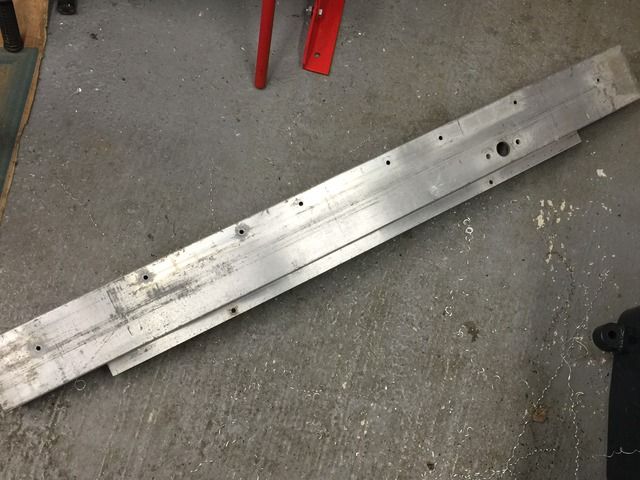 In-for-a-penny, and all that...one of the M6 tapped holes at the end had so badly rotted that the ally was peeling back from the edge. So, time to chop it out and chamfer the edges. I'll make up an infill for welding, then drill/tap before taking it over to be powder coated. 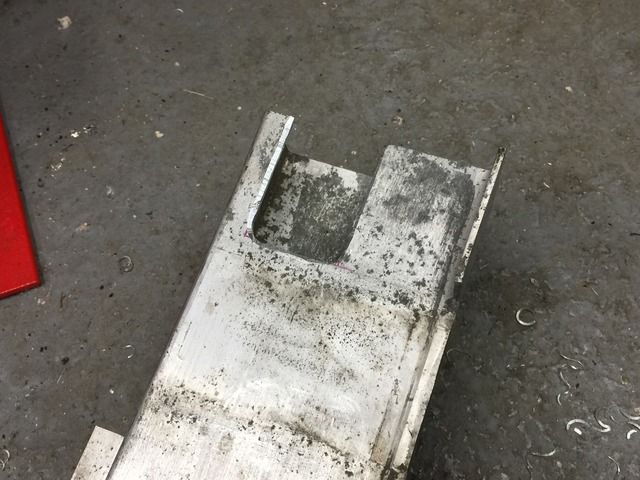 Same hole but the other end.... 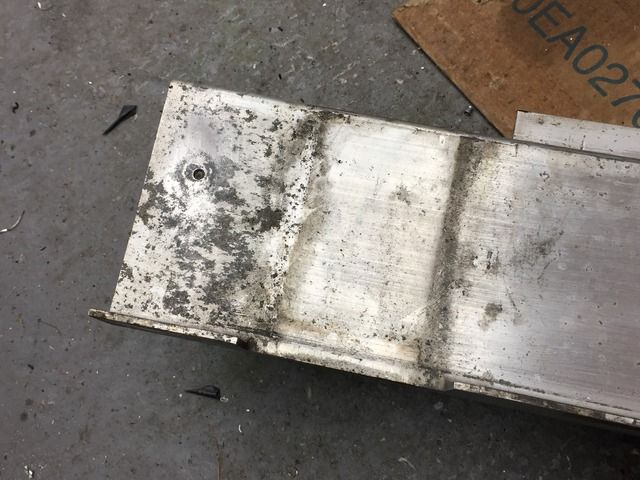 Time to then get on with the transmission stabiliser bar; still not got a definitive answer as to whether a steel part can be replated if there's a bonded in rubber insert...or whether it dissolves it. My plating shop don't know until they try - the trouble is, it's a pretty expensive part to experiment with, so I'll drop over some other rubber bobbins to try with....it all may be an academic exercise if my Plan B turns out OK, i.e., making a new one with a pukka rose joint. First off, a waffer-thin sleeve needed making to reduce the ID of the joint to that of the M12 bolt. Something like 0.5mm wall thickness, but surprising how wobbly it felt without it. It's now spot on to the 1/100th mm. Spacer next; some doodling on the whiteboard.... 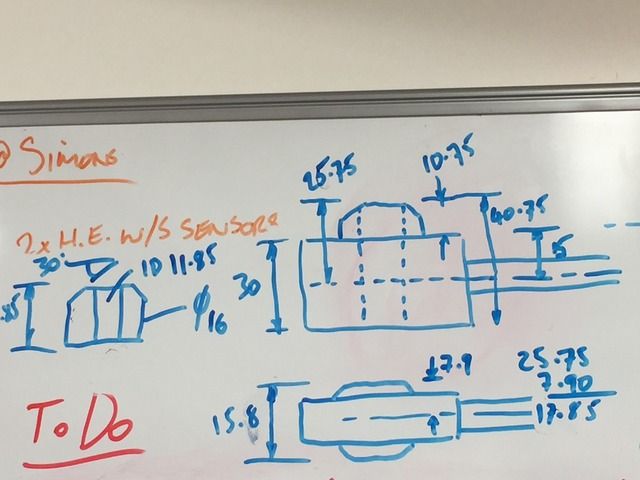 ...and I had the dimensions for the stand-off needed to put the RJ in the correct position.... 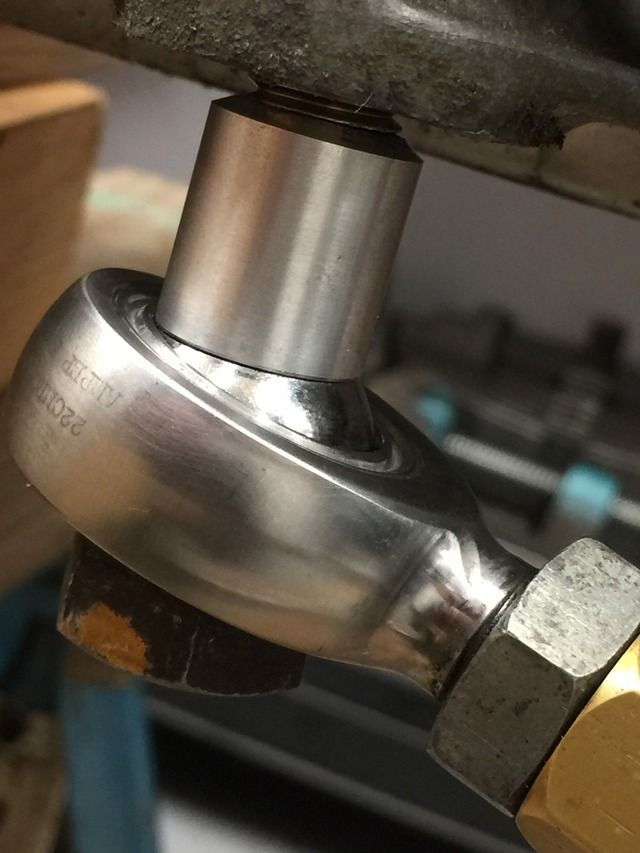 And that's about it for tonight, getting too late to carry on machining, but the next job is to shorten an old steering arm....up-cycling....then make another sleeve for the rubber donuts to slide onto inside the crossmember. Have also been in contact with the AC hosing guy. We have a plan; the reduced diameter of modern barrier hosing, versus the old thick rubber hoses means that the simplest, neatest and most-likely-to-succeed way forward is to chop the rigid lines (what I call the Z lines) before the 100º return bend, swage on the rubber hoses and run them across the bay to the RH side, then forward to the pump. Easy. (Pic of Pauls car from Rennlist...hope he doesn't mind!)  The original clamping bracket will then work perfectly for securing the lines, albeit on the rubber hose rather than solid ally tubing. The only reason I wasn't going to go this route was because of the bulk of the old rubber hose; the (almost 30mm) OD could have interfered with the air filter that will be adjacent to it....but the new hosing is over 6mm smaller in diameter and likely to be a lot more flexible to route. |
||
|
05-18-2015, 03:29 PM
|
|
|
Registered User

Join Date: Jan 2011
Location: North Yorkshire UK
Posts: 77
|
Hi Spenny,
This is epic stuff! A great read, Im going to have to have another go at it though! Quote:
I hope you find it useful.Cheers, Paul
__________________
1980-4 924 Turbo with mods. ex Tony Dron (12th at Le Mans 1980 with works 924 Carrera Turbo); 1984-9 911 SC; 1989-93 911 Carrera SE Sport; 2010- 964 Carrera 2 (project); 2012- Cayenne |
||
|
05-19-2015, 01:48 PM
|
|
|
Kartoffelkopf
|
Haha, thanks Paul! Indeed, very useful, thanks for your help - why Porsche didn't just go for the simple routing option for the AC lines, is beyond me.
Sorry, meant 911uk rather than Rennlist
|
||
|
05-19-2015, 03:56 PM
|
|
|
Kartoffelkopf
|
Another couple of jobs sorted this evening....
1) A fillet for the bumper beam repair was perhaps the easiest job on the project so far - literally took me 2 minutes; it's now with Pete for welding. 2) The bumper mounts (corroded) are also now with Pete for him to fabricate a new pair - probably a few weeks away with his current workload. 3) A call to Simon the wiring loom guy has got a date in the diary for Saturday May 30th; he's going to come over with every tool imaginable, so we can knock this on the head (all the jobs in the indented electrical list on the previous page). 4) The 3" inlet tract is now powder-coated, ready for collection tomorrow lunchtime. 5) The AluBright arrived via courier this afternoon - it stinks, so it must be good. And so it proved to be when I got stuck into the gearbox this evening. Now, bear in mind that I'd already spent HOURS cleaning the casing when I first removed it almost 4yrs ago...this is still way cleaner than it came out of the car, but in true "detailing forum" style, a 50/50 shot.... 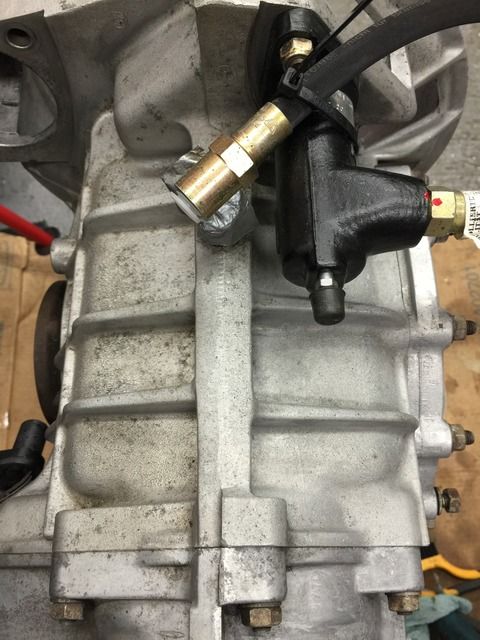 I don't think the photo's really do it justice, in reality it does look a lot nicer. I wouldn't say it quite looks like a factory fresh casing (as some of the "reviews" have said) but I could see it lifting the staining as I applied it. The clean side had perhaps an hours worth of work, keeping it wet and scrubbing with some hard nylon brushes and brass wire brush for the really stubborn spots. The rough cast casing has come up a lot less yellow, so it's clearly removed some of the deep grime. It's also very good at removing surface rust; the case nuts are coming up quite nice, as are the output flanges where the acid has dribbled onto them. AluBright cleaned side ---> 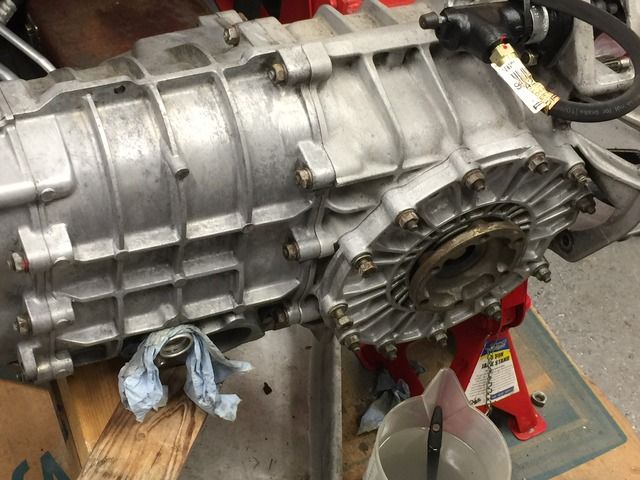 Other side ---> 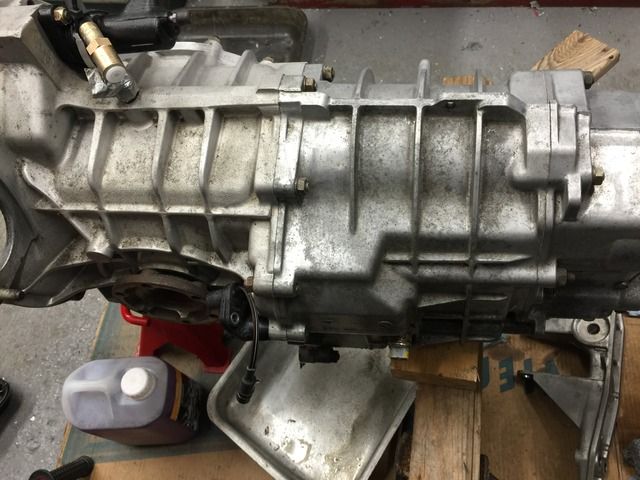 Of course, this is just a filler job and doesn't need to be finished until the 'box is reinstalled, so I'll recommence this tomorrow evening. 6) The job I did need to finish this evening is the transmission stabiliser bar, so that I can drop it off for plating tomorrow lunchtime. Very pleased how this has come out - I really hope I'm not doing something stupid by fitting this, or that it makes driving the car half a step removed from a track car. The gold rod that was a steering arm was shortened and an M10 thread cut into the non rose joint end. A piece of M10 studding was also turned to length, this will be thread locked in place. An ally sleeve was next to be made (13mm dia) for the rubber donuts to sit on. 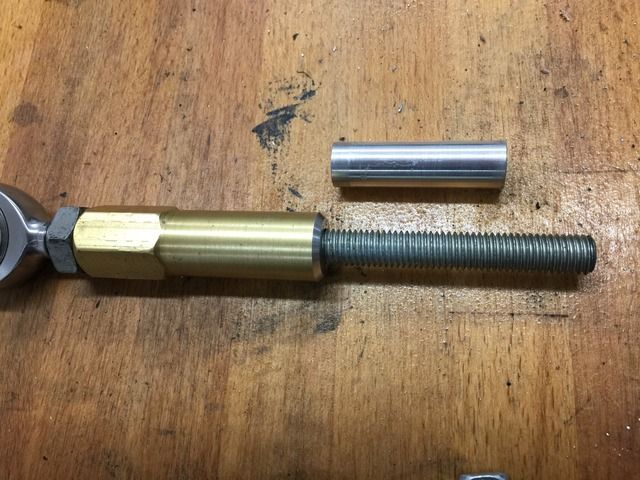 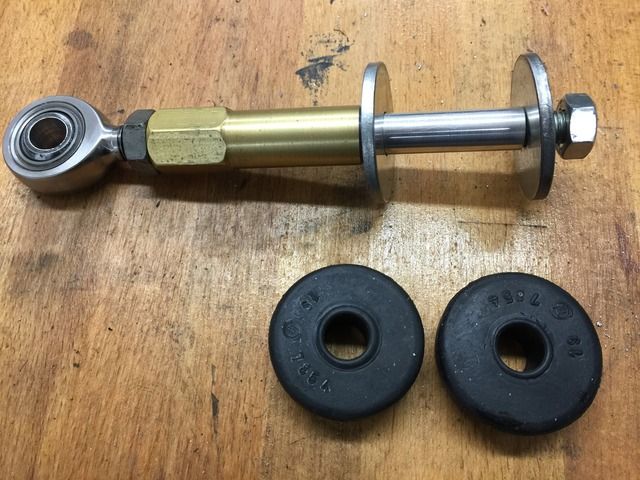 The stabiliser bolted onto the crossmember.... 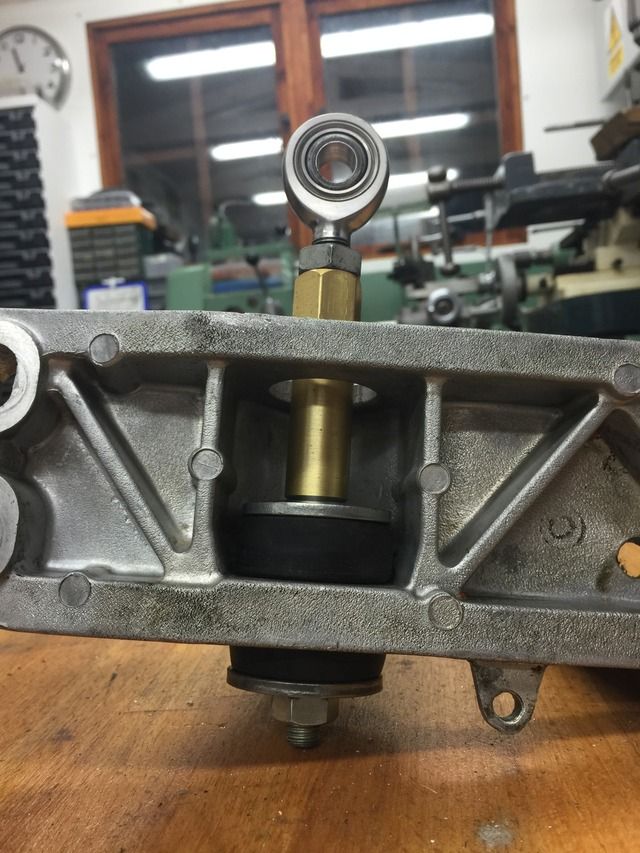 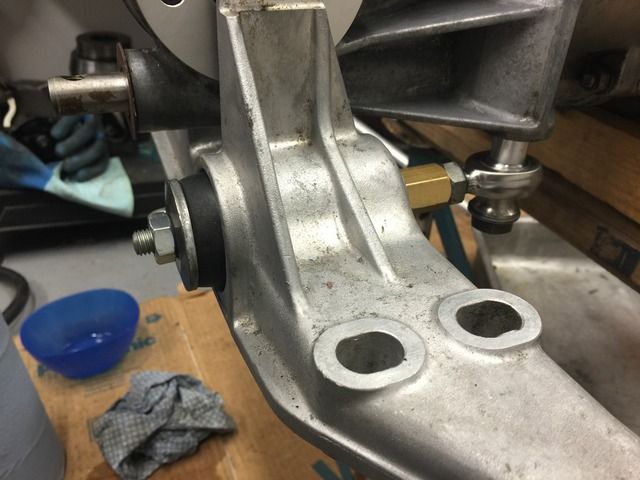 The gearbox end attached.... 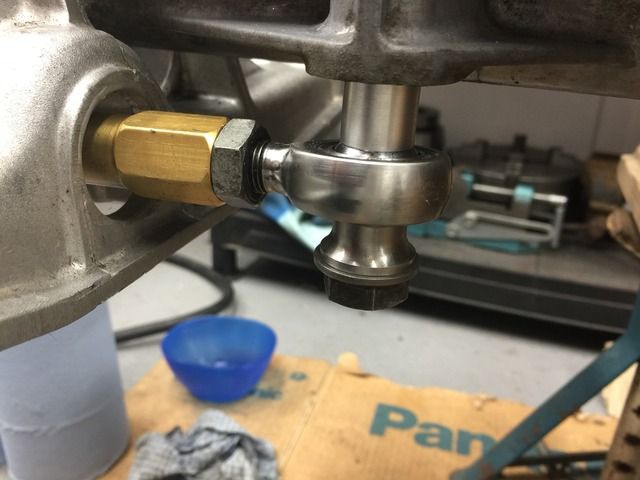 Finally, another piece of up cycling, a spare rose joint spacer that I must've made about 20yrs ago was modified to remove a locating diameter, then bored out to the correct 11.8mm ID. This sits between the bolt head and the RJ, to allow full joint articulation without fouling the bolt head. I also hadn't realised that this bolt is an M12 fine thread until this evening. |
||
|
05-19-2015, 04:33 PM
|
|
|
Registered
|
Hmmm I love DIY
 nice work spenny b nice work spenny b
__________________
Roland 930 Turbo '81 Too many modifications to list |
||
|
05-20-2015, 04:06 AM
|
|

|
|
Kartoffelkopf
|
Quote:
|
||
|
05-20-2015, 10:05 AM
|
|
|
Kartoffelkopf
|
Update for today....
Lunchtime duties were nothing more than driving between workshops to collect and deliver parts; it's a good job I'm right in the middle of everybody, and that each journey is only a couple of miles!...makes life very convenient. 1) Plating items delivered (hopefully will be done before the end of the week; Public Holiday here in the UK on Monday) 2) Structural bumper beam was welded by Pete this morning and is now with the powder coating shop. 3) ...And whilst there, I collected the freshly coated intake pipe. Chuffed to bits with this, it's come out exactly as I wanted, another superb job by Butterworths.  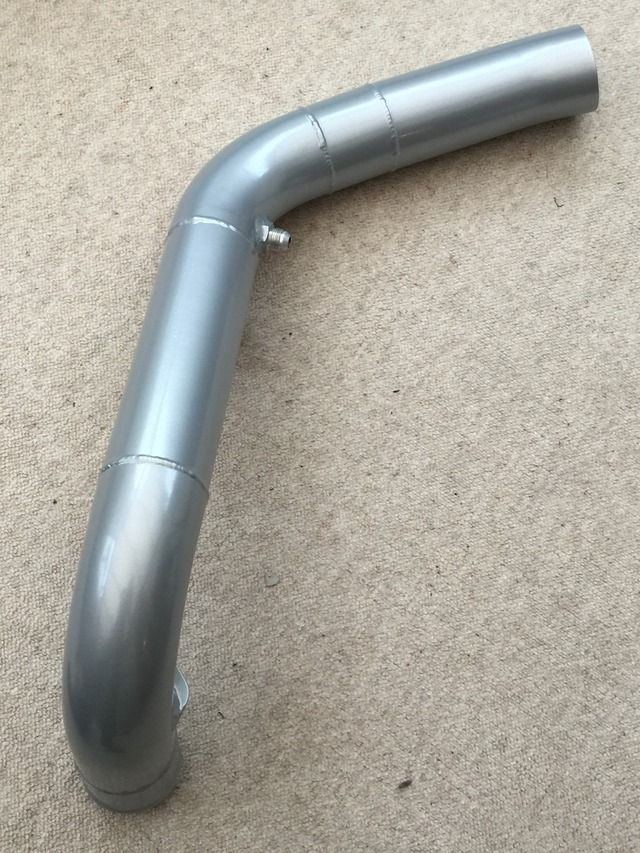 Tonights job is to carry on with the gearbox cleaning...then watch some TV for a change! On the way back home from collecting Lucy from school, we popped in to see our local garage owner, who if you remember from last year (I think I posted some pics?) races a 1983 Williams FW08 in the FIA Historic F1 Championship. The championship comes to our local circuit @ Brands Hatch this weekend, Lucy and I are planning on attending it (along with the VE Day Airshow @ Duxford...very much looking forward to the weekend!!) Richard was great, very encouraging of Lucy having a good look around it, and even a sit in....The car is absolutely immaculately prepared, a real credit to him and the team. Look out for Richard Barber if you follow this kind of historic stuff  At this point, I was chuffed that my daughter had done something that I never have...which is when Richard said I could get in as well! Bloody hell, it's so tight and a long way down. Not quite bathtub-feet-on-taps position, but not far off.... 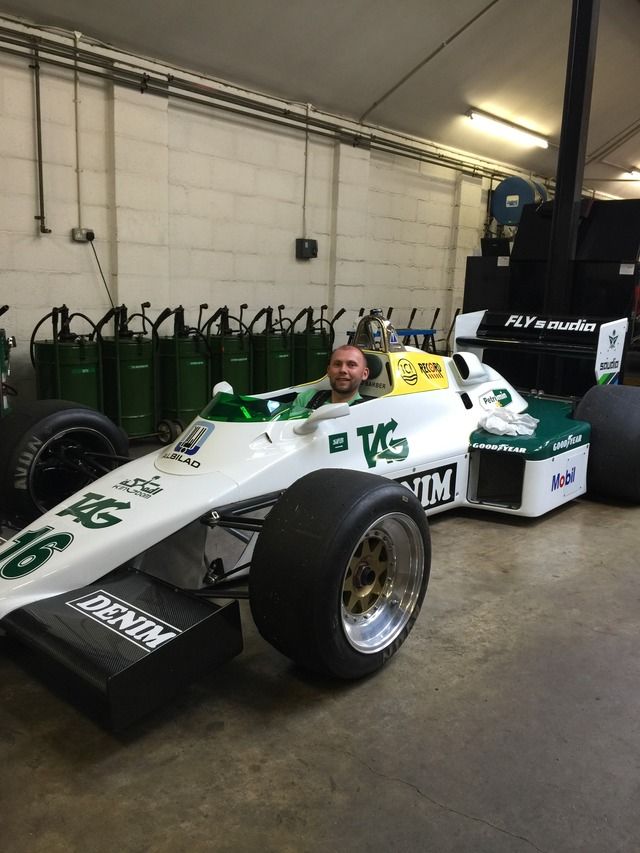 So, apart from driving one, I can now tick the "F1 Car" box! |
||
|
05-20-2015, 10:35 AM
|
|
|
Registered User
Join Date: Jan 2011
Location: North Yorkshire UK
Posts: 77
|
Quote:
Porsche wasn't exactly flushed with cash at the time and I don't expect the accountants were thrilled about the prospect of extra connectors and several whole centimetres more pipe in there ha! When you multiply the cost by a 60k units or so, it all er, adds up. This really is a great thread! Cheers, Paul
__________________
1980-4 924 Turbo with mods. ex Tony Dron (12th at Le Mans 1980 with works 924 Carrera Turbo); 1984-9 911 SC; 1989-93 911 Carrera SE Sport; 2010- 964 Carrera 2 (project); 2012- Cayenne |
||
|
05-20-2015, 12:47 PM
|
|
|
Kartoffelkopf
|
A quick coffee break update from last nights activites.
Well, so much for the easier evening and putting my feet up and watching TV! I seem to be on a roll at the moment, probably the light at the end of the tunnel meaning that I'm right in the middle of "the big push"? Anyway, I spent the evening inhaling AluBright fumes and cleaned the other half of the gearbox casing...and some of the first half again....and the inside of the bellhousing....again.... Once that was done, a great opportunity to then swap out the corroded nuts and washers on the casings, for the freshly plated ones I got back last week. Could also get the 2 brackets on there for wiring retention, plus the two brackets for the hall-effect sensors used for traction control. 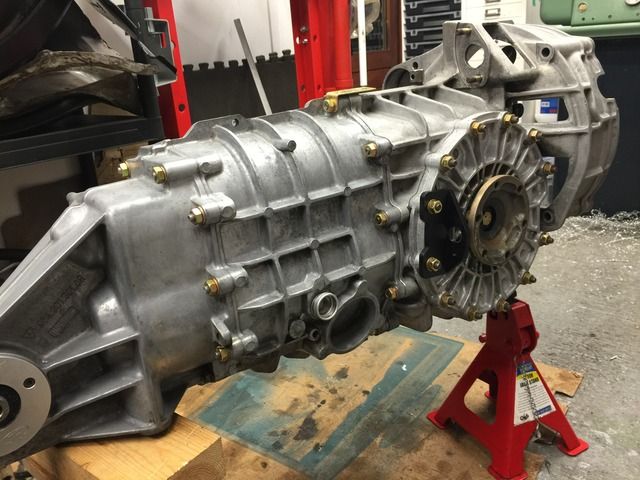 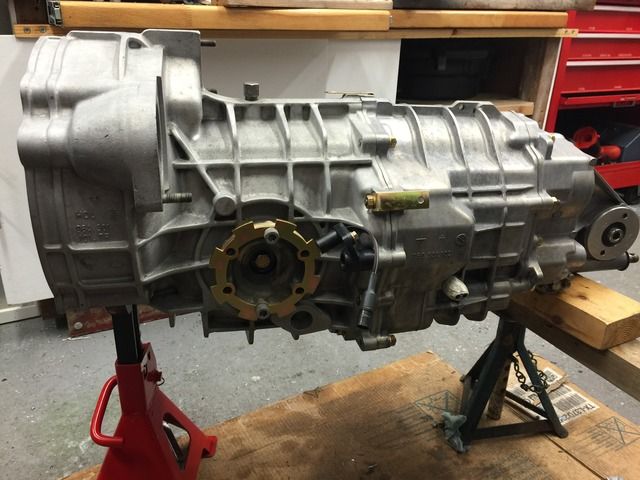 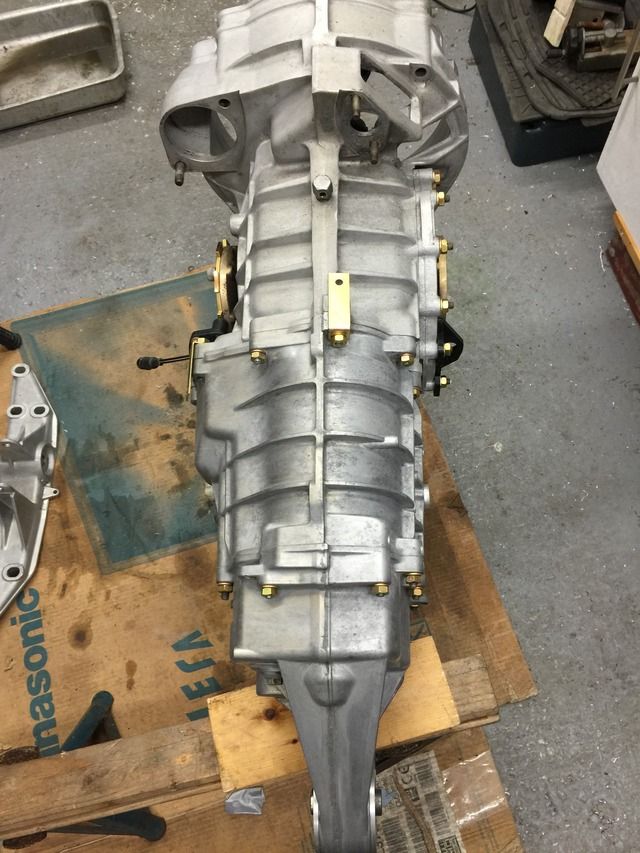 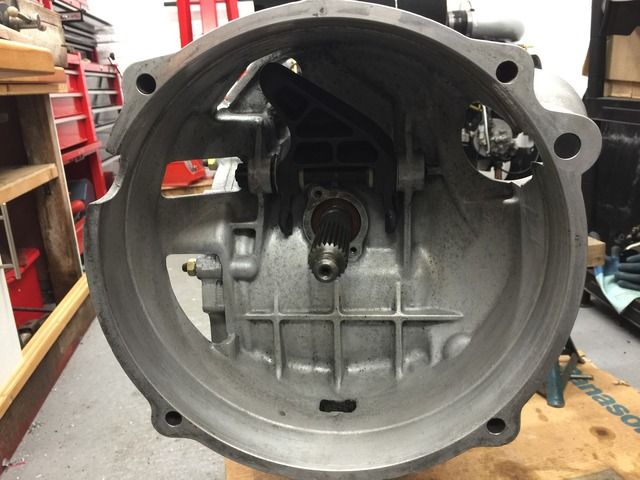 And that's where I'm now going to draw a line and stop cleaning. The crossmember is also gleaming again, and I reckon it's ready for a coat of Dinitrol clear; eager to try this and see what it looks like; I'm pretty sure it dries to a solid waxy finish, but will test on a scrap piece of ally first. A pic of the intake pipework quickly plonked into place on the engine ----> 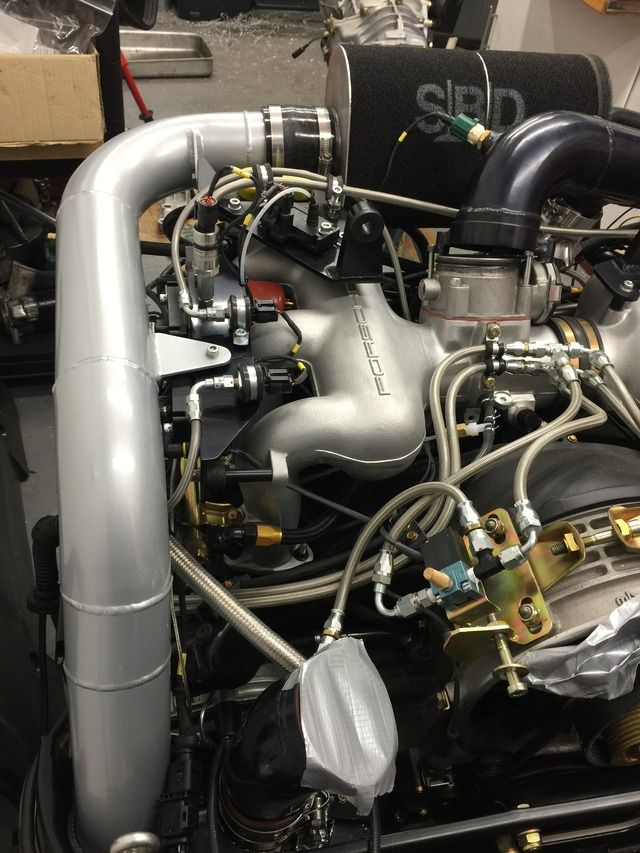 Just heard that my parts are now in at Tonbridge OPC, hoping to get there on the way home after work before they close; potentially a decent number of jobs can be crossed off the list, if I can. |
||
|
05-21-2015, 04:05 AM
|
|
|
Kartoffelkopf
|
Managed to get there just before they closed....I've said it before, but it still amazes me how little you get for $130....hub nuts, $30 each! They're not even shiny!
 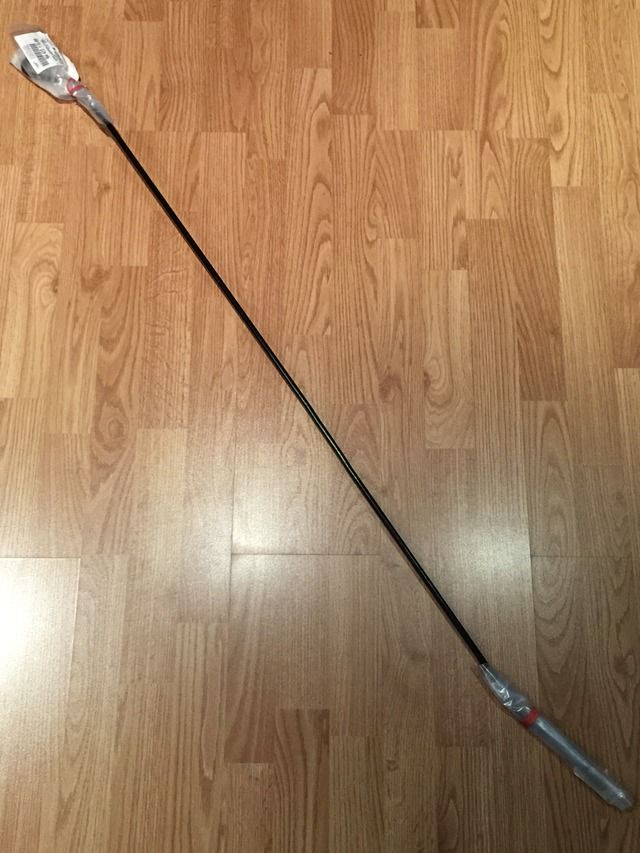 And as you can see, the clutch line - for the most part - comes un-formed. Bugger. OPC are happy to take it back if I don't want the faff of bending it myself; I'm sure I don't have a tool for this diameter tubing (its bigger than brake lines), nor am I confident of getting it accurately bent to the shape of the original. And it looks too long. Hmmm....maybe time to revert to Plan A and get a custom single-piece hose made using braided line. Last edited by Spenny_b; 05-23-2015 at 04:06 PM.. |
||
|
05-21-2015, 02:41 PM
|
|
|
Registered User
Join Date: Apr 2012
Location: London, UK
Posts: 58
|
Quote:
 , great day out! , great day out!
__________________
996 GT2 |
||
|
05-26-2015, 12:41 AM
|
|
|
Kartoffelkopf
|
Quote:
 Excellent, wasn't it? The whole day was very impressive, the final fly-bys of Sally B and the P51's was very poignant. Wish we'd started with the main hangar then worked backwards towards the far end of the site - did it the other way around and timed-out on the science based stuff which looks very good and could easily take a few hours in itself....oh well, next time. Last edited by Spenny_b; 05-26-2015 at 08:46 AM.. |
||
|
05-26-2015, 03:36 AM
|
|
|
Registered User
Join Date: Apr 2012
Location: London, UK
Posts: 58
|
Yes it was awesome! We only turned up for the air display from 2pm, so will have to go back for the museum part. My boys, 4 and 6, do get bored after too much of only looking at things so it was just gonna be too much and that aint fun for anyone.
As much as I love the whole sentiment of the day, and all the old wartime airplanes, I must say the Red Arrows stole the show for me. First time I've seen them live, very impressive. Oh and the Typhoon, fighters with big jet engines never fails to impress! On a different note, I was at Ace Cafe last night and got chatting to this guy who was also tuning a 964 turbo. Fella was German, turned up in a 500E with his Finnish girlfriend. You wouldn't know who this is by any chance? His name escapes me and I wouldn't mind having it for future reference!
__________________
996 GT2 |
||
|
05-26-2015, 04:53 AM
|
|
|
Kartoffelkopf
|
Ahhh the 'Arrows are pure class; unfortunately they didn't display on Saturday but saw (and met some of them in the local hotel) at Farnborough last year, as well as Goodwood many years ago. Last year in the trade week at Fab, one of them had a bird strike mid-display...no panic, calmly landed, hopped into another plane and resumed! They used to touch down 2/3 times a year for a splash-n-dash at Manston Airport, just up the road - was always good seeing them coming in - even their landings and takeoffs were perfectly spaced. Typhoon was awesome as well, crazy tight manoeuvres.
No, I don't know the German guy I'm afraid - he may well be lurking on here, but he's not contacted me AFAIK. Last edited by Spenny_b; 05-26-2015 at 08:48 AM.. |
||
|
05-26-2015, 08:46 AM
|
|
|
Kartoffelkopf
|
Right, tonights jobs are....well, truth be told, I don't have a clue what tonights jobs are yet apart from tinkering with my mate Ian's new toy. In the words of Chris Harris, "lovely lovely lovely"....an original 1964 Mk1 Morris Cooper which he bought in the Silverstone auction on Saturday....should start, doesn't start, needs new solenoid.
 Solenoid fitted, flat battery charged and we have a running engine. It's far from stock, apparently pushing 126hp at the wheels...think we're both a little hesitant in believing that at the moment, certainly without a build sheet of what's in the engine. Anyway, back on topic, whilst dinner was cooking I opened up the can of Dinitrol that I bought 4yrs ago, and started to give the gearbox it's coat of clear wax to protect it from the elements in future.... 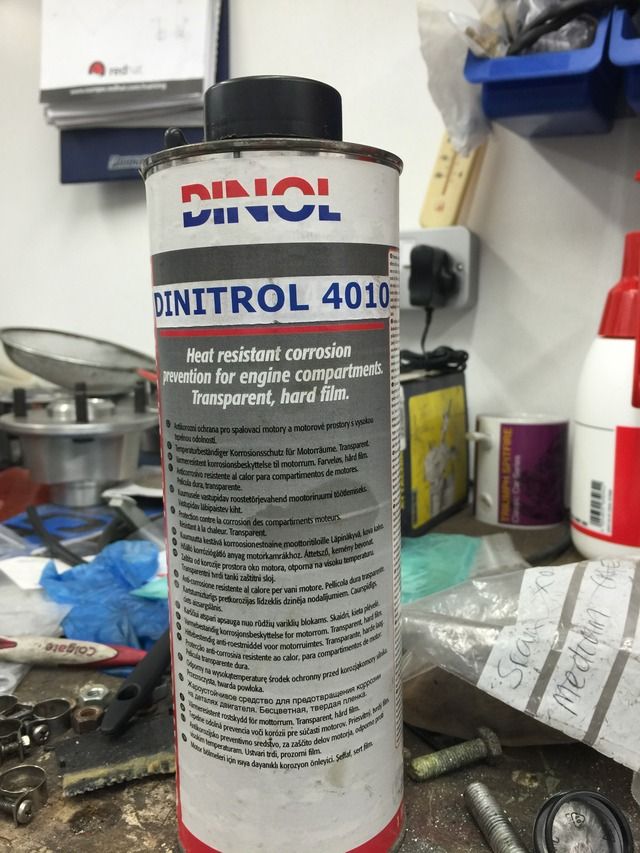 ...it's coming up nicely; not fully dry at time of writing, but the parts that are look fine and transparent. Last night, I had a think about how best to make a new crank position sensor bracket. I'd decided that it'd be a quick job just to use some right-angle ally extrusion, but upon removing the OE bracket, it turns out it's not a flat surface to mount onto. Neither are the mounting holes conducive to a piece of right-angle stock. To use it, I'd need to make 2x spacers to sit the sensor in the correct place; these would then need welding into place...all a bit over complicated. Then it struck me over a cuppa this morning....dead simple, just make a new M6 threaded boss and get Pete to weld it in the correct orientation for the magnetic sensor. Unlike the Honeywell 1GT101DC sensors that we're using for the crank phase detection and TC wheelspeed, this sensor does need correct orientation. 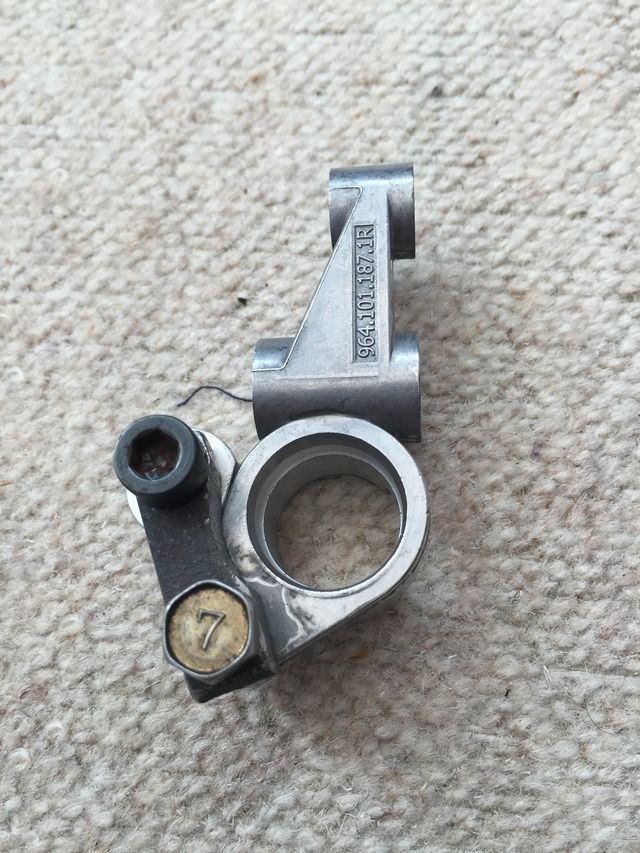 I'll cut off the old mounting hole once the jig is finished with, thus removing any chance for mis-installation should the sensor ever need removing/reinstalling. 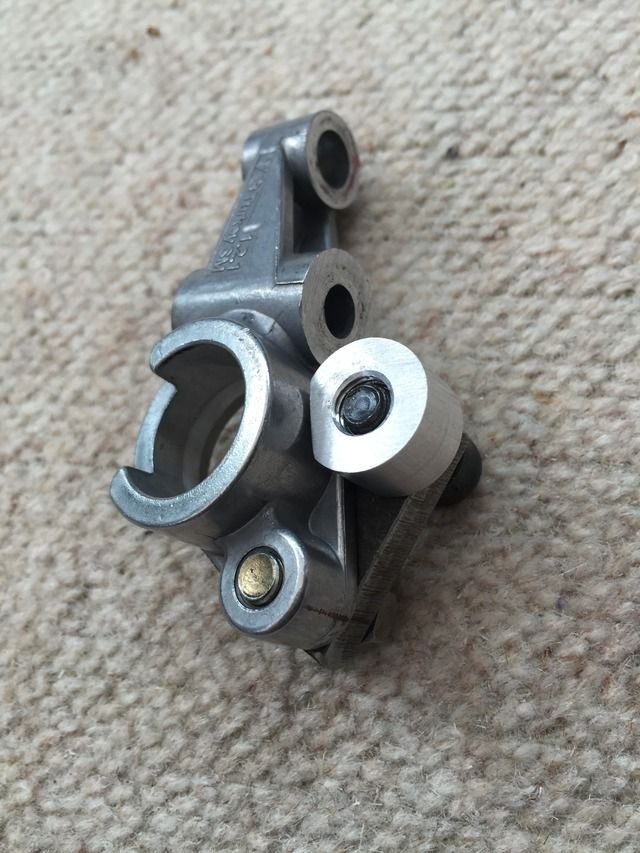 I forgot to mention, despite me wanting to switch back to using a HE crank position sensor, it turns out we can't...to many unknowns with how a new sensor behaves electrically, i.e. the rise and fall of the signal. Of course it's critical to the timing of the engine, so if this is "out" versus the sensor we mapped with, then it could easily be game over in a big way. So, I'm sticking with the sensor we used a few weeks ago and tidying up the mounting (it was quickly knocked-up at the 11th hour, to get the engine fired on the dyno), and Simon will fettle the harness on Saturday to tidy that up too. |
||
|
05-26-2015, 01:36 PM
|
|
|
Kartoffelkopf
|
Crank position sensor bracket now welded up - bit of a tough job just being able to get the torch in there, but Pete managed to get a sufficiently strong weld on there to hold the new boss.
Some filing and fettling and this is how it now looks.... 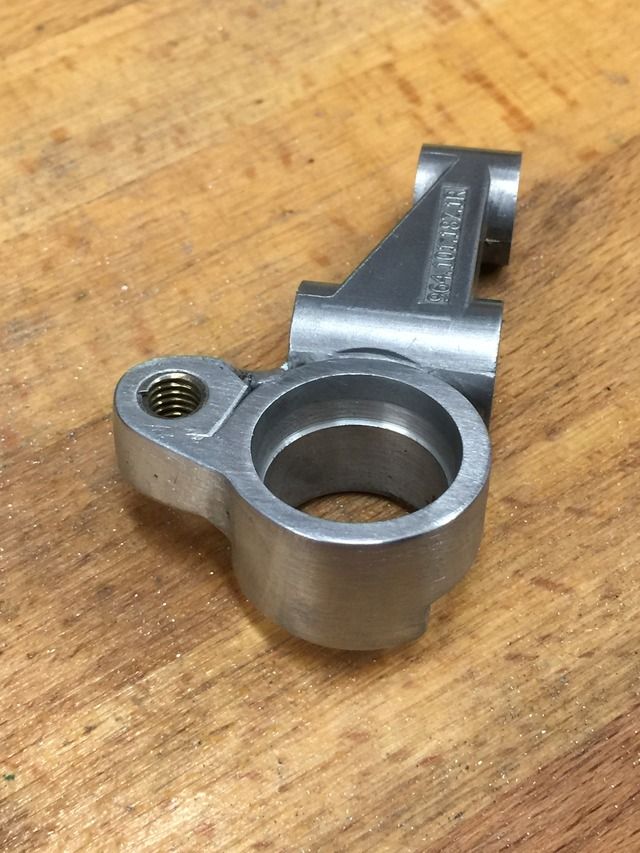 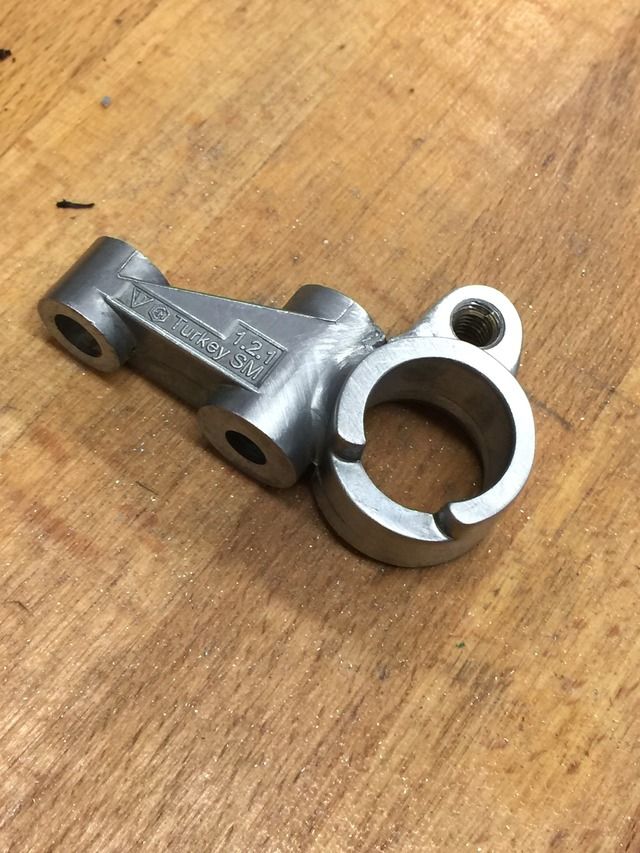 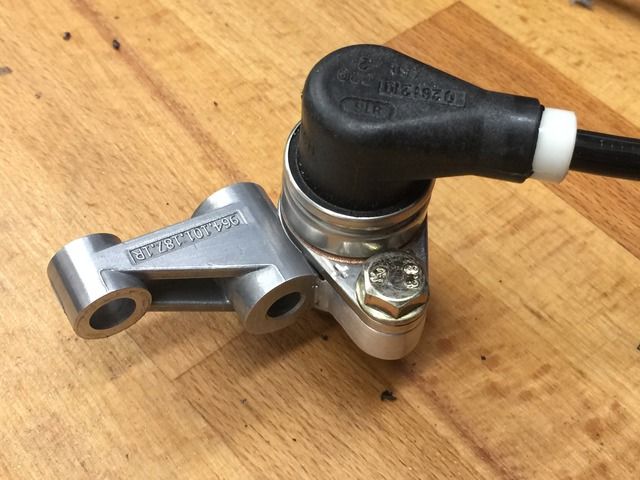 And then installed onto the engine....  Fairly unremarkable, but....cross it off the list. |
||
|
05-27-2015, 02:28 PM
|
|
|
Kartoffelkopf
|
I decided to replace the engine bay sound-proofing pad the other day; most of it is absolutely fine and in good condition; the odd tear but would be hidden once the engine's in. The part that I wasn't happy with is the edge that hits you as soon as the lid is opened - it's gone brittle and has broken off in places, and has sagged inbetween the plastic fixings. I did try and stick it back, but it looks rubbish.
So, a quick call to Tonbridge OPC to get one ordered - last night after I got home from work, their Service Manager very kindly hand delivered it to my house on his way home! What a good guy! Now, the first thing that struck me was that it's of a completely different construction to the one I already have. 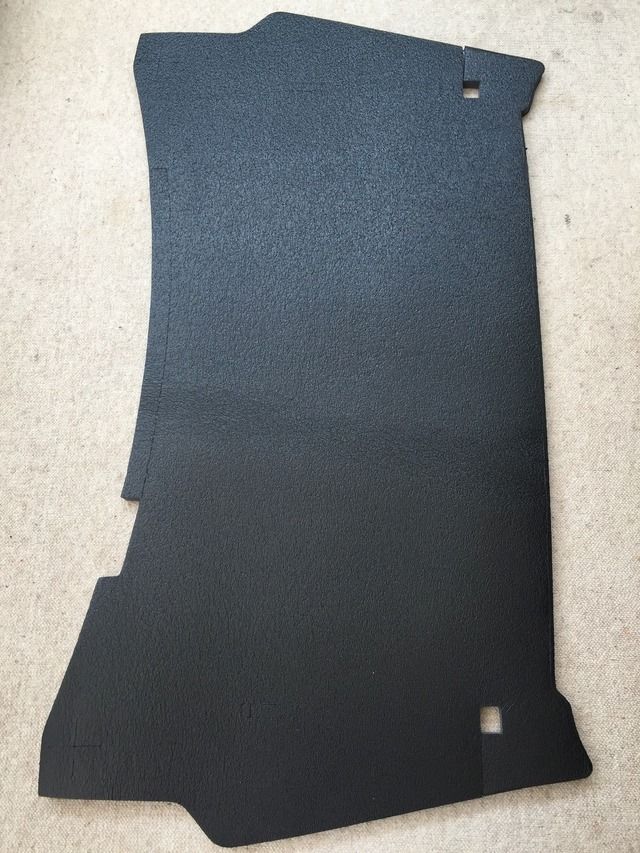 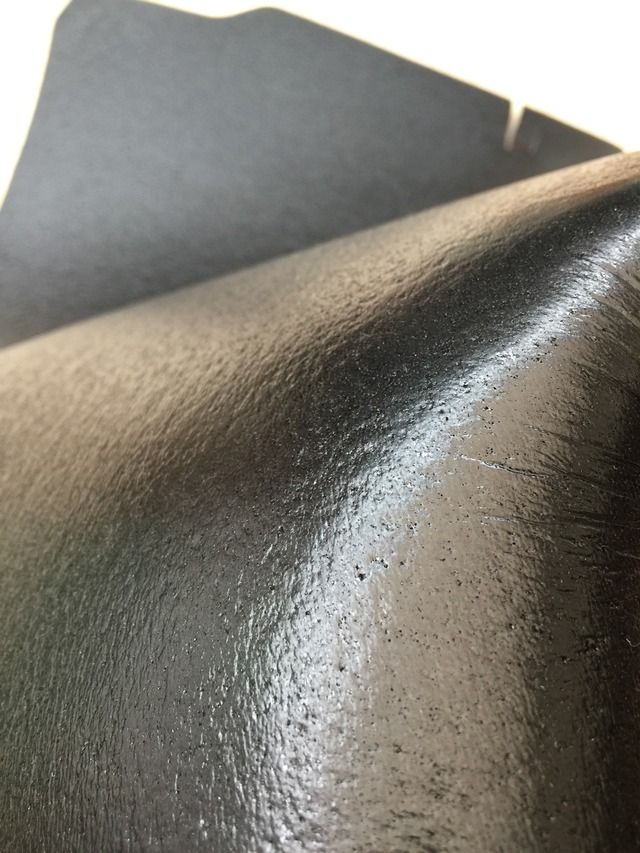 Curious - there's no part number succession, and only one part number for all models of 964 (964 556 281 01)....so whether my original one has been replaced with another type at some point in it's life, I have no idea. Logic says that the harder shell/skin of the original one *probably* reverberates noise rather than absorb it. The new one feels a lot lighter in construction, and softer on the surface, so will be interesting to find out if this will perform differently - it'll certainly be thinner once glued in place, so a few extra mm of space for A/C lines and the air filter.....perhaps. Last edited by Spenny_b; 05-29-2015 at 10:07 AM.. |
||
|
05-29-2015, 12:56 AM
|
|
|
Kartoffelkopf
|
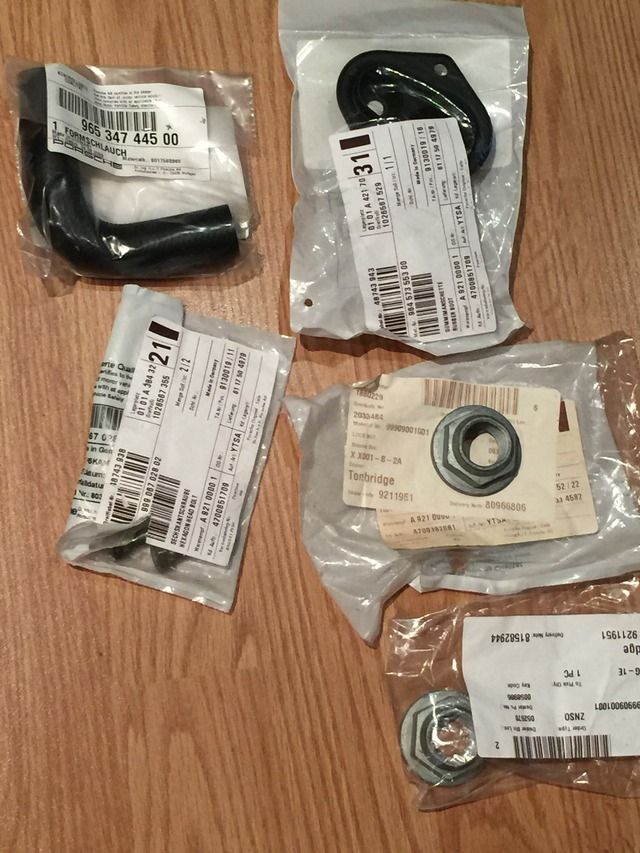
Another 5min update:
The latest batch of parts sent for re-plating was ready for collection this lunchtime - a quick jaunt down the road to collect and I now have the parts needed to re-assemble the gearbox stabiliser and cross member. 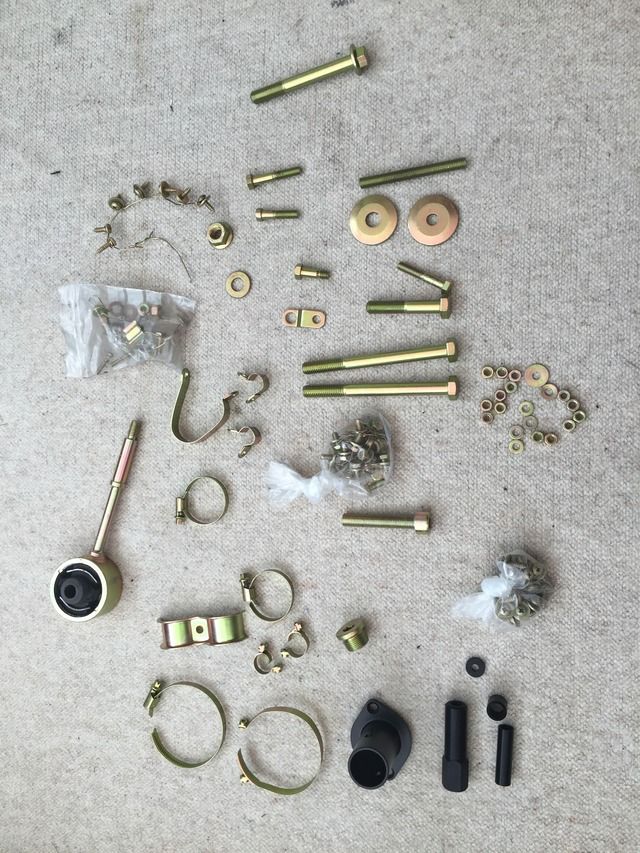 Loads of other sundry fixings plated as well; transmission cover fixings, tunnel fixings, etc. The re-plating of the original stabiliser bar - with the rubber insert still in place - was successful. I'm going to run with my new custom rose jointed setup to start with. If it turns out to be more aggravating than useful, then I have a freshened OE unit ready to go. The braided clutch line is being made as I type, by the guys at HEL Performance in the UK. The rear bumper structural beam was also being powder coated this afternoon, but was't quite ready for collection today - a pity but I have plenty of other jobs to be going at this weekend. The wiring guy is due over tomorrow so that both looms can be tidied up. We're also hoping to make the final 3rd part, dubbed the "auxiliary harness", which runs up to the variable boost and traction control potentiometers, as well as the feeds for the boost gauge. I was hoping to get the engine and transmission back into the chassis on Sunday, but it looks like this is going to be thwarted by a lack of clutch hose. Crazy that such a small part will hinder the big day, but it does make sense to fit the slave cylinder whilst the gearbox is out (but maybe I'll have a play and drag the gearbox into place to remind myself how accessible the slave is in-situ...or not...). If the engine doesn't go in, then my plan for the weekend is:
So, it's now the weekend....time to crack on.... |
||
|
05-29-2015, 10:04 AM
|
|
|
Kartoffelkopf
|
Good, productive day so far.
I finished off the stabiliser bar for the transmission early this morning, then another thorough tidy up of the workshop before Simon arrived. By mid afternoon the harness was finished, including making up the auxiliary harness for the variable boost, traction control and the outputs for a shift light and boost gauge. As I had to remove the original dealer fit immobiliser system (it was wired into the harness that I no longer needed, thus removed), we've also now re-installed "a certain amount of new security" - not going into details of course, but today was the ideal time to do it. The sound pad came out without too much of a fight. Some tidying-up of old glue and foam took an hour or so, and I'm now ready to wrestle with the new pad to get it in. I was trying to save effort by not removing some of the pipework and hoses that run along the back, but as is always the way, save 10mins by not removing them, but spend 30mins working around it.....so, now fed and watered, the evening shift begins and it's coming out. Back soon with another progress report.... |
||
|
05-30-2015, 11:11 AM
|
|
 |
|
|
| Tags |
| 964 c4/c2/turbo , efi conversion , life racing , syvecs , turbokraft |


 1993 Porsche 911 (964) Turbo 3.3
 2006 Lotus Exige Cup 240 (#45 of 50)
 BMW M2 Competition
 BMW R1250 GS Rallye HP
 Ducati 748R


