|
|
|
|
|
| Author |
|
|
Registered speed offender
|
The cost both times was $65 for the lot. I had a bit more the first time I think. I used a local place called Novation. The plate is yellow zinc. The parts must be free of rust before plating... I soaked these in white vinegar for a couple weeks twice and cleaned with Super Clean in between.
In order to get the very best results, the parts should be bead blasted. I don't care that much so I did it this way. I mainly didn't want things to rust again and wanted them to match the rest of the car. I even considered just doing regular bright zinc but I had parts that didn't need any work so I went with the yellow. As it turns out, I'll have some nuts and bolts that ARE bright zinc in the mix since they are readily available at the local hardware store.
__________________
If you keep looking back, you'll never move forward. http://forums.pelicanparts.com/paint-bodywork-discussion-forum/506621-project-911r-something.html Last edited by 78SCRSMAN; 01-26-2012 at 03:20 PM.. |
||
 01-26-2012, 03:08 PM
|
|
|
Registered speed offender
|
Perhaps a better photo of the dash... I love that Porsche Design steering wheel, it's really the shiznit!

__________________
If you keep looking back, you'll never move forward. http://forums.pelicanparts.com/paint-bodywork-discussion-forum/506621-project-911r-something.html |
||
|
01-26-2012, 03:17 PM
|
|
|
Registered
|
Wow, I hadn't visited this since the first few months, when you first had the body shipped in.
Impressive. Enjoy! |
||
|
02-19-2012, 10:15 AM
|
|
|
Registered speed offender
|
Not sure if anyone is still following this but I plan to post some updates soon. Lots going on and probably some missed photo opportunities... when I'm on a roll its hard to stop and take pictures.

__________________
If you keep looking back, you'll never move forward. http://forums.pelicanparts.com/paint-bodywork-discussion-forum/506621-project-911r-something.html |
||
|
07-01-2012, 08:13 AM
|
|
|
Bird. It's the word...
|
Still following

__________________
John Forcier Current: 68L 2.0 Hotrod - build underway |
||
|
07-01-2012, 02:22 PM
|
|
|
Tired Member

|
Quote:
__________________
Glenn Daily Driver - '78 911SC RoW Endurance Racer - '85.1 944 Street/Track Project - '86 951 Race Project - 944 Spec |
||
|
07-01-2012, 02:32 PM
|
|

|
|
Eschews Obfuscation
|
Quote:
__________________
'84 Porsche 911 Targa '97 Ford F250 Heavy Duty '98 Volvo S70 '02 Subaru Forester '05 VW Passat TDI |
||
|
07-01-2012, 09:42 PM
|
|
|
Registered

Join Date: Aug 2004
Location: Ottawa
Posts: 325
|
Still following as well
__________________
Gilles... ------------------------------------ 1970 Targa 911T |
||
|
07-02-2012, 02:53 PM
|
|
|
Registered User
Join Date: Oct 2010
Location: Southern NH
Posts: 3,553
|
Quote:
|
||
|
07-02-2012, 05:58 PM
|
|
|
Registered speed offender
|
Aaaaalrightythen...
Mostly I've been just tinkering but I finally got myself a blast cabinet and media blasted the remaining parts I have. Things like e-brake handle, pedal cluster, suspension and brake components etc. Then it was on to paint which were coated with black epoxy primer. Most parts will be left with the epoxy finish but there are a few things that received some color. Here are the A-arms installed along with the thru-body sway bar. The bushings are Weltmeister street compound. The second photo shows the grease fittings I installed per instructions from another thread. I also installed some 993 brake scoops to help keep things cool.    Here is the oil cooler installed... I wish I had taken some photos of the lines and brackets I made but like I said, I was on a roll. Now the front bumper is bolted on permanently so you can't see the brackets. Basically I used some angle aluminum and shaped some pieces to accept four rubber isolation bushings, one at each corner. It worked out perfect!  Here are how the spindles turned out. I used the original John Deere grean out of a spray can to match the Bilstein shocks they will house.  I've got the rear arms on but only temporarily as I'm saving up for some ER poly-bronze bushings for the spring plates. 
__________________
If you keep looking back, you'll never move forward. http://forums.pelicanparts.com/paint-bodywork-discussion-forum/506621-project-911r-something.html Last edited by 78SCRSMAN; 07-03-2012 at 11:42 AM.. |
||
|
07-03-2012, 11:39 AM
|
|
|
Tired Member
|
very nice!
__________________
Glenn Daily Driver - '78 911SC RoW Endurance Racer - '85.1 944 Street/Track Project - '86 951 Race Project - 944 Spec |
||
|
07-03-2012, 11:48 AM
|
|
|
Registered speed offender
|
I snagged some Rennline sealed mono-balls for the rear arms and thew those on too. They should prove to be a good improvement over the stock bushings.
 Gratuitous photo of the tunnel area... lots of new parts sticking out of there but not done yet. I ran into a little snag with the e-brake cables I picked up from our host. They didn't fit over the metal tubes coming out of the tunnel! I sourced some good used ones that have yet to be installed but long story short, be aware the cables our host sells may not fit.  I'm just about finished in here now. The tank is done, the steering rack is in, washer bottle (from an MK1 Rabbit) hooked up... just a few finishing touches plus a battery in the smugglers box and that should do it.  My rear lights are installed and wired in along with the plate bracket and lights. I still need to install the bumper seal but you get the idea.  Lastly, here's a nice shot of the polished aluminum door trim, chromed door handles and door glass installed. I also picked up some nice stainless steel door sill plates that have the "911" in script just like the engine lid emblem on them.  I forgot to take a photo of the pedal box installed but I have Rennline pedals in black. I'm going for the inconspicuous but sporty feel. If I haven't mentioned it before, the only real bling I have planned for the interior are the polished rings that Rennline sells for the gauges. Thanks for looking Pelicans. Now if I can just get that lucky lottery ticket so I can get this bad girl finished.
__________________
If you keep looking back, you'll never move forward. http://forums.pelicanparts.com/paint-bodywork-discussion-forum/506621-project-911r-something.html |
||
|
07-03-2012, 12:05 PM
|
|
|
Registered User
Join Date: Oct 2010
Location: Southern NH
Posts: 3,553
|
Thanks for the update. I used JD green for the powder on my front coil overs also. I felt it was a perfect match.
|
||
|
07-03-2012, 08:45 PM
|
|
|
Registered speed offender
|
Quote:
One thing I'm curious about is how the brake fluid reservoir is vented. It has a small tube sticking out that looks like a hose could be attached and routed somewhere. Is that what the factory did or is it left as is with no hose attached?
__________________
If you keep looking back, you'll never move forward. http://forums.pelicanparts.com/paint-bodywork-discussion-forum/506621-project-911r-something.html |
||
|
07-06-2012, 12:47 PM
|
|
|
Registered User
Join Date: Oct 2010
Location: Southern NH
Posts: 3,553
|
I'll have to search my pictures and see what mine was like before I disassembled.
|
||
|
07-06-2012, 06:23 PM
|
|
|
Registered
|
The vent hose from the reservoir was originally routed out the front trunk panel and allowed to drip on the ground. Of course, this meant that any brake fluid hitting the body would lift the paint there.
We have used 35 mm film canister to serve the purpose of collecting the fluid. So the hose goes from the brake reservoir to the canister. then from the canister to outside the car. Check and absorb out the overflow from the canister No fluid on the paint means the paint gets to stay attached to the car. Also don't over fill your brake reservoir. About 1/4" above the divider bar inside the tank is enough. It expands when it gets hot nice project
__________________
1970 914-6 street"evil cockaroach" 1970 911 Targa "ST" Jade Green IROC Tribute (ready to race) Last edited by TRE Cup; 07-20-2012 at 03:23 PM.. |
||
|
07-20-2012, 03:21 PM
|
|
|
Registered speed offender
|
thanks Dave. Now that I got the jist of the brake reservoir vent, how about the fuel tank vent???
I just need to make it vent without making a mess, no canister is or will be in place. Any ideas? I took some photos of my most recent little project... When I get some more time, I'll post and explain.
__________________
If you keep looking back, you'll never move forward. http://forums.pelicanparts.com/paint-bodywork-discussion-forum/506621-project-911r-something.html |
||
|
07-20-2012, 08:41 PM
|
|
|
Carmagic.us
Join Date: Feb 2007
Location: Virginia
Posts: 2,110
|
Quote:
I was planning to make something like that for my AX car. Thanks Engelbert
__________________
For BA7s Dash LED, and External Marker LED go to carmagic.us - Now Luftgekühlt Emblems |
||
|
07-21-2012, 05:26 PM
|
|

|
|
Registered speed offender
|
The splitter is home made from FG. There are some photos a page or two back of how it was made. EDIT: oops, I guess not. Easy ton do though. Just make your patter and cut up about six layers of fabric for each side and wet them out on a piece of wax paper, then its just beat to fit and paint to match.
Beware if you do your own that each side might be slightly different.
__________________
If you keep looking back, you'll never move forward. http://forums.pelicanparts.com/paint-bodywork-discussion-forum/506621-project-911r-something.html Last edited by 78SCRSMAN; 07-22-2012 at 09:17 AM.. |
||
|
07-22-2012, 09:12 AM
|
|
|
Registered speed offender
|
Finally got those pesky Weltmeister bushings fitted... I hope they work!
I know, I know, I should have got the ER bushings... So here's my process: They start out as new but aren't perfectly round or true on the outside soooo... I don't have a lathe so I did this all by hand and some measuring tools.  Now they are flat on the outside so they can be pressed into their respective orifices.   
__________________
If you keep looking back, you'll never move forward. http://forums.pelicanparts.com/paint-bodywork-discussion-forum/506621-project-911r-something.html |
||
|
07-23-2012, 05:52 AM
|
|


 Bellisima
 1969 PORSCHE 912 TARGA
 PEMBLETON SUPER SPORT
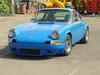 1969 Porsche 911T 2.7RS Spec with Webbers
 "The Porsche"
 Endurance Racer
 944 Spec "The green car"
 Scalded Cheetah?
 1984 porsche 911 carrera targa

