|
|
|
|
|
| Author |
|
|
Registered speed offender
|
It's good to know there are folks following this... gives me motivation.
Thanks for all the positive feedback. One thing I did get done is my "R" style tail lights. 911R Tail lights (a tech writeup + BONUS) I still need to buy some LED bulbs and get them wired up but they should be nice. Here's another detail/problem solved. Engine oil cooler block off? Henry? I've got the parts on hand but have yet to run a tap into the block for the plugs I'm using. They are OXS bung plugs which fit perfect!
__________________
If you keep looking back, you'll never move forward. http://forums.pelicanparts.com/paint-bodywork-discussion-forum/506621-project-911r-something.html Last edited by 78SCRSMAN; 02-25-2011 at 08:19 PM.. |
||
 02-25-2011, 08:16 PM
|
|
|
Registered
Join Date: Jun 2004
Location: PNW
Posts: 144
|
Wow. Holy crap, my friend.
You have made an amazing amount of progress. And I have to say it looks simply awesome. I would expect no less though... I know how meticulous you can be.  Seems everyone has to monkey with the glass bumpers to some degree to make them fit right. Seems everyone has to monkey with the glass bumpers to some degree to make them fit right. Again, wow. P.S. I've been meaning to check in to see what else has been going on... I'll email you.
__________________
-Troy 88 3.4L Coupe |
||
|
03-19-2011, 06:45 PM
|
|
|
Registered
Join Date: Dec 2007
Location: Temecula, CA
Posts: 316
|
What a project! I'm about two years behind you (no rotisserie yet). That color you chose is fantastic too. My wife spotted that color on a 356 at a swap meet a month or so back and really liked it. I think I'll be going that route too, but don't worry I'm on another corner of the US so we might not run into each other.
As I read through your posts I had to laugh at the wire wheel post about the wires flying off. I was in the shower after working the grinder last week and hidden in my cheek with 3 day beard was a wire jammed in. I only found it after washing my face and it jabbed my finger....some how it missed all the nerves and stayed in there for a while.
__________________
Ed, 1971 911e Targa, 2018 Porsche Cayenne Hybird 68 VW Transporter 2019 Ford F150 Quad cab 4X4 06 Ducati Monster S4R |
||
|
04-25-2011, 07:26 PM
|
|
|
Registered speed offender
|
Ooh, ouch!
I did most of that wire wheel stuff while it was cold out so they ended up in various parts of the jacket I was wearing but always found them with my hands. ***Update coming soon**** been working on the front bumper... still! Headliner is also in the works. |
||
|
04-25-2011, 09:31 PM
|
|
|
Registered speed offender
|
Okay, so here's what's going on... the front bumper is coming along nicely now. I added some strength to it by glassing in a vertical panel along the top and bottom. The one on top also serves as a mounting point to the front of the tub. I glassed in some bolts so all I have to do is push the bumper right on and fasten down the nuts from inside.
I'm using a 964 "smile" gasket as they're called. When on the car, the gasket front edge doesn't sit flush with the top of the bumper so there ends up being a 1/8" gap along the outer edge. It doesn't look that hot so I went and built up a ledge to eliminate the gap. The fit is much better now. I'm not quite finished with the filler work but will take some photos of what I'm talking about later. Here's the process: Ground down the split about 4-5 inches wide, all the way through the original glass.   Got the top part of the bumper glassed back in and sanded   You can see the difference here: 
__________________
If you keep looking back, you'll never move forward. http://forums.pelicanparts.com/paint-bodywork-discussion-forum/506621-project-911r-something.html |
||
|
04-27-2011, 09:13 AM
|
|
|
Registered speed offender
|
Here you can see the vertical strengthening strips I put in... this made the bumper MUCH more rigid. Also you can see the bolts that were glassed in from behind.
 Here are some closer pics of the ridge I was talking about. I used several layers of tape to create a wall for the filler to go up against.   Getting close to being ready for some primer... as you can see, it's a multi-step process. 
__________________
If you keep looking back, you'll never move forward. http://forums.pelicanparts.com/paint-bodywork-discussion-forum/506621-project-911r-something.html |
||
|
04-27-2011, 09:21 AM
|
|

|
|
Registered speed offender
|
Seriously???
Wait til' you see what I have to do to the rear bumper... It's a mess!
__________________
If you keep looking back, you'll never move forward. http://forums.pelicanparts.com/paint-bodywork-discussion-forum/506621-project-911r-something.html |
||
|
04-29-2011, 07:04 AM
|
|
|
Registered speed offender
|
Ok, I made some progress on the rear bumper... (at least I know what needs to be done) it goes like this. Cut in half like the front, then cut in half again on the corner. Why you ask? Uh cuz it doesn't fit right! WTF!!! It's not even close. Ugh!
You get what you pay for I suppose. Anyway, here's the evidence: A couple profile shots    Where this is marked, I need to cut out the sliver and move arch piece closer inward and then blend the panel back in (a lot of sanding) after glassing in from behind.  The license plate area wasn't quite straight so I decided to make some gussets. I use wax paper on a flat surface, wet out some mat and then cut out the shape I need. I may have covered that before but in case you missed it.    I plan to work on the halves separately until I get them up to par and then glass the two halves back together. If you look closely at the rear end shot, you'll notice where it was cut in half, it's about an inch short of the halfway point. So yeah, I need to come up with 2 inches of bumper some how. Stay tuned!
__________________
If you keep looking back, you'll never move forward. http://forums.pelicanparts.com/paint-bodywork-discussion-forum/506621-project-911r-something.html |
||
|
04-30-2011, 09:04 PM
|
|
|
Registered
Join Date: Jul 2008
Location: New Jersey
Posts: 8,910
|
Looks great 78scrsman. Nice glass work.
To make 2" use the bumper as a mold. Wax the surface several times with a good carnuba wax (Collinite insulator or mold release wax are best) then you can lay up the wetted matt right on the bumper. After it cures you can take a plastic putty knife and slide it between the bumper and your lay up the piece will will pop right off. You can then trim it and bond it in just like you did to the two halves of the front bumper. When you make the filler part lay it up about half thickness then when you bond it in you can lay up to full thickness that way it will be stronger and less sanding. She is looking awesome. Great work and good luck. 
|
||
|
05-01-2011, 03:35 AM
|
|
|
Registered speed offender
|
Quote:
Also thanks! Glass work is actually real easy to do, it's just messy. You really can't screw it up. My "glassing tools" consist of scissors, cheap paintbrush, small plastic cup, sandpaper and a cutoff wheel. The requisite Acetone for cleanup rounds it out. All real cheap stuff. I think I'll end up having spent about $75 fixing both bumpers.
__________________
If you keep looking back, you'll never move forward. http://forums.pelicanparts.com/paint-bodywork-discussion-forum/506621-project-911r-something.html |
||
|
05-01-2011, 06:31 AM
|
|
|
Registered
Join Date: Jul 2008
Location: New Jersey
Posts: 8,910
|
Meguiars will work just fine. You will need to do about three coats of wax to get a good build up as you said the last layer you can leave on. Your best bet would be to allow the part to stay on the mold for afew days to cure. the longer the better. Most of why glass parts are deforemed and need the amount of work they do is the part is removed from the mold to early. On your filler piece it wont be as critical but you will have much less work if you let it fully cure on the mold.
Glass work is very forgiving as long as you are not making structural parts and is very easy to make look good. To much glass grind it off, to little build up. Can't wait for the next update. |
||
|
05-01-2011, 07:42 AM
|
|
|
Registered speed offender
|
One of my pet peeves is that the arch profile doesn't seem to fit the cars profile.
  I've seen this before in photos of others on this forum. The trick when fixing this is not to screw up the wheel arch while altering the fender arch.    I decided to glass in some bolts for easy install/removal 
__________________
If you keep looking back, you'll never move forward. http://forums.pelicanparts.com/paint-bodywork-discussion-forum/506621-project-911r-something.html |
||
|
05-16-2011, 07:46 AM
|
|

|
|
Registered speed offender
|
Making the halves whole again...
 Making a mold   Back together and yes I did this while it was on the car    Corners are done in a similar manner  
__________________
If you keep looking back, you'll never move forward. http://forums.pelicanparts.com/paint-bodywork-discussion-forum/506621-project-911r-something.html |
||
|
05-16-2011, 07:55 AM
|
|
|
Registered speed offender
|
Some final glassing...
  Some more work I found.  A couple minutes later...  
__________________
If you keep looking back, you'll never move forward. http://forums.pelicanparts.com/paint-bodywork-discussion-forum/506621-project-911r-something.html |
||
|
05-16-2011, 08:03 AM
|
|
|
Registered speed offender
|
Final fitment of the front bumper before a loving block-sand then on to primer!
       Here you can kinda see why the buildup was necessary. 
__________________
If you keep looking back, you'll never move forward. http://forums.pelicanparts.com/paint-bodywork-discussion-forum/506621-project-911r-something.html |
||
|
05-16-2011, 08:07 AM
|
|
|
Registered speed offender
|
Finally done with both ends!!!
What a PITA that was. I'm just gonna say it now... If you buy fiberglass parts, consider the source. These were purchased from GT Racing. So there it is. Nuf said. The results ARE worth the effort, don't you agree?   This shows the welting I will be using.   Arches in line like they should be.    That's it for now. For the record, I estimate both bumpers took a total of 30 hours to this point. Another 20 hours will be about right for painting, sanding and buffing.  Now how much are my bumpers worth?
__________________
If you keep looking back, you'll never move forward. http://forums.pelicanparts.com/paint-bodywork-discussion-forum/506621-project-911r-something.html Last edited by 78SCRSMAN; 05-16-2011 at 08:21 AM.. |
||
|
05-16-2011, 08:18 AM
|
|
|
Registered?
|
Holy crap! Who made those bumpers? Let me guess - GT?
 It's a good thing you have the patience and skills - I would have sent them back. She's looking great Derek. It's a good thing you have the patience and skills - I would have sent them back. She's looking great Derek.
__________________
Brian R Gruppe #757 70T Ex-Waterlogged Rust Bucket http://forums.pelicanparts.com/porsche-911-technical-forum/519605-waterlogged-rust-bucket.html |
||
|
05-16-2011, 08:29 AM
|
|
|
Registered speed offender
|
Thanks Brian,
Yes, GT Racing. He did offer to return them but it would have cost me close to $200 for shipping. If I had to do it again, I would try to find some decent used pieces that you know fit well. Even with some repairable damage it would be better that what I have done.
__________________
If you keep looking back, you'll never move forward. http://forums.pelicanparts.com/paint-bodywork-discussion-forum/506621-project-911r-something.html |
||
|
05-16-2011, 09:10 AM
|
|
|
Registered

|
Your patience and glass work is amazing. This is one of the best projects I have seen.
Looking forward to seeing the rest of it come together.
__________________
My first love - 1993 964 C2 Manual Coupe My second love - 2021 Macan GTS |
||
|
05-16-2011, 03:16 PM
|
|
|
Bird. It's the word...
|
Nice work!
Don't you find the sanding cathartic? ")
__________________
John Forcier Current: 68L 2.0 Hotrod - build underway |
||
|
05-16-2011, 10:34 PM
|
|


 Pre-backdate
 Post-backdate
 New Project
 Project Complete
 2017
2017  Vroom vroom
 2023
2023  2024
2024  1983 Porsche 911 SC
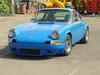 1969 Porsche 911T 2.7RS Spec with Webbers
