|
|
|
|
|
| Author |
|
|
Registered Misfit
|
I'm hoping for an autographed copy!!
__________________
Instagram: mark0morrissey Website: www.markmorrissey.org 911 hotrod -- 3.2L, short stroke, twin-plug. Elephant Racing Turbo brakes, Tarrett suspension. Lightened, abused with love |
||
 01-13-2009, 01:20 PM
|
|
|
Registered
|
Finished up the seam
I hate it when I spend too much time being anal about something on the underside of the car...that is just going to get beat up over time. Thats the problem with having a rotisserie. You get so accustomed to having access to an area...complete unrestricted access, that you start to treat the underside of the car like the top of the car. I don't clean the underside of any of my other cars, and I probably should clean the tops of them more often than I do
 The patient  The beginning of surgery  Stitched up....nobody looks good immediately post-op  And after the plastic surgeon   Now both ends look the same   Off to get ceramic hot coated. We'll see how long it lasts...at least better than a rattle can job that falls off after the first heat cycle. Rear lid ready to get mounted after the grill assembly. A three day weekend looms...I hope to get some parts in tomorrows UPS delivery. With a little luck the rear gets closed up and I can work forward towards doors and fenders. Last edited by speedo; 01-16-2009 at 05:55 PM.. |
||
|
01-15-2009, 06:48 PM
|
|
|
I hate freight charges
|
Very nice work!!

__________________
Tom 78 911SC SC to 73RS imposter SCWDP crew #50 and 51 1969 Camaro "The new project" 
|
||
|
01-16-2009, 01:14 AM
|
|
|
Registered

|
Lars - I wonder if you could help me with a measure ment for my project. What is the vertical distance from the bottom of the taillight housings to the top of your new muffler exhaust tips ??
Bob rw7810@att.com
__________________
Robert Williams 70' 911T |
||
|
01-16-2009, 07:12 AM
|
|
|
Registered

Join Date: Feb 2004
Location: Long Island, N.Y.
Posts: 1,798
|
Lars:
Does the addition of the dual outlets, change the exhaust path? I'm not familiar with the internal detail/chambers of the muffler, I'm curious if the majority of the baffling is bypassed with the dual outlets?? Regards, jp |
||
|
01-16-2009, 05:58 PM
|
|
|
Registered
|
Closing up the rear
I lied, there is more to be done on and in the rear before moving forward. I have a lott of plumbing to do and the rear lid needs to be attached. The original Rs and some of the other R/ST variants mounted the grill on the inside of the decklid. They were all very lightweight and there have been numerous threads on the orientation of the diamond stamped pattern. One of the problems I see with mounting the grill underneath, it the interference with the right side bank of carbs which sits further aft in the engine compartment. Rather than challenge the fitment on the inside, I decided to surface mount the grill in the decklid recess on the outside. Starting here...
 The lid was fitted prior to painting, so I will at least need to dress the mounting holes on both the car and the lid. I used a 914 rear engine grill, flattened it and welded the 6 mounting studs to the underside  I cleaned it up   I had decided to shoot it with high temp flat black...and afterwards decided that a gloss would look better  Bad picture, but it looks a lot better than the flat black. |
||
|
01-19-2009, 08:21 AM
|
|
|
Registered
|
Mount up...
Studs are long...maybe too long, but I can always remove length, it is hard to add when you are a quarter inch shy. I will use thick rubber fuel line as my washers to keep the gill supported off the fiberglass lid. The center studs are supported higher by the rib in the center of the lid, so their washers are smaller by comparison.
 The temporary fit with holes drilled  I took some time to massage the grill to the shape of the lid. I will trim the grill with a narrow piece of rubber channel  This was a PITA, but with patience...   It comes together. Now to actually mount the lid. Hinges go to the lid first, then lid to the car   The hinges are stiff which means working in the engine compartment is easy with the lid standing on its own, even though it will lay back on the rear window  
|
||
|
01-19-2009, 08:46 AM
|
|
|
Registered
|
Fuel lines,oil lines and air ducting
Dave at TRE set me up with the fuel pressure regulator from PMO. I will be running a return line and this is setup just for that
 The mount which attaches to the rear of the aluminum block looks like it wants to mount to the face of the crossmember in the front of the engine compartment  I want it to mount on the top of the crossmember, so a little modification of the bracket is necessary  Positioned and mounted...  Oil breather tank installed with the oil lines run from the crankcase to the wall, and from that same fitting back to the breather. On the other side of the inner fender wall fitting, the breather from the crankcase vents forward to the oil tank behind the passenger lockpost, then the tank vents back through the fitting to the small breather cannister which can be drained if necessary...we'll see.  My rear defrost isn't electric...it actually takes heat from the heat exchangers that is ducted up through the longitudinals and pops out with a 7/8s OD tube in the engine compartment on the outside of the rear shock towers. I had extra 7/8s oil line, so that got used to run from those lines up to the small metal tubes that run through the rear deck and blow hot air on the rear window. They are controlled by the same vents that send air forward to the cockpit in the longitudinals. Thinking being that if you need heat forward, you also need the rear defrost. This gets cleaned up next in preparation for the install up front.  Trip to town for some more 5/16ths fuel line, some clamps and fittings. Muffler comes back tomorrow. |
||
|
01-19-2009, 09:09 AM
|
|
|
Registered

Join Date: May 2003
Location: The Beave, OR
Posts: 6,288
|
Quote:
LOVE the car, BTW. 
__________________
Doug Currently Between Porsches PART OF MY SOUL: '09 Boxster 2.9 PDK, '86 911, '76 912E, '06 Cayman S, '90 911 C4, '74 911, '78 911 Targa, '01 Boxster, '70 911T, '99 Boxster (#2), '72 911T, '88 911, '99 Boxster (#1), '84 911 Turbo Look, '73 911 Targa, '88 944 |
||
|
01-19-2009, 09:28 AM
|
|
|
3 restos WIP = psycho
Join Date: Feb 2005
Location: North of Exit 17
Posts: 7,665
|
Lars, you and Chris Nielsen need to donate some DNA to Dr. Frankenstein and create the ultimate Porsche restoration monster.
__________________
- 1965 911 - 1969 911S - 1980 911SC Targa - 1979 930 |
||
|
01-19-2009, 09:53 AM
|
|
|
Registered
|
Muffler is back
Came out great...sort of a gunbarrel grey
 I spent the afternoon installing the last of the oil lines...the fabbed line from the thermostat console down to the oil cooler. The trannie got grounded, backup light switch connected, the new rubber bellows that protect the tunnel from moisture and debris for the shifter, throttle, and tach ( I need to grow a new arm with a hand that has very long fingers that are not only extremely strong and bend in both directions) as the bellows are very hard to get seated. Taillights got installed...as did the muffler I spent the afternoon installing the last of the oil lines...the fabbed line from the thermostat console down to the oil cooler. The trannie got grounded, backup light switch connected, the new rubber bellows that protect the tunnel from moisture and debris for the shifter, throttle, and tach ( I need to grow a new arm with a hand that has very long fingers that are not only extremely strong and bend in both directions) as the bellows are very hard to get seated. Taillights got installed...as did the muffler   These were going to get installed...freshly rebuilt but my nemesis did it again. I have to stop complaining about the guy that orders parts for the local dismantler, and I will if he will just order the correct parts! My axle gaskets were wrong...so they will wait for another day  . I also need to bolt up the rear sway bars. This is the cleanest the underside will be for a long time to come . I also need to bolt up the rear sway bars. This is the cleanest the underside will be for a long time to come
|
||
|
01-25-2009, 04:39 PM
|
|
|
Registered
|
Yeah...it would be nice to learn how to post the correct pics in the correct place...
The underside devoid of burnt-on grease...
 I also spent some time prepping the gas tank for final fit. The filler neck will get tacked when the hood gets a final fit, after the fenders, which are after the doors...which are next. The old filler neck removed and capped I also spent some time prepping the gas tank for final fit. The filler neck will get tacked when the hood gets a final fit, after the fenders, which are after the doors...which are next. The old filler neck removed and capped I decided to use a little filler to clean up the shape  Sanded smooth and primed   I am hoping the Wurth underbody "build" is going to match the factory finish on the tank  Looks good, but needs some more coats   The match is pretty close. I will tack the neck to fit, weld a bead and then clean the tank before applying the final color. It will then be time to get the front of the car up in the air to access the crossmember to do the final assembly of the fuel pump, filter, lines and gas tank. Last edited by speedo; 01-26-2009 at 05:59 PM.. |
||
|
01-25-2009, 04:56 PM
|
|

|
|
Happiest when Tinkering
Join Date: Jun 2007
Location: Missouri
Posts: 4,688
|
Bravo well done!
__________________
" Porsche there is no substitute" I always liked that saying. Air cooled is the only way to go! 76 911 C.R.A.P. Gruppe #2 BIG time TURBO C.R.A.P. Bitz EFI/EDIS Now MegaSquirt 3 76 Blazer also restored by me |
||
|
01-26-2009, 01:49 PM
|
|
|
Registered
Join Date: Dec 2007
Posts: 17
|
Just awesome. Can't wait for your updates.
Lars, what is the square thingy under the voltage regulator? (relay?) Also, will the regulator work ok without the two capacitors? Thanks. 
|
||
|
01-27-2009, 02:08 PM
|
|
|
Slumlord
Join Date: May 2001
Location: Canada
Posts: 4,983
|
To post your pics 'in position':
Enter your text, then hit return twice, then post the picture. Hit return after your picture link is loaded, then enter your text for the next photo, hit return twice et cetera... That is all I can add to this thread.
__________________
84 Cab - sold! 89 Cab - not quite done 90C4 - winter beater |
||
|
01-28-2009, 06:43 AM
|
|
|
Registered
|
Face first into a snag....
I had saved the bolt up of the sway bars for the last thing to do on the rear of the car. I wanted everything else to fit and be assembled, before I commited to the sway bars. They are easy to install, the mounts are welded up, links cleaned and assembled. I hit the mounts with a tap to clean the threads and mounted the 22mm Weltmeisterin the new rubber bushings and bolted it to the body. Remember, The factory bars differ in that the bar turns to the rear of the car and then again in towards the trannie. The drop links (or in this case the up links connect to a ball stem affixed to a gusset on the control arm where it meets the hub assembly and turns back forward to catch the spring plate
 This is not where after market links connect. They normally use a longer modified bolt that replaces the bolt in the spring plate that adjusts toe in. Here is the problem  Using the toe in adjustment bolt on the SWB springplate...means that with very little flextion of the suspension, the eyebolt on the uplink will imeadiately smack the undersideof the longitudinal. there is maybe a 1/2 inch clearance. If someone sets the suspension and swaybar up using this connection, when the suspension is loading...it will get quickly stopped by the bottom of the longitudinal. I guess similar to "bottoming out" a shock...but maybe more serious. I called Chuck Moreland and discussed my concern. He kindly took the time using a mockup in his shop and held up one of his swaybar arms to the longitudinal and agreed with me that this was a problem. The LWB cars don't have this issue, because of the length of the spring plate.  The Weltmeister link is similar to many afternarket sway bars in using the longer bolt for the toe in adjustment  Ok, I need to modify the pickup point. First try was to use the lower rear bolt that attaches the control arm to the spring plate  I made a bracket for both sides out of sheet stock that used the same bolt, but created a lower attach point for the link  And attached  There are some problems with this...the link is too long (easily remedied), but from the rear you can see that a side load is going to develope which will create a bending moment to the inside..essentially defeating some of the swaybars ability to "load" the suspension  I don't like that...going to plan "B" |
||
|
02-07-2009, 05:53 PM
|
|
|
Registered
|
The fix...
I talked to Grady about running a hole through the control arm and exiting at a point where the link can stand more vertically. I will weld a bushing in the control arm to maintain strength and keep the 10mm bolt from deforming it. I first measured where the hole would need to be with the link roughly vertical
 I centerpunched the placement of the pilot holes a few times to get things lined up before I drilled the pilot holes I centerpunched the placement of the pilot holes a few times to get things lined up before I drilled the pilot holes Measured and cut the bushings to be welded  Sized the holes for the bushings and fitted them   Welded them in, cleaned up the welds and painted ready to go  Fit and final assembly  
Last edited by speedo; 02-08-2009 at 11:08 AM.. |
||
|
02-07-2009, 06:14 PM
|
|
|
Registered
|
Adjusted and tightened up
They are still off vertical a little bit, but much straighter than the other choices and a much more robust connection, as well as no risk of "bottoming out" on the longitudinal.
   And the finished product actually looks like what the factory might have come up with. Although, they would have designed and fabricated it on a bench, not welding up from underneath the car   I might add as a note of caution...if anyone has had swaybars installed on their SWB car, do yourself a favor and look under the car to see how they were attached. If they were attached using the toe-in adjustment bolt, you may have issues with the longitudinal. I was originally concerned when I mocked up the original install using the toe-in bolts for the Weltmeister bars...that maybe the LWB springplates that I modified to create the SWB adjustable springplates might be the problem. Nope, the springplates whether adjustable or not are the same dimensions. I then had to consider the control arms. Could someone replace the SWB control arms with a later version that has the "ball stem" for mounting the factory sway bars? Nope, they are LWB and you can't use a LWB control arm on a SWB car. My guess is that the factory did some modification to the control arms on Rs and the early Ss to accomodate sway bars. If somone needs to get the measurements for doing the same thing to their SWB cars, PM me. This modification should work for most aftermarket swaybar systems...the difference being the diameter of the through bolts on the ends of the links. Last edited by speedo; 02-08-2009 at 11:39 AM.. |
||
|
02-07-2009, 06:37 PM
|
|

|
|
Registered
|
That snag is history....nice.
 Question for some suspension expert out there - should Weltmeister offer their own hardware fabrication solution - to avoid the problem as shown - on SWB models ? Or everyone in the same boat... ___________ '82 Targa -sold '77 Spitfire |
||
|
02-07-2009, 07:46 PM
|
|
|
Registered
Join Date: Feb 2004
Location: Long Island, N.Y.
Posts: 1,798
|
speedo:
Is there any chance a crack could develop from the welded area? Does the arm have enough strength to with stand the sway bar stress? Curious.. jp |
||
|
02-07-2009, 08:29 PM
|
|


 0 Porsche 911
 1974 Porsche 911 2.7
 1978 Porsche 911SC 3.0
 My Carrera
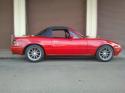 Miata of Doom!
 1970 Porsche 911T


