|
|
|
|
|
| Author |
|
|
Registered
|
forward...mush
Wiring up the front of the car...headlights, running lights, turnsignals, horns. Blecch
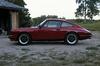
  The beast looks a little stealth luking in the shadow of the garage. TRE R front running lights and turn signals  Everything was pre-fitted prior to painting...which means inevitably there were be problems in final assembly. I am using the balance of an old wiring harness to scavenge the needed extra wire  I needed to extend the J tube up into the light bucket. I used a 1 inch vinyl hose...flexible, and easy to work with.   All the connectors are ...well... connected. The bucket is drilled    Assembled 
|
||
 03-15-2009, 05:54 PM
|
|
|
Registered
|
Now for the lights
I fitted the turn signal lense and discovered a problem....the shape of the lense is to "upright" for the front contour of the fender. I have a gap...
 TRE's package did not include a rubber gasket. I decided that I could create a rubber gasket to fill the void. What to use...I know what you are thinking...an inner tube!  Cut a couple templates   This will work...  Headlight installed, running light and turn signal done. Right side is finished.  Right side  
|
||
|
03-15-2009, 06:13 PM
|
|
|
Registered
|
Horns...
Normally, the horns are mounted on a clamp that secures the J tube to the pipe that comes out of the body. It is through this steel tubing that the wiring goes to the headlight bucket...and gets re-routed to the turn signal buckets and the horns. These are the Porsche clamps that do the securing
 And this is where they go   I eliminated the brackets and mounted the restored horns (different thread) to the old front bumper mounts...perfect location   This is what the completed assembly looks like on the drivers side with plenty of clearance for the bumper  Both sides lights in place and wired up...'bout time.  Temp refit of front bumper...seems like I never fitted this prior to painting. The pain of working with fiberglass vs steel...   Next...finish the bumper, and then the centerfill tank neck gets completed. 15x7 wheels should be here tomorrow. I will swap the deep sixes in the rear for the 15x7s and remount the Dunlop 205 50 15s. It will be interesting to see how the rear fitment changes. |
||
|
03-15-2009, 06:35 PM
|
|
|
Registered
|
I have the same issue with the front bumper, varying gap sizes, are you goingt o use a soft foam seal to close everything up?
__________________
Robert Currently Porsche less (but the wife has 2) |
||
|
03-15-2009, 07:01 PM
|
|
|
Max Sluiter
|
Great work, Lars!
 The car looks stunning in the Cobalt Blue. The headlights and chrome really shine on the color. Nice to see the fenders and front bodywork mounted. The car looks stunning in the Cobalt Blue. The headlights and chrome really shine on the color. Nice to see the fenders and front bodywork mounted.
__________________
1971 911S, 2.7RS spec MFI engine, suspension mods, lightened Suspension by Rebel Racing, Serviced by TLG Auto, Brakes by PMB Performance |
||
|
03-15-2009, 10:27 PM
|
|
|
Registered

Join Date: Apr 2006
Location: northeast
Posts: 4,532
|
great work as it has been all along here Lars!!!
Are you by chance going to do the book deal??? I for one woulf buy it... Also, any concerns on the fron facing direction of the horn opening? Won't that allow all kinds of road debris to enter the horn and kill it? Maybe face the opening down... I would guess it is best to face the opening forward as you have it so the sound emmiting from the horn goes fwd, but, I wonder how important the direction on a small car horn it is... Keep up the great work... almost there!! :-) Bob
__________________
I live for 911 tweaks... |
||
|
03-16-2009, 04:15 AM
|
|

|
|
Registered
|
Baby got new shoes
The deep sixes in the rear...don't fill out the fenders...
  I got the 15x7s refinished at Al Reeds and got the tires swapped over today Here is the new look on the rear....the deep sixes will stay on the front. I am running dunlop 205 15 50s all the way around.   This weekend...the front bumper gets fit, and I trial refit the fuel tank. I need to get the tank neck welded up. And the door panels are finally here....so the windows go in too. 
|
||
|
03-20-2009, 06:54 PM
|
|
|
Happiest when Tinkering
Join Date: Jun 2007
Location: Missouri
Posts: 4,687
|
Lars, you are an inspiration to watch I wish I had a tenth of your skill.
__________________
" Porsche there is no substitute" I always liked that saying. Air cooled is the only way to go! 76 911 C.R.A.P. Gruppe #2 BIG time TURBO C.R.A.P. Bitz EFI/EDIS Now MegaSquirt 3 76 Blazer also restored by me |
||
|
03-20-2009, 07:45 PM
|
|
|
Registered
Join Date: Oct 1998
Location: Denver, CO
Posts: 1,335
|
Five letters Lars...
D O D G E
__________________
- '72 911T - '81 911SC Euro |
||
|
03-20-2009, 07:48 PM
|
|
|
3 restos WIP = psycho
Join Date: Feb 2005
Location: North of Exit 17
Posts: 7,665
|
Quote:
__________________
- 1965 911 - 1969 911S - 1980 911SC Targa - 1979 930 |
||
|
03-20-2009, 08:59 PM
|
|
|
Registered
|
Quote:
Lars- Car looks great!
__________________
63 356 2.1 Rally Coupe 75 911M 2.7 MFI 86 Sports Purpose Carrera "O4" 19 991.2 S 25 992.1 GT3RS |
||
|
03-21-2009, 03:47 AM
|
|
|
Registered
|
Bump for the bumper
I assembled the bumper and marked where the seal edge should be. Using paiters tape I "drew the line" and then removed the bumper. I'll now lay down the seal onto the bumper and drill through the seal for the mounting holes.
  I need to glue in the front trunk gasket  Tis would be easier to do with the hood off...but as it is already fitted...I'll work around it  Front bumper fitted with fender-bumper seals in place and rubber hold down brackets installed  I am using a 7/16 x 3/4 foam seal...side view 
|
||
|
03-22-2009, 05:43 PM
|
|
|
Registered
|
All tightened up
Nice and even all around
  Turn signals and side marker look so much better with the bumper installed    Side view...front cleaned up nicely 
|
||
|
03-22-2009, 05:49 PM
|
|
|
Registered
|
center fill time
This feels like I am going backwards. The neck is almost ready to be welded to the tank. Everything was pre-fit before painting...and just needs to exactly re-fit. But before I do that, I need to get the bottom of the tank ready. I scrapped the old tank-body seal off and cleaned the edge up for the new seal. There were some scraps on the underside of the tank that had started to oxcidize. I got out the wire brush and took them down to bare steel. There was also a small dent that I metal-worked back straight.
 Primed...  And re-undercoated  I will leave the bottom of the tank black. Now I can install the new seal, and fit the tank back into the car. When tightened down I will be able to final fit the centerfill neck. as well as the "catch". I'll tack it together and then remove it from the car for final welding and painting. I will paint the top of the tank grey when the welding is done. Then it goes back into the car for final assembly. |
||
|
03-22-2009, 06:00 PM
|
|
|
Max Sluiter
|
Looking good, Lars. Great work as always.
By the way, I found a working fuel pump for my 911S and installed it today. I took it out for a fun test drive blast through the local twisty canyon roads. I was so excited to drive it again. Thanks for thinking of me and helping with the parts search. Your 911R progress is even better considering that you were distracted. Cheers
__________________
1971 911S, 2.7RS spec MFI engine, suspension mods, lightened Suspension by Rebel Racing, Serviced by TLG Auto, Brakes by PMB Performance |
||
|
03-22-2009, 09:53 PM
|
|
|
Registered
|
Gas tank...topside
Next time...the tank may be a centerfill...but not through the hood. It would be so much easier to open the hood to fill the tank. Although everything was fitted before the paint (I realize I have never said this before) it never seams to be fitted correctly afterwards. I have treated the bottom of the tank and applied the new body sealer
 I installed the tank for the first of 15 attempts to get everything to line up  The neck needed to be shortened  final fit before tacking  First couple of tack welds   Welding likes to warp steel...need to fit the tank again for clearance   Fit is still good...time to weld the bead |
||
|
03-29-2009, 08:53 PM
|
|
|
Registered
|
Gas tank... finished
Finishing up the neck. Few more tack welds...
 And final bead  Checking the warpage factor    Time to seam seal the weld and mount the drip tray   The stainless drip tray (cat food bowl) is too thin to weld, so I carefully positioned the tray upside-down and used JB Weld as a "collar"  Worked great...the JB Weld supports the tray from underneath...no welding involved, and it is not going to move. Last edited by speedo; 03-30-2009 at 06:00 PM.. |
||
|
03-29-2009, 09:07 PM
|
|
|
Registered
|
Close to the end...of the tank
With the neck and drip tray secured, time to clean up the top of the tank. I needed to deal with some dings and scratches...
 painted and ready for the final installation of the sender  Waiting for the final install  I need to re assemble the fuel sender...attach and also run the over flow line ...soon. I struggled with replacing the windows using later windows and the earlier tracks...they work, it's just a royal PIA. Here is the new door window  And the various choices of tracks  I cleaned up the replacement window and track...and the caulk used to seal the window and gasket to the track    I needed to replace the door channel...which will be here in three days, before the final assembly on the doors...this Wednesday. Speedo Last edited by speedo; 03-29-2009 at 09:34 PM.. |
||
|
03-29-2009, 09:25 PM
|
|
|
Registered
Join Date: Dec 2008
Location: New Jersey
Posts: 62
|
Using a cat food bowl for your drip tray is absolutely brilliant. I take it that is not a part that can be ordered from our host?
I am constantly amazed by your ingenuity and resourcefulness.
__________________
Andy |
||
|
03-30-2009, 12:53 AM
|
|
|
Registered
|
Time to install the gas tank
But before I do...I need to install a drain in the drip tray. Parts in place
  I think these are referred to as threaded rivets. I created a tool to cinch the rivet tight  Drill the hole and insert the rivet   Almost done  And done  Run the drain tubing... 
|
||
|
04-01-2009, 06:37 PM
|
|


 1974 Porsche 911 2.7
 1968 Porsche 911T
 1986 Porsche Carrera
 1971 Porsche 911S


