|
|
|
|
|
| Author |
|
|
Registered
|
Finishing up the wipers...
Instead of using NOS wiper blades...I purchased new blades with holders and decided to backdate them to look like the early aluminum holders. I separated the rubber blades and backdated.
Re-assembled  Installed...look pretty factory   This was a PIA...  The bracket that holds the turn signal and wiper switch assembly had been loosened during the restoration (2 allen bolts) and the whole thing had allowed the steering shaft to slide forward so that I didn't have enough threads to attach the steering wheel. Here's the factory drawing of the assembly in a side view  The blowup of the problem area....not enough meat on the splines  I had to completely dis-assemble the steering down to the rack and pinion. I wasn't looking forward to this, as it was bolted up and torqued  Which means all the electrics connected to the wiper and light switches need to be disconnected to be removed...yuck!  Once the problem was identified, I was able to correctly shift the housings to their original positions, reinstall the steering linkage, and bolt everything back down. This took half a day to diagnose and repair...I was thinking a couple minutes to install the steering wheel  The good news is that I managed to find a 914-6/RS steering wheel and it will be replacing the prototipo as soon as it arrives 
|
||
 05-03-2009, 07:56 PM
|
|
|
Registered
|
Fuel pump and filter install...
I had wanted to install both the fuel pump and filter on the aluminum crossmember. I could use the standard cradle that Porsche used to bolt up the fuel pump on the inside of the left longitudinal where the sway bar bracket mounts. I wanted something a little cleaner...here is where I wanted to mount it
 The pump will mount there ok...the filter is wider and longer  It is going to have to be relocated. Engine compartment....and forward away from the heat. I can use the vestige left engine lid hinge mount  I grab the flat stock and decide to make a bracket for mounting the fuel filter and pump  Here is the filter bracket  And the fuel pump bracket to mount the pump to the crossmember  Fitted  Primed and painted   Looks like a good fit. I wrapped a couple layers of bicycle inner tube rubber around the filter to isolate it from the mounting bracket 
|
||
|
05-03-2009, 08:13 PM
|
|
|
Registered
|
Final fit...
I need to re-engineer my plumbing in the engine compartment to accommodate the mounting of the filter
 And mounted   Now forward to the fuel pump. The bracket has been made and fitted...I also isolated the pump from the bracket and crossmember using rubber  For the hardline return going back to the tank, I sacrificed a CIS accumulator fitting  The schematic showing the low pressure pump pushing to the engine compartment...and through the filter  I found the correct Bosch fuel pump harness in here...my wiring harness reserve  
|
||
|
05-03-2009, 08:26 PM
|
|
|
Registered
|
Install the damn pump and close it up
Fitting
 Bracket is dead-on...run the plumbing   Getting there   Almost...   Buttoned up and covered  Ready to test the fuel system. |
||
|
05-03-2009, 08:37 PM
|
|
|
Registered
|
Dropped the car off the jackstands and dollies
Got the fuel pump wired up and put the beast on the floor. I was going to push it outside for the first photo-op...but it started drizzling. I now get to start sorting through the electronics that are either new...or modified. Close to starting the engine once the wiring is tested. Temporary seat....
 I filled the oil tank and charged the battery...    The poor car is very dirty from living in the shop for so long. As the motor was non existent (912 that didn't come with the car) and the new engine ...2.7 RS spec is brand new...I can't just hook everything back up and turn the ignition. I am embarrassed that he looks so dirty. Shortly he will get cleaned and the motor will get fired up....hang in there. I guess I am saying this to myself ")
|
||
|
05-03-2009, 08:49 PM
|
|
|
Max Sluiter
|
I am still watching and interested in your build. Good work. I had a heck of a time replacing the fuel pump on my 1971 911S with the pump above the sway bar.
__________________
1971 911S, 2.7RS spec MFI engine, suspension mods, lightened Suspension by Rebel Racing, Serviced by TLG Auto, Brakes by PMB Performance |
||
|
05-03-2009, 10:44 PM
|
|

|
|
I hate freight charges
|
That car is coming together quickly and beautifully. My hat's off to you

__________________
Tom 78 911SC SC to 73RS imposter SCWDP crew #50 and 51 1969 Camaro "The new project" 
|
||
|
05-03-2009, 11:18 PM
|
|
|
Registered
|
step by step.... inch by inch....
__________________
63 356 2.1 Rally Coupe 75 911M 2.7 MFI 86 Sports Purpose Carrera "O4" 19 991.2 S 25 992.1 GT3RS |
||
|
05-04-2009, 01:31 AM
|
|
|
Registered

Join Date: May 2003
Location: The Beave, OR
Posts: 6,288
|
Quote:
 On a similar note, has anyone contacted Excellence about this car? Really beautiful...on the inside and out.
__________________
Doug Currently Between Porsches PART OF MY SOUL: '09 Boxster 2.9 PDK, '86 911, '76 912E, '06 Cayman S, '90 911 C4, '74 911, '78 911 Targa, '01 Boxster, '70 911T, '99 Boxster (#2), '72 911T, '88 911, '99 Boxster (#1), '84 911 Turbo Look, '73 911 Targa, '88 944 |
||
|
05-04-2009, 04:33 AM
|
|
|
Registered

|
I have been completely consumed by work lately, but Lars, I am glad this was one of the threads I was able to catch up on. Absolutely beautiful car. Cheers!

__________________
Shane - 1984 928S |
||
|
05-04-2009, 05:41 PM
|
|
|
Registered
|
Waking up the electrics
I has been a long time since current has flowed through the wiring. And at leasr one PO got creative with the wiring...and surprisingly enough, it wasn't to hack-in a stereo. Nonetheless some of the wires to the ignition were "jumpered" from the fuse panel around the firewall male-female plugs (not sure why, but not a good sign) to the ignition switch. I eliminated the extra wires and restored the harness back to the original configuration. As luck would have it...with the battery hooked up, I have power to the fuse panel, but no power to the ignition switch...hmm...maybe that was why the jumpered wires were there. Sooo, I get out the volt meter and do a continuity check on everything from the fuse panel to the female side of the firewall plugs and then from the male side of the plugs to the ignition switch. I find a couple wires that have continuity, but when I apply voltage...nothing. Ok...maybe a short to ground somehow? Cracked insulation that isn't visible? A quick call to Grady, and his suggestion is to pull up the fuse panel and clean off any potential oxidation on the back side. As usual with me and electronics...it feels like several layered problems...where in reality it may very well be one wire or connection causing the problems. I did get to hear the Bosch fuel pump growling on the aluminum crossmember. Good news is that the big chunk of aluminum I strapped the pump to (...even with rubber to isolate the pump) really resonates the sound of the little pump. Bad news is that the big chunk of aluminum I strapped the pump to...really resonates the sound of the little pump. Hey, I'll know that the pump is operational. It will quiet down when there is fuel running through it I'm sure. Maybe I'll get a nice harmonic between the webers the R exhaust and the pump. Oh, maybe that's why I didn't provide a space for a stereo.
My steering wheel arrived. I cautiously opened the box, and it was better than represented. It is definitely a 914-347-805-10 which makes it a 914-6 wheel...and it has the turn signal canceler on the back. I'm no wheel wizard (so that means if I am off base here you can't bury me up to my neck and let the fire ants loose)...but the seller said the batwing is from a 67S. I installed it with this in place to see if I like the look. If not, I can swap it out for a nice hockey puck center cap I have stashed. Here is the recovered flat prototipo about to be yanked from the game...  And the new pitcher on the mound  Interesting...the prototipo is an inch and a halve smaller in diameter, but the new wheel allows a better view of the instruments. I'm sure someone can weigh in on whether or not the wheel is double wrapped...I really don't care, and can't tell. The leather is in great condition as is the batwing and center. I want to get the electrics fixed before I install the seats...because I have been spending a lot of time laying on my back on the floor under the dashboard with a voltmeter. And this position is a lot more friendly without the added burden of seats to deal with. As I am optimistic...I brought some fresh higher octane gas home. I have already fed him 9 quarts of oil...(yes there were a couple minor leaks) and need to get some brake fluid in him and bleed and test the brakes. As soon as the new engine gets started...I go load up the engine on my mountain road for 20 minutes to seat the rings. It would suck in my exuberance to get him running, to fire up the engine head out to the road and only have my emergency brake operational. I'm sure that nobody on this board would admit to doing that...or would theyI'm close! |
||
|
05-09-2009, 09:01 AM
|
|
|
TIG Welder
|
How much for the prototipo?
__________________
'79 SC Targa (SOLD) '85 944 (SOLD) '86 951 (SOLD) '97 Boxster (SOLD) |
||
|
05-09-2009, 01:11 PM
|
|

|
|
Max Sluiter
|
The Prototipo looks extra fat to me. Like 2 layers of leather.
Here's my slimmer wheel 
__________________
1971 911S, 2.7RS spec MFI engine, suspension mods, lightened Suspension by Rebel Racing, Serviced by TLG Auto, Brakes by PMB Performance |
||
|
05-09-2009, 03:33 PM
|
|
|
Almost Banned Once
Join Date: Feb 2009
Location: Adelaide South Australia
Posts: 38,638

|
Quote:
I think your car is female not male. She beautiful so that makes her a woman... Have you named the car yet? As a suggestion, how about "Adora" "The girl's name Adora \a-do-ra\ is of Greek, Old German and Latin origin, and its meaning is "a gift; beloved; adored". The name suits "her" perfectly.
__________________
- Peter |
||
|
05-09-2009, 04:07 PM
|
|
|
Recreational User
Join Date: Mar 2004
Location: A Mile High
Posts: 4,159
|
All of Lars' cars are male.
|
||
|
05-09-2009, 09:56 PM
|
|
|
Registered
Join Date: Sep 2007
Location: London Ontario Canada
Posts: 209
|
Name??
Howzabout "Fritz"? A good German name for a great German car, and also the sound the old wiring makes while Lars figures everything out?
Larrybrook Ps. Fabulous read, I rarely reply...it's truly inspirational. Thank you Lars.
__________________
Extremely Yellow 74 Targa 2.7 L - aka WIFES BANE |
||
|
05-12-2009, 06:52 PM
|
|
|
Registered
|
Final checklist.
Not to bore you...(again)...the wiring has been sorted. After rebuilding my starter, checking repeatedly for a short to ground in the + cable that goes from the battery to the starter, and jumpering the solenoid with an auxillary battery...things started to come together. I finally got the engine to turn over. Not sure where the gremlins were...but for the time, they are exorcised. I pulled the plugs and built up as much oil pressure as I could just using the starter. I then took both of the lines to my PMO fuel pressure regulator and joined them. This effectively pushed fuel all the way from the tank to the engine compartment and then all the way back to the tank...flushing the inlet and return lines. I then reconnected the lines to the pressure regulator and checked for pressure. I couldn't get the regulator to read below 5.5 PSI which is about 1 PSI higher than I want, something to deal with after I talk to Dick Parr. Next thing to check is the carbs. I checked the float level on the webers...3 were good and one was too high, so I replaced the washer under the valve with a thinner one and remeasured...perfect. With the fuel pump off, I checked to make sure the carb linkage actually provided the carbs with fuel...bingo. I didn't repeat this to avoid potentially flooding the carbs. As my ignition/starter issues seemed to have been solved, I reinstalled the ignition switch, and tidied up the remaining wiring. I can now at least install the drivers seat. Rails need to be cleaned up
.  derusted and painted  Installed  Drivers Recaro...good to go   When I was cranking the engine to get oil pressure, I didn't have a low oil pressure light and wondered why. I pulled the early oil pressure gauge and noticed that unlike later gauges that have warning lights for (from the top of the gauge) emergency brake,oil pressure,alternator), the green face gauge has the e-brake light and alt light...but no middle light for the oil pressure? Hmmm, I looked at the back of the gauge and there is a "socket" for the light, and the light is wired up, but doesn't look like there is a "lense" to be iluminated on the front of the gauge. In other words...sort of a "tunnel to nowhere". Another "worry about it later item. I checked the wiring diagrams  Last item on the checklist was to pull a plug wire and trigger the ignition to see if I have spark on plug #4. I made sure the fuel pump was off , I grabbed the fire extinguisher and had someone turn the key...
Last edited by speedo; 05-25-2009 at 05:28 PM.. |
||
|
05-25-2009, 05:06 PM
|
|
|
Registered
|
It's alive...
There was a spark...and more. When I earlier checked the carb throttle linkage and shot fuel into the throats, there was enough fuel and/or fumes for the engine to "catch" when I was checking for the spark. I quickly shut it down. Before the "break-in drive, I want to test the brakes again, look for leaks again, install the K and N air filters to avoid the carbs belching fuel out the stacks and maybe finding a hot wire that I haven't detected yet. It is not going to happen today. The weather outside is miserable and I don't want the 20 minutes of "seating the rings" to be on a mountain road in the rain. It's been too long coming for the first drive to be in the rain. Brand new engine in a brand new car...
 With only one seat  Ready-get-set  Go....  Next up...the test drive and...the car gets washed for the first time in a year. I can't remember what cobalt blue is supposed to look like. For now it looks like cobalt-shopdirt-grey. |
||
|
05-25-2009, 05:22 PM
|
|
|
Registered
Join Date: Nov 2004
Location: Santa Cruz, CA
Posts: 966
|
Keep up the good work Lars. First drives/test drives are always exciting. I'm pretty sure most of us here would like to be on a ride along. Keep us posted.
__________________
Matt Cooley 1974 911 |
||
|
05-25-2009, 05:42 PM
|
|
|
Registered
|
This thread is almost over...
Big day. Bleed the brakes again, check the plug wires again, check for oil leaks again. I decided that I wanted as little fire risk as possible, so I installed the K and N air cleaners.....at least the fuel won't splash out of the cleaners if the floats overfill
  Chris came up and helped with all of the above. I am having issues with either two faulty fuel regulators, or my Bosch fuel pump as we were reading 6 psi at the regulator, while trying to dial it down to 4 psi. Weird thing is that the regulator...won't. we swapped out the first one for a new one to see if the valve on the first one was faulty...same problem...6 psi. As the floats weren't overflowing, and we didn't see any fuel leaks, we decided to go ahead with the first drive anyway. I carried a fire extinguisher and we had one at the ready. We pushed the car outside the shop, realizing that if the engine didn't start...we would have a difficult time pushing the car back uphill into the shop. I preferred to run the risk of an engine fire outside the shop. In the meantime we checked the static timing using the starter only...nope, not very much negative camber on those rear wheels  The regulator being swapped....or I'm trying to get my hands back out of the carbuerators  If the brakes do fail, I wanted to see if the hood and doors would be able to act as flaps, or dive brakes  Cobalt blue-grey-dirt-yuck 
|
||
|
05-30-2009, 08:43 PM
|
|


 1974 Porsche 911 2.7

 1971 Porsche 911S
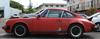 1978 Porsche 911SC 3.0
 My Carrera
 Miata of Doom!


