|
|
|
|
|
| Author |
|
|
Registered
|
914-6 Conversion Questions
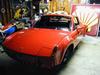
I'm building a 914-6 for a friend. I just got a 3.0L with CIS for it. I am using the Rich Johnson engine mount to install the engine.
I have some questions for those that have BTDT. Will the CIS fit the engine bay without mods? Or do you need to remove the engine lid latch and trunk springs? How did you route and plumb the CIS? Where did you locate the fuel accumulator and filter? What did you use for oil lines? I need to plumb the engine to a re-pro 914-6 oil tank and plumb in a front mounted cooler. I plan to use AN line for the front cooler, what's recommended for the tank to engine, the factory style lines? What about wiring issues? Removing the stock relay board? Wiring the CIS? Any other tips and info appreciated. Thanks, Ed BTW - you can see the project at http://community.webshots.com/user/evill914 click on Nick Cole's 914
__________________
Basically, I'm One Giant Train Wreck. http://community.webshots.com/user/evill914 |
||
 06-04-2004, 05:08 AM
|
|
|
Registered

Join Date: Aug 2000
Location: Williamsburg, VA
Posts: 1,147
|
Sorry I can't help you Ed but I have a question.
What is wrong with the location you used for you accumulator in you other CIS conversion? I believe you put it below the fuel tank. Cheers Kerry 
__________________
Kerry (Back on the road, sort of) 914-6 in the Werks |
||
|
06-04-2004, 07:17 AM
|
|
|
Registered
|
Kerry, I had the accumulator mounted in the engine compartment of the turbo car. I had to fabricate all of the lines for that set up.
On this car, I am trying to use as many of the factory lines, from the 911 donor car, as I can to make the install easier and cleaner. Ed
__________________
Basically, I'm One Giant Train Wreck. http://community.webshots.com/user/evill914 |
||
|
06-04-2004, 09:03 AM
|
|
|
Registered
Join Date: Nov 2002
Posts: 79
|
Ed,
I'm in the process of doing a similar conversion but it is not done yet so some of my comments are based on a work in progress. Regarding the Rich Johnson motor mount. When I bought my mount from Rich, I mentioned that my motor would have CIS on it. He has faced this problem before. He recommends that you do a trial fitting of the motor into the chassis to look for any clearance problems. Most likely this will involve fabricating a pair of donut shaped thick spacer washers that go between the bottom of the rubber mounts and the top of the motor nose piece. Rich said that the thickness of these washers will be somewhere in the 1 to 1.5 inch range but the exact dimensions will be determined in the trial fit. If you don't use the spacers, the top of the CIS housing will rub on the bottom of the engine lid, even after you have eliminated the rain catch tray. It may also rub on the sheet metal that forms the front edge of the rear trunk. I saw one car where the owner chopped a hug chunk out of this trunk sheet metal and then fabricated a metal housing that bulged into the rear trunk as a way of making more space available for the CIS. Functional but ugly, I am trying to avoid that. I have also modifed the engine lid to use two air grilles rather then one to significantly improve air flow for cooling. I'm told this may do as much for cooling as a front oil cooler but that may depend on how you use your car. If you autocross, I would add the front cooler as well as the dual air grilles I haven't mounted the CIS accumulator or the fuel filter yet. When the motor is trial fitted into the chassis, I will look to see how much room I have left inside the engine compartment. They don't have to be located into the engine bay if space is limited. When I mount the transaxle into this car there will be several modifications to make. Fabricating a new rear shifter shaft that is built to go around the 914/6 heat exchanger. You start with the rear shifter shaft for an early 914/4 1970 to 1972). This shaft is almost a straight shaft with a small dog leg bend in it which works perfectly for positioning the shaft slightly above the left heat exchanger. I'm assuming here that you are using a side shifter style transaxle and 914/6 heat exchangers. You weld the front and rear fittings of a late style rear shifter shaft onto the early shaft to complete the job. Replace your 914 rubber transaxle mounts with 911 style mounts. The 914 style rubber mounts are softer and much weaker then the 911 mounts and they will not hold up to the addional torque that your motor puts out. Regarding brake upgrades for your car. Certainly do yourself a favor and put a 19 mm master cylinder in your car. Even if this is the only upgrade you make. I'm going further then that. 911S front struts, 911s front calipers and rotors up front and 914/6 brake calipers with spacers added plus 911S rear vented brake rotors with spacers. It is a big job and not cheap but one of the benefits of these changes is that I can eliminate the brake porportioning valve which will significantly reduce the spongy brake pedal feel that one has with a 914. Even my original 914/6 had a spongy pedal feel to it and I'm convinced that the porportioning valve was to blame for it. No amount of brake bleeding on either my 72 914/4 or on my 70 914/6 ever got ride of the spongy feel. Another less expensive approach that would accomplish most of the same objectives would be to use the BMW 320 front brake caliperconversion. This upgrade is covered in great detail elsewhere on this same website. It is a well written article and an excellent upgrade to your car. If I had stayed with the 4 lug wheels, I would have used the BMW calipers, but I decided to go with vented brake rotors front and rear. I want my stopping power to be more then a match my going power! Rear springs? with the additional weight of a 6 cylinder motor at the rear of the car, you will have to replace your rear springs with stiffer springs. If your original springs have many miles on them, chances are your car is sagging in back anyway. I'm going with 100 #/inch springs. There are even stiffer springs available but I would prefer the filings in my teeth to remain where the dentist put them. What springs are you going to use? I'm also adding front and rear factory sway bars and Koni shocks. A nice set of KYB gas shocks would be another good option and they are much less expensive. I've mounted the CD ignition box in the standard 914/6 location at the front edge of the battery tray. I changed the alternator over to a later model that had a higher output and came with an internal voltage regulator and then eliminated the relay panel completely. This involves a fair amount of rewiring, namely opening up the engine wiring harness casing and rerouting the wires so that the large multi-pin plug now is located at the front right hand corner of the engine compartment (right next to and under the battery. Next I slit open the main wiring harness where it routes through the engine compartment on its way to the relay panel. Relocated/replaced the 914/4 12 pin connector with a 914/6 14 pin connecter which is now located in the right front corner of the engine compartment. I added a new fuel pump relay and the BZK control module used in the tach. circuit right next to the battery area and installed them inside a water proof plastic case (Radio Shack). Again this box is located under the battery. I have bought a Optima battery to totally eliminate the acid rusting problem around the battery box area. Before doing any of this rewiring, I recreated the engine compartment dimensions on the top of a 4' x 8' sheet of plywood secured to the top of a tabletop. The chassis dimensions, battery location and engine location were traced out onto the plywood and then the various wiring harness bundles were strapped to the plywood so that the wire lengths and connector locations were all accurate. While doing this rewiring, I also rewired the gauges so that the 911 style Oil volume, Oil pressure, 911 Tach gauges were prewired and electrically debugged. Using a 911 Tach also meant that you need to adapt you turn signal wiring harness behind the gauges to use left and right hand turn signal lights rather than just one combined light like the 914/r has. This part of the job made for a mini project that was done over the winter, down in the basement where it was nice and warm. Obviously this means the entire wiring harness was removed from the car but it was already out of the car anyway for the car repaintand sheet metal repair. Right now the car chassis is stripped completey bare and up on a rotisserie so it was fairly easy to measure up the engine compartment and to make the mods necessary for the oil tank. This is time consuming but allows you to completely check out every switch, light bulb, relay and gauge on the workbench before you ever start up your car. I found a bare wire, one bad gauge, some corrosion on the terminals of the fuse panel, many burned out light bulbs (now is a go time to replace every light bulb on the car) and corrosion on and inside the front and rear light housings . I think it will save me time in the longrun. Have you every tried to rewire a wiring harness while it is still in the car? It isn't any fun and half the time you can't even see what you are working on. Regarding oil lines, I would recommend that you use a factory steel oil return line to go from the crankcase over the oil tank. It looks neater then having a flexable hose dangling under your car. The original 914/6 metal oil line has a fairly small ID. Not sure if it is big enough to work with a 3.0 engine. I suppose you could fabricate you own metal line or even fab an flexible line since you will probably be using mostly AN hose fittings. instead of metric ones for most of your hoses. I would suggest a Mocal oil thermostat for plumbing in the front oil cooler circuit. It makes for a neat looking plumbing job under the car. Give some thought to where you wil route the oil lines. and how you will mount the oil cooler upfront. Some have even located the cooler under the rear trunk and avoided the problems associated with front oil coolers. Most of these involve use of an electric fan to circulate air thru the cooler. Fuel Tank Upgrades My fuel tank had little specs of rust flakes laying on the bottom of the tank. I used the 3 part gas tank sealer sealer kit to clean, etch and seal the inside and the outside of the gas tank. After letting it dry for a month, I connected the fuel tank, pump, filter, accumulator and the entire CIS system up and bench tested the complete system. I found problems with my fuel pump (leaking). the CIS fuel distributor (stuck piston), fuel injectors (two of them had poor spray patterns, the cold start valve (wouldn't open at all). Detecting and fixing those problems on the bench took time but it was much easier then what would have happened if I had put the engine in the car and tried to start it! Since I have rebuilt the engine but haven't started it yet, I may still have other problems that I don't know about yet. CIS upgrades Since you have decided to go with CIS engine , do yourself a favor and install the Anti-back fire prevention valve. You should also install the pressure fed hydraulic chain tensioners and a Pertronix breakerless ignition module on your engine before you install it in the car. Like I said earlier, this is still a work in progress for my car but at least it gives you some things to consider for your own conversion. Good luck with your car. Lyle |
||
|
06-04-2004, 11:52 AM
|
|
|
Registered

Join Date: Oct 2003
Location: San Luis Obispo
Posts: 139
|
Ed, from what i know about the CIS system, i've seen alot of people cut into the rear trunk upper firewall to get better access for the airbox boot.
Yes, you need to take off the trunk torsion bars and the engine lid latch. As for the accumulator, anywhere will work, engine compartment would probably work best. With regards to wiring it up, get the wiring diagram from the year SC motor you have, and the year 914 you have. Everything is pretty much the same; yellow-starter, green/red- oil press, green/white- oil temp, red- bat+,black-key+, blue-Alt, black/purple- RPM, and i can't think of the others off the top of my head. You have PM about the oil lines Thanks, Don.
__________________
Info@********.com 800.321.5432 |
||
|
06-04-2004, 12:20 PM
|
|
|
OCD project capitan
|
Quote:
  Shrink wrapped:   Good luck, Don.
__________________
Don Welch '73 914ish ->6ish GTish 2.8 twin plug mfi... happy camper. |
||
|
06-04-2004, 12:45 PM
|
|
|
Registered

Join Date: Jan 2003
Location: Upstate New York
Posts: 600
|
Geezus lookit all dem wires
 ! !I'm lucky if mine doesn't melt to the ground after my BIG job of a stereo install.
__________________
- "NOW" Magically Delicious - |
||
|
06-04-2004, 01:36 PM
|
|
|
OCD project capitan
|
Ya, its basically the whole front wiring of a 911, with the 914 wires mated to the 911 fuse panel. Almost every wire was the same color code. Plus i spent the first week with the wiring diagrams and sketched out my own complete 914 with all the wires, gauges, motors, solinoids, relays,etc on a big peice of butcher paper. This helps work out the logic of a flow diagram before you get tangled up in the acctual wires. As soon as i make a nice photoshop color version, i'll post it.
Edited in: Sorry in advance for any highjacking
__________________
Don Welch '73 914ish ->6ish GTish 2.8 twin plug mfi... happy camper. Last edited by BigD9146gt; 06-04-2004 at 05:40 PM.. |
||
|
06-04-2004, 05:05 PM
|
|
|
RETIRED
|
"I" cut the trunk when I did my 3.0 conversion. Wayne (Pelcan owner) claims to have done one w/o cutting. Might want to check the archives or email him directly....
__________________
1983/3.6, backdate to long hood 2012 ML350 3.0 Turbo Diesel |
||
|
06-05-2004, 05:07 PM
|
|
|
OCD project capitan
|
Ya, you don't have to cut anything out, but it helps for access reasons.
__________________
Don Welch '73 914ish ->6ish GTish 2.8 twin plug mfi... happy camper. |
||
|
06-05-2004, 05:26 PM
|
|
|
Registered

Join Date: Mar 2002
Location: Grove City, OH
Posts: 1,397
|
I think that there were pictures on this site of that very type. You should do a search. I saw some within the year.
__________________
AKA: Dr Evil on the 914World forum, need your tranny rebuilt, or want a "How to rebuild your transmission DVD" set? PM me. -74 914 with 74 2.7 CIS -74 VW Bus with modified 3.1 corvair engine and 3.0 CIS fuel injection system. -74 BMW R90 |
||
|
06-05-2004, 07:09 PM
|
|
|
Registered
Join Date: Mar 2002
Location: Grove City, OH
Posts: 1,397
|
__________________
AKA: Dr Evil on the 914World forum, need your tranny rebuilt, or want a "How to rebuild your transmission DVD" set? PM me. -74 914 with 74 2.7 CIS -74 VW Bus with modified 3.1 corvair engine and 3.0 CIS fuel injection system. -74 BMW R90 |
||
|
06-05-2004, 07:22 PM
|
|

|
|
Registered
|
Thanks for the replies guys. Keep 'em coming.
Ed
__________________
Basically, I'm One Giant Train Wreck. http://community.webshots.com/user/evill914 |
||
|
06-06-2004, 05:49 AM
|
|
|
914 Geek

|
Wayne did this job. Let me look through my saved mail, he took pics but never wrote up an article for it. (I thought I had seen an article, but I guess I was wrong.)
...Rats, looks like I didn't save it...  But I think the pics are somewhere on the site. Wayne used hard fuel lines from some other CIS-equipped car to go from the relocated fuel distributor to the intake ports, I think. Drop him a note and he will probably send you a link for it. But I think the pics are somewhere on the site. Wayne used hard fuel lines from some other CIS-equipped car to go from the relocated fuel distributor to the intake ports, I think. Drop him a note and he will probably send you a link for it.--DD
__________________
Pelican Parts 914 Tech Support A few pics of my car: http://www.pelicanparts.com/gallery/Dave_Darling |
||
|
06-06-2004, 06:44 PM
|
|
|
Registered

Join Date: Aug 1999
Location: Hickory NC USA
Posts: 2,502
|
To answer the questions;
I'm building a 914-6 for a friend. I just got a 3.0L with CIS for it. I am using the Rich Johnson engine mount to install the engine. I have some questions for those that have BTDT. Will the CIS fit the engine bay without mods? Yes, it can fit, but it is not easy. A RJ mount is needed. Install the mount as low as possible. Or do you need to remove the engine lid latch and trunk springs? I move the whole latch assembly to the other side How did you route and plumb the CIS? CIS pump was located were the stock FP was on the 75... by the gas tank. Where did you locate the fuel accumulator and filter? You can use the 911 mounting system (I have a NOS one). Mount it on the trunk wall passenger side engine compartment. What did you use for oil lines? From the motor, cut the brass oil line and then ran AN 12 lines to the front on the passenger side behind the rockers. Ran the return from the coolers on the drivers side rockers. I need to plumb the engine to a re-pro 914-6 oil tank and plumb in a front mounted cooler. I plan to use AN line for the front cooler, what's recommended for the tank to engine, the factory style lines? For AN lines to the motor suction side AN 16 min. What about wiring issues? Removing the stock relay board? Keep Stock relay board. Need to make engine wire harness longer then plug it into the board once the wiring is sorted out. Wiring the CIS? Any other tips and info appreciated. Yes, you will need to space the motor down. If you are using headers, you can use the stock side shifter bar if you cut and then reweld it so it clears everything. Of course the whole project is much easier if you use carbs. Thanks, Ed
__________________
'75 914-6 3.2 (Track Car) '81 SC 3.6 (Beast) '993 Cab (Almost Done Restoring) |
||
|
06-06-2004, 06:56 PM
|
|


 10 yr toy
 Da cab
 74 Porsche 914 2.0
