|
|
|
|
|
| Author |
|
|
Registered
|
Perfect Spencer !

|
||
 03-25-2018, 04:47 AM
|
|
|
Registered
Join Date: Feb 2016
Posts: 360
|
I really look forward to the book..
Sent from my SM-N950U using Tapatalk |
||
|
03-28-2018, 09:35 PM
|
|
|
Kartoffelkopf

|
So, steady progress just crossing off those to-do list items. Monday was a great Day #1 of my vacation week, getting a lot of the stuff done that I can - other items needed me to have the anodised water parts back before I can sensibly tackle them. Thankfully a phonecall into the plating shop and I was on my way over to collect them on Tuesday.
Off the top of my head, Mondays work:
Valve covers on, radiator pump supports in place, CoP's installed:  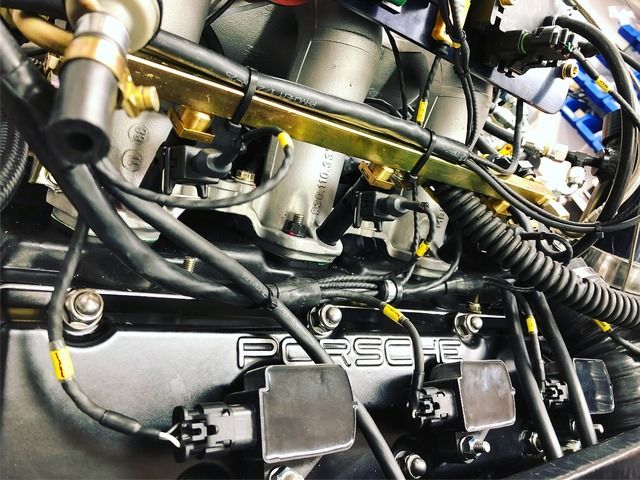 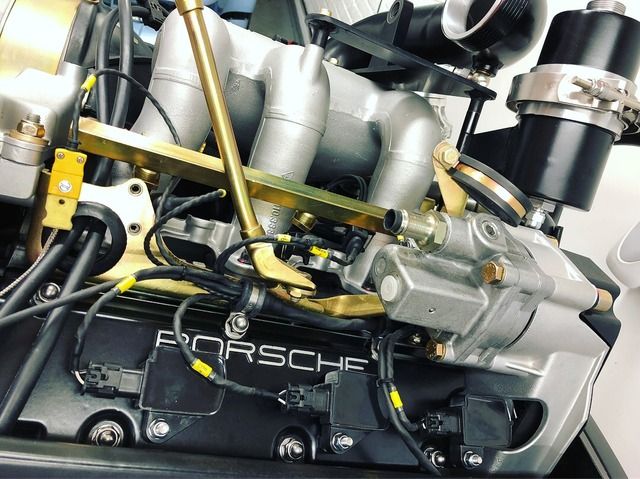 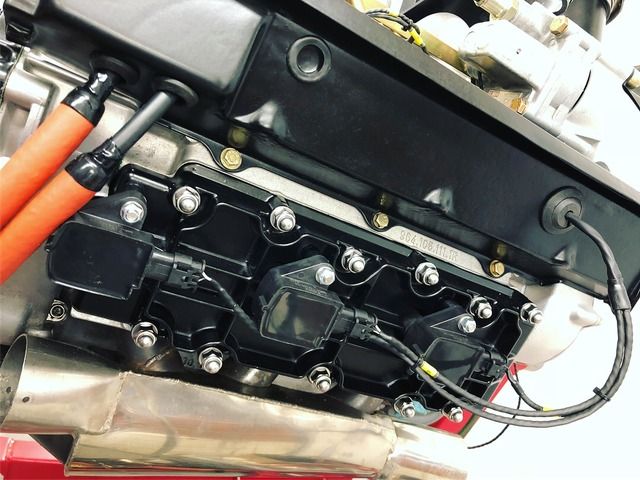 Wednesday day was just a frustrating day in the workshop. As mentioned, I got the anodised parts back, all's well with the quality...  But then it was time to re-assemble everything and it should be "job-done" right? Nope. The engine goblins have been playing, and what I took a lot of time to make sure fitted before stripping it down, now doesn't re-assemble correctly. I've been struggling with clearance of water cooling fittings on the turbo versus the turbine shroud hex bolt fasteners, versus the -10 oil drain fitting; I can absolutely see why hard lines are used for this rather than hosing. After much scratching of head, and switching around of the -8AN straight/135º connections, I've arrived at the answer.....I need to make a 25-30mm stand-off for one of the banjo's. The rear banjo is fine - which is good, because space behind the turbo is really tight to the turbo mounting flange. This hose now has a straight fitting to drop it straight down, missing the oil drain line. The oil feed line can (I think) stay as it is, albeit it's an absolute sod to install the 90º -4 fitting onto. The oil drain line now needs to be re-made. It's quite a lot too short now that the CHRA has been rotated. I may play with this again, but I am debating the merits of keeping the CHRA with a 20º upward angle. The Garrett whitepaper says that there are benefits to be had with natural syphoning of water through the housing, even without the engine running (and water not being pumped)...however, I'm sure this is intended for cars that are plumbing a turbo into an existing, large capacity and mechanically pumped water circuit. With my setup, I'm not sure that water could be drawn through a static electric water pump. I'm pretty sure that we can achieve the same outcome and keep the pump operating post-shutdown using ECU control. Anyway, the parts that are re-assembled - to be fair, it's most of it - does look very nice in my opinion; I'd like to think it's more towards a factory look and not a thrown together "DIY" lash-up!   So, this spacer. Well, this is needed for the front water fitting. I'm going to have to make this myself, probably out of ally hex stock. M14x1.5 male thread at one end, and M14x1.5 female thread at the other. Approx 30mm long, with a waisted diameter at it's base, so that it can clear the wretched hex setscrew head....a bit like this one, which I happened to find in one of my parts trays (but is too short to rework/repurpose): 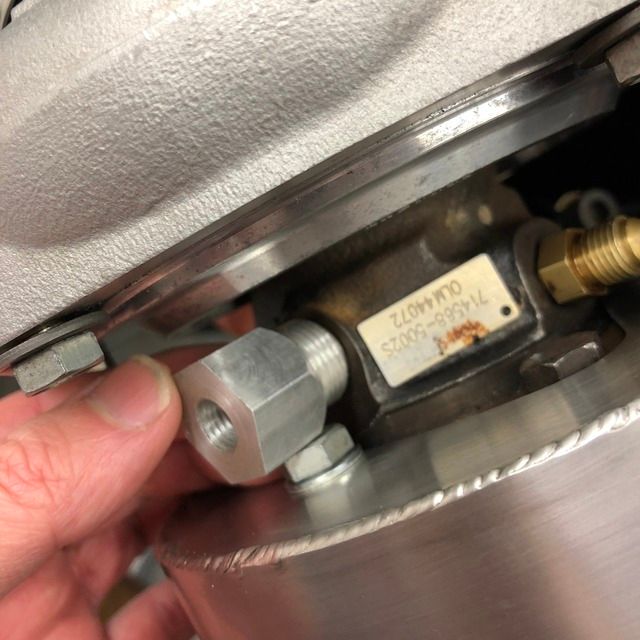
|
||
|
03-29-2018, 08:04 AM
|
|
|
Kartoffelkopf
|
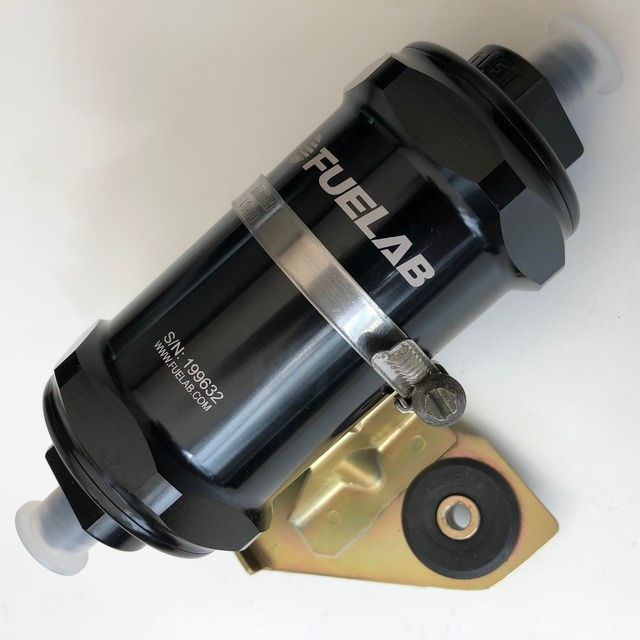
In other news, I've taken this opportunity to install a deluxe fuel filter while the engine is out. I need to switch some fittings on the fuel hoses from metric to JIC, not a major job. The Fuelab 10um filter unit should also arrived yesterday. I thought I'd need to fabricate a new bracket, as it looked a fair bit smaller in diameter to the stock unit, but actually it fits beautifully with a thin piece of rubber glued to the bracket to prevent slipping and scratching. An hour or so switching over the fittings, and it's now in place looking rather smart....
   Really am just waiting for the tap and die to arrive, to make that spacer. Weather is too wet to roll the car outdoors and fit the ECU harness through the interior. I suppose it's a good sign that I'm now at a bit of a loss as to what job to do next! Silencer and flywheel/clutch are jobs for when the engine is off of the stand.... |
||
|
03-29-2018, 08:08 AM
|
|
|
Kartoffelkopf
|
Quote:
Quote:
|
||
|
03-29-2018, 08:28 AM
|
|
|
Kartoffelkopf
|
Brief update this evening....brief because I got the √(sod all) done today! Too much NASA ISS EVA watching.....kind of like watching paint drying, but at the same time curiously addictive....
But...I did get the fuel regulator mounted, using the aforementioned factory bracket. The swapping of the metric fluid fittings for -6 was a little challenging, the "nut" recepticle of the old fittings can only be removed by cutting the hose; it has barbs on the ID. Getting the new recepticle for the -6 fitting also takes some elbow grease. Anyway's it's all done, and hooked up ready for the onwards fuel rail connection. 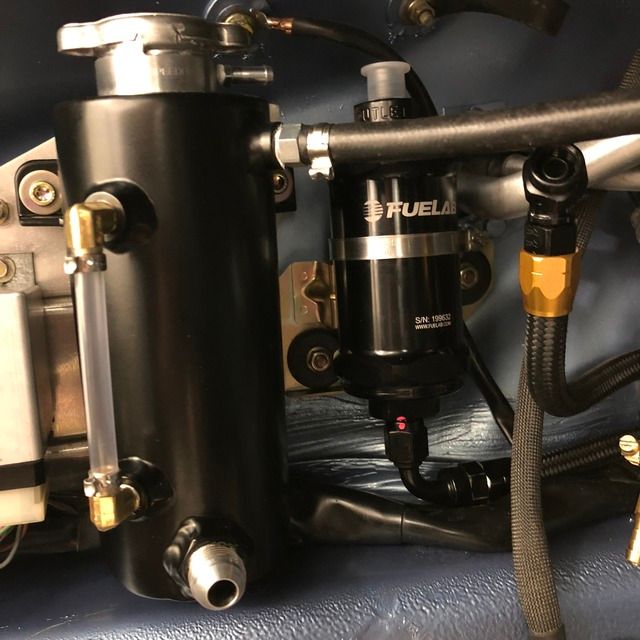 I also started making the new front water port spacer.... 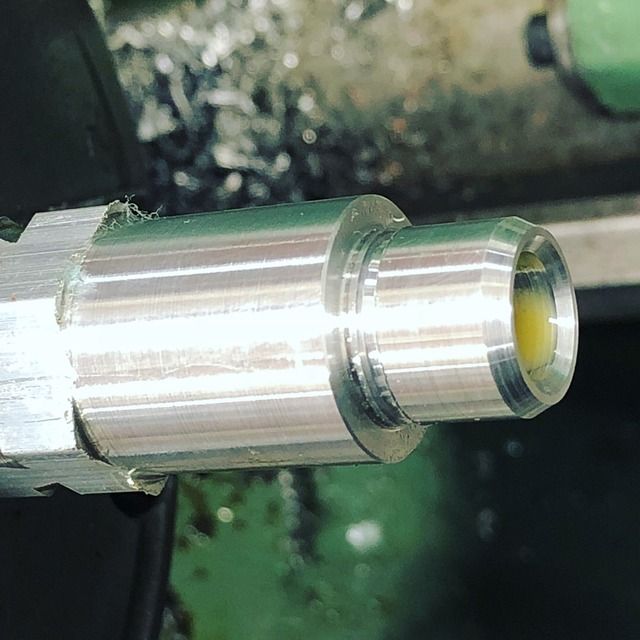  An undercut to allow the die to not leave a shallow thread at the end, and also keeping a shoulder for the copper washer to locate onto. Hoping the tap and die arrive in tomorrows post, then I can finish this little job, and get the water system completely finished. |
||
|
03-29-2018, 03:17 PM
|
|
|
Kartoffelkopf
|
An unexpected productive days work!
First order of the day was to wheel the car outside and start re-installing the ECU harness through the interior. Way-back-when, I tried to reuse the original rear bulkhead grommet that was part of the old CIS loom. Stupidly, I didn't soften it in hot water before trying to squeeze through the 2x MIL plugs which connect to the engine. Predictably it split the thin centre sealing section. It has a Porsche part number, but apparently nobody can source it as an individual item. Trying to find something suitable for a 60mm hole is also not easy, so I ended up buying a very nice split grommet from Think Automotive a few weeks ago, with a perfect fit hole to seal against the harness. All I've been waiting for is a break in the weather to get it fitted. Which I got this morning. For an hour. So, it's all now in, the surrounding area tidied up a little, removing lots of fragments of split/broken sound deadening and adhesive. I can't reinstall the rear quarter panels, carpet or seats just yet, as I need to ensure that enough harness sits engine-side (but not too much).   Elsewhere, the CHRA is now rotated back to it's original position, and tightened against the turbine side; I'm holding off tightening the compressor side until the tinware goes back on, so I can check alignment. The oil drain hose to the catch tank is now refitted, and so is the 90º oil feed line. Unfortunately there's no UK postal service on Good Friday, so still no tap and die to finish the spacer with....however...in giving it some thought overnight, I realised that I ought to skinny-down the centre section of the spacer so that it clears the CHRA/Turbine bolt, so another few minutes on the lathe...  Finally, the RH air duct hose from the shroud is now back on; I'm sure that previously I simply pushed it in place, as getting a hose clip on there was troublesome. No idea why I didn't realise that by simply removing the AC pump platform, you can quite easily fit a clip on there properly. 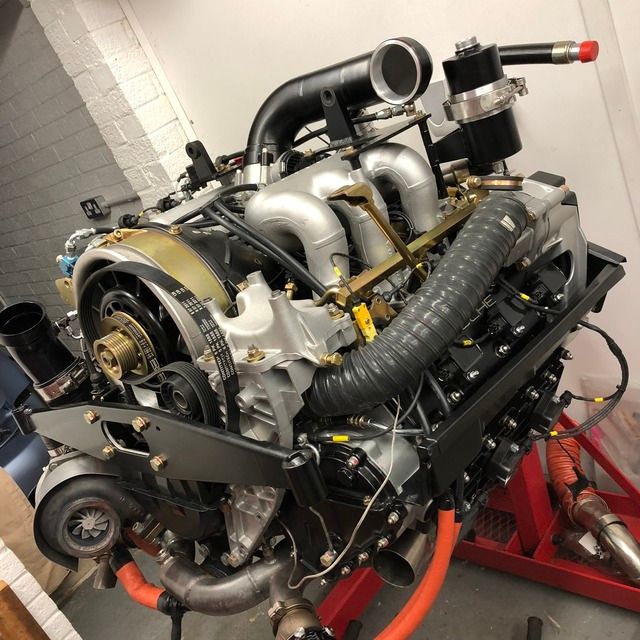 Not sure of plans for this evening, I may get time to reinstall more heat shielding and the silencer mount, as well as the front tinware...we'll see. |
||
|
03-30-2018, 09:20 AM
|
|
|
Kartoffelkopf
|
Quote:
The problem? The M10 thread in the crankcase has stripped. No idea how, it takes some doing to over-torque an M10 fixing, and I'm religious with torque wrenches...but it is what it is. 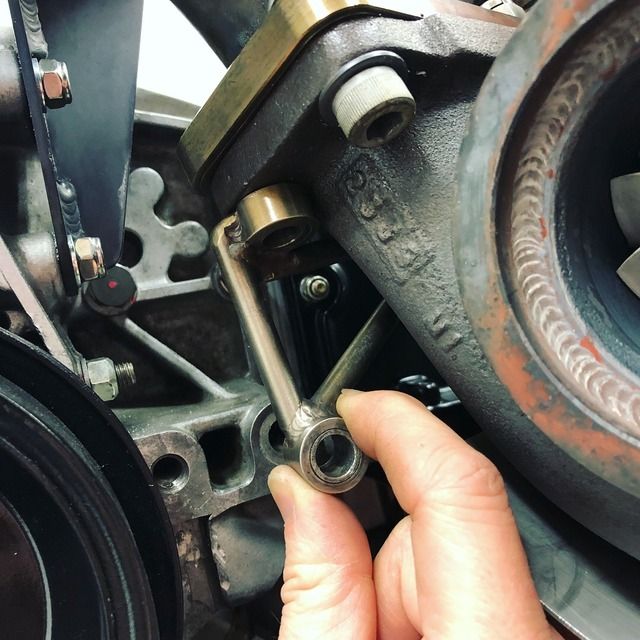 The disassembly to remedy the problem was a pain in the arse, only because the lowest 2 bolts holding the crank cover on can't be removed without getting the exhaust manifolds out of the way. Arggghhh!!! 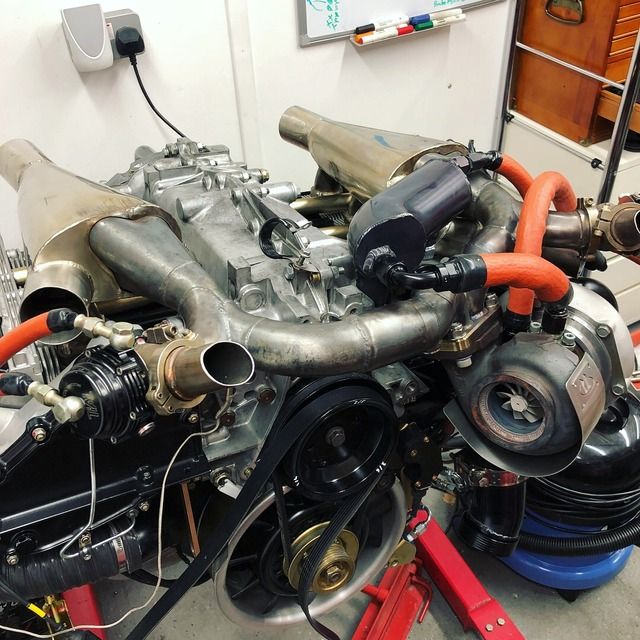 Anyway, it didn't actually take as long as I'd feared, just brew a cuppa and crack on with it. The offending hole is now drilled out and tapped to accept a helicoil, however, the only M10 helicoils I have are only 13.5mm long. A quick-swipe-right on Amazon and I should get a pack of 20mm helicoils on Monday.  This mornings work was more positive; the M14 taps and die arrived (only for me to get the tailstock die holder out...and find an M14x1.5 die already in there! Doh. Of course, I was making ally blanking plugs a few months ago, but unusually, I hadn't stripped it after use and replaced it in my taps and dies drawer. That'll teach me). The spacer for the turbo coolant port is now finished; not the tidiest piece of work I've done, but functions fantastically, nice and strong, and clears everything it needs to. 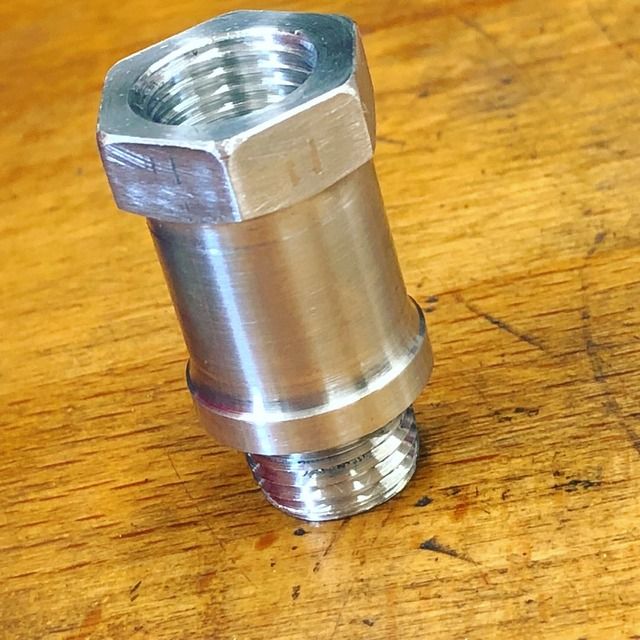 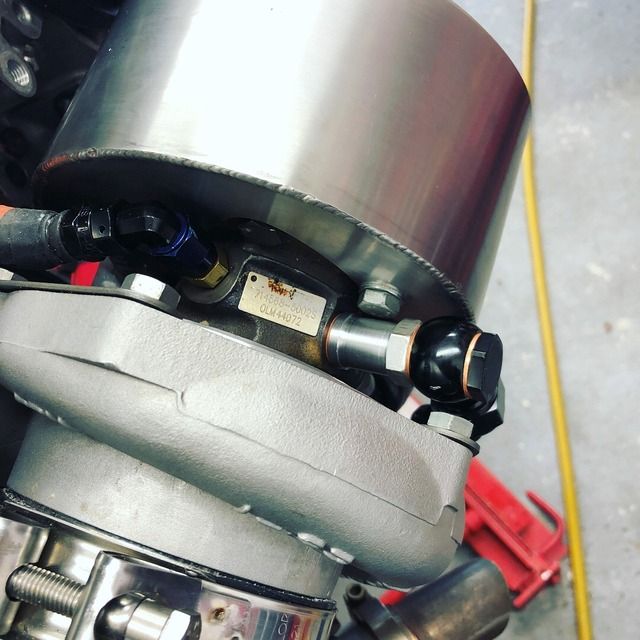 I even had some luck with the hose running across to it; I thought I'd have to make a new hose about 50mm longer, but by reversing it and re-routing, it's spot-on, clearing the LH wastegate nicely. 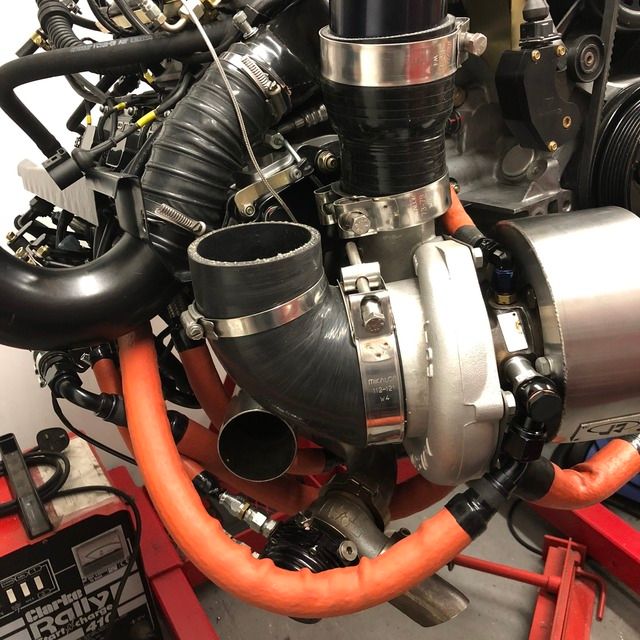 And that's about all I can do on the engine itself until the helicoil pack arrives after the Easter break. I may have a go at making a new under-seat mounting plate for the Syvecs ECU. The old one has all the mounting holes for the MBE unit, so would look scruffy if reused. I'll also look to get the new plate powder coated, as I have a few weeks now until the (rescheduled) engine install date in a few weeks time. A few pals are going to come down and help, followed by the mandatory curry and beer in the evening
Last edited by Spenny_b; 03-31-2018 at 01:00 PM.. |
||
|
03-31-2018, 12:57 PM
|
|
|
Kartoffelkopf
|
A quick catch-up update;
The longer Helicoils arrived the other day, approx 20mm long. The M10 thread that needs repairing has a depth of 33mm. [Now, whilst repairing one of my lightweight aluminium trolley jacks last weekend with Lucy (as you do...) I needed to drill out one of the M8 bolts in the piston housing, and then also repair it with a Helicoil. I thought it'd be a good opportunity to test whether stacking 2x coils into the tapped hole would work - no reason that I could think of why it shouldn't, unless the tang at the end of the top-most coil doesn't break off cleanly. It was absolutely successful, just a slight "catch" where the two coils butt up to each other.] Repeating that process with a 20mm + 13mm standard Helicoil into the crankcase M10 hole was also 100% successful....  ....however when re-fitting the exhaust headers, three nuts from finishing it, the stud on #5 stripped. I thought it was strange that when undoing the headers, the stud came out rather than the nut coming off. All of the studs were new and Loctite'd with red 263 threadlock, after we drilled out the snapped studs a few months ago. There was one stud that was a little problematic; in trying to clean the thread it kept snagging, locking the tap. I guess it removed just a little too much thread material and it's now ripped. 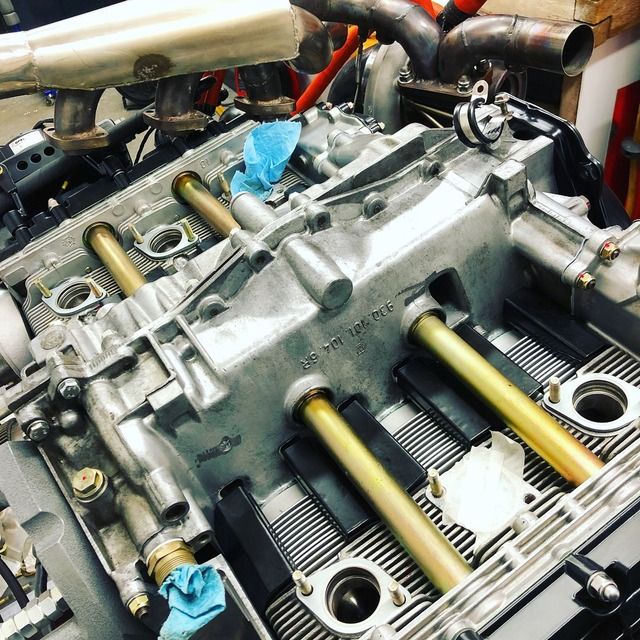 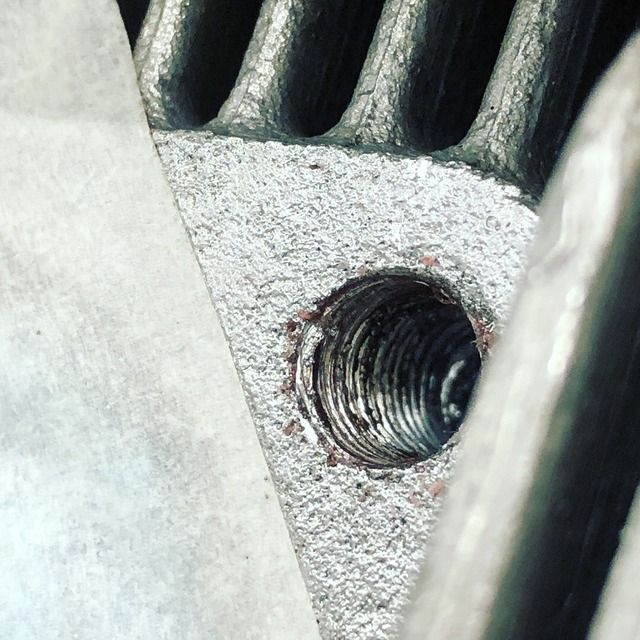 So, time to remove the headers AGAIN, and fix it with another Helicoil. I took the opportunity to also Helicoil one of the studs on #4, which had also unscrewed. The thread in the head was looking "less than optimal". I then also noticed (!!) that #2 needed attention; this was a stud which was snapped when I bought the car, and was "fixed" using a Timesert as one of the first jobs I asked a specialist to do. Clearly it hadn't been installed as well as it should've been, as the Timesert has unwound itself when trying to undo the nut; the crush nut clearly offering more resistance than the Timesert locking feature. 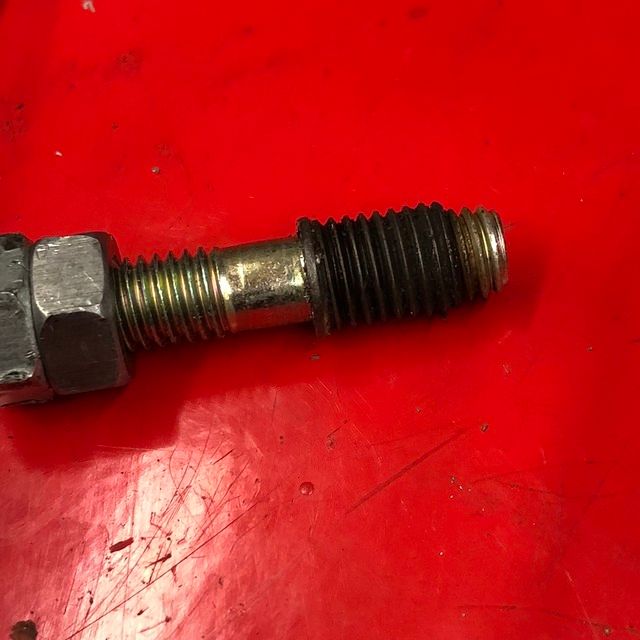 So, a third Helicoil required. All very easy to do with the engine out....a pig to do in-situ, so thankful I found the issues now. Interestingly, in doing some research as to whether Helicoils are stronger than Timeserts, I found this >> "Helicoil or Timesert, which is stronger?" Some interesting stats in that forum posting from some people who have direct first-hand knowledge. And I have to also say, that I've never had a Helicoil fail on me; perhaps not install cleanly, but they're easily removed. A Timesert kit is also £100 for the tools with 5x M8 inserts. Not cheap, but if the evidence was such that it was way stronger, then of course, I'd buy it....but that isn't the evidence that I'm finding, so I'm sticking with Helicoils. If it's good enough for vast quantities to be used on Boeing 747's and Rapier missiles, then it's good enough for my exhaust studs! Finally last night I was able to refit the heatshielding that sits behind the exhaust silencer, and then the front tinware apron. The shield needed a little reworking, as I'm now using the TK turbine shield on the turbo, and now looks neater with that rework. Looking good, I think we're now ready to install the engine into the chassis in a few weeks time. Pics of the new ECU mounting tray over the weekend.... Last edited by Spenny_b; 04-06-2018 at 02:41 AM.. |
||
|
04-06-2018, 02:38 AM
|
|
|
Registered
Join Date: Feb 2016
Posts: 360
|
Not only are you a great mechanic you are also a great writer.I always look forward to your updates.I have caught you on the TAIL end of your build so one of these days I will start from the beginning.
Sent from my SM-N950U using Tapatalk |
||
|
04-06-2018, 01:27 PM
|
|
|
Kartoffelkopf
|
Quote:
|
||
|
04-07-2018, 04:08 AM
|
|
|
Slippery slope skier

|
Awesome progress mate. Very inspiring.
Any chance you can share with us the secret to Spenny's relentless patience, perseverance and time management?
__________________
'85 930 ...the oil leak rebuild which mutated into more than I could chew... then came back to my senses and climbed "back up" the slippery slope! A stock 930 is far better than an incomplete project car! 930 rebuild The revival of my mothballed project |
||
|
04-07-2018, 11:46 AM
|
|

|
|
Registered
Join Date: Jan 2012
Location: Erehwon
Posts: 3,369
|
Quote:
Dennis |
||
|
04-07-2018, 11:53 AM
|
|
|
Kartoffelkopf
|
Quote:
Quote:
 Seriously though, no, I'm perhaps the least tolerant person I know and thankfully I'm not time-lapse recording the build; a) I don't think even YouTube could muster enough storage to hold such a lengthy project, and b) it'd be a blur of flying spanners being flung around (joking). Better still there'd be no foul mouthed audio (not joking). The only way for me to keep sane is knowing that every delay and hiccup just means I have more time and opportunity to make the project a bit better. Time Management? "If in doubt, flat out" ...Mr McRae (RIP) and quoting in a completely different context, but equally as effective for me...A quick post-dinner snooze resets my body clock and then get out into the garage until the very daft hours, as Chris will attest. Not every night by any means (we're all getting older....) but sometimes when you're in the groove and things are going well, then it's easy to keep going. Maybe I should write that book... Last edited by Spenny_b; 04-14-2018 at 02:13 PM.. |
||
|
04-08-2018, 06:33 AM
|
|
|
Registered
Join Date: Feb 2016
Posts: 360
|
Write the book..
Sent from my SM-N950U using Tapatalk |
||
|
04-11-2018, 10:51 AM
|
|
|
Kartoffelkopf
|
Evening gang,
Not much to report form this week, been crazy at work then had a cracking day in London with Lucy doing a whole manner of things yesterday and today. How about this for a random selection of activities... Natural History Museum, London Eye (overcoming her fear of heights), Shrek Adventure (!), very nice twilight al-fresco evening meal on Londons South Bank, people watching....then this morning an early start for last minute cramming in advance of our PADI Open Water SCUBA exams, over to Margate to sit exams (and pass with flying colours), then back over to the Spitfire & Hurricane Memorial Museum for my Spitfire "flight" in their new scale replica cockpit simulator (cool experience), then the first evening BBQ of the season followed by Harry Potter film. I'm absolutely shattered! Anyway, this afternoon I did also get to fit an upgrade that I should've got around to doing weeks/months ago, to install a new set of "Gucci" grade injectors. I don't know why, but with everything else going on with the engine build, including the water cooling circuit, I suppose it just disappeared off my radar. My memory was then jogged by seeing Costas project update last week. Cue the panic, as this isn't a job I want to start doing with the engine in the chassis. I saw the Speed Academy YouTube video of a factory tour at Injector Dynamics a few years ago. Needless to say I was very impressed with their attention to detail and incredible levels of obsession. After some investigation, it looks like the Siemens Deka's I've been using thus far - fine injectors according to some very experienced folks - are very comfortable to about 100hp/injector whilst still maintaining good duty cycles. They will go further, but perhaps out of their sweetspot. We should really be knocking on the door of 600hp on this build (was 544hp on v1.0), so time to invest. After plugging values into the Injector Dynamics online fuel calculator, I was seeing that the logical choice was an ID850. Speaking with Injector Dynamics the other evening to understand how the 1050x's fit in their range with the ID725, ID850, ID1000's and I very quickly understood that these 3 models are now end-of-lifed. They were off the shelf injectors which were then modified and tested by ID. The ID1050x, however, is designed as a clean sheet design by ID and made for them by Bosch Motorsport. They tell me that it's so well behaved at the lower end of the operating window, that it actually outperforms the older 725 and 850 units. Intended to replace the 1000, they found there was no need to now have so many offerings; the 1050x supersedes all three. With all injectors installed and the rail tightened back down, time to do a check to ensure that any vertical movement in the injector doesn't bring the o-rings close to un-sealing in the fuel rail. A lot easier to do all of this with the engine on the stand, added to which the engine wiring harness needs another change, switching the current Junior Minitimer connectors to the USCar style connections. ID will sell you adapters to mate JMT to USC, but frankly, thats a hokey bodge in my opinion; new crimp connectors are supplied with each kit, so lets get them fitted. And here they are....   Now, the only thing is, I'm going to have to relax my policy of no other colour plating other than black or gold. They're very purple!   All of the operating parameters are apparently in the Syvecs code already, which makes life easier come the time to build the calibration maps. Change of plans with installation; Dad and I are going to get started on it during the week on our own, in good time for Sam then coming down here to build the base fire-up map. Keep you posted. |
||
|
04-14-2018, 03:12 PM
|
|
|
Registered
|
Hello Spencer,
I am very satisfied for you, I look forward to hearing the humming of your engine! 
|
||
|
04-20-2018, 02:17 AM
|
|
|
Chain fence eating turbo
Join Date: Dec 2008
Location: Austin, TX
Posts: 9,205
|
Injectors have come a long way! I've read small Honda's idle with over 200lb/hr injectors.
That's pure insanity years ago (that you can idle such huge Olympic pool-draining injectors!), but awesome for our current time period in the EFI world!
__________________
Cory - turbo'd '87 C3.2 Guards/Blk, 3.4, 7.5:1 CR, 993SS cams, Borg-Warner S366 turbo @ 1.2-1.5 bar, Treadstone full bay IC, 70mm TB, TiAL F46 WG, HKS 1 1/2" BOV, twin 044 pumps, MicroSquirt AMP'd w/GM smart coilpack, Bilstein coilovers, Tramont replica Speedlines (285's rr, 225's frt), Big Reds frt, 993 rr., tower brace, MOMO wheel |
||
|
04-20-2018, 05:43 AM
|
|
|
Kartoffelkopf
|
Yup, I was pretty shocked when I was reading and speaking to folk about them, and they're not *that* much more expensive than stock injectors...bearing in mind that each one is run-in on a test bed, flow tested and their performance profile logged, should any replacement or rectification work be necessary. Money well spent, methinks.
|
||
|
04-24-2018, 03:16 AM
|
|
|
Registered
|
Not easy to make a choice between 1050X and the 1300X if in the future we wish to use the ethanol E85.
|
||
|
04-24-2018, 03:19 AM
|
|
 |
|
|
| Tags |
| 964 c4/c2/turbo , efi conversion , life racing , syvecs , turbokraft |


 930
930
 1993 Porsche 911 (964) Turbo 3.3
 2006 Lotus Exige Cup 240 (#45 of 50)
 BMW M2 Competition
 BMW R1250 GS Rallye HP
 Ducati 748R


