|
|
|
|
|
| Author |
|
|
Kartoffelkopf

|
Great, thanks. Good timing, just about to go into the garage and finish this part off.
|
||
 09-13-2014, 12:51 PM
|
|
|
Kartoffelkopf
|
Very productive few evenings over the weekend, will post some pictures tomorrow when the finishing touches have been made; I ran short of a few jubilee clips and nyloc nuts, but apart from that, this is what I've got done:
The two-tone horns are stripped and ready for a quick repaint tomorrow evening. Once that's done, the bodywork can go on, along with two sets of inner arches, and I get acres of reclaimed space in my home office! Very nice to finally see boxes and bags of fixings being emptied, and the car looking like it's being built rather than dismantled. May look to get the refurbed rear wing back on tomorrow evening with assistance from my Brother and Father....that'll then clear the spare bedroom (!) |
||
|
09-14-2014, 05:52 PM
|
|
|
Registered
|
A warm congratulations Spenny_b for your great work of restoration and good luck for the continuation ! ;-)
Patrice (France) |
||
|
09-15-2014, 01:10 AM
|
|
|
Kartoffelkopf
|
Merci beaucoup, Patrice! Glad you're enjoying the project.
S |
||
|
09-15-2014, 02:02 AM
|
|
|
Kartoffelkopf
|
Dammit. Mixed fortunes tonight. Lets start with the positive....
And now the not-so-good.... One job I mentioned last night, that I wanted to do before posting any pics, was to buy some more jubilee clips for the 2 x lower oil tank rubber hoses....the ones that both go to the thermostat. So, I wasn't happy with how the "cranked" front hose was sitting on the thermostat input, not sitting square or far enough onto the neck. Do you think I could manoeuvre it into place? Like hell I could(n't). So, time to: - undo the oil lines to the cooler, both from the chassis and the thermostat. - undo the rubber mounting - remove the larger rear 90deg elbow hose from other end of thermostat - eventually concede and undo the tank mounts to see if I could squeeze more wiggle-room - ok, concede a little more and undo the bellow hose and the straight hose>rigid pipe just beneath it.... And then I see it.... The hose that runs behind the tank, with the cranked rigid pipe that screws onto the top union on the thermostat....is moving. Now, doesn't sound like a major issue, just tighten up, right?...Nope. I tightened it up as much as poss in-situ last night....32mm and 36mm spanners allow for a fair amount of torque, and this thing was TIGHT....but the pipe is still swivelling...DAMMIT!!! For those that aren't aware, the trouble is is that the hose is so tightly packed in behind the oil tank, the 964's huge suspension arm is also pivotted right next to the thermostat, so you'd never see this problem with everything in place. When I had a new flexi section swaged onto this hose a few weeks ago, we changed the rusty nut for a nice shiney new one...however, upon inspection the new one bottoms out before the flange of the pipe (that the nut acts upon) is pulled down far enough, thus the conical end isn't tight in the union. The thread in the nut doesn't extend as far up into the nut as the OE part. So, what started off as an annoying, recalcitrant rubber hose not wanting to seat correctly, actually saved me from one hell of a problem come first fire-up day, where I'd have very quickly spat gallons of oil all over the place. It actually gets me wondering whether to hold-off reassembling any bodywork; bumpers, sills, inner arches, etc, until that first firing-up of the engine has been done, so I can keep any eye out for any weeps (or floods) Anyway, the hose will have to wait until Friday lunchtime; I happen to have a meeting in the morning about 5 miles from the place I get the hoses done....plenty of other stuff to get done. Moral of the story? Always check yer nuts. (I'm here all night...) Last edited by Spenny_b; 09-15-2014 at 03:22 PM.. |
||
|
09-15-2014, 03:13 PM
|
|
|
Kartoffelkopf
|
Parking the issue of oil lines for the time being, been cracking on with other tasks and making use of the warm autumnal evenings to roll the car out and address the bumper support bracket brackets (!)....the box sections under the engine sealing skirt.
The LHS was looking quite ropey, the RHS factory fresh; strange. Anyway, got the angle grinder + wire wheel on the case, plenty of Gunk degreasant, and it's ready for some zinc primer and top coat/lacquer. Before cleanup... 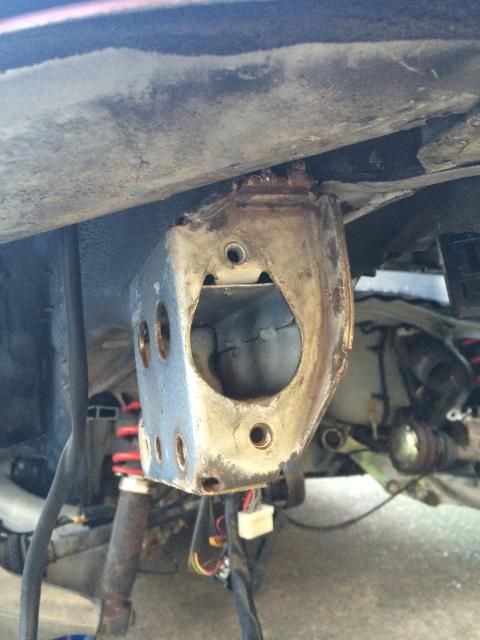 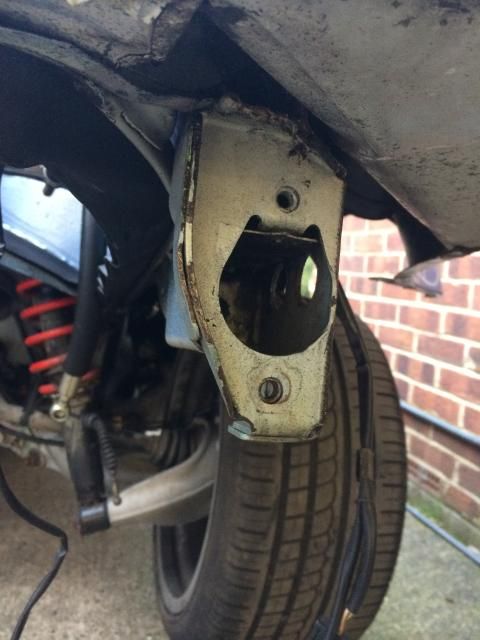 Also, some rust had crept in right on the seam at the bottom of the inner arch. Clearly the stonechip paint had been compromised and let in water.....thankfully nothing more than cosmetic, and it's back to fresh metal again. 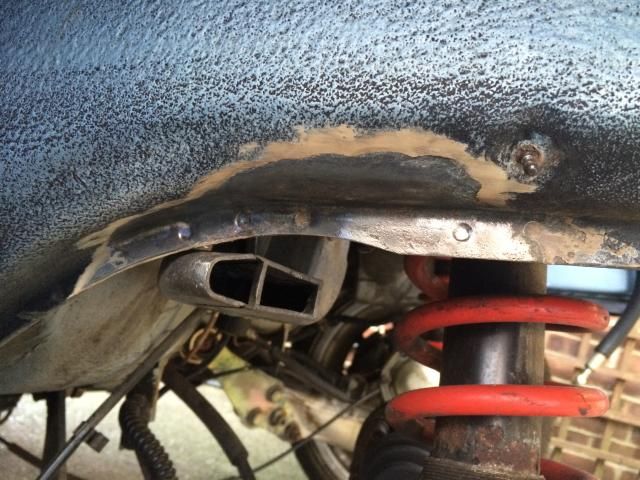 The rear LHS wheelarch had 21yrs of dried road grime, but is now clean. 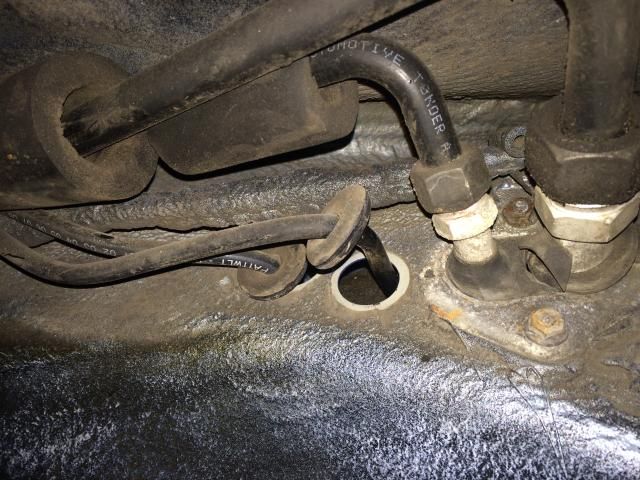 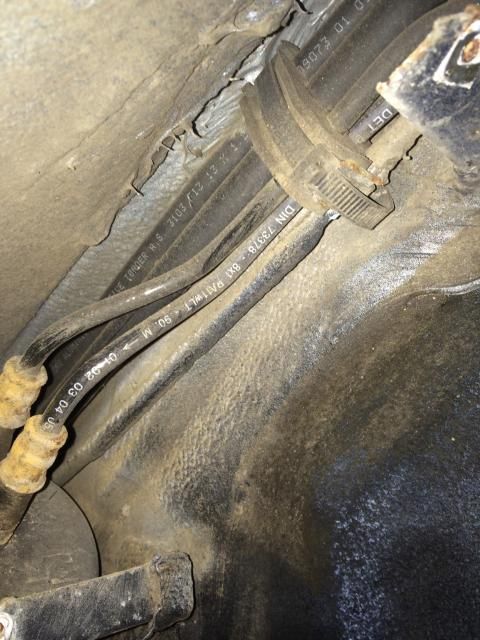  Removed the carbon canister and pipework so I could get right into the depths of the inner/outer wing. Fingers crossed the weather holds until this evening, to get a coat of the rubberised protective paint on. 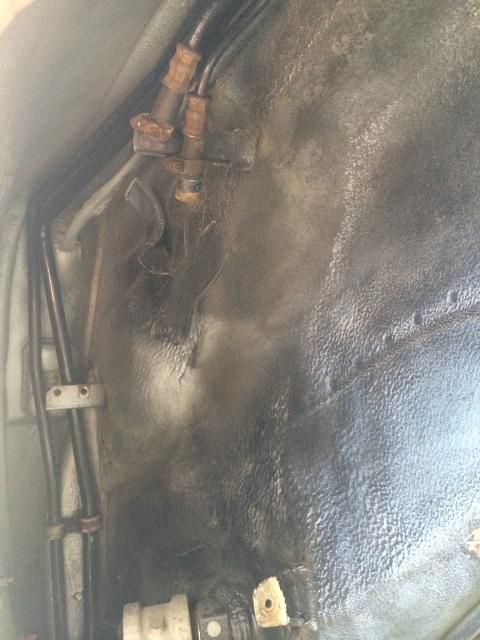 Once the paintwork is finished, it's time to bolt back the bumper support bracketry. Have got a couple of wing stay brackets, that somehow escaped my attention, over at the powder coating shop. Another batch of brackets and fixings is also over with the plating shop - hoping to get them back by the end of the week, to get the bumper back on this weekend (going to keep the inner arches off the car for time being, as mentioned previously, want to keep an eye on the oil plumbing when starting the engine for the first time). Heat management - discussed a few weeks ago with respect to lining the tinware above the turbo, and/or making a shield, but it occurred to me the other whilst cleaning the inside of the rear bumper, that it may be good practise to also line the inside of the bumper with the same gold reflective material. Nice and thin and self-adhesive, so should be easy to stick onto the degreased OE aluminium heat shields. Another order in with my OPC for more fixings, plus some new support brackets for the rear bumper (original ones are extremely rotten, beyond blasting and powder coating). Hoping to get this order before the weekend as well. Coming along nicely.... Last edited by Spenny_b; 09-19-2014 at 04:33 PM.. |
||
|
09-17-2014, 06:02 AM
|
|

|
|
Kartoffelkopf
|
More progress this evening....
The bare metal and the box section coated with zinc primer: 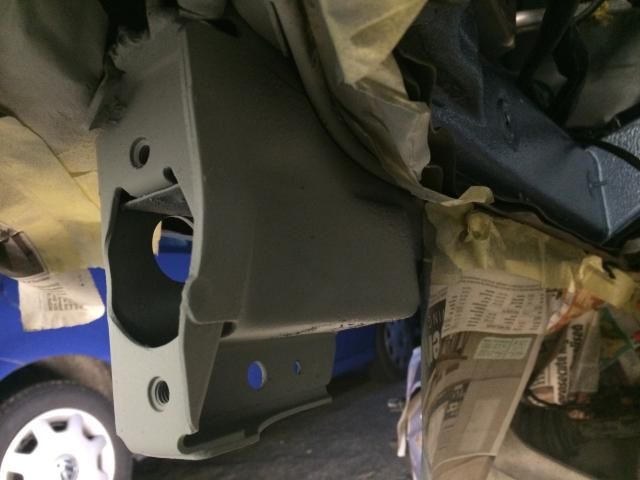  The final wheelarch, LHS rear, is now sprayed with the rubberised paint. More great use of the Daily Mail. 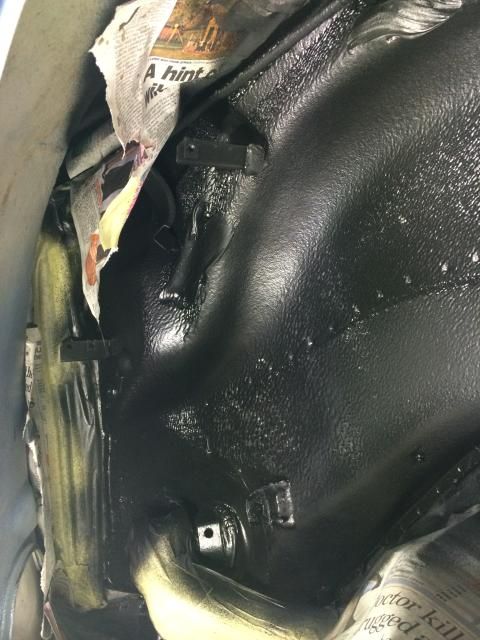 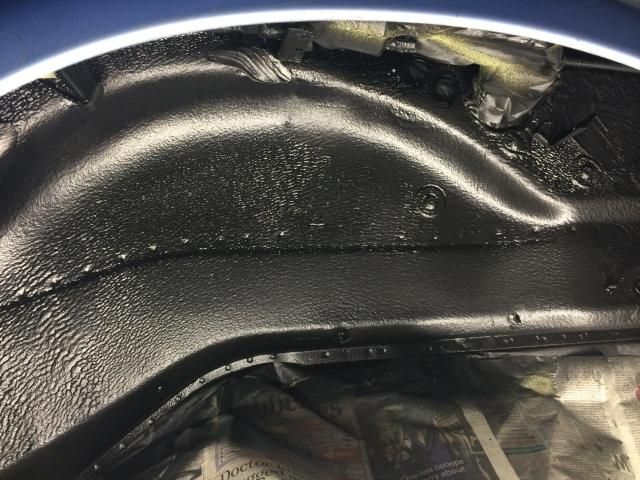 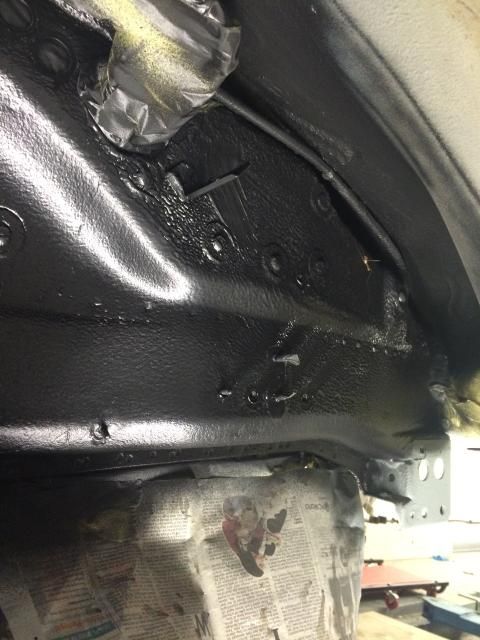 And the top and lacquer coats on the bumper mount box section:  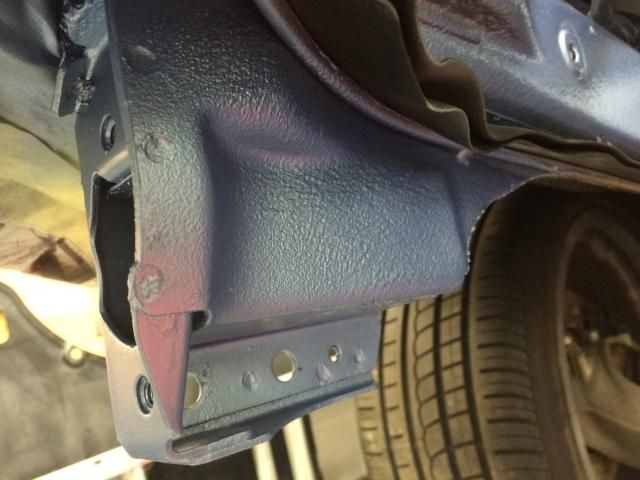 (that's a red reflection, not a paint cock-up) Just need to wait for the lacquer to harden overnight, then mask it up to re-apply some of the black rubber paint; little bit of overspray that just needs a little correction. Also want to spray some Waxoyl into those enclosed sections; I noticed when cleaning it up that there's a part where two sections are welded together, but leaving a gap which trapped a load of muck. Time to get some Wayoyl in there as well. I also now have the last two wing stays back from powder coating. The latest update to the OPC order has some hardware for the carbon canister; relatively inexpensive, not worth the effort of cleaning up the old stuff and getting it (waiting for it to be) re-plated. Next bit should be easy, just reassembling a load of brackets and stays, refit the carbon canister assy, finish that corner with inner arch liners. Back onto the front bumper, the aftermarket brake ducts are more decorative than useful; enclosed backs with about a 1" diameter hole out the back...useless. I may look to either open that duct up completely, or buy some internal ducts that will mount behind the bumper and mate to the "RS" looking ones. Finally, attach hoses to direct the airflow more accurately to the oil cooler and A/C condensor. Then bolt the front bumper back on (...I keep threatening to do this, don't I?....) |
||
|
09-17-2014, 04:27 PM
|
|
|
Kartoffelkopf
|
Managed to collect a load of parts on my way home and after work today; Fortuitously, my meeting today was a couple of miles down the road from Think Automotive, so swung past there over lunch to show them my oil feed/thermostat issue. Some puzzled looks and trying of a few other parts didn't turn up anything we could use to fix the problem, so it's going to have to be a case of going back up there in a week or two, removing the swaged ferrule, re-using the original nut (that's now been re-plated) and re-swaging the pipe. Very strange affair that Porsche chose to do with the conical section of that rigid pipe; it's about 2mm thinner than a comparably sized alternative (strangely, also manufactured by the OEM supplier to Porsche back in the 90's). I'll post a pic tomorrow of the bit I'm referring to.
Encouragingly, Matt (owner of Think Auto) said that they'd be willing to pressure check all the hoses, to ensure all swages are sound. The reason I asked this, was because I've seen the chap who posts on PP who makes new fuel lines for folk, post a few horror story pics of instances where the wrong swage couplings have been used, with obvious consequences....now, I'm certain that all is well with my lines, otherwise they wouldn't have offered to swage to them in the first place, but getting a proper pressure check done may be prudent. Or paranoid. It may make sense whilst everything is disconnected again, to also pressure check the rigid lines from thermostat > oil cooler. The guys at my OPC had received all-but-a-couple of the items on this weeks shopping list...despite me rebuilding the thermostat a year or so ago, refurbing parts and making a new cover plate, I decided the other day to buy new parts for it; felt like I was scrimping a little, on such a vital part...so...new cover plate, o-ring, circlip, unions, allen screw, etc.--->  The electro-plating shop had also finished my A/C and horn mounting brackets and other sundry items....  And late this evening, a trip over to Si-Leck to visit Simon for the final bench testing of my wiring loom. Apart from a head-scratching moment wondering why my ECU was throwing all sorts of garbage to the UI (turns out there was no base map loaded! Easily fixed), it all went very well indeed. So, I now have the engine half back again, with a few mods that we identified a week or so ago, plus I now have the ECU / Cabin side of the loom, with wheel speed sensors hookups, etc.....all ready to be installed into the car. Another lovely piece of workmanship..... 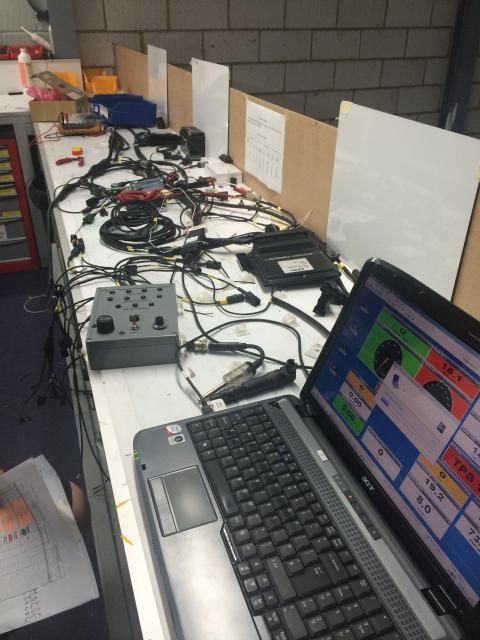 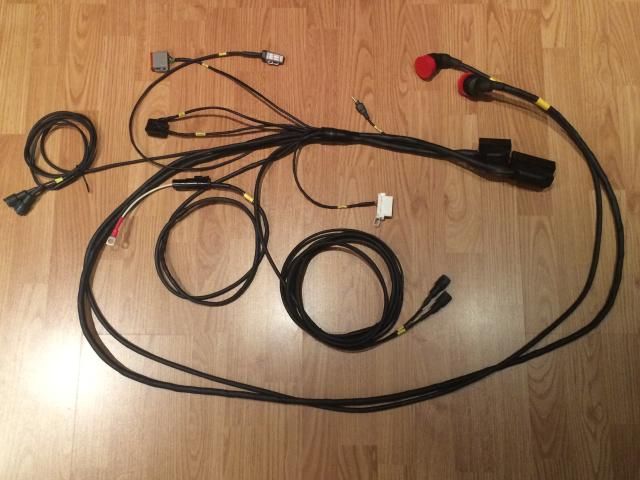 Pretty dense ECU plugs...sooner him than me! --> 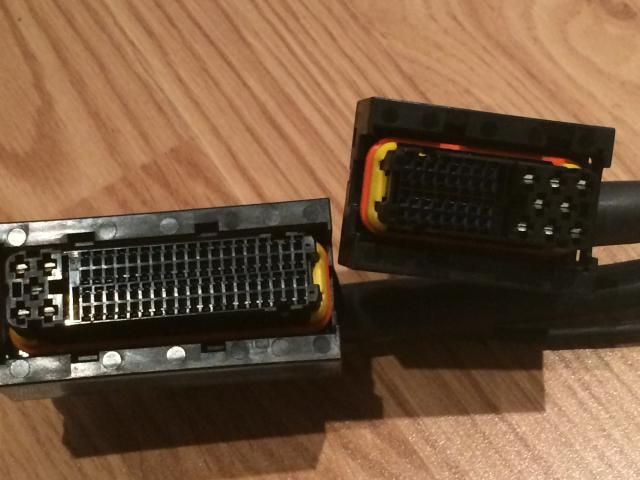 The feed from the AEM EGT transducer to the ECU plus the Dashboard loom feeds --> 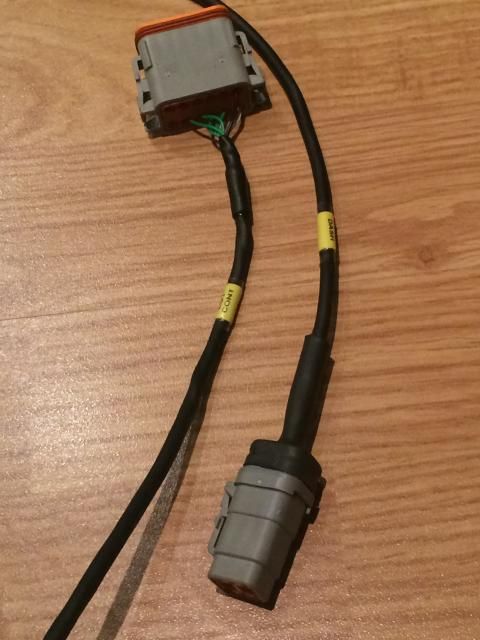 The final part of the loom to be made is the above dashboard section, which will have the rotary switches for traction control and boost control, warning lamp output and the feed for my boost gauge  Two of the 4 wheel speed sensor inputs, along with a comms interface (we can now use an OBDII interface for basic in-flight diagnostics; bluetooth dongle and iOS app spring to mind...) --> 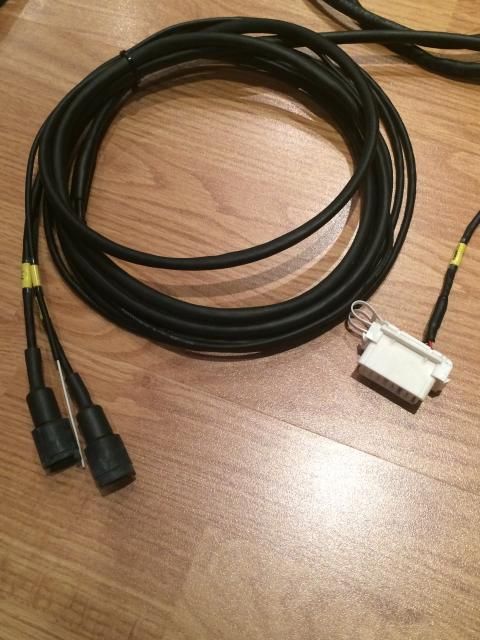 The power feed for the whole loom, which we're taking from the starter motor +VE supply....no fusebox feeds for this setup, the sort of thing that's a swearword to guys like this. This is a single pin Deutsch connector with daft amounts of current handling, and means I can leave one half permanently bolted to the starter motor stud. --> 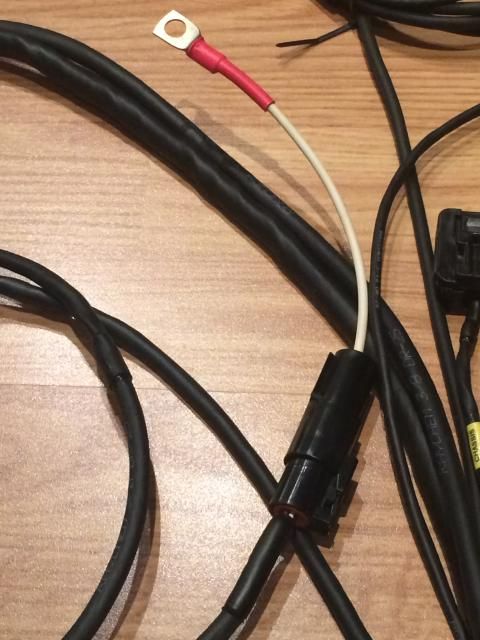 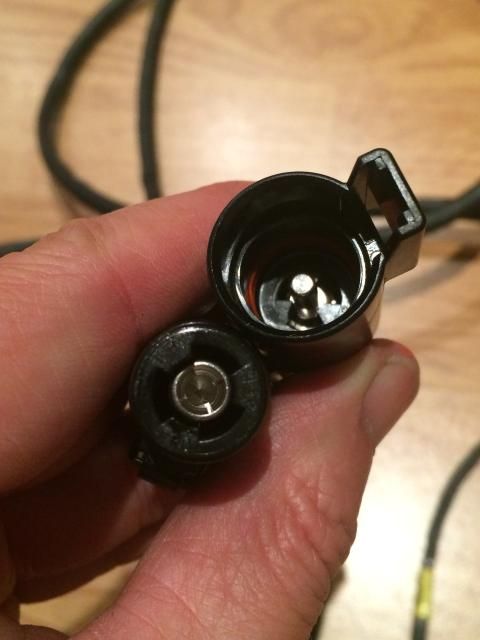 Another weekend to myself, hoping to really get a tonne of stuff done. Going to be over in Boston all next week, so remembered just in time to buy one of Kirks tappet setting tools, now being shipped to my hotel so I can hand carry it home....and save $40 in shipping! Another gadget. Got to have gadgets. John - I know you also bought one, have you had chance to use it yet on your chariot? Last edited by Spenny_b; 09-19-2014 at 05:35 PM.. |
||
|
09-19-2014, 05:15 PM
|
|
|
Registered
|
Hello Spenny_b,
Your car transports be going to be as new, I adore tone concerns(marigolds) of the detail and the optimization! May I ask you some questions with regard to(compared with) your engine? Good WE! ;-) |
||
|
09-20-2014, 12:53 AM
|
|
|
Kartoffelkopf
|
Hey Pat, thanks again, and sure, what do you want to know?
Have a great weekend too....time for me to get productive. S |
||
|
09-20-2014, 01:30 AM
|
|
|
Registered
|
Thank you Spenny_b! At the moment my BTR RUF is at the coachbuilder's for a complete restoration and the installation of a completely integrated arch so that it is the most discreet possible, my body will be everything in carbon and will have no more the gutters of roof as for the CTR. I kept at home the engine and I am trying to make him(her) a beautiful health. Thus, I wanted to know if later I decide as you to pass in the EFI if it is preferable that I install(settle) with the pulley of the brace a trigger wheel 36-2 or one 60-1, that it is the one who suits best? Did you also install(did also settle) one?Another question, what type(chap) of fuel injector did you install(did settle)? How much debit(flow) by injector? Openly(frankly) I look forward to knowing the continuation(suite) of your restoration(catering) and also intending(hearing) to hum your engine. Thank you again for all your beautiful photos and explanations, I am absolutely sure that you helped many people here. @+ !
 Patrice (France) |
||
|
09-20-2014, 06:23 AM
|
|
|
Kartoffelkopf
|
Quote:
I'm using a 964RS flywheel, which is a single-mass unit but more importantly, is also a 60-2 design. By doing this rather than running a toothed wheel on the nose of the crank, I can then retain the OEM sensor bracket. The stock sensor was a magnetic type, I've just replaced it with a hall effect unit; same size dimensionally, easy. Depending on the ECU you're using and how it uses the crank position sensor but I believe a lot of ECU's, even if you use a 60-2 wheel, will then convert it to a lower resolution for it to then base timing from. I'm sure the MBE units (specifically the 9A9 system) doesn't do this, it uses a native 60-2 resolution. The injectors are Siemens, I'm pretty sure they're 690cc and 12.5ohms (but it was so long ago that I bought them, almost 3yrs!). Your project sounds great! You definitely need to start a thread to share the experience. Cheers Spencer. |
||
|
09-20-2014, 04:11 PM
|
|
|
Kartoffelkopf
|
Progress update.
Not sure if I'm happy with todays efforts or not. Lots of odds-and-sods jobs done and underway, but if you didn't know better, you'd guess there was about 1-2hrs worth of work in the stuff I've done. But you do know better....it's never that straightforward! Spent a lot of time searching the workshop, the house, the home office, the conservatory and anywhere else I could think of, looking for long-lost bags of bolts and fasteners. Also a lot of time Googling for images to substitute for my rubbish lack of dismantling photos....you always think you've captured everything until you realise you didn't, 3 yrs later! I'd never make a curator or a librarian (er...). Good job my copy of the PET is digital, any paper copy would be worn out after todays constant referring to it.....lots of time sussing which clip goes on which part. But in fairness I did get stuff done....
The recovered hot air shield ---> Before:  After: 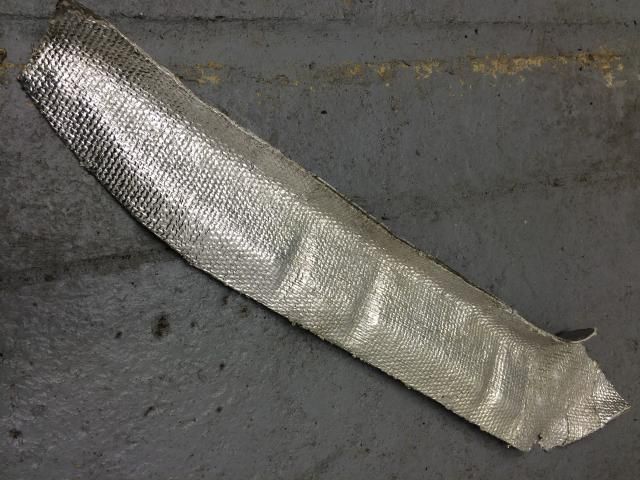 Carbon canister, as good as new ---> 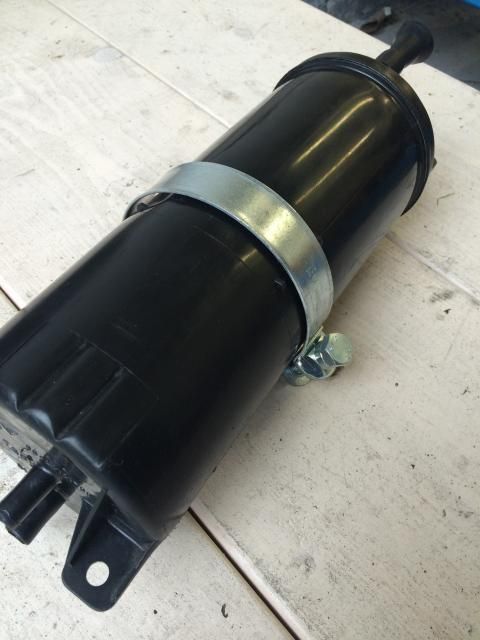 The wing now in place ---> 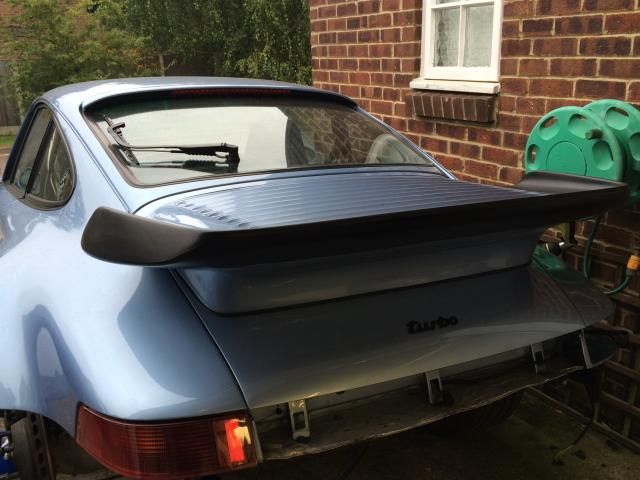 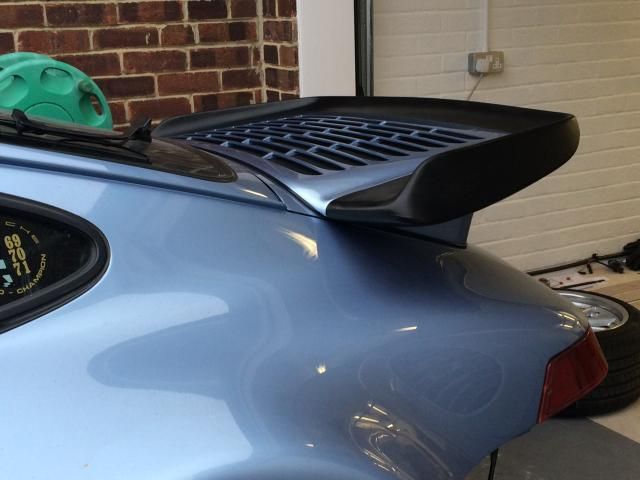 Will take some pics of the heatshields in place tomorrow....there's a surprising lack of any (useful) images on Google for the 964 Turbo. A few of the brackets off the car and aftermarket stainless alternatives, but not a lot showing how it all mounts onto the chassis. |
||
|
09-20-2014, 06:11 PM
|
|
|
Registered
|
Quote:
I bought a flywheel Fidanza mono mass, I am thus obliged to put a trigger wheel 60-2 with the light pulley.  We see of everything in the syringes of fuel of 660cc in + of 1000cc, difficult to know the good value for its engine, it is necessary to aim maybe at the mean value towards 800cc, Anyway I am not there still there but me reflected! Did you increase the diameter of opening of the exits of exhaust in more than 35 mm? By wanting to polish mine I am crossed(spent) of 35mm in 39.5mm, of the blow I also had to modify my collector of exhaust.   You are right Spencer, I should make a subject on my car but my project is so enormous that I do not even know by or to begin, nor if I would have ended a day! : D You are placed well for the knowledge, I read your subject completely. Thank you again and good luck Spencer! Patrice (France) |
||
|
09-21-2014, 03:39 AM
|
|
|
Kartoffelkopf
|
Quote:
I've lost count how many times I've needed to re-read my own thread, if I've not worked on the project for any length of time. (Plus, I want to see the carbon stuff you're putting on your car)
|
||
|
09-21-2014, 01:30 PM
|
|
|
Registered
|
Quote:
Everything or almost will be in carbon, only the back wings will not be it. My roof will also be in carbon, the glazing will be macrolon with a special traîtement which resists stripes(scratches). She(it) will have no more her(its) gutters of roof. My dream is to make me make wheel rims 18 " in carbon (5kg / wheel) with the same appearance as my RUF in 17 ". In brief, it is not the ideas which miss me! On the other hand the budget hem! My body is for the moment in Belgium. If ever you try to gain weight easily, you can change your battery(drum kit) by a Great B (battery(drum kit) of very good quality). My friend who works at Renault Sport uses him(it) on Mégane RS Trophy R, I plan to put one on mine-( 14kg ). I shall not have more than the electric windows, the heating windscreen and a ventilator for the cockpit(passenger compartment) as "the options". If you wish to have a reference for yours which has more options as the air conditioning asks I, she(It) will be just a little heavier 3.6 kg instead of 2.9 kg. Good evening!
|
||
|
09-21-2014, 02:50 PM
|
|
|
Kartoffelkopf
|
Evening folks, not much progress the last few weeks, been busy at work, lots of travelling, but have sneaked a few hours tonight in the workshop.
Addressing the oil feed pipe issue that I mentioned in post#308, I've now removed the swage ferrule on that line, so I could remove the swan-neck rigid section, try the original but re-plated nut and take it back up to Think Auto over the weekend for it to be re-swaged. And I'm glad I did check the old nut....it also is extremely borderline with clamping that pipe into the thermostat. I've now got new unions in the housing (genuine Porsche), and the pipe was still swivelling even with a healthy amount of tightening on the bench; probably more than you could get with the parts in-situ. A bit of rotating and shuffling to seat it and it was marginally tighter but of course, once everything gets hot, it'll most likely loosen. So this is no good whatsoever. No idea why this situation has arisen, nothing's changed apart from cleaning and replating, I can only assume it was only just clamped enough before I removed it...thinking back, the nut was BLOODY tight when I removed it. I put it down to corrosion in the threads, but perhaps it was a previous attempt at getting a seal? One option could be to scrap the idea of using the original hose and swan-neck.....but I know damn well that a completely flexible hose is unlikely to fit between the oil tank and the inner wing, the outside diameter of hose being too large. Another idea could be to chop off the conical section of that swan-neck pipe and braze on a new fitting with a thicker flange, but having tried to braze old fittings before (oil catch tank), it's a nightmare; the oil is too impregnated. Plan C - make a spacer that will sit between the nuts tightening face and the flange of the swan-neck. I couldn't get the vernier into the nut to measure the gap, but comparing it to the thickness of the step flange on the pipe, you can see it's very similar, hence not able to clamp down tight enough ---> 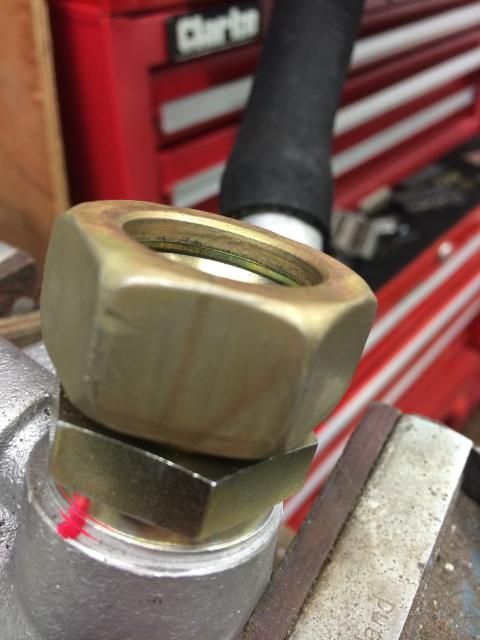 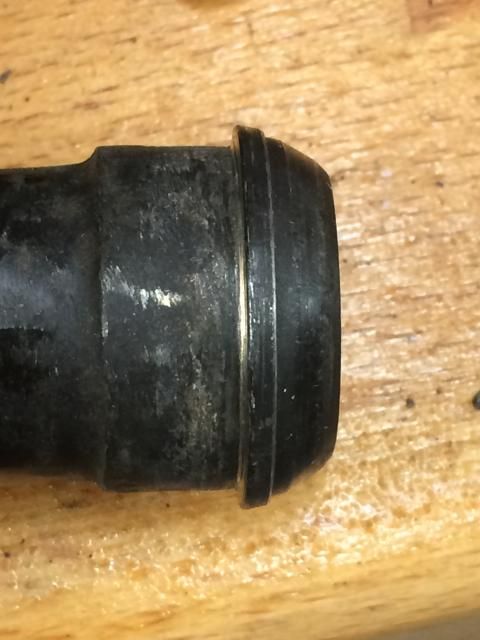 So, 10mins on the lathe and we have a washer that sits nicely in the nut, and once assembled onto the thermostat housing, it allows a few threads extra turning to get it nice and tight. 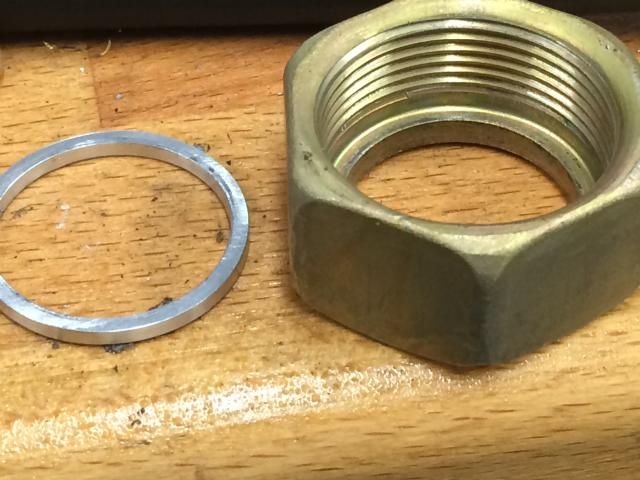 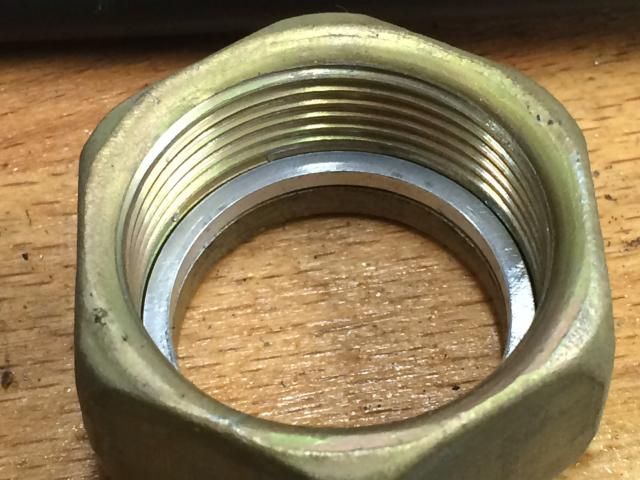 As mentioned, over the weekend I'll get it assembled but also get the other lines pressure checked. Last weekend I stripped down the rear blower fans; they looked pretty tired with the motor casings now quite corroded, and signs of rust on the black fan casings. Very simple to strip them down (I'll document it later once I have some decent pics). The fan housings are now away for powder coating and although I'd like to have also re-plated the motor casings, the motor magnets are held in place with metal spring plates that are in turn held in place with pressed on spring clips on stud/rivets. I certainly didn't want to risk breaking anything by prising off the clips, so after a thorough wire brushing and internal degreasing, I've zinc primered them, repainting them black and lacquered for protection. |
||
|
10-02-2014, 04:57 PM
|
|
|
Kartoffelkopf
|
Moving things along quite nicely today.
Oil lines pressure checked and all fine; knew it would be, but made sense to be double-sure whilst I could get the lines and hoses out. The problematic feed line to the top of the thermostat has been re-swaged with the original nut and my modification washer. But what a nightmare refitting the oil tank and all the new hoses! That's not a job I want to repeat any time soon. The short S-shaped hose at the square end of the thermostat, it turns out, is significantly different in shape to the old one; the bends on the original item being more like 90degs, the new item more like 45degs. It was also about 10mm too long with the top cut that goes onto the tank being at the wrong angle, meaning that it prevented the thermostat mounting high enough nor close enough to the rigid oil lines. This was then stretching the rubber bobbin that it mounts on. Some trimming got it better, then it was a case of gently tightening everything in sequence, to make sure the oil lines to the cooler were square, the the S-shaped hose was seated nicely, that the tank then mounted onto the chassis correctly, and that the swan-neck rigis section of the problematic feed hose didn't foul the suspension....Arrgghhh!!!! Anyway, 4-5 attempts later and I got there. I can almost call it quits on this part, and refit all the braces, bodywork fittings, and loosely refit the inner arches to get them out of the way. 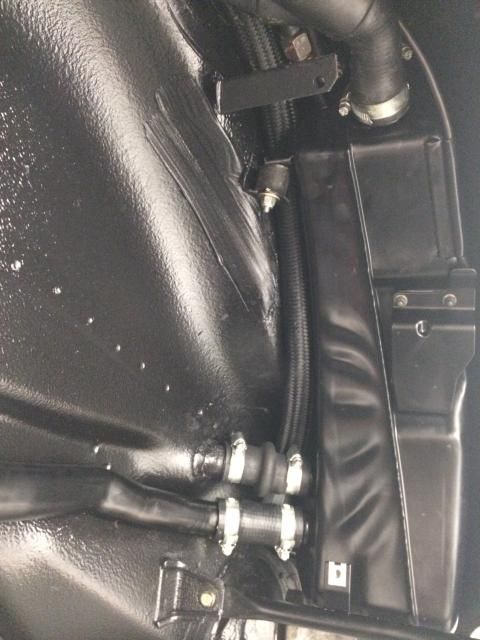 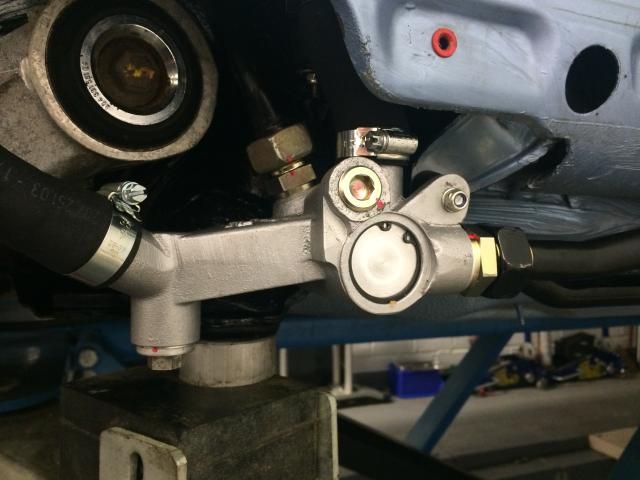 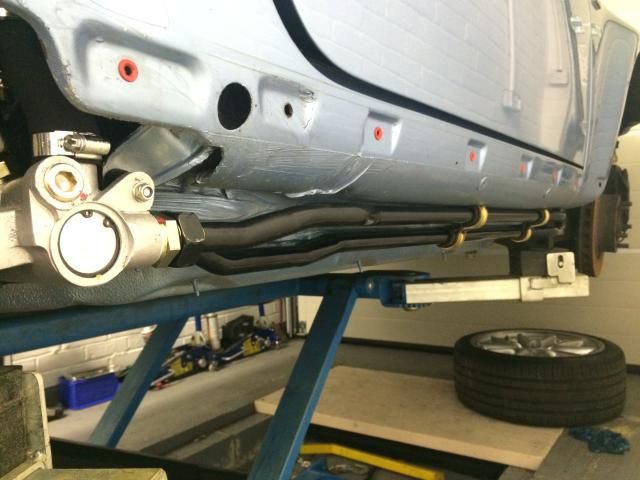 Have also played around with the engine itself; shortened the two -3AN F/F adapters that I'm using to mount the exhaust backpressure sensors. The threaded sections were too deep, meaning that both the sensors and the bulkhead fittings were bottoming out on the thread rather than sealing against the tapered seat. Easy job on the lathe, now ready to be re-plated. (not a huge amount to see here, was just a 2mm chop from either end) 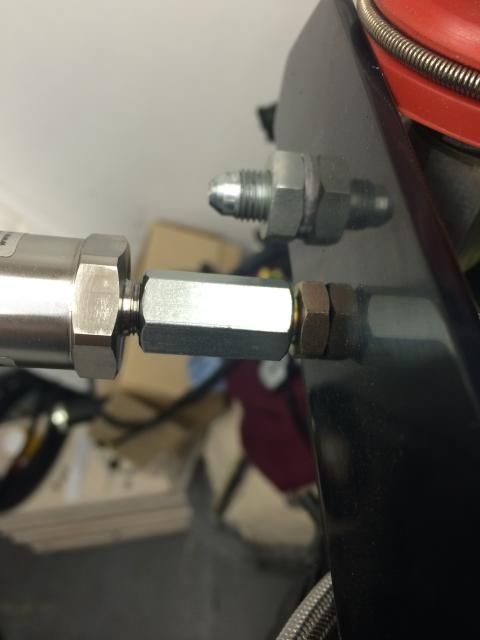 Found a suitable location to mount the pressure sender for the new boost gauge. I decided to locate it on top of the LH intercooler bracket. Unfortunately I only decided on this boost gauge after I'd designed and made the sensor bracket over a year ago, otherwise it'd have been nice to put all 3 of these senders next to each other. But nevermind, it's still looks good where it is, and makes use of some empty real-estate. 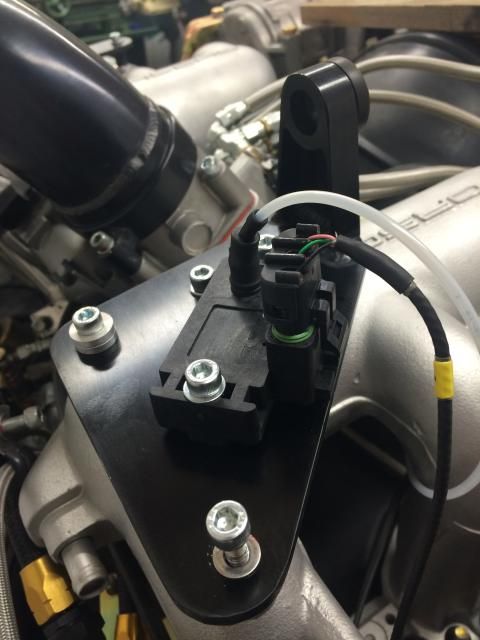 The pressure sensor take-off "T" is also now in place, fed from the underside of the throttle plate. 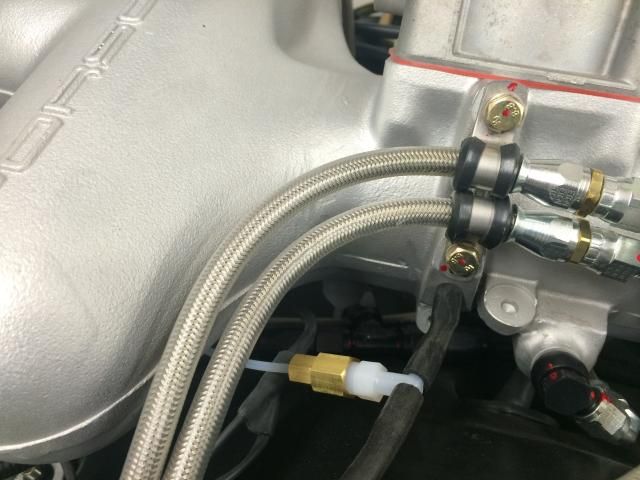 Now, strange story of the day; went up to Think Auto to get the oil lines checked and swap over some other fittings I had. Walked in and noticed an older chap at the counter. He quickly moved some stuff out of the way on the counter, said hello, then carried on working with Tino to sort out some brake fittings, describing the callipers they were being used for, and how they were trying to overcome a link pipe challenge whilst not fouling the lower wishbone...Hmmmm.... I spotted the name on his invoice on the counter....curious as to whether it was THE same guy I was thinking, I quickly ducked out to the car and got the long oil lines, thinking "if it is him, he'll recognise these for sure" .....and he did!...I walked back in and he recognised them straight away. We got chatting, asking me what model they were from, why they were off of the car, talked about the conversion project then what I was looking to get out of the engine in terms of bhp....so I told him, and his reply was "my word, that's almost as much as the 917...". My perfect opportunity to pop the question....I'd just been chatting with David Piper, he of 917 fame! Thoroughly nice guy, very down to earth. Spent a good 10 minutes chatting....the people you meet unexpectedly, eh? (yes, am aware of "that story" about the 917 gearbox failure and the journo, but speak as you find...) |
||
|
10-04-2014, 03:42 PM
|
|
|
Registered
|
Ton travail est super propre Spencer, continues comme ça ! ;-)
|
||
|
10-05-2014, 03:30 AM
|
|
|
Kartoffelkopf
|
Quote:
__________________
1993 (MY92) 964 Turbo 3.3 - Horizon Blue - Follow my 964 Turbo project here... http://forums.pelicanparts.com/911-engine-rebuilding-forum/626572-964-3-3-turbo-efi-conversion-using-syvecs-life-racing-engine-management.html On Instagram (along with other stuff) as @spenny_.b #spennybengineproject |
||
|
10-05-2014, 03:43 AM
|
|
 |
|
|
| Tags |
| 964 c4/c2/turbo , efi conversion , life racing , syvecs , turbokraft |


 1993 Porsche 911 (964) Turbo 3.3
 2006 Lotus Exige Cup 240 (#45 of 50)
 BMW M2 Competition
 BMW R1250 GS Rallye HP
 Ducati 748R
 930
930

