|
|
|
|
|
| Author |
|
|
Kartoffelkopf

|
Progress this last few days has seen the final bolting down of the intake system, the IC mounting hardware and fitting the sensors (the MAF and Baro are fixed using some temporary scabby cap heads until I get some suitable BZP's)
  Decided I didn't want the P-Clips mounted in direct contact with the black anodising, so a quick bit of turning to make 3 x spacers (God I love having a lathe on hand!). This also overcomes a concern where the oil and boost pressure hoses *may* have abraded against the corner of the IC bracket.  Have also finished the AC pump; a lick of paint to the pulleys and clutch assembly -->  Wasn't going to do the clutch, as it didn't seem too bad, but then did look shabby compared to the freshly painted main pulley. Some careful masking-off of the riveted arms, the rivets and the centre bolt to preserve the plated finish, and I have to say, I'm rather pleased with how it looks, atop the AC mount and bolted down.  The rear wing is almost finished - for the time being. The plastic inner section with the IC gasket is temporarily fitted just to get it out of the way, but it'll need reworking (opening out) to feed air to the far bigger TK intercooler. Very pleased with how this has come out, with replated fasteners and the use of Raceglaze to bring the plastics back up to factory look....just need to mount it to the deck lid and stick the Turbo badge back on.   (Bean bags make great work benches  ) )This evenings job will be to: 1. Test fit the IC, make sure that nothing's changed (no reason why it should have), but unfortunately it can't stay on there as I need to retain access to the amal valve that now lives on what was the ignition coil mount on the cooling fan housing. The amal valve is going to be fitted with that very nice Deutsch connector (see above) on Monday or Tuesday, then it can be bulkhead fitting and mounted onto the sensor bracket. 2. Turn the engine upside down and fit the header gaskets, bolt down the manifolds (I can't remember why I didn't do this some time ago - perhaps it was just the constant fitting/removal to do the WG fabrication work?), and then I can bolt on the turbo, fit the new oil drain tank and hook one up to the other, with the lines I made last year. Tomorrow, it's time to fit the correct wastegate springs and get them bolted on for the final time, then I can refit my water cooling hoses. A few more engine specific jobs still to do after that, which I need to get the powder coated items back for (e.g., rear tinware). Then it's time to turn my attention to the chassis; fitting pumps, ignition amps, water lines, water pump and radiator, re-installing the oil cooler, etc. |
||
 12-14-2013, 04:27 PM
|
|
|
Kartoffelkopf
|
Evening folks, lots of activity this few days, but mostly driving around buying and collecting parts, then bolting up for the final time some of the items already pictured, tightening of the wastegate feed lines/T's, etc.
 So, one of the items on the "to do" list above was to check alignment of the IC pipes. Sods-law, and despite best efforts when welding everything up last year, the rear cold charge pipe is ever-so-slightly out of alignment with the output of the IC - only about 1.5mm L>R, but it's enough to make getting the collar for the quick release clamp on and off, an absolute pig of a job. Even with full access to the engine on the stand, it was almost impossible to slide it over both halves, so doing this in-situ in the engine bay would be virtually impossible. Spent some time fettling to get this better, and am now almost there - but not quite. Have to say, am kicking myself on this - we tacked all the pipes in place whilst they were connected, but with all the O-rings in place to give that accurate alignment, tacking is about as much as you want to do, to avoid driving too much heat into everything and melting the rings. If I can't get it any better, then I may have to resort to chopping the pipe near the BOV and using silicon hosing to allow the removal/refitting of the IC. Really don't want to do this, as in my mind, this is a compromise aesthetically, but we'll see.... Exhaust headers are now gasketed and bolted on for the final time. The turbo can be now be bolted on (ran out of steam at 2.30am!). The hot charge pipe from turbo>IC was aligned and clamped into place with new Mikalor clamps. The plated oil drain connector for the turbo is also now in place:  The oil catch tank itself is bolted in and ready to be hooked up:  The boost control solenoid is also now re-terminated with its Deutsch connector - the first bit of Raychem is now on the engine! This is now riveted in place using countersunk rivets to give a clean appearance on the sensor bracket. Even this required some guerilla engineering; the nose of the pop rivet gun was too big to get in to where the rivets affix, so time to quickly turn up a small spacer. Another instance where having the lathe in the workshop has paid dividends.  Some good news this morning - a call into the guys doing the powdercoating, and they were putting my tinware and oil tank through the process during the day. Final day before their Christmas shutdown, so was very keen to get over there this afternoon and collect everything. Another superb job, has come up just like new and good for at least another 20yrs. Oil cooler radiator mounting hardware, rigid oil pipe, bumper support brackets, rear wing mount, engine bay strip (fixes just above the full width rear reflector) and some of the rear engine tinware assembly....  ...talking of which:    The underside of this is going to be lined with heat reflective cloth; having seen what damage the heat had done to the previous piece of tin, and the fabrication work that went into the customisation of this one for the GT35R, I'm not in a hurry to replace it! Dry sump oil tank:   All items of course need to be un-taped, and despite the guys not incinerating or blasting the tank to remove any previous coatings, I'm still going to give it another flush through, to ensure nothing has got in there since the last wash. Moving on....steadily....
__________________
1993 (MY92) 964 Turbo 3.3 - Horizon Blue - Follow my 964 Turbo project here... http://forums.pelicanparts.com/911-engine-rebuilding-forum/626572-964-3-3-turbo-efi-conversion-using-syvecs-life-racing-engine-management.html On Instagram (along with other stuff) as @spenny_.b #spennybengineproject |
||
|
12-20-2013, 04:06 PM
|
|
|
Kartoffelkopf
|
I also managed to get around to finalising another shopping list of sundry items from my local OPC, including finally getting around to ordering a new fuel damper for the 4/5/6 injection rail...but also on there are just the odds-and-sods items like clips, bolts, rubber mounting bobbins (none of the eBay ones seem to quite measure up dimensionally), oil tank sender gasket, new fuel tank sieve/fllter and new oil cooler ballast resistor. Am retaining the stock control of this fan, I don't think there's any point in over complicating it by handing over control to the new ECU.
Am always shocked by how a very modest list of consumables and non-descript, boring parts, can still generate a bill of a few hundred quid! Some news on the ECU; MBE have just made some significant changes to the 9A9 ECU that I'm using; mostly software but also some important HW changes to the input feeds, insomuch that they're now using completely isolated ground circuits for the wheel speed sensors, and the ability to intelligently detect any noise on these feeds and do some self determination (as well as reporting on this). So, being as this is absolutely what I need to handle the hp I hope we're going to be pushing out, it's an upgrade I'm pursuing. Because of the input feed changes it of course needs a new physical unit, so that's back with SBD awaiting a swap over. Went over to see Simon @ Si-Leck, the wiring guy, who was in the process of getting a couple of urgent looms made before the w/e, then hopefully it's onto mine. Really looking forward to getting this (really high quality work), and pinned in place on the engine before re-installing. |
||
|
12-20-2013, 04:55 PM
|
|
|
Kartoffelkopf
|
Ok, belated Merry Christmas folks, and a few updates....
Rear wing and engine lid is now finished....much masking tape used in the name of getting the new Turbo badge aligned.     I'm absolutely chuffed with how this has eventually come out - worth every penny, mile travelled and week waiting for parts. All internals and the powder coated bracing piece bolted in - the only exception is that the plastic intercooler duct will have to be removed at some point, for modification to seal up against the new TurboKraft intercooler. If I can find out which material this is, my idea is to open up the aperture, then plastic weld on the ducting. Kind of reversing what the original IC had, where the ducting was fixed to the IC itself, which of course I can't do with the new IC...so, if it can be designed, made and then fixed to the wing, that should achieve the same thing. I remember way back in the mid 90's when I worked for Xerox and environmental legislation was brought in w.r.t. recycling of plastics, every plastic part had to be stamped detailing what it was made from....I think these parts precede all that, and so I can't see any identifying marks....its flexibility makes it feel more like a polythene based material rather than ABS... ** If anyone knows this material, please shout ** A little Xmas present to myself a few days ago - went up to my favourite machinery supplier near London, and apart from finding myself rubbing shoulders and exchanging pleasantries with a very famous knighted actor (...who has a Top Gear track corner named after him...), I picked up an X/Y table for my pillar drill. It can't replace a proper vertical mill, of course, but it does allow me to do some light milling jobs that aren't perhaps dimensionally critical, a little easier than bench fitting by hand. New, very much "midrange" quality, but more than adequate for those "get you out of trouble" jobs.  On the other hand, what I also picked up was a complete set of Burnerd collets and associated T1-3 chuck for the lathe. Probably as old as the hills, in its original metal box (needs a lick of paint, but somehow quite charming the way it is), but these things are beautifully engineered and more flexible to use than the traditional collet, where you have to have one for every size and rely on overtightening to accommodate any under or oversized material:   
|
||
|
12-27-2013, 10:35 AM
|
|
|
Kartoffelkopf
|
Wastegates....
This afternoons efforts have been on getting the wastegates rebuilt with the correct springs, then mounted on the headers.
I'm not going to lay claim to this being my idea - I stumbled upon it on one of the Honda forums (I think), but it's a very simple tip - like all good ideas, it's the simple and most obvious ones that are the best! Removes the need for a second pair of hands....  Using a plastic faced cramp to prevent the loss of fingers...eyes....temper....and to clamp up the WG before undoing the 6x perimeter bolts, then brace yourself while using the release mechanism to slowly allow the top cap to open. This allows access to all 6 bolts, which a bench vice wouldn't.   The Tial MV-R wastegates I have, shipped with 3x springs;
So, 0.9bar total...not sure if this was how Tial ship them or this is how Chris built them before shipping to me, but as I want to be able to wind the boost down to less than 0.9bar, I removed the green spring from each to get me down to 0.7bar. I also read somewhere that it's not recommended to run more than double the boost of the installed spring ratings; 1.4bar is more than I'll be running, so I *think* this should be good...but on the day of mapping, I will be taking the extra springs I have (white, yellow and blue, for each WG) with me to swap out on the day should the need arise. Another tip, close down the lid to within a few mm, then if needed use the elbow of a 1mm allen key to gently persuade any edges of the diaphragm back in place. Wasn't necessary for me, but apparently quite a common gotcha.  So, they're now back on the manifolds, just need aligning before final tightening. Hoping to get the turbo bolted down permanently tonight, with the aux oil pump hose connected to the drain tank, along with the drain hose from the turbo, etc. Sods law, I'm going to need to adjust the rear tinware, goddamn it. The Mikalor clamps on the hot feed pipe from turbo > IC are just too big (or rather, their bolts are) to accommodate, without taking a corner out of the tinware. Bloody annoying, given how much time it took to make this piece in the first place. Par for the course when making one-off parts I guess.
__________________
1993 (MY92) 964 Turbo 3.3 - Horizon Blue - Follow my 964 Turbo project here... http://forums.pelicanparts.com/911-engine-rebuilding-forum/626572-964-3-3-turbo-efi-conversion-using-syvecs-life-racing-engine-management.html On Instagram (along with other stuff) as @spenny_.b #spennybengineproject |
||
|
12-27-2013, 10:58 AM
|
|
|
Kartoffelkopf
|
Just a quick update to keep folk up to speed with where I'm at; not a lot of progress on this engine recently, as I've been focussing my efforts on a) the new job, and b) my Westfield engine, in readiness for getting it advertised and sold (a Vauxhall/GM 2.0litre XE "Redtop"....c.265-270hp...if anyone knows somebody wanting a very high spec unit, pls do let me know!)
 However, yesterday the UK's dismal weather finally gave us a break so it was time to get the car out and prepare the floor lift and get the car hoisted....   ...so that I could finally remove the old gear linkage rod and replace it with the new "Golden Rod" from FD Motorsports. This should put a smile on Marks face, I know he's been patiently waiting for a number of core exchange units to be sent back to him! Far from being the hardest job one could do on this car, it is however a total PITA, not helped by the design of my vehicle lift [luxury gripe mode=on]....the central spine of the lift sits smack-bang underneath the tunnel, so trying to do 3 things at once:
Anyway, after using a cable tie to compress and rid myself of the rubber boot, some patience and a cuppa saw the job done. Only a small job, but in the end, quite satisfying. Interesting doing a side-by-side comparison.  One point to note is that although there is a disc on the new Golden Rod that's welded perpendicular to the rod at the UJ end, the diameter is significantly smaller than the stock unit, meaning that the rubber gator that would usually locate onto this, now doesn't. Not too worried, as all this is enclosed with the tunnel cover on the underside, but a little perplexing.   The old knuckle joint was really worn; out of curiosity I measured >1mm of lateral play but to be honest, it actually *feels* far sloppier, more like 2-3mm, so I'm very much looking forward to feeling what the new linkage feels like - rifle bolt precise, I imagine (hope). Next job this evening will be getting the front fuel pump off, the in-tank filter changed and some cleaning up done. I want to do a very thorough inspection of the fuel lines; despite me saying all along that they're going to be replaced with -6AN PTFE hoses, surprisingly they do look in excellent condition - something that a lot of the UK guys aren't so fortunate with, due to our weather (and I guess to some extent the salty winter roads). If they can remain in place then great, I'll just swap out the rubber hoses that couple everything up. |
||
|
02-10-2014, 03:00 AM
|
|

|
|
Registered

|
Quote:
The bushing is oval from the factory, not worn. When the joint is welded to the rod, how do you adjust the linkage? To be honest I haven't seen a shift rod like the left one, whats transmission?
__________________
Magnus 911 Silver Targa -77, 3.2 -84 with custom ITBs and EFI. 911T Coupe -69, 3.6, G50, "RSR", track day. 924 -79 Rat Rod EFI/Turbo 375whp@1.85bar. 931 -79 under total restoration. |
||
|
02-10-2014, 04:51 AM
|
|
|
Kartoffelkopf
|
Quote:
The transmission is stock 964 Turbo, a G50/52 with slipper diff. The adjustment, or lack of, is the same on both rods; the OE unit has no adjustment either, just a bushed sleeve receptacle that mounts to the underside of the gear shifter at one end, then a knuckle joint the other, which slips onto the selector shaft at the gearbox end, then clamped tight via an M6 bolt. The only difference between the OE and the FDM rod, is that the FDM has a solid UJ not that sloppy rubber bushed item (they use the stock rod as a core unit, cut off the ally/rubber knuckle then weld on a solid UJ). Nothing that couldn't be achieved as a DIY project really, if you had welding gear to hand and could get the orientation and longitudinal position of the UJ correct...not rocket science but I've got enough "sub-projects" to get on with.
__________________
1993 (MY92) 964 Turbo 3.3 - Horizon Blue - Follow my 964 Turbo project here... http://forums.pelicanparts.com/911-engine-rebuilding-forum/626572-964-3-3-turbo-efi-conversion-using-syvecs-life-racing-engine-management.html On Instagram (along with other stuff) as @spenny_.b #spennybengineproject |
||
|
02-10-2014, 01:45 PM
|
|
|
Moderator

Join Date: Dec 2001
Posts: 9,569
|
Car
Engine Parts Engine Car Yep, that is about the right progression of photos to know you are on track! Can you see the light at the end of the tunnel? (at certain points in my own engine odyssey I thought it was the train!) RIP Westfield. That motor looks fast just sitting on the stand. Would look even faster in a vintage LBC, anybody have an MGA MKII that needs a heart transplant? 
__________________
'66 911 #304065 Irischgruen 96 993 Carrera 2 Polarsilber '81 R65 Ex-'71 911 PCA C-Stock Club Racer #806 (Sold 5/15/13) Ex-'88 Carrera (Sold 3/29/02) Ex-'91 Carrera 2 Cabriolet (Sold 8/20/04) Ex-'89 944 Turbo S (Sold 8/21/20) |
||
|
02-11-2014, 06:21 AM
|
|
|
Kartoffelkopf
|
Haha, mid-morning tea break mate?
Not sure I can see the light to be honest John; but I have managed to relax into it a little, so not beating myself up too bad at the moment! Yes, it certainly is a stonking engine, the pickup was mighty, often mistaken for a big capacity bike, and frankly, a little OTT for road use in something as light as the Westfield....but, I tell you what, I'm seriously tempted to keep hold of the Vauxhall engine for another project some time down the line....eg., buying a Series 1 Elise (or Exige) and doing a transplant...trouble is, a lot of the S1's that originally had the rubbish K-Series engines have now been transplanted already with the Honda or Audi lumps, so there's not really such thing as a cheap project car these days (especially with a lot of the cars being sold to new homes over in mainland Europe). Wouldn't want to transplant the Toyota unit in my S2 Exige either, as it's a 1 of 50 "Cup 240", so quite rare and worthy of remaining untouched. Almost. We'll see....toe in the water and see if it sells. Want the space back!
|
||
|
02-11-2014, 06:34 AM
|
|
|
Kartoffelkopf
|
The next batch of plating has now been finished, so quickly popped down the road at lunchtime to collect....only small stuff (pump brackets, fuel filter bracket, fuel dampener bracket, and some odds-and-ends bolts).
Fuel filter/accumulator bracket before --->  And after a little modification --->  And the rest of the parts, not much to really see apart from it all looking nice and shiny--->  Front pump now out....can't believe how much fuel was still left in the tank despite me running it as dry as I dared before taking the car off the road. All fuel kindly donated to my pal for his concrete mixer/chainsaw/etc....patiently waiting for the phonecall where he swears at me for giving him fuel that's about as volatile as orange juice, haha  So, time to order some new rubber joining hoses, and get cleaning. Last edited by Spenny_b; 02-11-2014 at 05:15 PM.. |
||
|
02-11-2014, 06:42 AM
|
|
|
Moderator
Join Date: Dec 2001
Posts: 9,569
|
Quote:
I just popped over to SBD's site and was shocked to see they have the Duratec motor in their westfields producing 300 HP! It is a long British tradition of absurdly high specific output from naturally aspirated motors. Like FVD territory. What did yours dyno? I see also why MBE. . . of which there will be a significant amount discussed on this thread in the near future, without a doubt!
__________________
'66 911 #304065 Irischgruen 96 993 Carrera 2 Polarsilber '81 R65 Ex-'71 911 PCA C-Stock Club Racer #806 (Sold 5/15/13) Ex-'88 Carrera (Sold 3/29/02) Ex-'91 Carrera 2 Cabriolet (Sold 8/20/04) Ex-'89 944 Turbo S (Sold 8/21/20) |
||
|
02-13-2014, 12:28 PM
|
|

|
|
Kartoffelkopf
|
Quote:
Yep, Steve does some cracking engineering on their chosen engines; their Hayabusa engines are pushing crazy hp for their capacity and physical size - at one point they were running supercharged examples in their OMS single seater, just bonkers - too much really, which is why they went back to N/A. The Duratecs are excellent engines, kind of the next generation on from the Vauxhall XE that I have. Strangely, the Vauxhall engines that succeeded the 2.0 XE weren't really up to much in terms of tuneabilty, except for the 1600cc variant...the 2.0 was pants, designed for emissions. It's also very interesting seeing "their latest project", which is all a bit hush-hush at the moment In terms of MBE - to be honest, I don't have any direct experience with any other vendor, so can't *really* argue one against the other; I know that a lot of the Japanese car contingent are very happy with Syvecs, of course there's MoTeC as well and Chris @ TurboKraft being a strong advocate for AEM; using MBE was really a forgone conclusion based on my experience and the fact that Steve is part of their extended development team, and knows it inside out and backwards. They also do a lot of military work, so I'd like to think a lot of the design considerations and practises that those guys require, also make it into the commercial range (in terms of durability).
__________________
1993 (MY92) 964 Turbo 3.3 - Horizon Blue - Follow my 964 Turbo project here... http://forums.pelicanparts.com/911-engine-rebuilding-forum/626572-964-3-3-turbo-efi-conversion-using-syvecs-life-racing-engine-management.html On Instagram (along with other stuff) as @spenny_.b #spennybengineproject |
||
|
02-14-2014, 09:45 AM
|
|
|
Registered

Join Date: Mar 2005
Location: Phoenix, AZ
Posts: 2,862
|
I am really looking forward to the results with MBE. I think using the e-throttle is a cool idea, it also eliminates an idle motor, and you can create a driver-adjustable traction control program that scales back throttle with wheel spin.
__________________
Chris Carroll TurboKraft, Inc. Tel. 480.969.0911 email: info@turbokraft.com http://www.facebook.com/TurboKraft - http://www.instagram.com/TurboKraft |
||
|
02-14-2014, 10:19 AM
|
|
|
Moderator
Join Date: Dec 2001
Posts: 9,569
|
You haven't started working in the Garden now have you? I look forward to the whistle of boost.
__________________
'66 911 #304065 Irischgruen 96 993 Carrera 2 Polarsilber '81 R65 Ex-'71 911 PCA C-Stock Club Racer #806 (Sold 5/15/13) Ex-'88 Carrera (Sold 3/29/02) Ex-'91 Carrera 2 Cabriolet (Sold 8/20/04) Ex-'89 944 Turbo S (Sold 8/21/20) |
||
|
04-03-2014, 04:30 PM
|
|
|
Registered
Join Date: Jan 2008
Posts: 281
|
What are u asking for the vauxhall
|
||
|
04-11-2014, 10:27 PM
|
|
|
Kartoffelkopf
|
Quote:
Quote:
(Hi Jim!), then a week on one of our Bootcamp courses (which was truly excellent), then another week studying for Pt2 of my RH-CSA certification, so lots of stuff that's far more important to focus on, but with a few long bank-holiday weekends, it's time to get going again.....and to use the Lotus now the weather's here!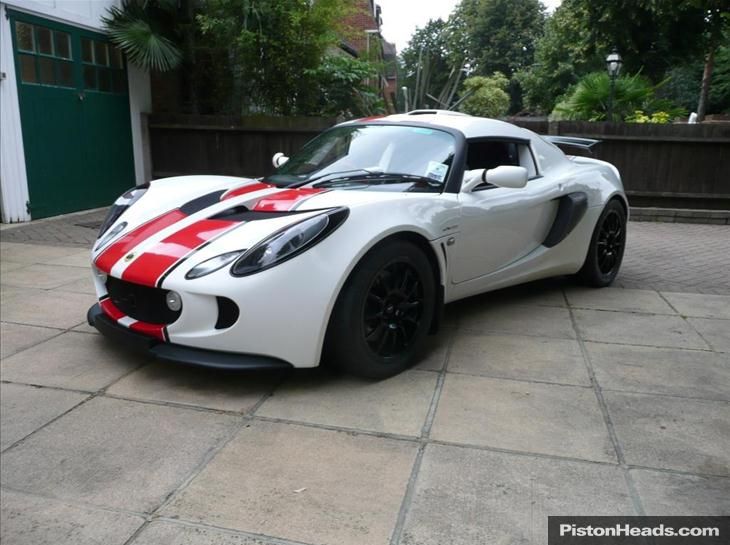 I managed to get a whole day of good weather and free time a few weeks ago, where the car was rolled out and uber-cleaned at the back-end....20yrs of grime and grease cleaned off - will post some pics later, but looking far better. Am going to have to spend some time re-painting the inner arches though (back and front). A previous owner has had them resprayed with a black protective coating, and of course they should be body coloured, so have bought a Shutz gun and some cans of over-paintable stonechip paint, which I'll apply and get my mate to then paint with Horizon blue. Last edited by Spenny_b; 04-12-2014 at 04:39 AM.. |
||
|
04-12-2014, 03:07 AM
|
|
|
Kartoffelkopf
|
Quote:
Last edited by Spenny_b; 04-12-2014 at 04:39 AM.. |
||
|
04-12-2014, 03:08 AM
|
|
|
Moderator
Join Date: Dec 2001
Posts: 9,569
|
Hmm all that Schutz adds weight. . . which can impact your power-to-weight ratio. . . fortunately you have done something about the power component of that equation. . . .
That Lotus looks like it will bite you if you get too close. Must be a blast to drive! Looking forward to photos!
__________________
'66 911 #304065 Irischgruen 96 993 Carrera 2 Polarsilber '81 R65 Ex-'71 911 PCA C-Stock Club Racer #806 (Sold 5/15/13) Ex-'88 Carrera (Sold 3/29/02) Ex-'91 Carrera 2 Cabriolet (Sold 8/20/04) Ex-'89 944 Turbo S (Sold 8/21/20) |
||
|
04-19-2014, 03:47 AM
|
|
|
Registered
|
Respect
Sir, just read your thread from soup to nuts over the past couple of days. Nothing short of epic; seems like the kind of work that would be needed to create a vehicle to go to the moon and back. Fantastic amount of thinking and doing involved, and great use of "latest tech" along with lovely old nuts and bolts stuff, such as your lathe. Interesting, too, what you have learned about each of the vendors. Thanks for all the time and effort you've given us to share/explain/educate. One thing I'd like to ask is, what is the difference between the waste gate(s) and the blow off valve on your engine? Kind regards, John
|
||
|
04-19-2014, 11:02 AM
|
|
 |
|
|
| Tags |
| 964 c4/c2/turbo , efi conversion , life racing , syvecs , turbokraft |


 1993 Porsche 911 (964) Turbo 3.3
 2006 Lotus Exige Cup 240 (#45 of 50)
 BMW M2 Competition
 BMW R1250 GS Rallye HP
 Ducati 748R
 1977 Porsche 911 Targa 2.7s


