|
|
|
|
|
| Author |
|
|
Kartoffelkopf

|
Quite a productive day, and certainly a lot more enjoyable than yesterday.
So, following up on the earlier post, the bumpers inner heat shield that mounts onto the box section aluminium structure was removed, washed and prepped for sticking. Five M6 repair washers were used to fix the areas that had corroded and pulled through. The washers are going to be sandwiched between the ally and the heat cloth, so contact adhesive was used to keep them in place (you can just about see one of them on the far right in the photo) Contact adhesive was then used to stick the middle section; have run out now until tomorrow, but will get some to then finish the end sections --->  The welded rear wheel speed sensor has now been cleaned up and re-polished ready for anodising. Fits beautifully - the angle of the HE sensor vs the timing wheel is bang-on. Not bad for a quick cardboard wedge that I made to help set the angle when tacking  Similar pics to previously....just nicer. Similar pics to previously....just nicer.  This evening I got around to shuffling the car around and took all the measurements I need for the front ABS timing wheel and front upright, in anticipation of the ally stock arriving in the next day or so. Now all drawn-up on the whiteboard, so it shouldn't take me too long to turn them on Wednesday. In the pics below, you can see the intended orientation of the HE sensor, but I need to check with Craig/Steve @ SBD whether the teeth of this wheel pass close enough to the centre of the sensor for it to register. Got a feeling it's not going to do the job, so will start thinking of a Plan B....perhaps it may require another 8x tooth wheel to be mounted onto the ABS wheel. Instead of having the trigger teeth on the outside of the circumference, maybe invert the design, so they sit on the inside of the "polo" ring. 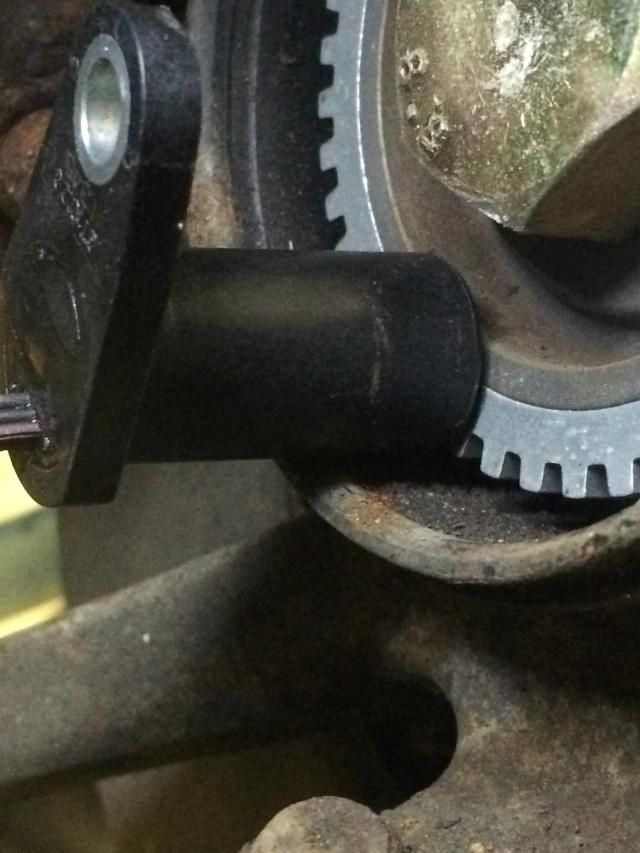 The sensor will sit through a top-hat end cap, essentially an aluminium replacement for the plastic caps that Porsche use to cover the end of the stub axle. I'll then drill and tap a retaining hole into the upright, that will secure the top hat. Wondering how much of a ball-ache it would be to remove that stub axle bolt and get the timing wheel out?..... |
||
 12-29-2014, 04:29 PM
|
|
|
Kartoffelkopf
|
Quote:
The plan at the moment is to indeed look at an inverted timing wheel, as described yesterday, rough diagram below ---> 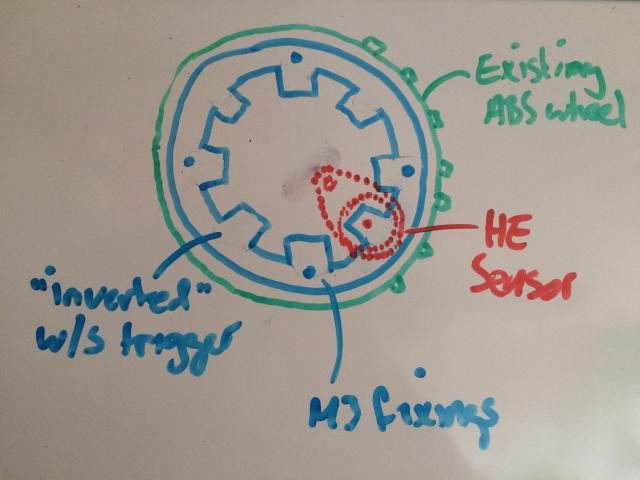 Oh well, unless the lead-times are daft, we'll get these cut from an outfit that does water cutting, locally to SBD. I'll then look to secure to the ABS timing wheel using 4x M3 countersunk screws....wonder what the chances are like of being able to drill and tap these into the stub axles, in-situ...hmmm The heat proofing material arrived today. My overriding thought is that of not getting much for £65! 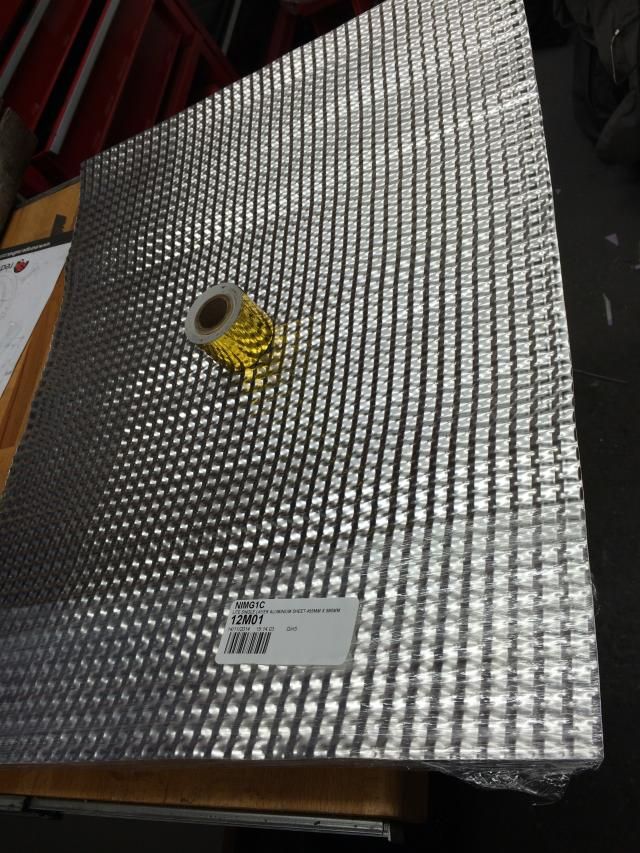 Template not yet finished, but have bought some very short 3/16" pop rivets and M5 washers, so that when I need to assemble the various sections of the Nimbus sheet, it'll be done robustly and they shouldn't pull through. The bumper inner heat shield is now finished; just about managed to line the whole item with the sheet of material I had spare. It wasn't a new sheet, so it's not 100% neat, but pretty good and a damn sight better than what was there before ---> 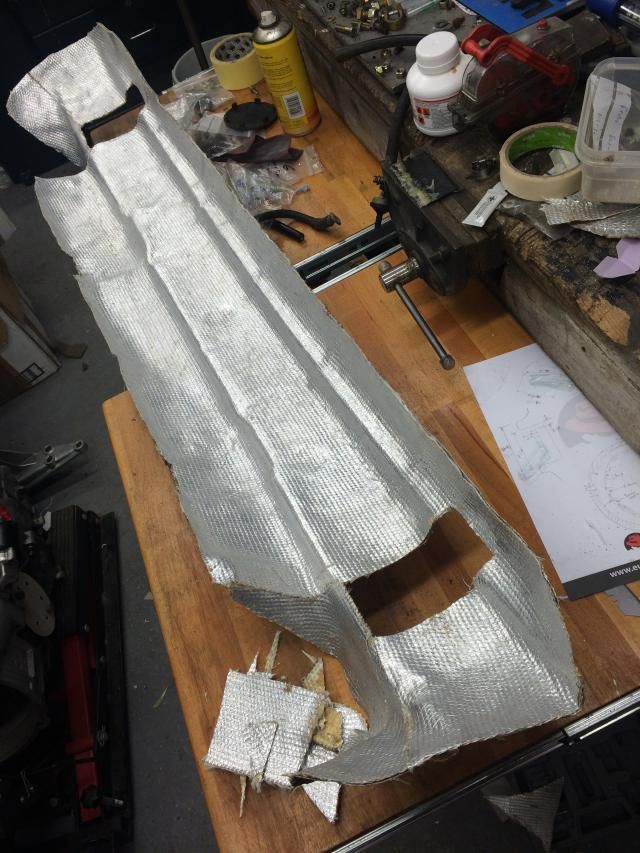 As it happens, I'll be driving past my pal Shauns workplace tomorrow, so have decided to pull forward the bumper respray. Am currently stripping it down into the (many) component parts, then dividing it into the 3 sections so that it can be sprayed properly. Goddamn it, i hope the pillock that decided to put a single stud in either part to hold it to the centre section, has been fired. Trying to remove the nut from the stud was a hell of a job, and I'll be surprised if the blue cloud of swearing has moved from my house by the morning. Tried a couple of options; grinding a slot to try and use a screwdriver hold the stud - nada. Then ground some flats onto the "head" to try and use a spanner, with mixed success - trouble is, hot metal = melted plastic. Got them off eventually but took over an hour and have damaged one half of the RH side. Want to punch that prat in the mouth for that piece of s**t design. Anyway, more or less stripped for spraying. 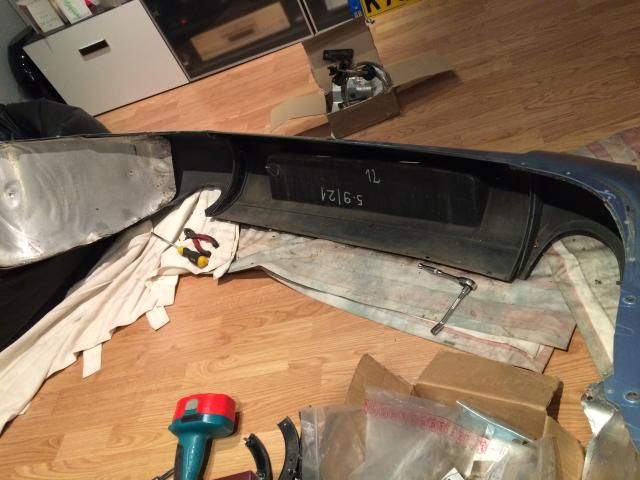 While this is being done, some of the fixtures can be re-plated with the next batch of items.  ....this is feeling very much like the rear wing project all over again.... |
||
|
12-30-2014, 03:56 PM
|
|
|
Forced Induction Junkie
|
Quote:
Always thought that reflective matting was the best approach in combatting excessive heat vs. wrapping. Sticker shock to say the least.
__________________
Dave '85 930 Factory Special Wishes Flachbau Werk I Zuffenhausen 3.3l/330BHP Engine with Sonderwunsch Cams, FabSpeed Headers, Kokeln IC, Twin Plugged Electromotive Crankfire, Tial Wastegate(0.8 Bar), K27 Hybrid Turbo, Ruf Twin-tip Muffler, Fikse FM-5's 8&10x17, 8:41 R&P |
||
|
12-30-2014, 06:50 PM
|
|
|
Registered

Join Date: Mar 2005
Location: Phoenix, AZ
Posts: 2,862
|
Quote:
__________________
Chris Carroll TurboKraft, Inc. Tel. 480.969.0911 email: info@turbokraft.com http://www.facebook.com/TurboKraft - http://www.instagram.com/TurboKraft |
||
|
01-07-2015, 03:49 PM
|
|
|
Kartoffelkopf
|
Quote:
 Thanking you! Thanking you!
|
||
|
01-07-2015, 04:46 PM
|
|
|
Kartoffelkopf
|
Quote:
|
||
|
01-07-2015, 04:49 PM
|
|

|
|
Kartoffelkopf
|
Just a quick update this evening....
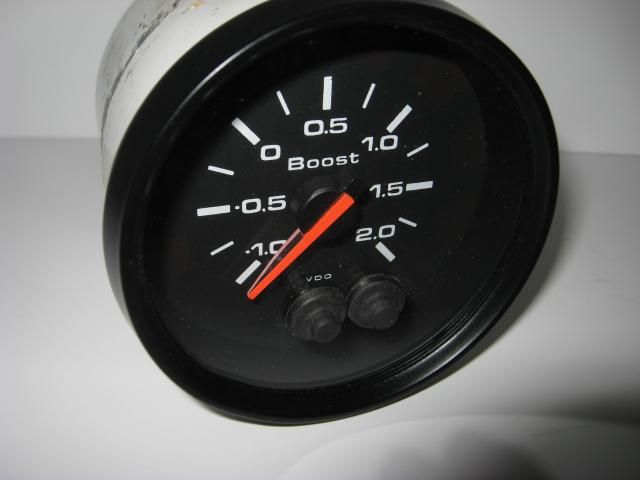
After spending a lot of time making the cardboard template for the heat shield, I've spent the last few evenings carefully transposing this on the (above) Nimbus Lite material, then binding into shape and riveting. Not a quick job by any means, but I have to say, I'm rather pleased with the end result. Just loosely fitted for the time being, as I need to drill out 5-6 pilot holes in the tinware next. ---> 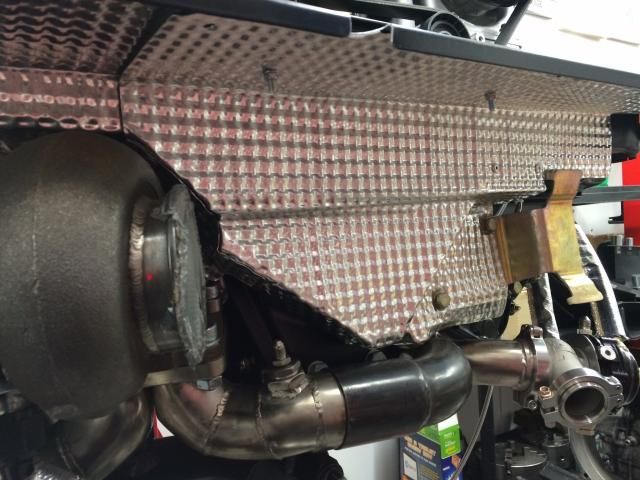  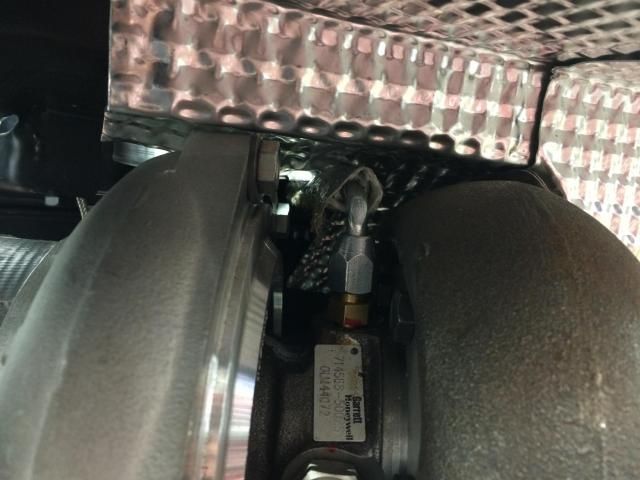  So, the next job is to get the tinware re-coated; coating has now been compromised with the tinware fixing and the semi-circular cutout needed to clear the Lambda sensor (did I mention that previously?). Once it's back I can then apply the gold foil tape to the underside, that'll sit behind the Nimbus material. For info (again, forgive me if this is a repost) here's the spec for the Nimbus material --> 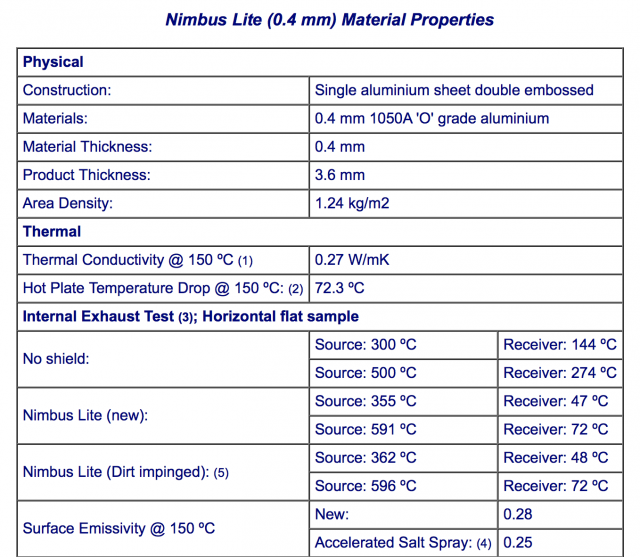 With regards to the lights and reflector I mentioned previously, I went across to my pal Brians house at the weekend to check out some almost new lights, and the brand new reflector on his own car....good news insomuch that one of my rear lights and the reflector itself are in very good condition, indiscernible fading, I hadn't realised that (new) they are pretty pink in comparison to the 993 lights/reflector. So, no need to replace the LHS light, I've taken a new RHS light (for some reason a unit made in 1989 was fitted, and looked a little tired), now I've just got to either play around with trying to repair the reflector mounts using plastic welding (need to identify the type of plastic first) or stump up the readies for a new unit. But at least I know they'll all match without having to buy a whole new set. Have also got a double-switch switch unit from a Carrera 4 centre console - unfortunately it has an LED mounted, as do a lot of UK cars for the dealer fit alarm lamp - but I can re-purpose this with a tricolour LED that will be hooked up to the boost control switch, illuminating different colours for each preset boost level - bright red for the Spinal Tap setting, of course. Ok, that's about it....time to call it a night. |
||
|
01-07-2015, 05:19 PM
|
|
|
Registered User
Join Date: Jan 2015
Posts: 1
|
Quote:
Hi dear Spencer, How are you? Thanks for your post. It helps a lot  ------------------------------- NCH High-Precision |
||
|
01-08-2015, 01:45 AM
|
|
|
Moderator

Join Date: Dec 2001
Posts: 9,569
|
You are chasing the dream, not the competition. Do not stop until you are happy!
__________________
'66 911 #304065 Irischgruen 96 993 Carrera 2 Polarsilber '81 R65 Ex-'71 911 PCA C-Stock Club Racer #806 (Sold 5/15/13) Ex-'88 Carrera (Sold 3/29/02) Ex-'91 Carrera 2 Cabriolet (Sold 8/20/04) Ex-'89 944 Turbo S (Sold 8/21/20) |
||
|
01-11-2015, 10:55 AM
|
|
|
Kartoffelkopf
|
Dontcha just hate when you have a full daily update typed and ready to submit, and the browser token expires...and loses the whole bloody lot?!
[Take 2] This weekend I’ve spent hours on the lathe; the metal stock finally arrived on Friday (it was only ordered straight after Christmas. Grr), so I was able to get on and make the ally blanking plug for the “chimney”; I’m no longer using the temp sender that’s normally used, and thanks Chris for confirming it’s M14x1.5. Ordered a new tailstock die holder; far easier than trying to square up a handheld die holder against the tail stock, and a lot more accurate. 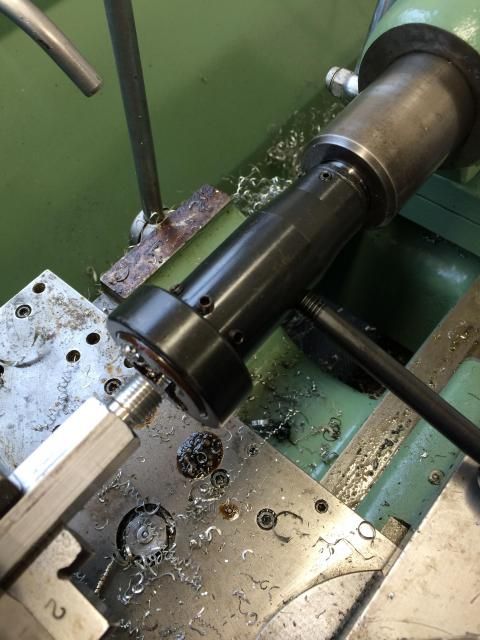 One complete plug, ready for anodising. 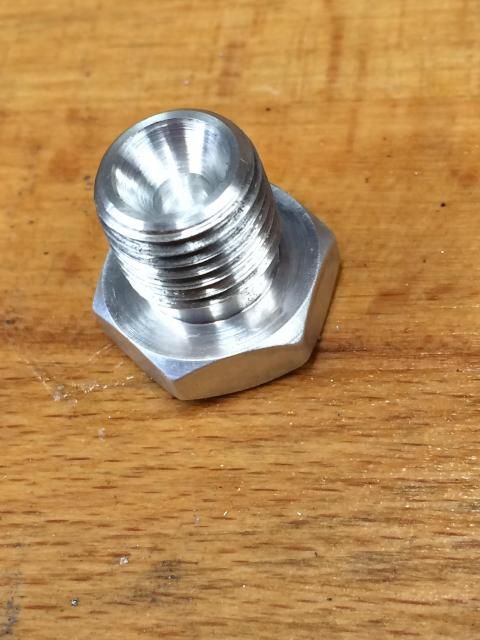 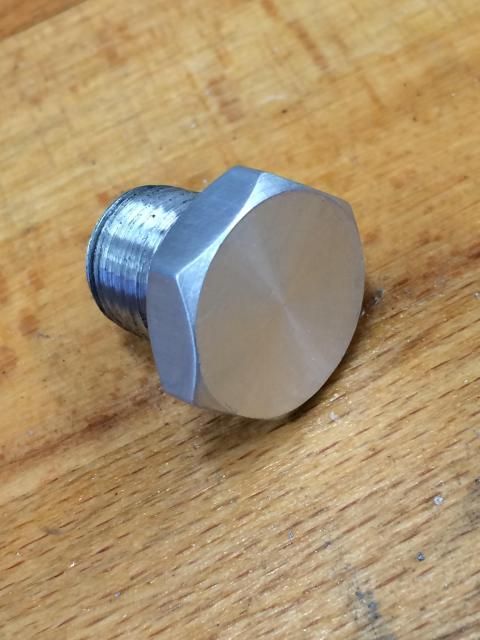 Then time to use the 13mm AF stainless stock to make the 4x M8x1.0 plugs that close off the water cooling ports on the wastegates - I don’t want anything open to the elements, just invites detritus to play havoc later on down the line. As I think I mentioned a few weeks ago, trying to buy M8 fine-thread fixings is not easy; tried my usual supplier of fixings, and he couldn't even think of anyone else to recommend. So, not going to naff about trying to track down something that's kind of "ok"...buy more tools and make some! Was surprised how long these took; quite fiddly getting the exact thread depths right, then grinding a custom tool to make the narrow undercut at the end of the thread. While I was at it, decided to tart them up and use a centre drill to hollow them out a little. 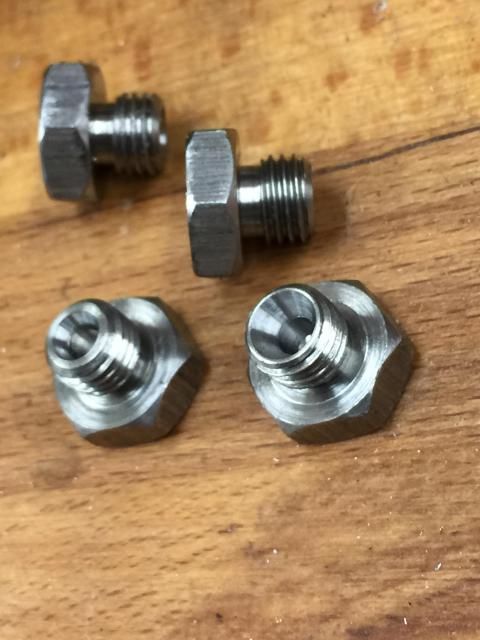 (still a little dirty with cutting lube) 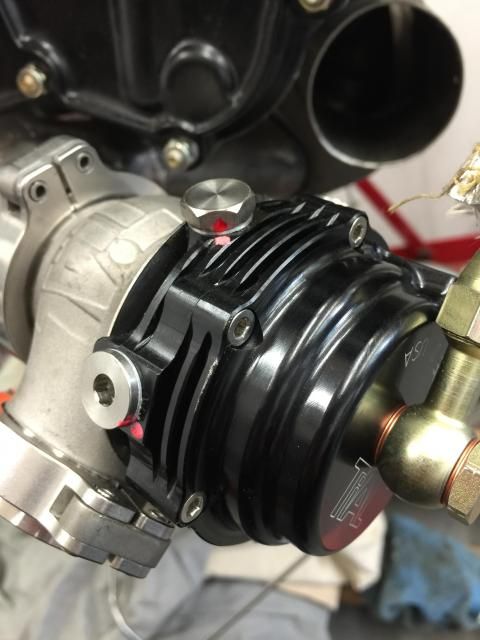 Couldn’t find the packet of crush washers, so used that parting off tool again to quickly make four out of some ally stock….just finished flatting them, then found the packet. Sods law.  This morning, for a bit of a break, got around to doing a simple job - replace the short guide tube on the input shaft of the gearbox with the new one needed for the 964RS lightweight flywheel. I never ever regret buying any tools, quite often ones bought on an impulse but with no immediate requirement….they alway come in useful at some point, case-in-point being a (manual) impact driver set and a pneumatic impact wrench. I think I’ve used the hand impact driver once, and never used the air tool, preferring to always do wheel nuts manually….but I was glad to have both this morning as those M6 countersunk screws were well and truly “in”. The Philips bit form the impact set, plus the air tool, and it came out extremely easily. Must remember to use it more often…. Old tube —> 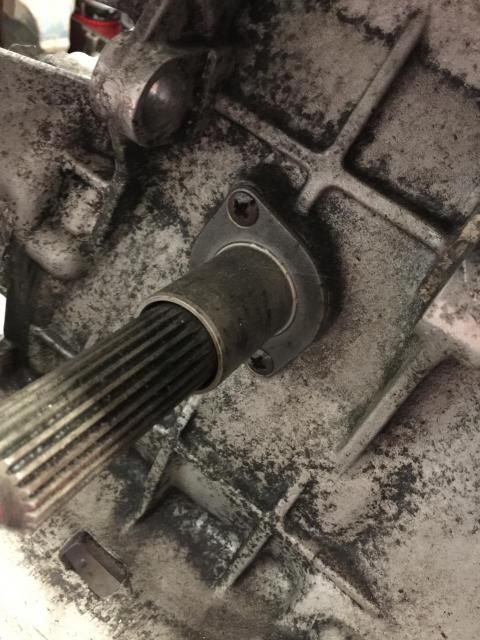 Side-by-side —> 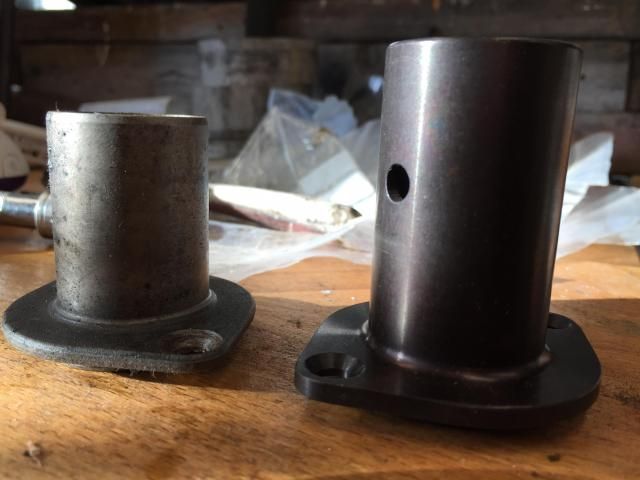 New tube in place —> 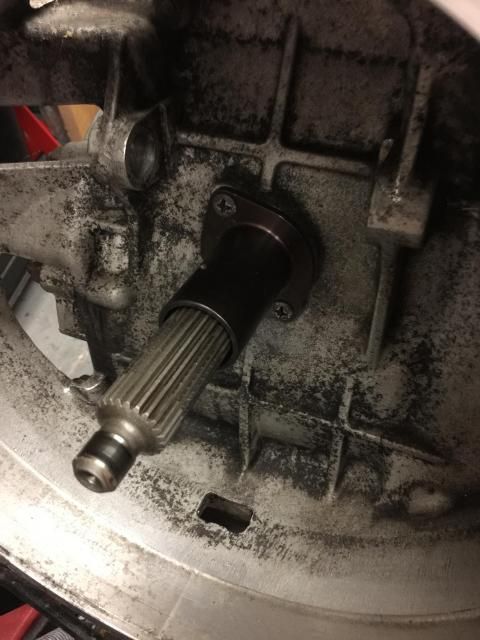
Last edited by Spenny_b; 01-11-2015 at 03:12 PM.. |
||
|
01-11-2015, 02:45 PM
|
|
|
Kartoffelkopf
|
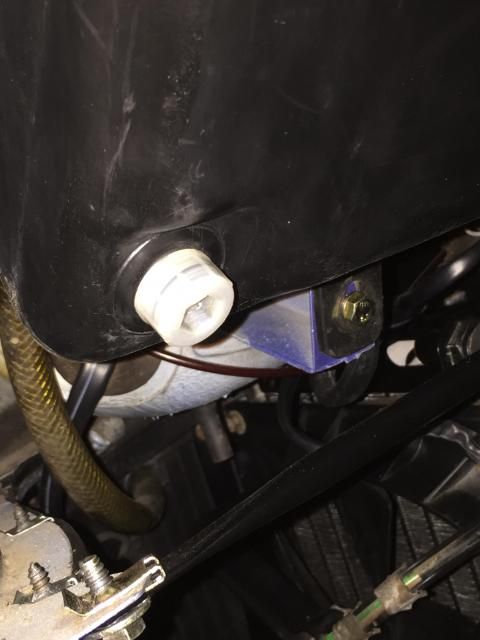
Finally…FINALLY I’ve sorted out the blessed windscreen washer tank screw cap annoyance. I had to buy a whole complete secondhand tank off of my pal Brian, but it was money well spent, as I’ve got a nice unbroken, clean screw cap. Note to self, don’t use allen key to remove or replace the cap in future….anyone need a new washer tank?
 Then, this afternoon it was time to hop back onto the lathe and make a start on the next big job, the top-hats that will house the hall effect sensors on the front wheels, for the 4 wheel traction control setup. These need to be pretty damn accurate to ensure that vibration won’t affect the readings, so lots of patience, lots of measurements. The aluminium billet blanks —> 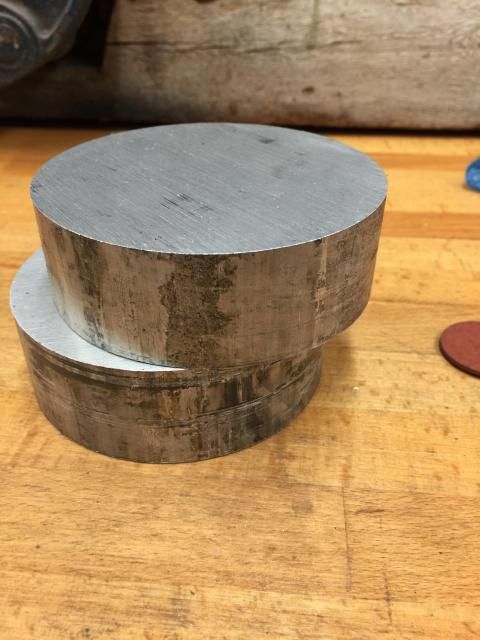 In the 3-jaw chuck for the first machining operation, a face, then turn the OD, then bore it so that it clears the trigger wheel that’s already mounted to the stub axle. Got to use a load of tools for the first time; the jaws in the chuck you see below, the new carbide tips I’ve got that are meant for turning ally; very impressed with the surface finish of these. Also my new 10mm boring bar to get the centre started, before moving onto the 16mm tool to really start removing material quickly —> 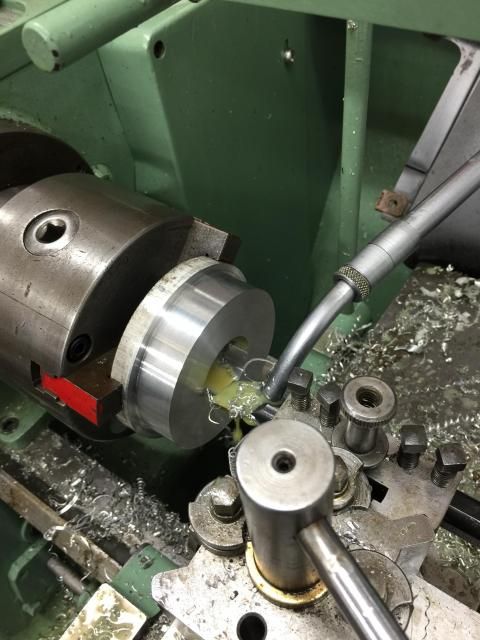  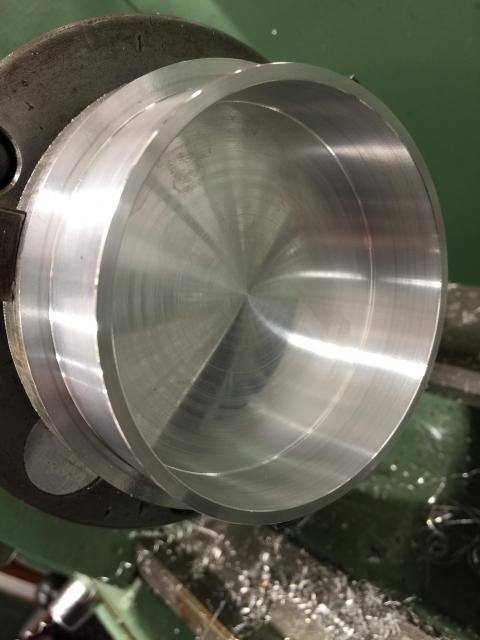 Lots of coolant = lots of splash. Good job I haven’t yet refitted the inner arches….they came in useful! 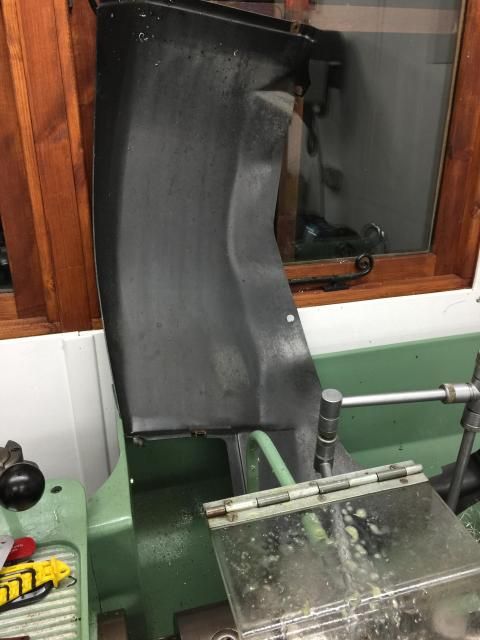 Then reverse it to face the outer surface, machining it down to the exact depth (6.6mm) that will accommodate a stainless M6 helicoil for the HE sensor. 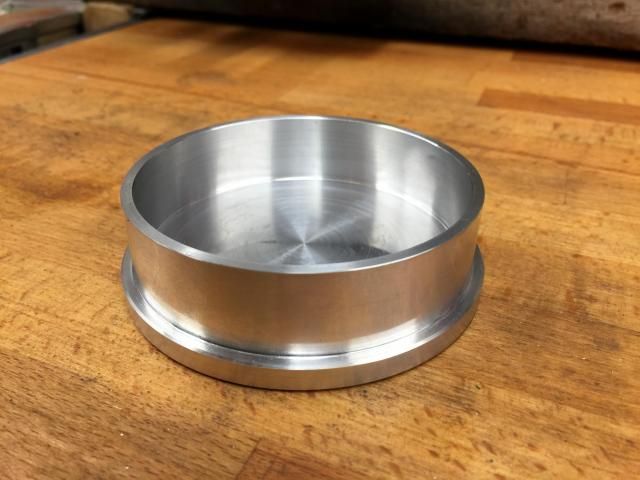 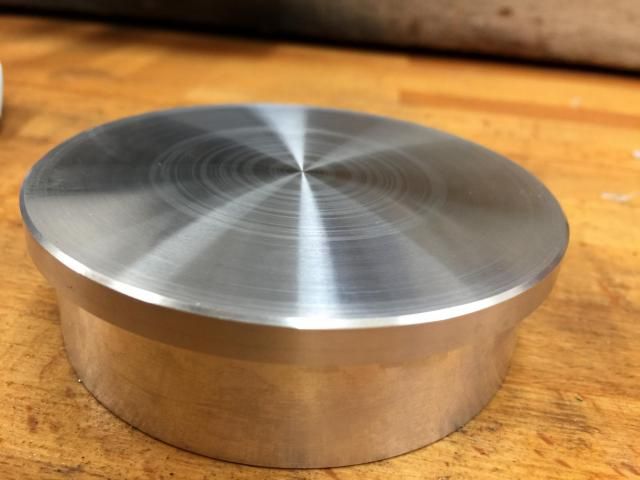 The next machining operation will be to put a notch into the tube, about 10mm wide and 10mm deep, in order to clear the tip of the ABS magnetic sensor already in place on the hub. Following that, the piece will be offset mounted into the 4-jaw chuck, so I can bore the hole for the hall effect sensor. May have to hold-off doing this for a while, as ideally I ought to get the trigger wheels made and installed, then double-check the offset required. Would hate to cock them up on the last phase. Finally, the hub will need drilling and tapping to accommodate a small cap-head screw (or maybe a grub screw) to lock the top-hat into the hub. Very pleased with todays efforts, especially with being able to get every dimension on the top-hats to within 0.02mm of my drawings. Along with the tools I ordered the other day, I also bought a 3MT test bar, and a 4MT>3MT adapter to allow a centre to fit into the headstock. With another centre in the tailstock and the test bar mounted between centres, I did a quick DTI check on the tailstock alignment - about 0.1mm out over the length, so could be adjusted a little tighter, but not wildly out for what I need at the moment. I'll check headstock alignment later this week, but again judging by how well todays parts have come out, and how nice the lathe cuts in general, it feels pretty good. |
||
|
01-11-2015, 03:09 PM
|
|
|
Kartoffelkopf
|
Quote:
Typical me, when over at Brians again the other day, I took my (extremely good condition, practically perfect...) LHS light and did a side-by-side comparison...and somehow talked myself into going the whole hog and buying the other new one he had. Was there any difference? Hmmm....the tiniest of tiny spider cracks was starting on mine, but in terms of colour difference, no. Oh well, I'll sleep a little easier knowing my OCD was been satisfied. Just need to fix that reflector now, but I confess to thinking that it may be worth investing my time on the real project rather than trying to plastic weld the old one - perhaps successfully, but quite possibly not....on top of buying a decent welding kit and the plastic sheeting. May succumb and use that ultra useful plastic tool that's 4"x2".....(man maths; I saved on the cost of buying the new lights....therefore more budget to buy the reflector?) |
||
|
01-11-2015, 03:20 PM
|
|
|
Kartoffelkopf
|
Interim update tonight. Managed to get a flying start after finishing work this evening; straight into the workshop without any distractions.....
Got the second top-hat made - took less than half the time of the first, dimensionally spot-on again, and a lovely fit inside the upright. You can see below how they're going to fit; clearly the one below isn't all the way in, they need those reliefs machining to clear the ABS sensor, which will be tomorrow nights task.    No more garage work this evening - need to get some drawings done for the trigger wheels and get them underway. |
||
|
01-12-2015, 12:58 PM
|
|
|
Kartoffelkopf
|
Some quick tinkering whilst sitting in front of the telly watching a replay of the Colts beat the Broncos (at home...bye bye Peyton, imho)
Took the Carrera 4 switch panel apart, ready for Simon to play with it and get some rotary switches to fit. 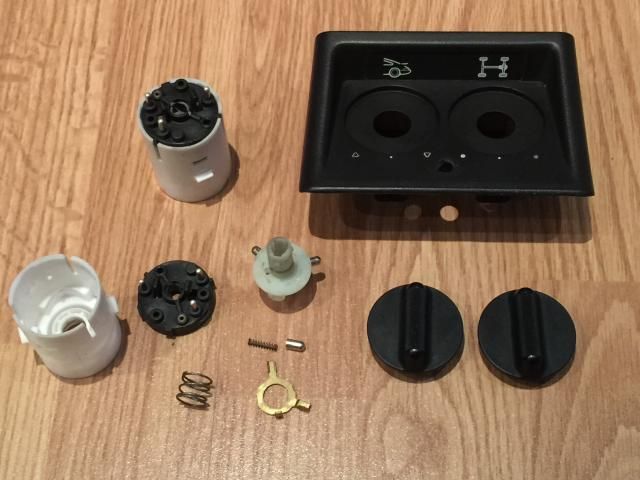 As you can see, not much to them; I thought that there'd be a momentary switch unit housed inside the white tubes, but actually the white tubes are the housing with the sprung contacts, actuator and contact plate all loaded into the tube. Quite tough to undo, rigid plastics and 3 x detents that need to be wiggled out, but do-able. A quick wash later (you wouldn't believe how much food crummage there was under the switch knobs) and it looks good as new. Really hoping we can use some guerrilla engineering to meld our functions into the stock looking panel. Even the switch legends are kind-of right....the left hand one = pic of rear of the car = engine bay = boost setting. The RH legend = 4wd bias adjust = i.e., traction = traction control setting. Squinting. And with imaginative thinking.... Last edited by Spenny_b; 01-12-2015 at 03:17 PM.. |
||
|
01-12-2015, 03:13 PM
|
|
|
Registered
Join Date: Jun 2014
Location: Germany
Posts: 42
|
Can I just say I am genuinely jealous, not just of the tediousness, but the knowledge on your side for this build.
I am currently building my 964 C2 and converting it to Turbo, because the engine needs a rebuild anyhow, but so many things I need to look into looking at your build, that I am now even more afraid of the bill awaiting me at the end the Misses that will likely ban me from any decisions for the rest of my life. :/ |
||
|
01-13-2015, 02:08 AM
|
|
|
Kartoffelkopf
|
Hey Undutched! Many thanks for the kind words, appreciate it.
I'm sure that conversions can be done far simpler than the way I'm doing it, but my compulsion to absolutely not refit any items that are dirty or corroded has really added a lot of time to the project, waiting for re-plating, powder coating and buying new parts. I also like creating parts, looking at something and wondering if I can improve upon it...the "hot rod" spirit, but again, that adds so much time. There's nothing to be afraid of, I'd never built a Porsche engine before (although have built numerous other engines and have an engineering background, so cleanliness and thoroughness are second nature), and everything I've done on the engine is all documented in Waynes book, plus searching of Forums. That's why I'm being very thorough on my documentation, so that guys like you can benefit and see how I tackled a problem (it may not be the *best* way, and at the moment of course, it's unproven)....but you can see every little detail. So....it doesn't need be this in-depth, and certainly working with Chris at TurboKraft has been so great. The best route would be to get everything you need as a kit of parts from Chris (and our hosts, of course) and build it yourself, or....if you really want to be 100% sure, I would crate the engine and ship it to him...which actually isn't that expensive versus the time and effort of doing it yourself. It keeps it simple, a lot faster and probably a lot more cost effective, as there's far less risk of "scope creep" and doing things while-you're-at-it. |
||
|
01-14-2015, 03:28 AM
|
|
|
Registered
Join Date: Jun 2014
Location: Germany
Posts: 42
|
I have contacted Chris on several occasions and actually referenced back to this thread to talk about my fuel system (and what I'd need), which needs to be completely redone in any case, to suit the turbo.
I am in contact with vendors that are all on this forum: Raceboy (ECU), Edelweiss (that's where my engine is) and Chris (support mods and that itty bitty more) and of course a thread like this, that gives you goose-bumps, both good and bad On some occasions I've thought "I'd wonder if he could do another one" And thank you for clearing up your work. That does make my heart feel a little lighter! Just to add something to this thread. An exhaust builder here uses the reflective tape on the exhaust systems themselves:  
Last edited by Undutched; 01-14-2015 at 06:09 AM.. |
||
|
01-14-2015, 05:59 AM
|
|
|
Kartoffelkopf
|
Hmm interesting....lots of work gone into that, although does look to be a hard way of achieving the same thing as the exhaust wrap tape -->
Titanium Exhaust Wrap Or even these jackets (which I confess, I wasn't aware of until a few moments ago) ---> Exhaust Jackets ...and arguably far less serviceable, should the need arise. I used the tape wrap on my Westfield, where the over-the-chassis-rail 4-1 manifold came very close to the engine cover....worked beautifully, really controlled the temps, looked ok once painted in the black paint that you can also buy.....BUT....there is a school of thought with exhaust wrapping like this (and I'm referring to a discussion I read that was specific to the Vauxhall/GM XE "red top" engine, not Porsche flat 6's) where the increased internal temps at the start of the primaries had a significant detrimental effect on the cylinder head. Now, I never suffered any damage on my XE Red Top, so it could be urban myth, but I also do know that moisture that collects when heating/cooling sits between the manifold and the wrap and can speed up corrosion. ETA - this Zircotec solution is probably the ideal way of overcoming all the above, and one I've considered; I may come back to that as Phase 2, once we've established that the geometry of my headers work well and there's no alterations needed.. Last edited by Spenny_b; 01-14-2015 at 02:31 PM.. |
||
|
01-14-2015, 10:21 AM
|
|

|
|
Registered
Join Date: Jun 2014
Location: Germany
Posts: 42
|
From what he told me is that it has a few advantages.
1. Can be placed in any location, around any type of bend or material 2. Does not need to be replaced, but can be repaired 3. exhaust wrap, if not done correctly is not as effective, especially around bends 4. Exhaust wrap will deteriorate after time I am not sure how it compares to ceramic or other coatings, or whether price is the choice for or against more use. Here is his facebook (has no site) https://www.facebook.com/pages/Abgastechnik-Hiller/210854442351009 |
||
|
01-14-2015, 11:40 PM
|
|
|
3 restos WIP = psycho
Join Date: Feb 2005
Location: North of Exit 17
Posts: 7,665
|
Bloody...freaking...brilliant.
Oh how I wish I still had access to machine tools.
__________________
- 1965 911 - 1969 911S - 1980 911SC Targa - 1979 930 |
||
|
01-15-2015, 12:43 PM
|
|
 |
|
|
| Tags |
| 964 c4/c2/turbo , efi conversion , life racing , syvecs , turbokraft |


 1993 Porsche 911 (964) Turbo 3.3
 2006 Lotus Exige Cup 240 (#45 of 50)
 BMW M2 Competition
 BMW R1250 GS Rallye HP
 Ducati 748R

 1985 Porsche 930 Fac. Slantnose 3.3l